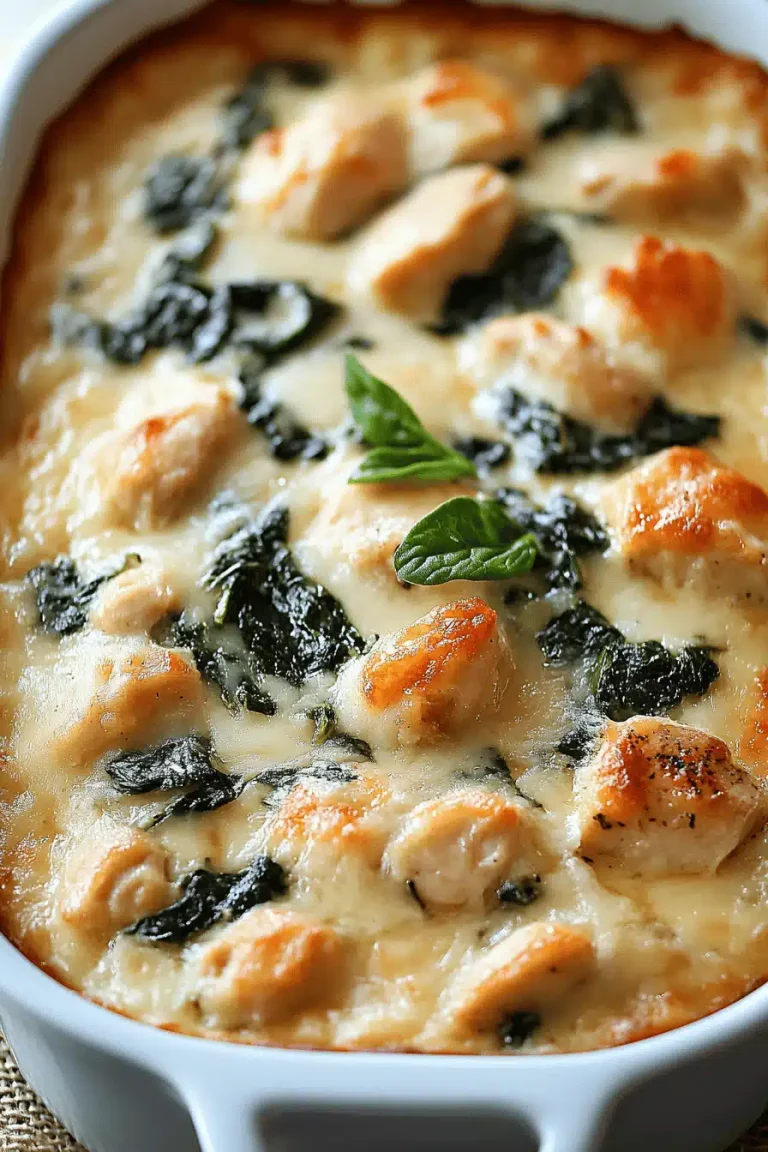
smoked turkey brine recipe
I remember the first time I tried to smoke a whole turkey. It was for Thanksgiving, and let’s just say it was… memorable. For all the wrong reasons. The skin was a bit dry, the meat was okay, but it definitely wasn’t that fall-off-the-bone, bursting-with-flavor turkey dreams are made of. I was so disappointed! After that, I vowed to find a way to consistently achieve that perfect, moist, and incredibly flavorful smoked turkey. And you know what? I think I’ve cracked the code. This smoked turkey brine recipe is my absolute go-to. It’s not just about making the turkey moist, oh no. It’s about infusing every single bite with a deep, savory, and slightly sweet flavor that just sings. Forget those bland, dry birds of the past; this brine is a game-changer, especially when you’re aiming for that show-stopping centerpiece. If you’ve ever worried about your turkey turning out dry or flavorless after a long smoking session, then buckle up, because this is the smoked turkey brine recipe you’ve been searching for.
What is a good recipe for turkey brine?
So, what exactly is this magic elixir I keep raving about? At its heart, a smoked turkey brine recipe is a simple solution of water, salt, sugar, and a medley of aromatics that you soak your turkey in before cooking. Think of it as giving your turkey a spa treatment before its big performance on the smoker. The salt and sugar work together to draw moisture into the meat and also help tenderize it. The water helps distribute everything evenly, and the aromatics? That’s where the flavor party really starts! It’s essentially a flavorful bath that transforms a good turkey into an *unforgettable* one. It’s not complicated, and it doesn’t require any fancy equipment, just a little planning ahead. This method ensures that even the notoriously dry breast meat stays incredibly juicy and absorbs all those wonderful smoky and herbaceous notes.
Why you’ll love this recipe?
Why do I keep coming back to this particular smoked turkey brine recipe?flavor is just out of this world. It’s not just salty; there’s a beautiful balance of sweet, savory, and herbal notes that permeate the entire bird. When you slice into it, you’ll notice how incredibly moist it is, and each bite is a little burst of deliciousness. It’s a far cry from the dry, bland turkey I used to dread. Beyond the taste, the simplicity is a huge win. Yes, it takes a little planning, but the actual process of making the brine and soaking the turkey is surprisingly easy. You just simmer some ingredients, let it cool, and then let the turkey do its thing. It’s truly a set-it-and-forget-it kind of deal once the brining begins. And for anyone watching their budget, this is incredibly cost-efficient. The ingredients are all pantry staples or easily found at any grocery store, and the impact it has on the final turkey is immense for suchversatile. While I usually use it for whole smoked turkeys, it’s also fantastic for brining turkey parts like breasts or legs if you’re not smoking a whole bird or are short on time. It’s that one recipe that always impresses, no matter the occasion. What I love most about this smoked turkey brine recipe is that it takes the guesswork out of getting a perfect turkey every single time, which is invaluable, especially around the holidays!
How to Make This Smoked Turkey Brine Recipe
Quick Overview
This recipe is all about building layers of flavor and moisture. We’ll start by creating a potent, aromatic liquid by simmering key ingredients. This liquid will then be cooled and used to submerge your turkey, allowing it to soak up all the goodness for at least 12-24 hours. The result is a bird that’s incredibly tender, juicy, and deeply flavorful, ready to take on that smoky char. It’s a straightforward process that guarantees a superior outcome, making it a lifesaver for any host!
Ingredients
For the Brine Base:
1 gallon water (plus more for soaking)
1 cup kosher salt (trust me, use kosher salt for better dissolving and less bitterness)
3/4 cup packed light Brown Sugar (adds a subtle sweetness that caramelizes beautifully)
1/4 cup whole black peppercorns (for that warm, pungent kick)
2 tablespoons mustard seeds (adds a slight tang and earthy note)
1 tablespoon allspice berries (for a warm, complex spice profile)
1 tablespoon coriander seeds (adds a bright, citrusy aroma)
For the Aromatics:
2 large oranges, quartered (the citrus brightens everything up)
1 head of garlic, halved crosswise (sweetens and mellows when cooked)
3-4 sprigs fresh rosemary (classic with poultry)
4-5 sprigs fresh thyme (earthy and fragrant)
2 bay leaves (adds a subtle, herbaceous depth)
For the Turkey:
1 whole turkey (12-15 lbs is ideal for this amount of brine), thawed if frozen
Additional cold water, as needed, to completely submerge the turkey
Step-by-Step Instructions
Step 1: Create the Brine Concentrate
In a large stockpot (at least 8-quart size), combine the 1 gallon of water, kosher salt, Brown Sugar, peppercorns, mustard seeds, allspice berries, and coriander seeds. Place the pot over medium-high heat and bring it to a simmer, stirring occasionally until the salt and sugar are completely dissolved. Once simmering, reduce the heat to low and let it gently simmer for about 5 minutes to allow the spices to release their fragrance. This is your flavor base!
Step 2: Add the Aromatics
Remove the pot from the heat. Add the quartered oranges, halved garlic head, rosemary sprigs, thyme sprigs, and bay leaves to the pot. Stir everything together. The heat from the brine will start to soften the aromatics and release their oils. Let this mixture steep while it cools to room temperature.
Step 3: Cool the Brine
This is a crucial step! You *must* let the brine cool completely before adding your turkey. An unsafe temperature can cause the meat to cook prematurely and encourage bacterial growth. You can speed up the cooling process by placing the pot in an ice bath or by transferring the brine (straining out the solids if you prefer, though I usually leave them in for more flavor) to a large container and refrigerating it until it’s cold. I usually make my brine the day before and let it cool overnight in the fridge.
Step 4: Prepare the Turkey and Brining Container
While your brine is cooling, prepare your turkey. Remove it from its packaging, take out the giblets and neck from the cavities, and give it a good rinse inside and out with cold water. Pat it thoroughly dry with paper towels. This is important for getting crispy skin later. You’ll need a large container that can hold your turkey and enough liquid to completely submerge it. A food-grade 5-gallon bucket or a large brining bag works perfectly. Ensure it fits in your refrigerator!
Step 5: Submerge and Brine the Turkey
Once the brine is completely chilled, carefully place your turkey into the brining container. Pour the chilled brine concentrate over the turkey. You’ll likely need to add more cold water to fully submerge the bird. For a 12-15 lb turkey, you might need another 1-2 gallons of water. Make sure the turkey is completely covered by liquid. If any part is sticking out, add more cold water. Cover the container tightly (with the lid, plastic wrap, or the brining bag’s seal) and place it in the refrigerator. Brine for 12-24 hours. For a larger bird or if your fridge isn’t super cold, stick closer to 12-18 hours. For smaller birds, 18-24 hours is fine. I personally find 18 hours to be the sweet spot.
Step 6: Remove, Rinse, and Dry
After the brining time is up, carefully remove the turkey from the brine. Discard the used brine (it’s not safe to reuse). Rinse the turkey thoroughly inside and out under cold running water to remove any excess salt and spices. Again, pat the turkey completely dry with paper towels. This step is vital for achieving that beautiful, crispy skin when you smoke it. Let the turkey air dry in the refrigerator, uncovered, for at least a few hours, or ideally overnight. This helps dry out the skin even further.
Step 7: Smoke the Turkey
Once your turkey is brined, rinsed, dried, and ready, it’s time for the smoker! Follow your preferred smoking method for temperature and wood type (applewood or hickory are my favorites for turkey). This brine recipe provides all the internal moisture and flavor you need, so you can focus on getting that perfect smoky crust.
Step 8: Rest and Carve
Once your turkey is cooked to an internal temperature of 165°F (74°C) in the thickest part of the thigh (without touching the bone), remove it from the smoker and let it rest for at least 20-30 minutes before carving. This resting period allows the juices to redistribute throughout the meat, ensuring maximum moisture and tenderness. Then, carve and enjoy the fruits of your labor!
What to Serve It With
This incredible smoked turkey, thanks to the amazing smoked turkey brine recipe, is pretty much the star of any meal, but that doesn’t mean it can’t shine even brighter with the right companions! For a glorious Breakfast, I love slicing the leftover smoked turkey and serving it in a simple scramble with some sharp cheddar. A hot cup of coffee is, of course, mandatory. For an elegant Brunch, think about serving it alongside fluffy Buttermilk Pancakes or a savory cornbread stuffing. A mimosa or a sparkling cider would be lovely. As a decadent Dessert – hear me out! – some thin slices of smoked turkey with a dollop of cranberry relish or fig jam can be surprisingly delightful, especially with a crisp white wine. And for those purely Cozy Snacks moments, nothing beats a smoked turkey sandwich on toasted sourdough with a smear of Dijon mustard and some sharp cheddar cheese. My family also loves making turkey hash the next day with roasted potatoes and a fried egg on top. It’s a tradition that started after a particularly large Thanksgiving, and now it’s just expected!
Top Tips for Perfecting Your Smoked Turkey Brine Recipe
Over the years, I’ve learned a few tricks that take this smoked turkey brine recipe from good to absolutely spectacular. Firstly, when it comes to the Turkey Prep, make sure you really get into all the nooks and crannies when rinsing. Sometimes I even lift the skin gently over the breast and thighs to ensure the brine can get in there, although that’s not strictly necessary for this recipe. Patting it *bone dry* after rinsing is probably the single most important step for crispy skin. I usually let it air dry uncovered in the fridge overnight. For the Mixing Advice, always ensure your salt and sugar are fully dissolved in the initial simmer. Undissolved granules can lead to uneven salting, and no one wants a bite that’s too salty or too bland. Don’t rush the cooling process; warm brine is a no-go. When it comes to Brine Customization, feel free to play with the aromatics! If you love a little heat, a couple of dried chilies can be a fun addition. Some people also like to add a tablespoon of soy sauce or Worcestershire sauce for extra umami, though I prefer to keep it classic for that pure turkey flavor. For Ingredient Swaps, if you can’t find allspice berries, a pinch of ground allspice can work in a pinch, but whole spices are always better for a slow infusion. And if you’re not a fan of coriander, you can omit it or double up on the peppercorns. When it comes to Baking Tips (or in this case, smoking tips!), don’t overcrowd your smoker. Good airflow is key for that even smoky flavor and crispy skin. I always aim for a consistent temperature between 250-275°F (120-135°C). And for the Glaze Variations (though this brine doesn’t use a glaze *before* smoking, the skin caramelizes beautifully on its own), if you decide to add a glaze *after* it’s cooked and rested, a simple mix of melted butter, Brown Sugar, and a splash of apple cider vinegar is divine.
Storing and Reheating Tips
Once you’ve got this glorious smoked turkey, you’ll want to make sure you store it properly to enjoy it for days. If you have leftovers, they’re fantastic at Room Temperature for no more than two hours, as per food safety guidelines. After that, get them into the fridge! For Refrigerator Storage, I recommend carving the turkey and storing the meat in airtight containers or wrapped tightly in plastic wrap and then foil. It should stay good in the fridge for about 3-4 days. The flavor actually gets even better as it melds overnight! If you want to keep it longer, Freezer Instructions are your best friend. Wrap carved meat very securely in plastic wrap, then in foil, or use freezer-safe bags, squeezing out as much air as possible. It will last in the freezer for up to 2-3 months. For reheating, I find the best way to preserve moisture is to gently warm the carved meat in a covered dish in a low oven (around 300°F/150°C) with a splash of chicken broth or water. Alternatively, you can reheat it in a covered skillet over low heat. The key is to avoid drying it out. For the Glaze Timing Advice, if you’ve applied a glaze before smoking, that’s already done. If you’re planning to add a glaze *after* cooking and reheating, do it just before serving to keep it fresh and appealing.
Frequently Asked Questions
Final Thoughts
So there you have it – my tried-and-true smoked turkey brine recipe that has saved countless dinners and earned me rave reviews. It’s the secret weapon in my culinary arsenal, and I truly believe it will become yours too. The combination of savory, sweet, and aromatic notes creates a turkey that’s not just moist, but deeply flavorful in every single bite. It’s that kind of dish that makes people close their eyes in delight. If you loved this recipe, you might also enjoy my recipe for Smoked Chicken Wings or my guide to Perfectly Smoked Pork Shoulder, as they both utilize similar flavor-building techniques. This smoked turkey brine recipe is more than just ingredients; it’s about creating memories around the table. So go ahead, give it a try, and prepare for your most delicious smoked turkey yet! I can’t wait to hear how yours turns out. Don’t forget to share your own tips or variations in the comments below!

Juicy Smoked Turkey Injection Recipe
Ingredients
Injection Marinade
- 1 stick Butter, melted
- 1 cup Chicken broth
- 1 tablespoon Hot sauce
- 2 tablespoons Lemon juice
- 1 teaspoon Onion powder
- 1 teaspoon Garlic powder
- 1 teaspoon Salt
Instructions
Instructions
- Melt butter in a large (at least 2 cups) glass measuring cup or bowl.
- Add remaining ingredients and stir to mix.
- Use a meat injector to insert the liquid throughout the turkey. Use different angles and be sure to get it deep within the thickest part of the breast.
- Add your favorite turkey rub to the skin and cook the injected turkey as desired. You can use this injection recipe for a smoked turkey but it works for roasting or frying as well.