peanut butter pie
You know those days? The ones where you’re just *craving* something sweet, something comforting, something that feels like a warm hug in dessert form? For me, on those days, nothing beats a slice of creamy, dreamy Peanut Butter Pie. Seriously, this isn’t just any peanut butter pie; it’s the one that my family begs for, the one I whip up when unexpected guests pop by, and the one that single-handedly saved me during a particularly hectic holiday season. It’s surprisingly easy, incredibly decadent, and tastes like a million bucks without costing a fortune. If you’ve ever thought a pie required hours in the kitchen, this recipe is going to change your mind entirely. It’s the kind of dessert that makes you feel like a baking superhero, even if you’ve never turned on your oven for pie before.
What is peanut butter pie?
So, what exactly *is* this magical creation? Think of it as the ultimate indulgence without the fuss. It’s a No-Bake Peanut Butter pie, which means no oven time required, just a little chilling to set. The base is usually a simple graham cracker crust, giving it that perfect crumbly texture that contrasts so beautifully with the filling. And the filling? Oh, that filling! It’s a luscious, cloud-like concoction packed with rich peanut butter flavor, sweetened just right, and often lightened with whipped cream or cream cheese for that airy, melt-in-your-mouth quality. The name itself, “peanut butter pie,” is pretty straightforward, but the experience of eating it is anything but ordinary. It’s a celebration of one of the most beloved flavor combinations out there, delivered in a stunning, sliceable package that’s deceptively simple.
Why you’ll love this recipe?
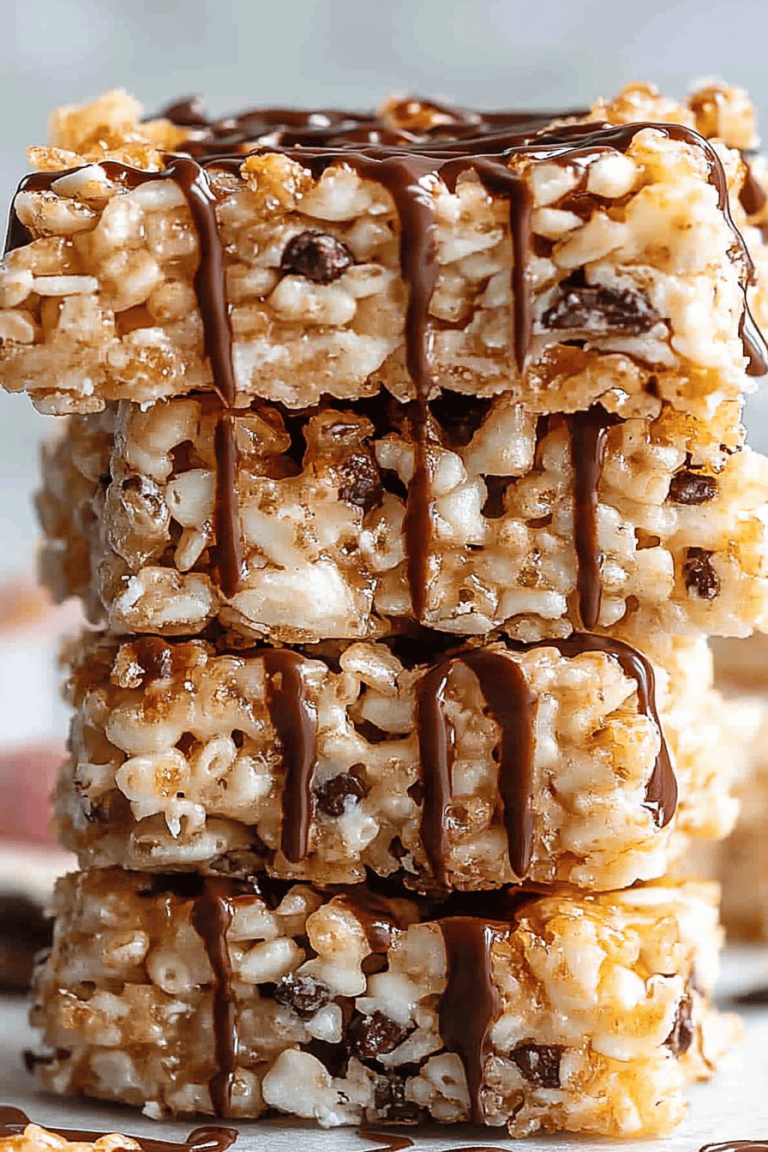
Honestly, the list of reasons to adore this Peanut Butter Pie is pretty long, but let me hit you with the highlights. First off, the flavor is just out of this world. It’s that perfect balance of salty and sweet that peanut butter lovers dream about. It’s intensely peanut buttery, but it’s not heavy or cloying. Then there’s the texture – it’s unbelievably smooth and creamy, like velvet on your tongue, especially when you get that perfect graham cracker crust crunch alongside. And the simplicity? It’s a lifesaver! I’ve made this when I’ve only had an hour before needing to serve dessert, and it’s always a hit. No complicated steps, no double boilers, just straightforward mixing and chilling. Plus, it’s incredibly budget-friendly. The ingredients are pantry staples for most of us, making it an accessible treat any time of year. What I love most about this is its sheer versatility. You can totally customize it! Add chocolate chips, a swirl of caramel, or top it with crushed peanuts. It’s the perfect make-ahead dessert, meaning you can have it ready to go for any occasion, from a casual weeknight treat to a show-stopping dessert for a dinner party. It’s also incredibly forgiving, which is a huge win in my book.
How do I make a peanut butter pie?
Quick Overview
Making this peanut butter pie is so straightforward, it almost feels like cheating. You’ll quickly press together a simple crust, whip up a gloriously Creamy Peanut Butter filling, and then let it chill until firm. That’s it! No baking, no fuss, just pure, unadulterated peanut butter goodness. It’s the ultimate dessert for busy bakers or anyone who wants a truly impressive treat with minimal effort. The magic happens in the chilling process, which transforms simple ingredients into a rich, decadent dessert.
Ingredients
For the Graham Cracker Crust:
2 cups Graham Cracker crumbs (about 14-16 full crackers)
1/2 cup unsalted butter, melted
1/4 cup granulated sugar
A pinch of salt
Tip: You can use a food processor to get your crumbs super fine, or just pop the crackers in a ziplock bag and give them a good bash with a rolling pin. For a little extra depth, I sometimes add a teaspoon of cinnamon to the crumbs – it’s subtle but lovely!
For the Luscious Peanut Butter Filling:
8 ounces cream cheese, softened
1 cup creamy peanut butter (use your favorite kind! Jif or Skippy are classics for a reason, but natural peanut butter works too, just give it a good stir first.)
1/2 cup powdered sugar (sifted to avoid lumps)
1 teaspoon vanilla extract
1 cup heavy whipping cream, cold
Optional: 1/2 cup mini chocolate chips, for folding in
Tip: Make sure your cream cheese is truly soft. It should give easily when you press it. This is crucial for a smooth filling! Using cold heavy cream is also a must for whipping it up perfectly.
For the Optional Chocolate Ganache Topping (Trust me, you want this!):
1 cup semi-sweet chocolate chips
1/2 cup heavy whipping cream
Tip: If you don’t want to make ganache, a dusting of cocoa powder or some whipped cream and chopped peanuts is also delicious.
Step-by-Step Instructions
Step 1: Preheat & Prep Pan
While this is a no-bake pie, we do need a crust, so let’s get that ready. Preheat your oven to 350°F (175°C). Take a standard 9-inch pie plate and set it aside. You’re going to press the crust mixture into this plate.
Step 2: Mix Dry Ingredients
In a medium bowl, combine the graham cracker crumbs, granulated sugar, and pinch of salt. Give them a good stir with a fork or whisk to ensure everything is evenly distributed. This little bit of sugar and salt adds just the right amount of sweetness and flavor contrast to the crust.
Step 3: Mix Wet Ingredients
Pour the melted butter into the dry ingredients. Use a fork to mix until all the crumbs are moistened and the mixture resembles wet sand. It should hold together when you squeeze a little bit in your hand.
Step 4: Combine
Pour the crumb mixture into your pie plate. Using the bottom of a glass or your fingers, press the crumbs firmly and evenly into the bottom and up the sides of the pie plate. You want a nice, compact crust that won’t crumble when you slice it. Bake the crust for 8-10 minutes, just until it’s lightly golden and fragrant. Let it cool completely on a wire rack while you prepare the filling.
Step 5: Prepare Filling
In a large bowl, beat the softened cream cheese with an electric mixer until it’s completely smooth and creamy, with no lumps. This step is key for a silky-smooth filling! Add the peanut butter to the cream cheese and beat until well combined and smooth. Then, gradually beat in the sifted powdered sugar and vanilla extract until everything is nicely incorporated and smooth. If you’re adding chocolate chips, gently fold them in now.
Step 6: Layer & Swirl
In a separate, clean bowl, whip the cold heavy cream with your electric mixer on medium-high speed until stiff peaks form. Be careful not to over-whip, or you’ll end up with butter! Gently fold about half of the whipped cream into the peanut butter mixture to lighten it. Then, gently fold in the remaining whipped cream until just combined and no streaks remain. You want it to be light and airy, not overmixed.
Step 7: Bake
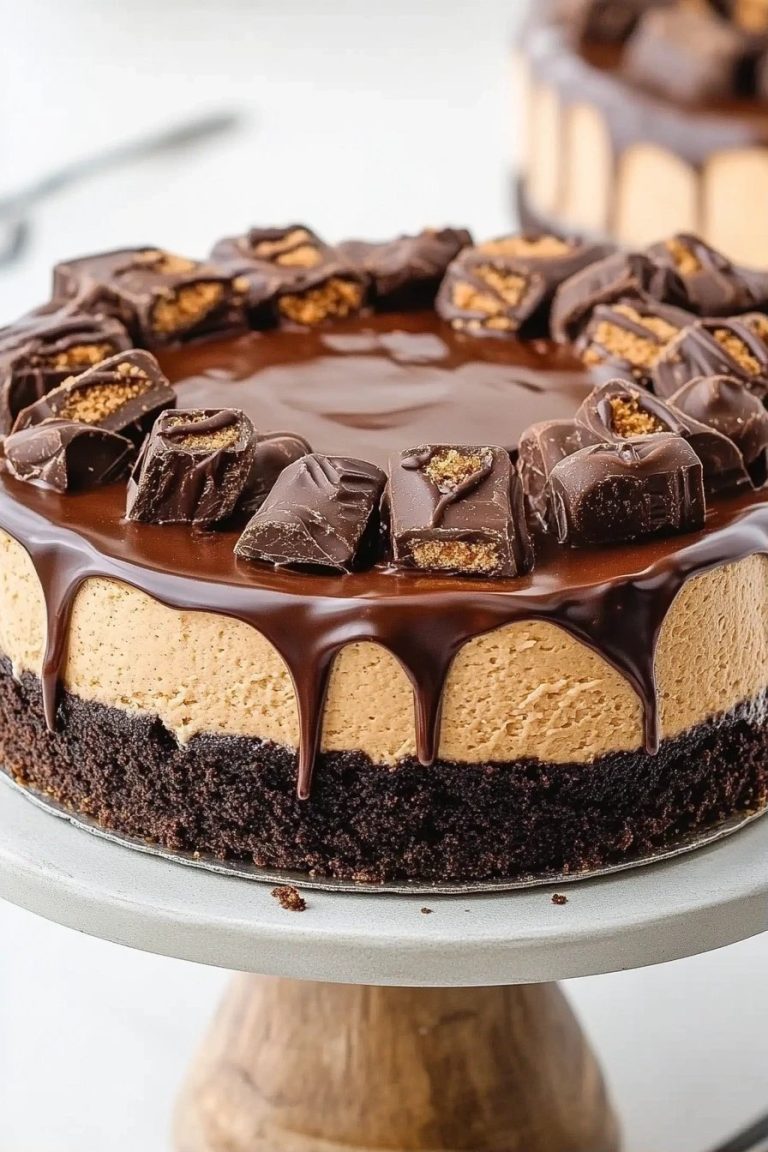
Spoon the peanut butter filling into the cooled graham cracker crust. Spread it evenly with a spatula. If you’re making the optional chocolate ganache, now’s the time. Gently heat the 1/2 cup heavy cream in a small saucepan until it’s just simmering (don’t boil). Pour it over the chocolate chips in a heatproof bowl. Let it sit for 5 minutes, then whisk until smooth and glossy. Let the ganache cool slightly, then drizzle it over the peanut butter filling. You can use a toothpick to swirl it gently for a pretty design, or just pour it on! Chill the pie in the refrigerator for at least 4 hours, or preferably overnight, until it’s completely firm.
Step 8: Cool & Glaze
The chilling step is critical for this pie to set up properly. Make sure it’s in the fridge for the recommended time. If you’re adding the ganache, ensure it has cooled slightly before drizzling so it doesn’t melt into the filling too much. If you skipped the ganache, you can add whipped cream or chopped peanuts just before serving.
Step 9: Slice & Serve
Once the pie is firm, you can slice and serve it. For the cleanest slices, use a sharp knife dipped in hot water and wiped dry between each cut. Serve chilled, and watch it disappear!
What to Serve It With
This peanut butter pie is practically a meal in itself, but it also pairs beautifully with a few things to enhance the experience. For a truly decadent dessert, a dollop of extra whipped cream is always a good idea, maybe with a sprinkle of flaky sea salt or some chocolate shavings. Coffee is a classic companion, especially a rich, dark roast that can stand up to the sweetness. If you’re serving it for brunch, a glass of milk or a light, crisp white wine can be surprisingly delightful. For a more playful twist, try serving it with a scoop of vanilla ice cream – the hot and cold, creamy and icy textures are divine! My family also loves it with fresh berries, like raspberries or strawberries, because the tartness cuts through the richness so nicely. It’s the perfect dessert for a cozy evening at home, served with a warm mug of tea or hot chocolate. It’s honestly great anytime, anywhere, and with anything (or nothing!).
Top Tips for Perfecting Your Peanut Butter Pie
I’ve made this peanut butter pie more times than I can count, and through trial and error (mostly delicious error!), I’ve picked up a few tricks that I think make all the difference. First, about the peanut butter itself: use a good quality creamy peanut butter. While natural peanut butter has great flavor, the oil separation can sometimes make the filling a little less stable. If you do use natural, make sure it’s *really* well stirred to incorporate all that oil back in. For the crust, pressing it firmly into the pan is non-negotiable. A loose crust means a messy slice, and we don’t want that! Baking it for just 8-10 minutes helps it set up without getting too dark. When it comes to the filling, the temperature of your ingredients is crucial. Softened cream cheese and cold heavy cream are your best friends here. If your cream cheese isn’t soft enough, you’ll end up with lumps, no matter how much you beat it. And don’t over-whip the cream! Stop as soon as you see those firm peaks. For the swirl on the chocolate ganache, less is more. A few gentle drags with a toothpick is all you need to get a pretty pattern. If you’re worried about over-mixing the filling, try folding in the whipped cream in two additions. The first addition lightens the base, making the second addition easier to incorporate without deflating the whipped cream too much. And for the ultimate chilling, I always recommend making this pie the day before. It gives all those flavors a chance to meld and the texture to firm up perfectly. Trust me, the patience is worth it!
Storing and Reheating Tips
This peanut butter pie is fantastic because it holds up so well, making it perfect for making ahead. Once it’s set, you can store it covered loosely with plastic wrap or foil at room temperature for up to 2 hours. Beyond that, it’s best to refrigerate it. In the refrigerator, a well-covered pie will stay delicious for about 3-4 days. Make sure it’s tightly covered to prevent it from absorbing other odors in the fridge. If you think you won’t get through it that quickly, or you want to make it even further in advance, you can freeze it! To freeze, make sure the pie is completely set and chilled. Wrap it tightly in a double layer of plastic wrap, then a layer of aluminum foil. It can be stored in the freezer for up to 1-2 months. When you’re ready to serve it from frozen, the best way to thaw it is to transfer it to the refrigerator overnight. This allows it to thaw gently and maintain its texture. If you added the chocolate ganache, it will hold up well to refrigeration and freezing. Just remember to cover it well to prevent ice crystals forming.
Frequently Asked Questions
Final Thoughts
So there you have it – my absolute favorite no-bake peanut butter pie recipe. It’s more than just a dessert; it’s a memory maker, a crowd-pleaser, and honestly, just pure, unadulterated joy in pie form. I truly hope you give it a try. It’s one of those recipes that makes you feel incredibly accomplished with minimal stress, and that’s a win-win in my kitchen. If you love this, you might also enjoy my no-bake chocolate cheesecake for another effortless dessert option, or my classic apple crumble pie if you’re in the mood for something baked. I can’t wait to hear what you think of this peanut butter pie! If you make it, please drop a comment below and let me know how it turned out, or share any fun variations you tried. Happy baking… or rather, happy chilling!
Peanut Butter Pie a Crowd Pleaser
Ingredients
Main Ingredients
- 8 ounces cream cheese softened
- 1 cup powdered sugar
- 1 cup creamy peanut butter
- 1 cup milk
- 8 ounces frozen whipped topping thawed, like Cool Whip
- 2 9-inch prepared graham cracker crusts
Instructions
Preparation Steps
- In the bowl of your electric mixer, cream together the cream cheese and powdered sugar until smooth and fluffy.
- Set the mixer to low speed and add in the peanut butter and milk. Mix well until fully combined.
- Using a rubber spatula, gently fold in the thawed whipped topping until incorporated and light.
- Spoon the peanut butter mixture evenly into the two 9-inch graham cracker pie shells. Cover and freeze for at least 3 hours or until firm.