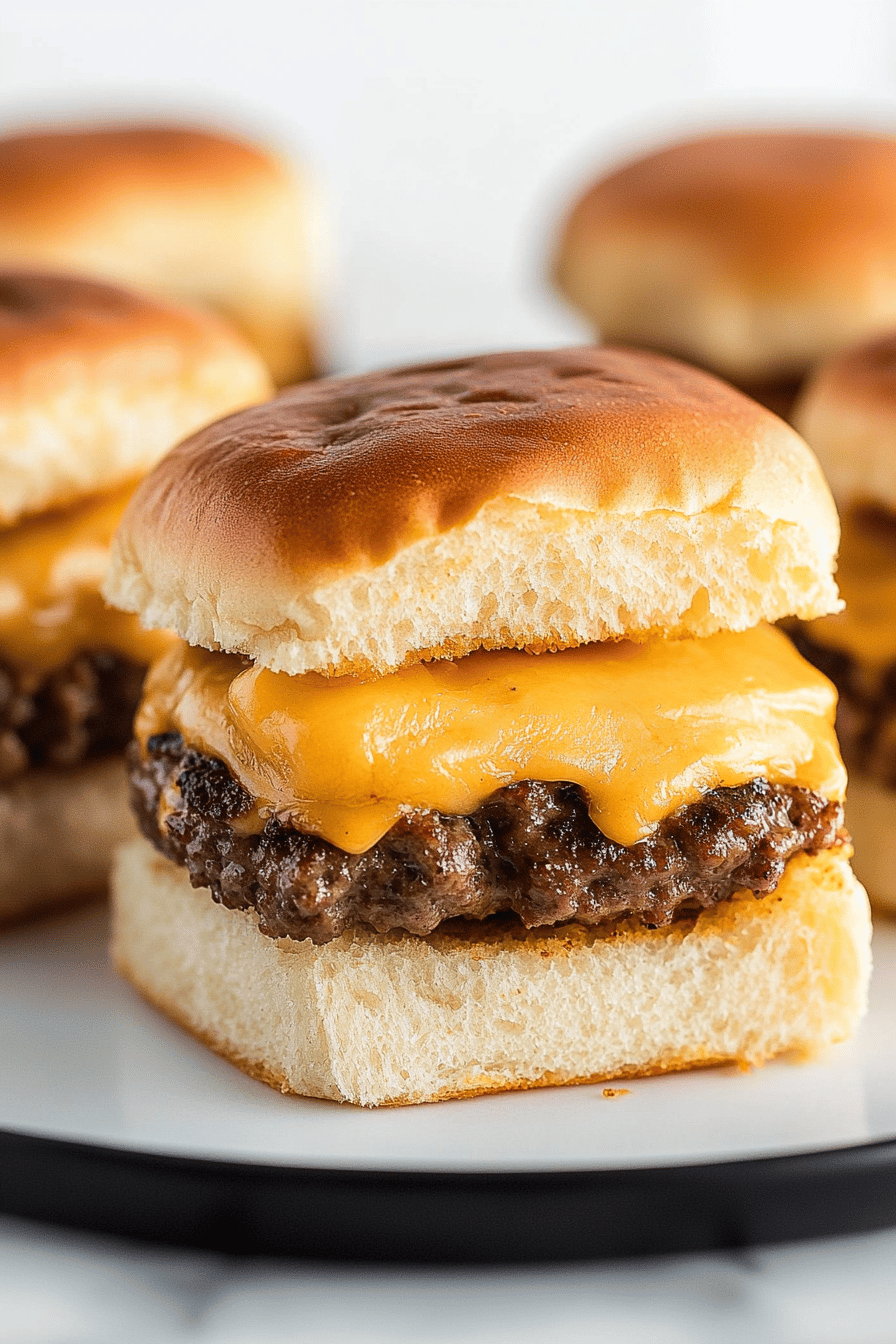
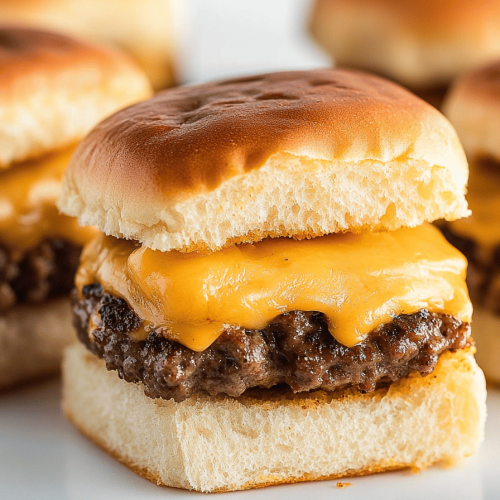
ham and cheese sliders
You know those nights? The ones where the day just seemed to run away from you, and the thought of making a proper dinner feels like climbing Mount Everest in flip-flops? Yeah, I have those. And for years, my solution was the dreaded takeout menu or a sad bowl of cereal. But then, I stumbled upon something magical, something that changed my weeknight dinner game forever: ham and cheese sliders. Seriously, these little wonders are like a warm hug in sandwich form. They’re ridiculously easy, incredibly satisfying, and always, *always* a crowd-pleaser. My kids practically beg for them, and honestly, I don’t blame them. They remind me a little of those classic party pinwheels, but with way more gooey cheese and savory ham goodness packed into every bite. If you’ve ever loved a Grilled Cheese sandwich, prepare to have your mind blown by these miniature marvels. They’re the perfect antidote to a long day and way, way better than any sad cereal bowl.
What are Ham and Cheese Sliders?
So, what exactly are these glorious little sandwiches? Think of them as a deconstructed, bite-sized ham and cheese sandwich, but elevated. Instead of just slapping some ham and cheese between two slices of bread, we’re taking slider buns (or Hawaiian rolls, which are my absolute favorite for this) and layering them up with savory ham and melty cheese, all slathered in a dreamy, buttery, often savory-sweet sauce before being baked to golden perfection. It’s essentially a casserole of mini sandwiches, all held together in one glorious pan. The magic happens in the oven, where the buns get wonderfully soft on the inside yet slightly toasted on the outside, and the cheese becomes a gooey, luscious river flowing through the ham. It’s comfort food at its finest, approachable enough for a weeknight but special enough for a party. They’re more than just a sandwich; they’re an experience!
Why you’ll love this recipe?
Honestly, there are so many reasons why this ham and cheese slider recipe has become a staple in my kitchen. First and foremost, the flavor is just out of this world. You get that salty, savory punch from the ham, the rich creaminess of melted cheese, all wrapped up in a slightly sweet, tender bun. The buttery glaze that gets brushed over the top before baking? Pure genius. It seeps into the buns and makes them incredibly flavorful and just a little bit crispy on top. Then there’s the sheer simplicity of it all. I can whip these up in about 15 minutes from start to finish, which is a lifesaver on those busy evenings when cooking feels like a marathon. And talk about budget-friendly! Ham, cheese, and some slider buns are usually pretty affordable ingredients, making this a fantastic option for feeding a crowd without breaking the bank. Plus, they are ridiculously versatile. Serve them as a main course, cut them in half for appetizers, or even have them for breakfast – they work for everything! What I love most is the pure joy they bring. The smell alone when they’re baking fills the house with warmth, and the way everyone dives in, grabbing a few (or more!), is just the best. It’s a recipe that brings smiles, and that’s truly priceless.
How do you make ham and cheese sliders?
Quick Overview
Making these ham and Cheese Sliders is almost embarrassingly simple. You’ll slice your buns, layer in your ham and cheese, whisk together a quick, flavorful butter mixture, pour it over everything, and bake until golden and bubbly. That’s it! The key is the gentle baking that softens the buns while melting the cheese into a glorious, gooey mess. It’s the kind of recipe you can make with your eyes closed after the first time, and it always delivers crowd-pleasing results.
Ingredients
For the Main Event (The Sliders):
We’re starting with a base of soft, slightly sweet slider buns. Hawaiian sweet rolls are my absolute favorite for this because they caramelize beautifully and their sweetness plays so well with the savory ham and cheese. If you can’t find them, a good quality soft dinner roll will work too! You’ll need about 24 of them, so one standard pack is usually perfect. Make sure they’re fresh; stale buns just won’t give you that melt-in-your-mouth texture we’re after.
For the ham, I like to use thinly sliced deli ham. It distributes easily and melts nicely. You can use your favorite kind – honey ham, smoked ham, whatever you love! I usually layer it generously, folding it a bit to create little pockets of savory goodness. And the cheese! Oh, the cheese. I swear by a good sharp cheddar for its bold flavor, but a blend of cheddar and Monterey Jack or Swiss is also fantastic. Make sure it’s sliced or shredded – shredded melts a bit more evenly, in my opinion. You want enough cheese to create that irresistible gooey pull in every single bite.
For the Flavor Boost (The Glaze):
This is where the real magic happens! It’s a simple mixture of melted butter, Dijon mustard, Worcestershire sauce, and a touch of Brown Sugar or honey. The Dijon adds a lovely tang that cuts through the richness, the Worcestershire gives it a deep, savory umami flavor, and the brown sugar or honey brings just a hint of sweetness that complements everything. Some people even add a pinch of garlic powder or onion powder to this, and I’ve tried it – it’s delicious! The consistency should be smooth and pourable. This glaze is what transforms a simple ham and cheese sandwich into something truly spectacular, seeping into the buns and adding an incredible depth of flavor.
Step-by-Step Instructions
Step 1: Preheat & Prep Pan
First things first, let’s get that oven ready. Preheat it to 350°F (175°C). Now, grab a 9×13 inch baking dish. You don’t need to grease it, but some people like to line it with parchment paper for super easy cleanup. I usually just toss them in the pan as-is, but parchment paper is a great idea if you’re short on time for washing up later!
Step 2: Mix Dry Ingredients
This step is more about preparing the buns. Take your package of slider buns and carefully slice them in half horizontally, just like you would for a regular sandwich. It’s easiest to do this if you keep them together in the package or as a connected block. A long, serrated knife works best for a clean cut without squishing them.
Step 3: Mix Wet Ingredients
In a small bowl, melt your butter. Once it’s liquid, whisk in the Dijon mustard, Worcestershire sauce, and Brown Sugar (or honey). Stir it all together until it’s nice and smooth. This is your flavorful glaze that’s going to make everything so delicious. I like to give it a taste at this point just to make sure I’m happy with the balance of sweet and savory.
Step 4: Combine
Now we assemble! Place the bottom halves of your slider buns into the prepared baking dish, cut-side up. Layer your ham slices evenly over the bottom buns. Don’t be shy! Fold them or layer them to create nice, thick portions. Then, pile on your shredded cheese or lay your cheese slices on top of the ham. Finally, place the top halves of the buns over the cheese. Make sure everything is nestled in the pan.
Step 5: Prepare Filling
Wait, we already did the filling in Step 4! This recipe is so fast, we’re already ahead of ourselves. The ham and cheese *is* the filling, nestled right inside those glorious buns.
Step 6: Layer & Swirl
This is where the magic sauce comes in. Drizzle or brush the butter mixture evenly over the tops of all the slider buns. Make sure to get a good coating on each one. I usually use a pastry brush for this, but you can also just spoon it over, trying to distribute it as evenly as possible. It’ll soak in as it bakes and make the tops beautifully golden and flavorful.
Step 7: Bake
Pop the dish into your preheated oven. Bake for about 15-20 minutes, or until the cheese is melted and gooey, and the tops of the buns are golden brown and slightly crisp. Keep an eye on them, as oven temperatures can vary. You want them cooked through and bubbly, but not burnt!
Step 8: Cool & Glaze
Once they’re out of the oven, let them sit in the pan for about 5 minutes. This allows everything to set up just a little bit, making them easier to handle and preventing the cheese from oozing out everywhere immediately. The glaze has already been applied and baked on, so no extra glazing needed at this stage unless you want to add a little something extra, which is totally optional.
Step 9: Slice & Serve
Carefully remove the sliders from the pan, either individually or by cutting them into sections with a sharp knife right in the pan. Serve them warm, when the cheese is perfectly melty. They are absolutely divine!
What to Serve It With
These ham and cheese sliders are incredibly versatile, which is another reason I adore them. For a simple breakfast, they’re perfect alongside a strong cup of coffee. The slight sweetness of the buns and the savory ham and cheese are just what you need to kickstart your day. If you’re planning a brunch, these are a guaranteed hit. You can make a big batch and serve them alongside a fresh fruit salad or a colorful caprese skewer for a lovely contrast. For a more elegant brunch spread, I sometimes cut them in half and arrange them on a tiered tray. As a delightful dessert, yes, you read that right! Hear me out: serve them warm with a side of sweet and tangy dipping sauce, like a raspberry chipotle or even a simple Honey Mustard. The sweet and savory combination is surprisingly addictive after a meal, especially if you’re craving something a little different. For those truly cozy snack nights, these are unparalleled. Grab a plate, maybe a side of pickles or some potato chips, curl up on the couch, and enjoy. They’re also fantastic served with a side of creamy coleslaw or a simple green salad to round out the meal. My family loves them with some sweet potato fries on the side. It’s all about comfort and deliciousness!
Top Tips for Perfecting Your Ham and Cheese Sliders
I’ve made these ham and cheese sliders more times than I can count, and over the years, I’ve picked up a few tricks that I think really make a difference. First, when it comes to the buns, don’t overstuff them initially. It’s tempting to cram in as much ham and cheese as possible, but if you do that, the glaze won’t penetrate properly, and they can get a bit soggy rather than deliciously soft. Let the ingredients breathe a little! Speaking of ingredients, using good quality ham and cheese really does elevate these. A good sharp cheddar will give you a much more complex flavor than a mild one. For the glaze, don’t skimp on the Dijon or Worcestershire sauce – those are the flavor powerhouses that balance out the sweetness of the buns and the richness of the butter and cheese. I learned this the hard way when I tried using just butter and sugar once – it was way too sweet! When you’re mixing the glaze, make sure the butter is fully melted and everything is well combined. I sometimes give it a quick whisk right before pouring to ensure it’s emulsified. For baking, keep an eye on them! Ovens are all different, and you want that perfect golden-brown top. If your buns are browning too quickly, you can always loosely tent the pan with foil for the last few minutes. Another tip is to make sure your cheese is distributed evenly. If you have big clumps of cheese in one spot, it might not melt as well as it would if it’s spread out. Shredded cheese is often easier to distribute evenly than slices. If you’re using slices, overlap them slightly. And finally, for the best texture, serve these immediately after they come out of the oven. That gooey, melty cheese is at its peak perfection when it’s hot and luscious. If you have leftovers (which is rare in my house!), they’re still good, but that initial melt is something special.
Storing and Reheating Tips
So, what happens if by some miracle you have leftover ham and cheese sliders? Don’t worry, they’re still delicious! If you’re storing them at room temperature, I’d say they’re best enjoyed within about 4 hours. Make sure they’re covered loosely with foil or plastic wrap to keep them from drying out. For refrigerator storage, these guys can last for a good 2-3 days. I like to keep them in an airtight container or wrap the pan tightly with plastic wrap and then foil. The glaze helps them stay moist, but they won’t be quite as soft as when they’re fresh. Reheating is key to bringing back that gooey cheese magic. The best way, in my opinion, is to pop them back into a 300°F (150°C) oven for about 5-10 minutes, or until they’re heated through and the cheese is melty again. This method keeps them from getting soggy. You can also use a microwave, but be careful not to overdo it, or they can become a bit rubbery. Just a quick 20-30 second zap should do the trick. If you’re thinking about freezing these, it’s totally doable! You can freeze them baked or unbaked. For baked sliders, let them cool completely, then wrap them individually or in small batches tightly in plastic wrap, then in foil, and freeze for up to 2-3 months. Thaw overnight in the fridge and reheat as mentioned above. If freezing unbaked, assemble them, wrap them well, and freeze. When you’re ready to cook, you can bake them directly from frozen, just add a few extra minutes to the baking time. For the glaze, I usually apply it just before baking, so if you’re freezing unbaked, you’d apply it after thawing and before baking. For baked and frozen, the glaze is already on there and should reheat beautifully.
Frequently Asked Questions
Final Thoughts
Honestly, I hope you give these ham and cheese sliders a try. They’re more than just a recipe to me; they’re a solution to weeknight dinner dilemmas, a guaranteed hit at parties, and a little piece of comfort food happiness. The way the cheese gets all gooey, the ham is perfectly savory, and those soft buns soak up all that amazing buttery glaze… it’s just pure bliss. If you love a good grilled cheese, or just enjoy simple, incredibly satisfying food, these sliders are for you. They’re forgiving, adaptable, and always bring a smile to faces around my table. If you enjoyed this recipe, you might also love my recipes for Mini Meatball Subs or my Cheesy Garlic Breadsticks – they share that same crowd-pleasing, easy comfort food vibe! I can’t wait to hear how yours turn out. Please leave a comment below and let me know your thoughts, any delicious variations you try, or how quickly they disappeared! Happy baking (and eating)!
Ham and Cheese Sliders
Ingredients
Main Ingredients
- 12 pieces slider rolls
- 0.5 pound sliced ham
- 0.5 pound sliced cheese such as Swiss or cheddar
- 0.25 cup butter melted
- 1 tablespoon Dijon mustard
- 1 teaspoon Worcestershire sauce
- 0.5 teaspoon poppy seeds optional
Instructions
Preparation Steps
- Preheat oven to 350°F (175°C).
- Slice the slider rolls in half horizontally.
- In a small bowl, whisk together the melted butter, Dijon mustard, Worcestershire sauce, and poppy seeds (if using).
- Arrange the bottom halves of the slider rolls in a baking dish.
- Layer the ham and cheese slices on top of the bottom rolls.
- Place the top halves of the rolls over the cheese and ham.
- Brush the tops of the rolls evenly with the butter mixture.
- Cover the baking dish with foil and bake for 15 minutes.
- Remove the foil and bake for another 5 minutes, or until the cheese is melted and bubbly.
- Let cool slightly before serving.