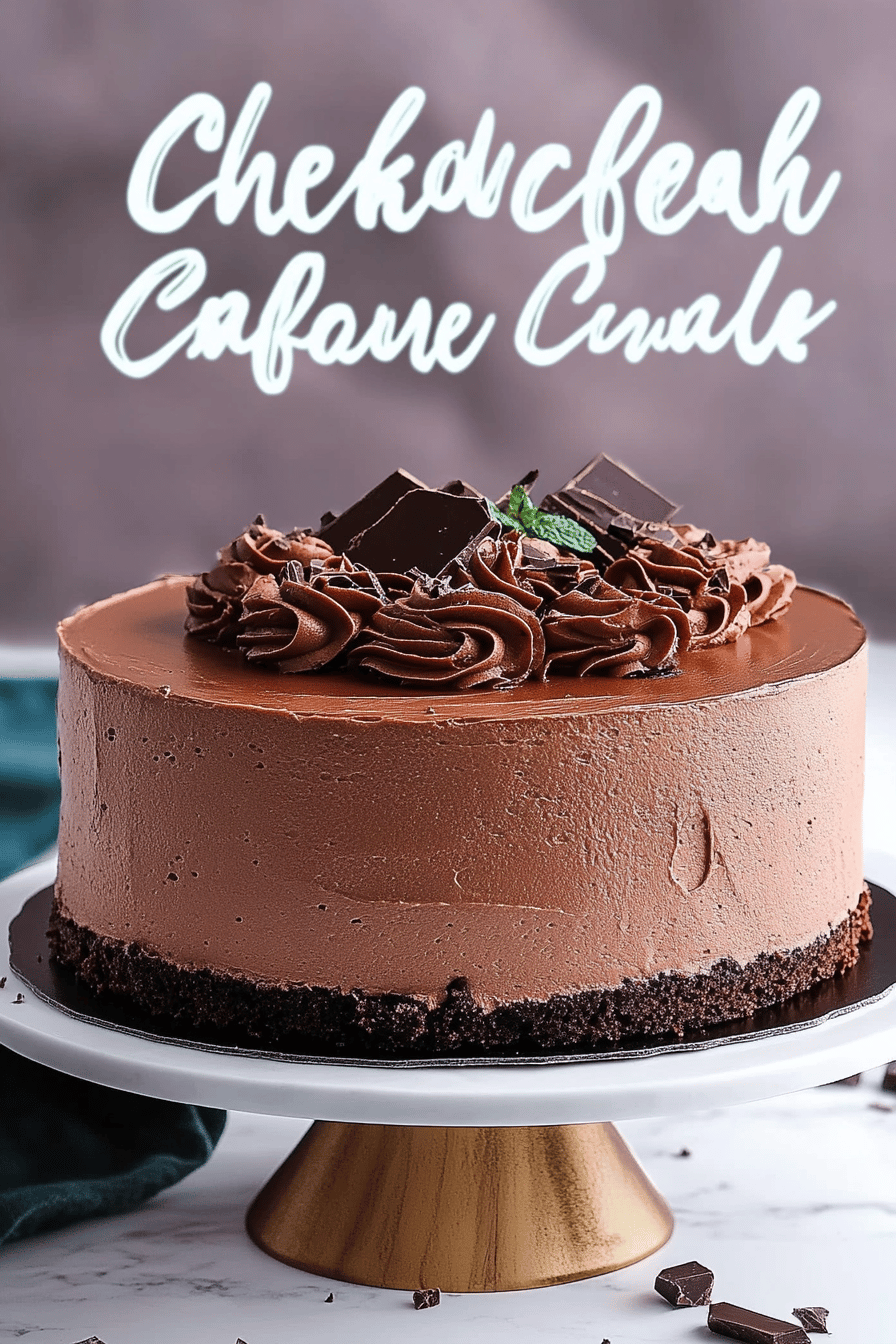
Chocolate Craving Buster Cake Simple
There are those evenings when the house falls quiet, but your brain won’t let go of that persistent whisper: “Chocolate.” That’s exactly when I turn to my chocolate craving cake—a rich, gooey, utterly satisfying dessert that’s as simple as it is indulgent. I still remember the first time I made it for a close friend who confessed she could never find a quick cake recipe that truly hit the chocolate spot. This one swept in, kind of like a favorite old movie that comforts you no matter how many times you’ve seen it. The smell alone, warm and deep with cocoa, always pulls everyone to the kitchen counter faster than I can cut the first slice. Unlike some of those super fussy desserts that take forever, this cake is a lifesaver on busy nights or when you just really, really need something chocolatey but don’t want to fuss with a million ingredients. It’s a bit like a cross between a decadent brownie and a tender cake—just enough to feel like a celebration without stealing your whole evening.
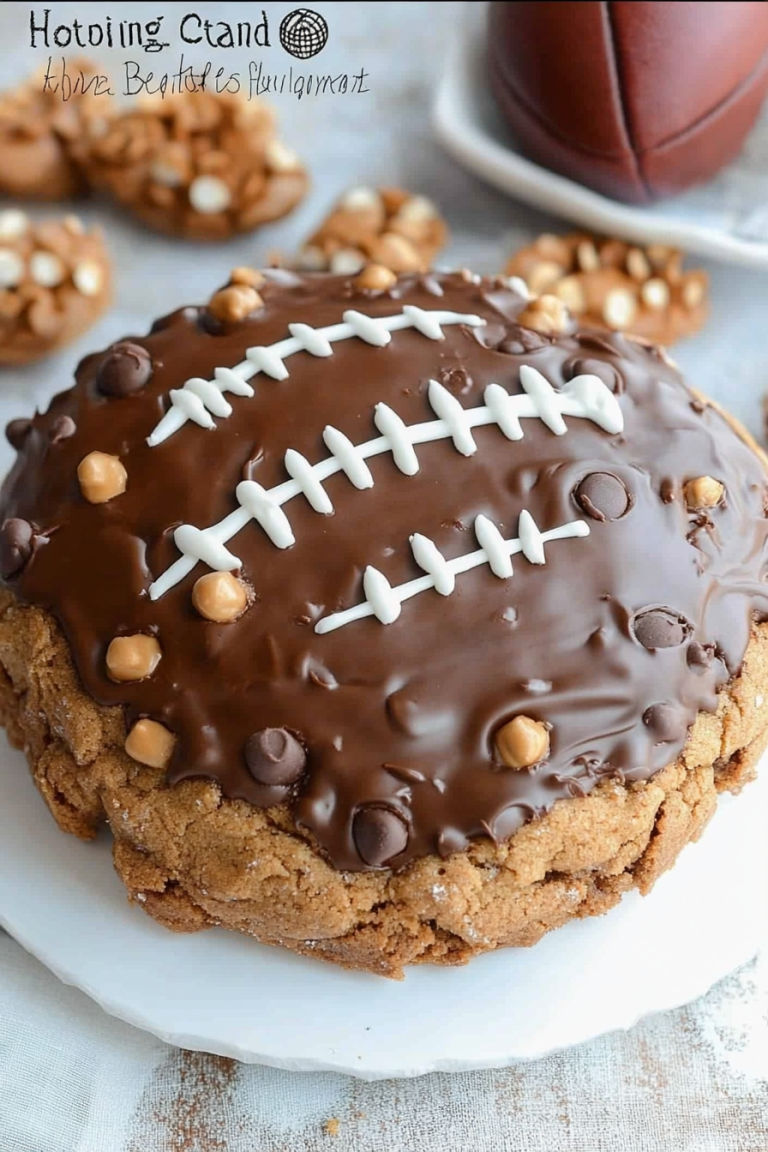
What is chocolate craving cake?
If you’ve ever found yourself stuck between wanting a cookie and a cake, this is your sweet spot. Think of it as a cozy hug in cake form, designed specifically to crush those urgent chocolate cravings. It’s essentially a deeply chocolatey, moist cake with a slightly fudgy center—nothing dry or crumbly here, trust me. The name “chocolate craving cake” popped up around my kitchen after several experiments meant to get the texture and flavor just right without overcomplicating the process. It’s not fancy, it’s not pretentious, but it’s the kind of recipe that feels like home. What I really love is how approachable it is; you don’t have to be a seasoned baker to get this right, and it’s forgiving enough for little tweaks or substitutions if your pantry is half empty. It’s the kind of dessert I bake when the kids have friends over or when I’m crashing on the couch after a long day—it always delivers that chocolate punch without any drama.
Why you’ll love this recipe?
What I adore most about my chocolate craving cake is how it balances richness and simplicity. The chocolate flavor is so deep and satisfying, it’s like a cozy blanket for your taste buds—without being too sweet or heavy. I once had a friend say it reminded her of the best chocolate cake her grandmother used to make, and that comparison warmed my heart because it’s just genuine comfort food.
One of the biggest wins here? The ease. I can usually throw this together in under 15 minutes. No creaming butter and sugar separately, no multiple bowls or fancy equipment—just mix, pour, and bake. This saved my sanity many a night when I wanted a homemade treat but was exhausted from the daily chaos.
Budget-wise, it’s super friendly. The ingredients are pantry staples—cocoa powder, a modest amount of flour, eggs, sugar, and butter or oil. No need for pricier fancy chocolates or special extracts, although of course, you can jazz it up if you like! What’s really lovely, though, is how versatile it is. I sometimes add a sprinkle of cinnamon or swap in coffee to deepen the flavor. The cake also happily hosts add-ins, from nuts to chocolate chips, or even a swirl of peanut butter for a twist. And if you’re feeling wild, try a little orange zest on top—the citrus really brightens everything.
This recipe shares some attributes with quick brownies and sheet cakes but stands out because it never feels too dense or gummy. It hits the middle ground, which means it’s perfect whether you want a quick snack or a fuss-free dessert for the whole family. My kids ask for it all the time and have even made it for their friends with a bit of help—it’s a total crowd-pleaser.
How do I make a chocolate craving cake?
Quick Overview
Making this chocolate craving cake is like a dance of simple steps that come together to make a showstopper. You mix your dry ingredients, blend your wet ones, combine gently (because overmixing is the enemy), then add a little chocolate magic—sometimes a luscious filling or a glossy glaze tops the final creation. Baking it involves just one pan and about 30 minutes in an oven with easy monitoring for doneness. What makes it special is how the cake balances that tender crumb with moist, fudgy pockets that melt in your mouth. Honestly, it’s the kind of recipe you can pull off on a whim, even when baking isn’t your regular thing.
Ingredients
For the Main Batter:
- 1 cup all-purpose flour (I sometimes use cake flour for an even lighter texture)
- 1/2 cup cocoa powder, unsweetened (use a good-quality one for intense flavor)
- 1 cup granulated sugar (feel free to tweak this depending on your sweet tooth)
- 1 teaspoon baking powder
- 1/2 teaspoon baking soda
- 1/4 teaspoon salt
- 2 large eggs, at room temperature
- 1/2 cup unsalted butter, melted (you can substitute light oil but butter adds richness)
- 1/2 cup buttermilk or whole milk (I’ve had great results with almond milk, too!)
- 1 teaspoon vanilla extract
For the Filling:
- 1/2 cup chocolate chips or chunks (semi-sweet or dark chocolate works best)
- Optional: 2 tablespoons peanut butter or cream cheese for swirls
- Optional: a handful of chopped nuts (walnuts or pecans)
For the Glaze:
- 1/2 cup powdered sugar
- 2 tablespoons cocoa powder
- 3-4 tablespoons milk or cream (adjust for desired consistency)
- 1/2 teaspoon vanilla extract
- Optional: a pinch of espresso powder to boost chocolate flavor
Step-by-Step Instructions
Step 1: Preheat & Prep Pan
Start by preheating your oven to 350°F (175°C). Grease an 8-inch round or square cake pan with butter or non-stick spray, then lightly dust it with flour or cocoa powder to avoid sticking. If you want extra insurance, line the bottom with parchment paper—this makes cleanup a breeze and keeps the cake’s edges nice and clean.
Step 2: Mix Dry Ingredients
In a large bowl, sift together the flour, cocoa powder, baking powder, baking soda, salt, and sugar. I always sift because it helps combine everything evenly and prevents lumps, especially in the cocoa powder. Give it a good stir with a whisk until the color is uniform—rich and chocolatey with no streaks.
Step 3: Mix Wet Ingredients
In another bowl, crack your eggs and beat lightly. Add melted butter (not too hot—room temperature is perfect), milk, and vanilla extract. Mix gently until combined. The wet mix will look smooth and a bit glossy. The eggs are what help give the cake its structure and tenderness, so don’t rush this step.
Step 4: Combine
Pour the wet ingredients into the dry, stirring just until no flour pockets remain. Don’t overmix here—it’s tempting, especially when everything smells so good, but a light hand keeps the crumb soft. Your batter should be thick but pourable, with a luscious chocolate sheen. If it looks too stiff, a splash more milk is okay.
Step 5: Prepare Filling
If you’re adding chocolate chips or chunks, fold them gently into the batter now or reserve a few for sprinkling on top. For swirls like peanut butter or cream cheese, soften them first and dollop spoonfuls generously. This filling element is what takes the cake from simple to special, creating those melty, irresistible pockets inside.
Step 6: Layer & Swirl
Pour half the batter into your pan. Drop spoonfuls of the filling or swirl ingredients over this base. Then add the remaining batter on top. Use a butter knife or skewer to swirl gently—think artistic but not too neat. I love the marbled effect; it looks like a homemade masterpiece and hints at all the flavors waiting inside.
Step 7: Bake
Bake on the middle rack for about 30-35 minutes. Your oven might vary, so start checking at 28 minutes. The trick is that a toothpick inserted near the center should come out with just a few moist crumbs—avoid letting it dry out fully, as the beauty is in that fudgy middle. If your cake seems like it’s browning too fast, tent it loosely with foil after 20 minutes.
Step 8: Cool & Glaze
Let the cake cool in the pan for about 15 minutes—this helps it settle and makes slicing easier. For the glaze, whisk powdered sugar, cocoa powder, vanilla, and milk together until silky smooth. Adjust thickness by adding small amounts of milk if too stiff, or powdered sugar if too runny. Pour it over the slightly warm cake so it drapes softly like a silky chocolate blanket.
Step 9: Slice & Serve
Use a serrated knife to slice the cake neatly. Serve warm or at room temperature, maybe with a scoop of vanilla ice cream or a dusting of powdered sugar. The cake’s aroma will fill the room, and the first bite will remind you why this recipe sticks in your heart. It’s just one of those desserts that disappears fast at my house—sometimes before the glaze even sets!
What to Serve It With
For Breakfast: This cake pairs beautifully with a strong cup of black coffee or a velvety latte. My morning routine often includes a modest slice with some fresh berries on the side to balance the richness, turning a simple breakfast into a little celebration.
For Brunch: If you’re doing a weekend brunch, plate the cake with a side of whipped cream and perhaps some candied nuts. A sparkling rosé or fresh-squeezed orange juice brightens things up, making it feel a little fancy without fuss.
As Dessert: Serve the cake with a scoop of vanilla bean ice cream and drizzle warm caramel or raspberry coulis over the top. A sprinkle of flaky sea salt can really elevate the chocolate flavor here—it’s a little trick I learned after many tastings.
For Cozy Snacks: When comfort is key, this cake alongside a mug of chai tea or hot cocoa feels like a warm hug. I swear the smell of chocolate and cinnamon curling through the air instantly chills away any stress.
My family’s tradition is to keep a slice for “after dinner sweet talk”—where we gather, share stories, and sometimes reheat a piece with a tiny dab of butter. Trust me, those little moments make this cake feel even more special. Whether it’s a casual snack or a centerpiece dessert, this chocolate craving cake fits right in.
Top Tips for Perfecting Your Chocolate Craving Cake
Zucchini Prep: (Wait—why zucchini? Just kidding! For anyone tempted to experiment with zucchini or moisture-heavy add-ins as I have, always squeeze out excess water with a clean kitchen towel. Too much moisture can weigh the cake down and make it gummy.)
Mixing Advice: I can’t stress this enough—don’t overmix your batter. It’s tempting to keep stirring, especially because cocoa powder can be a bit gritty at first, but stop as soon as the ingredients come together. Overmixing makes the gluten develop too much, resulting in a denser, less tender crumb.
Swirl Customization: Swirling is such a fun way to make your cake look unique. Use a butter knife or skewer to gently drag through the layers—you want pretty, random marbling rather than perfect circles. Different fillings like peanut butter, cream cheese, or even caramel all create beautiful patterns and exciting flavor contrasts.
Ingredient Swaps: I’ve swapped buttermilk for vanilla almond milk and still gotten rich results, especially with a teaspoon of white vinegar added to mimic the acidity. For gluten-free, a mix of almond flour and oat flour works well, but expect a slightly denser cake. Coconut sugar also works fine instead of granulated sugar for a deeper, almost caramel undertone.
Baking Tips: Keep your cake in the center of the oven for even heat. If you get hotspots, rotate once halfway through. Don’t be afraid to check early because ovens run hot and you want to keep it moist but cooked through. A shallow stick test with a toothpick near the edges is smarter than the center since the middle will hold onto moisture.
Glaze Variations: If you’re short on time, a quick dusting of powdered sugar is enough to make the cake feel dressed up. I also love mixing a teaspoon of espresso powder into the glaze to make the chocolate flavor pop, or adding a hint of chili powder for a surprising warmth. Pour when the cake is warm, not hot—that way, the glaze sets nicely and doesn’t just soak in.
I’ve learned the hard way that rushing glazing when the cake is too hot makes a runny mess, and that using melted butter in the batter adds just the right fuss-free richness without turning it greasy. Making this cake never gets old—keeping these tips in mind really brings it to the next level every single time.
Storing and Reheating Tips
Room Temperature: You can keep the chocolate craving cake covered with a cake dome or tightly wrapped in plastic wrap on your countertop for up to two days. This keeps it moist and prevents it from drying out, but you’ll want to dig in quickly since homemade cakes don’t last long anyway!
Refrigerator Storage: Wrapping the cake well in cling film or storing it in an airtight container prevents it from picking up fridge odors and keeps the texture nice for up to five days. I usually avoid chilling the cake with glaze on since powdered sugar-based glazes can get a little sticky—better to glaze just before serving.
Freezer Instructions: This cake freezes beautifully. Wrap individual slices or the whole cake tightly in plastic wrap, then aluminum foil, and place in a freezer-safe container or bag. It’ll last up to three months. Thaw in the fridge overnight or on the counter for a couple of hours. Warm a slice gently in the microwave to revive that freshly-baked feel.
Glaze Timing Advice: If you plan to freeze the cake, it’s best to add the glaze after thawing. If you glaze before freezing, the texture can change and sometimes crack. Fresh glaze always tastes best—and it’s quick to whip up.
Frequently Asked Questions
Final Thoughts
Honestly, this chocolate craving cake has become a little treasure in my kitchen. It’s the kind of recipe I turn to when life feels hectic but there’s a need for something comforting and delicious. The way it teases with that fudgy center and smells intoxicatingly like a chocolate bakery just pulls everyone closer to the table. Beyond taste, it’s the simplicity and warmth it brings—whether I’m baking solo or making it a family affair—that keeps me coming back. If you love this cake, I’d bet you’d enjoy exploring some of my other chocolate-forward recipes—the ones that are just as easy but bring different angles of joy.
So go ahead, bake this cake, experiment with a swirl or two, and make it your own. Let me know how your chocolate craving cake turns out—I’m always excited to hear your stories and swaps. Happy baking, friends!