chocolate caramel candy
You know those treats that just bring you straight back to childhood? The ones that smell like pure happiness baking in the oven and taste even better than you remember? For me, that’s this chocolate caramel candy. It’s not quite a cookie, not quite a brownie, but something magically in between. Think of it as a hug in candy form. I’ve tried a gazillion versions over the years, some too dry, some too fudgy, some where the caramel just decided to run away. But this recipe? This one is the real deal. It’s the one my family begs for, the one I bring to potlucks where it always disappears first, and the one that’s surprisingly simple to whip up even when life gets hectic. It’s like a classic Chocolate Chip Cookie met a decadent caramel bar and they had the most delicious baby. If you’re looking for a chocolate caramel candy that’s both incredibly satisfying and easy enough for a weeknight treat, you’ve found your winner.
What is chocolate caramel candy?
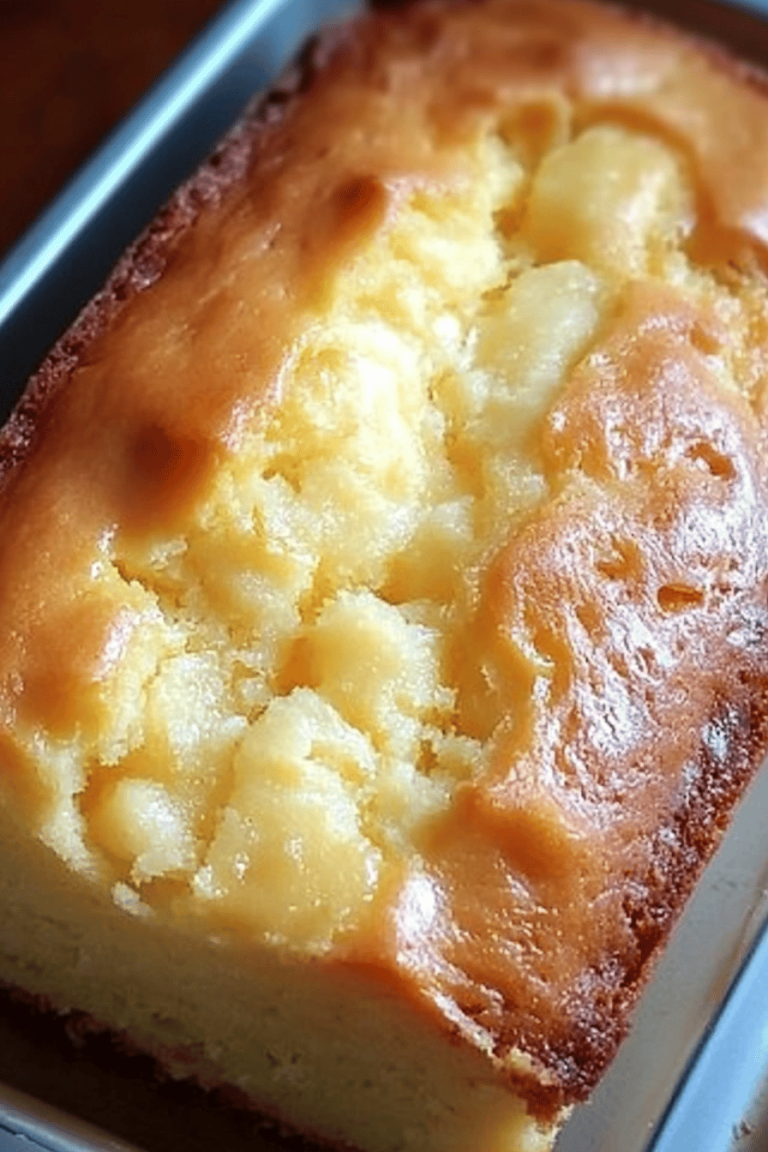
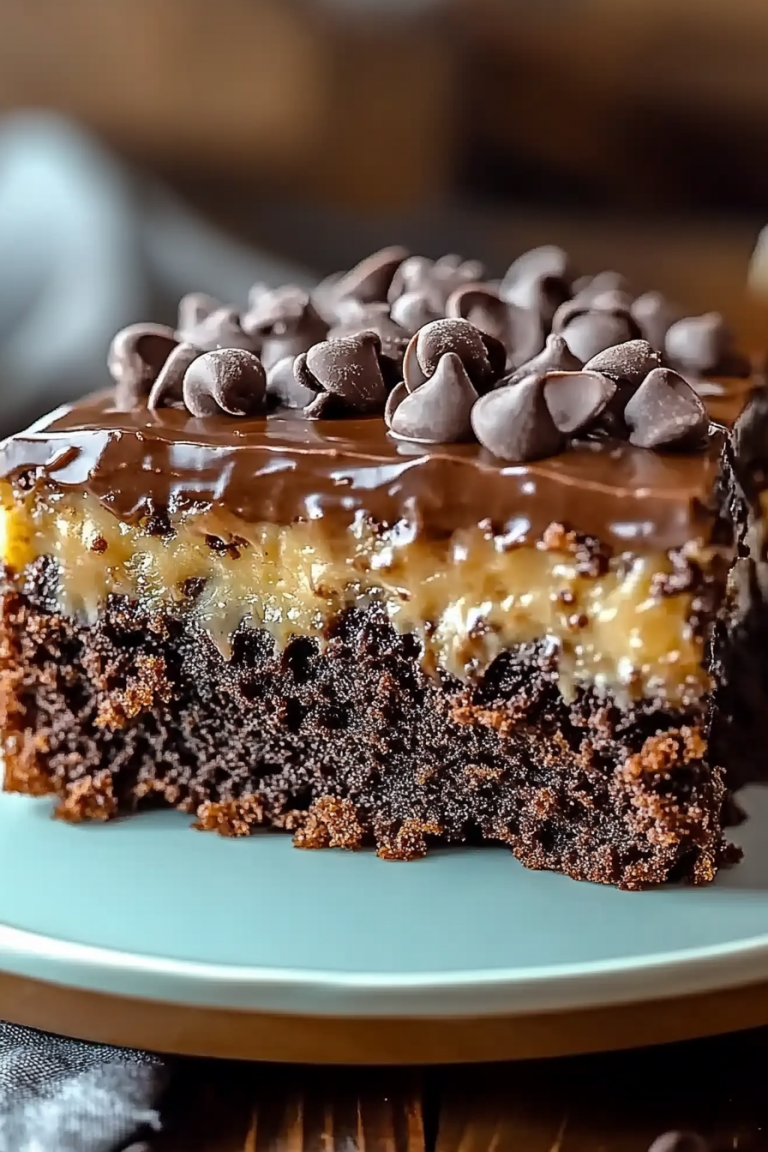
So, what exactly are we talking about when I say “Chocolate Caramel candy”? Well, it’s my own little creation, a sort of fudgy, chewy bar that’s packed with rich chocolate flavor and then gets a luscious swirl of gooey caramel right through the middle. It’s not a hard candy, and it’s not a soft cookie. It’s that perfect in-between texture that’s just a joy to bite into. The name kind of says it all, right? It’s the best of both worlds! I like to think of it as a deconstructed caramel brownie, but with a more consistent and utterly delightful texture that’s perfect for grabbing on the go or serving up for a casual get-together. It’s essentially a warm, comforting hug made edible, with that irresistible combination of deep chocolate and sweet, buttery caramel that just makes everything feel a little bit better.
Why you’ll love this recipe?
Honestly, there are so many reasons why this Chocolate Caramel candy has become my absolute go-to. First off, the flavor is just out of this world. You get that deep, satisfying chocolate taste from the base, and then the caramel swirl adds this rich, buttery sweetness that perfectly cuts through the chocolate. It’s not cloyingly sweet, it’s just… perfect. And the texture? Oh my goodness. It’s fudgy and chewy, with just a hint of cakey-ness on the edges. It’s that delightful chewiness that makes you want to savor every bite.
But beyond the incredible taste, it’s just so darn easy to make. I know that sounds like something you hear all the time, but seriously, this one’s a lifesaver on busy nights when you need a quick dessert fix. The ingredients are all pantry staples, and the steps are straightforward. You don’t need any fancy equipment or complicated techniques. Plus, it’s incredibly budget-friendly! I can whip up a whole batch for way less than a store-bought treat, and everyone knows that homemade tastes a million times better.
And the versatility! You can cut these into small squares for a bite-sized treat, larger bars for a more substantial dessert, or even little diamonds for something a bit more elegant. They’re fantastic on their own, but I’ll tell you, drizzling a little extra caramel over the top before serving takes them to a whole new level. What I love most about this recipe, though, is how consistently it turns out. I’ve made this countless times, and it never fails to impress. It’s the kind of recipe you can make with your eyes closed, and it still comes out looking and tasting spectacular. It’s a real crowd-pleaser, and the fact that it’s a family favorite makes it even more special to me.
How do you make chocolate caramel candy?
Quick Overview
This recipe is all about building layers of flavor and texture. We’ll start by whipping up a quick, rich chocolate batter, then prepare a simple Caramel Sauce that we’ll swirl right into the batter before baking. The key is in the gentle mixing and the precise caramel swirl for that beautiful marbled effect. It’s a simple process, but it yields a truly decadent result. You’ll be amazed at how easy it is to create such a delightful treat!
Ingredients
For the Main Batter:
2 cups all-purpose flour: Make sure it’s fresh! Sifting it beforehand can help with a lighter texture, though it’s not strictly necessary if you’re short on time.
1 ½ cups granulated sugar: The classic sweetener that gives our bars that perfect balance.
¾ cup unsweetened cocoa powder: Use a good quality one for the best, deepest chocolate flavor. Dutch-processed cocoa works wonderfully here.
1 ½ teaspoons baking soda: Our leavening agent that helps these bars achieve a lovely chewiness.
¾ teaspoon salt: Essential for balancing the sweetness and enhancing the chocolate flavor.
2 large eggs: At room temperature, they’ll incorporate much more smoothly.
1 cup milk: Whole milk gives the richest flavor, but 2% works fine too. I’ve even tested this with almond milk and it actually made it even creamier!
½ cup vegetable oil: Or any neutral-flavored oil. This keeps our bars wonderfully moist.
1 teaspoon vanilla extract: A must-have for bringing out all those wonderful flavors.
½ cup hot water or hot brewed coffee: Coffee deepens the chocolate flavor without making it taste like coffee at all – trust me on this one!
For the Filling:
1 cup (2 sticks) unsalted butter: Melted and slightly cooled.
2 cups packed light Brown Sugar: This is what gives our caramel that signature rich, toffee-like flavor.
1 teaspoon vanilla extract: Again, for that flavor boost.
½ teaspoon salt: To balance the sweetness.
Step-by-Step Instructions
Step 1: Preheat & Prep Pan
First things first, let’s get our oven ready. Preheat it to 350°F (175°C). You’ll want a 9×13 inch baking pan. Lightly grease it with butter or non-stick spray, and then line it with parchment paper, leaving an overhang on the sides. This parchment paper trick is a lifesaver for easy removal later on!
Step 2: Mix Dry Ingredients
In a large mixing bowl, whisk together the flour, granulated sugar, cocoa powder, baking soda, and salt. Give it a good whisk to make sure everything is well combined and there are no clumps of cocoa. This ensures an even distribution of flavor throughout your bars.
Step 3: Mix Wet Ingredients
In a separate medium bowl, whisk together the eggs, milk, vegetable oil, and vanilla extract until just combined. Don’t overbeat them; we just want them nicely incorporated.
Step 4: Combine
Pour the wet ingredients into the bowl with the dry ingredients. Mix on low speed with an electric mixer (or by hand with a whisk) until just combined. Be careful not to overmix! Overmixing can lead to tough bars. Now, carefully pour in the hot water or coffee and mix on low speed until the batter is smooth and slightly thinner. It’ll seem a bit runny, but that’s exactly what we want for that fudgy texture.
Step 5: Prepare Filling
While the batter is resting for a moment, let’s make our caramel filling. In a medium saucepan, melt the butter over medium heat. Once melted, stir in the brown sugar, vanilla extract, and salt. Bring the mixture to a boil, stirring constantly, and then let it boil for about 1-2 minutes. It will thicken up nicely. Remove it from the heat.
Step 6: Layer & Swirl
Pour about half of the chocolate batter into your prepared baking pan. Then, carefully dollop spoonfuls of the caramel mixture evenly over the batter. Don’t worry about making it perfect. Now, pour the remaining chocolate batter over the caramel. Here’s the fun part: take a knife or a skewer and gently swirl the caramel and chocolate together. You can make figure eights or random swirls. Don’t over-swirl, or you’ll lose the distinct layers.
Step 7: Bake
Bake for 30-35 minutes, or until a toothpick inserted into the center comes out with moist crumbs attached, not wet batter. Be careful not to overbake, as this can dry out your bars.
Step 8: Cool & Glaze
Let the bars cool in the pan on a wire rack for at least 20-30 minutes. This is important for them to set properly. Once slightly cooled, you can either serve them as is, or if you’re feeling extra indulgent, you can warm up a little extra caramel sauce and drizzle it over the top. I sometimes do this just before serving for that extra wow factor.
Step 9: Slice & Serve
Once completely cool, use the parchment paper overhang to lift the bars out of the pan. Slice them into squares or rectangles. These are delicious served at room temperature or slightly chilled. Enjoy the incredible chocolate caramel goodness!
What to Serve It With
These chocolate caramel candy bars are so versatile, they fit into almost any occasion. For a simple breakfast treat, they’re wonderful with a strong cup of coffee. The coffee really complements the chocolate and cuts through the sweetness beautifully. I sometimes cut them into smaller, bite-sized pieces and serve them alongside a fruit salad for a lovely sweet start to the day.
At a brunch, they add a touch of decadence. I like to arrange them on a platter with some fresh berries – the tartness of the raspberries or strawberries is a fantastic contrast to the rich chocolate and caramel. A glass of sparkling cider or even a mimosa pairs perfectly.
As a dessert, they are simply divine. Serve them warm, maybe with a scoop of vanilla bean ice cream or a dollop of whipped cream. A dusting of powdered sugar or a drizzle of extra caramel makes them feel extra special for an after-dinner treat. They’re also fantastic for holiday cookie platters – their rich flavor makes them stand out amongst the gingerbread and sugar cookies.
And for those cozy snack moments? They are the ultimate comfort food. Grab a bar and a glass of cold milk – it’s like a grown-up version of a childhood favorite. My kids ask for this all the time when they’re craving something sweet after school, and I don’t mind one bit because I know they’re getting a good quality treat. Honestly, they’re delicious with just about anything, or even better, all by themselves!
Top Tips for Perfecting Your Chocolate Caramel Candy
After making this recipe more times than I can count, I’ve picked up a few tricks that I think really elevate these bars. First, for the zucchini prep (which isn’t in this recipe, but I always think of it as a similar baking challenge!), it’s all about getting the moisture out. For this particular recipe, though, the hot water/coffee step is crucial for achieving that perfect fudgy texture. Don’t be tempted to skip it or use cold liquid – the heat is what helps the cocoa bloom and creates that tender crumb.
When it comes to mixing the batter, remember that less is more! Overmixing develops the gluten in the flour, which can lead to tough, dense bars. Mix just until everything is combined. You want those tender, chewy bites, not something that feels like chewing on a brick. For the caramel filling, make sure you’re stirring constantly while it boils. This prevents scorching and ensures an even consistency. If it seems too thick after boiling, you can always stir in a tablespoon of milk or cream to thin it out a bit.
The swirl is where you can really have fun! I like to aim for distinct ribbons of caramel running through the chocolate. Don’t overdo it, or you’ll end up with a muddy mess. Gentle, artistic swirls are key. For ingredient swaps, if you don’t have vegetable oil, a neutral oil like canola or even melted coconut oil (though it might add a subtle flavor) can work. For a richer chocolate flavor, you can substitute half of the all-purpose flour with cake flour for an even more tender result.
Baking is also a bit of an art. Ovens can vary, so keep an eye on your bars during the last 10 minutes of baking. The toothpick test is your best friend here. A few moist crumbs mean they’re ready. If it comes out clean, they might be a little overbaked. And for the glaze variations? If you don’t want to make a separate caramel drizzle, you can always stir a tablespoon or two of extra cocoa powder into the batter before baking for an even more intense chocolate experience.
One thing I learned early on is the importance of letting them cool properly. Resist the urge to cut into them piping hot! They need time to set up, otherwise, you’ll have a gooey, messy situation. Patience is key here, and I promise the wait is worth it for that perfect, sliceable texture. These are the little things that make a big difference!
Storing and Reheating Tips
The best part about these chocolate caramel candy bars is that they actually get even better the next day, as the flavors meld together. For room temperature storage, keep them in an airtight container. They’ll stay wonderfully fresh for about 3-4 days. I usually just use the container they were baked in, making sure to cover them tightly with plastic wrap or foil. Make sure they’re completely cool before sealing them up, though, to prevent condensation.
If you need them to last a bit longer, the refrigerator is your friend. Store them in an airtight container in the fridge for up to a week. They’ll be a bit firmer when cold, which some people actually prefer, especially if they like a chewier texture. To reheat, you can pop a slice in the microwave for about 10-15 seconds, or gently warm them in a low oven for a few minutes to get that gooey, melt-in-your-mouth consistency back. They’re also great slightly warmed up with a scoop of ice cream.
Freezing these bars is also a fantastic option if you want to have them on hand for future cravings. Once completely cooled, I like to wrap individual slices tightly in plastic wrap, then place them in a freezer-safe bag or container. They’ll keep their quality for up to 2-3 months. To thaw, simply transfer them from the freezer to the refrigerator overnight, or let them come to room temperature on the counter for a couple of hours. The key is to ensure they’re well-wrapped to prevent freezer burn.
Regarding the glaze timing, if you plan to store them at room temperature or in the fridge, it’s best to add any extra caramel drizzle *just before* serving to keep it from getting sticky or affecting the texture of the bars. If you’re freezing them, I’d recommend waiting to add any extra glaze until after they’ve thawed and are ready to be eaten. This keeps everything looking and tasting its best!
Frequently Asked Questions
Final Thoughts
I truly believe this chocolate caramel candy recipe is a winner, and I hope you’ll give it a try. It’s that perfect balance of rich chocolate and sweet caramel, with a delightfully chewy texture that’s just so satisfying. It’s the kind of treat that feels special enough for company but is also simple enough for a weeknight craving. The way the caramel swirls through the fudgy chocolate is just beautiful, and the smell that fills your kitchen while it bakes? Pure magic.
If you love this, you might also enjoy my recipe for [Link to another relevant recipe, e.g., Fudgy Brownies] or my [Link to another relevant recipe, e.g., Salted Caramel Sauce]. They hit some similar flavor notes and are equally delicious. I can’t wait to hear what you think of these chocolate caramel candy bars! Please leave a comment below and let me know how yours turned out, or if you’ve tried any fun variations. Happy baking, and enjoy every single delicious bite!
Rich Chocolate Caramel Candy Easy
Ingredients
Main Ingredients
- 12 oz White Chocolate Chips
- 0.5 cup Creamy Peanut Butter
- 1 can Sweetened Condensed Milk (14oz)
- 1 tsp Vanilla Extract
- 1.5 cups Candy Corn divided
- 1.5 cups Peanuts regular or honey roasted, divided
Instructions
Preparation Steps
- Line an 8x8 or 9x9 inch pan with foil and spray with cooking spray.
- In a medium saucepan, combine white chocolate chips, peanut butter, and sweetened condensed milk. Heat over low heat, stirring constantly, until melted and smooth.
- Remove from heat and stir in vanilla extract. Stir in 1 cup each of the candy corn and peanuts. Spread in the prepared pan.
- Top with remaining candy corn and peanuts; press to adhere. Let cool to room temperature, then chill to set. Cut into squares.