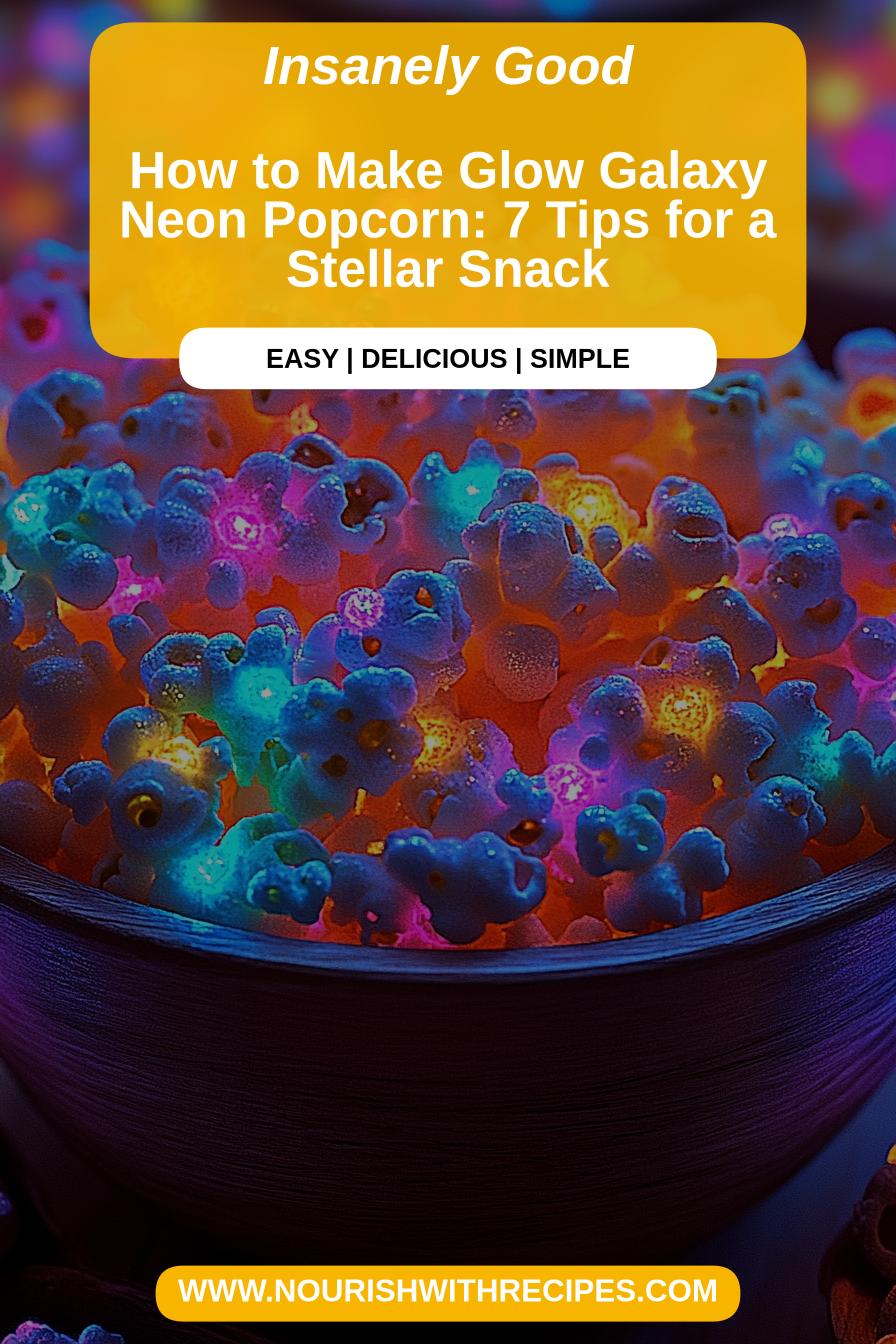
Glow Galaxy Neon Popcorn
Oh, you guys! I am SO excited to share this recipe with you today. Seriously, if you’re looking for something that’s a little bit magical, ridiculously delicious, and surprisingly easy, you’ve found it. This Glow Galaxy Neon Popcorn is one of those treats that just makes you smile. I remember the first time I whipped this up, it was for a neighborhood movie night, and let me tell you, it was gone in about ten minutes flat! The kids (and honestly, the adults too) were mesmerized. It’s got this fantastic sweet and salty combo going on, with a delightful little crunch that’s totally addictive. If you’ve ever tried those fancy flavored popcorns from the mall, this is like that, but even better because *you* made it! It’s way more fun than just plain old buttered popcorn, and it’s perfect for when you want something a little extra special without spending hours in the kitchen.
What is glow galaxy neon popcorn?
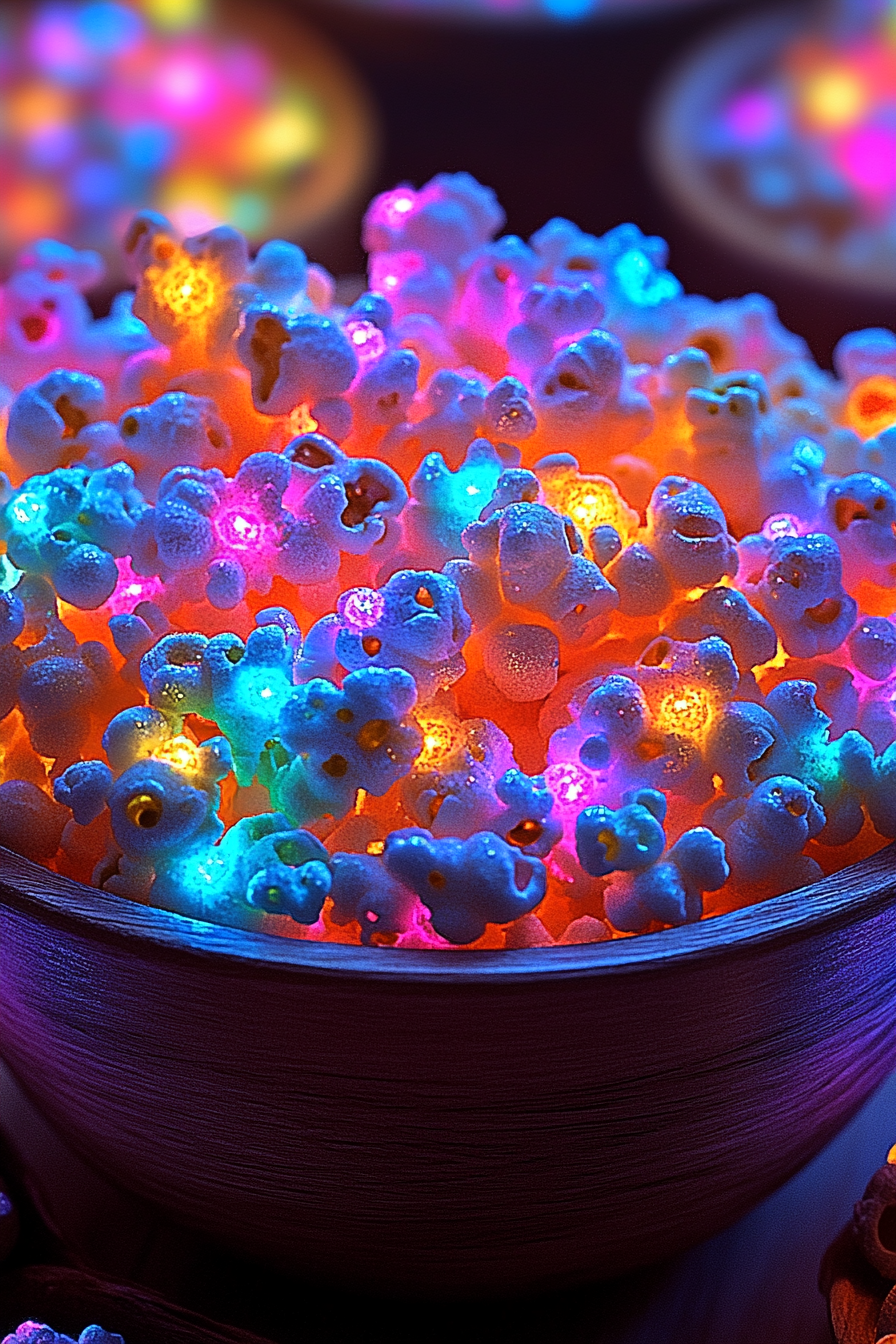
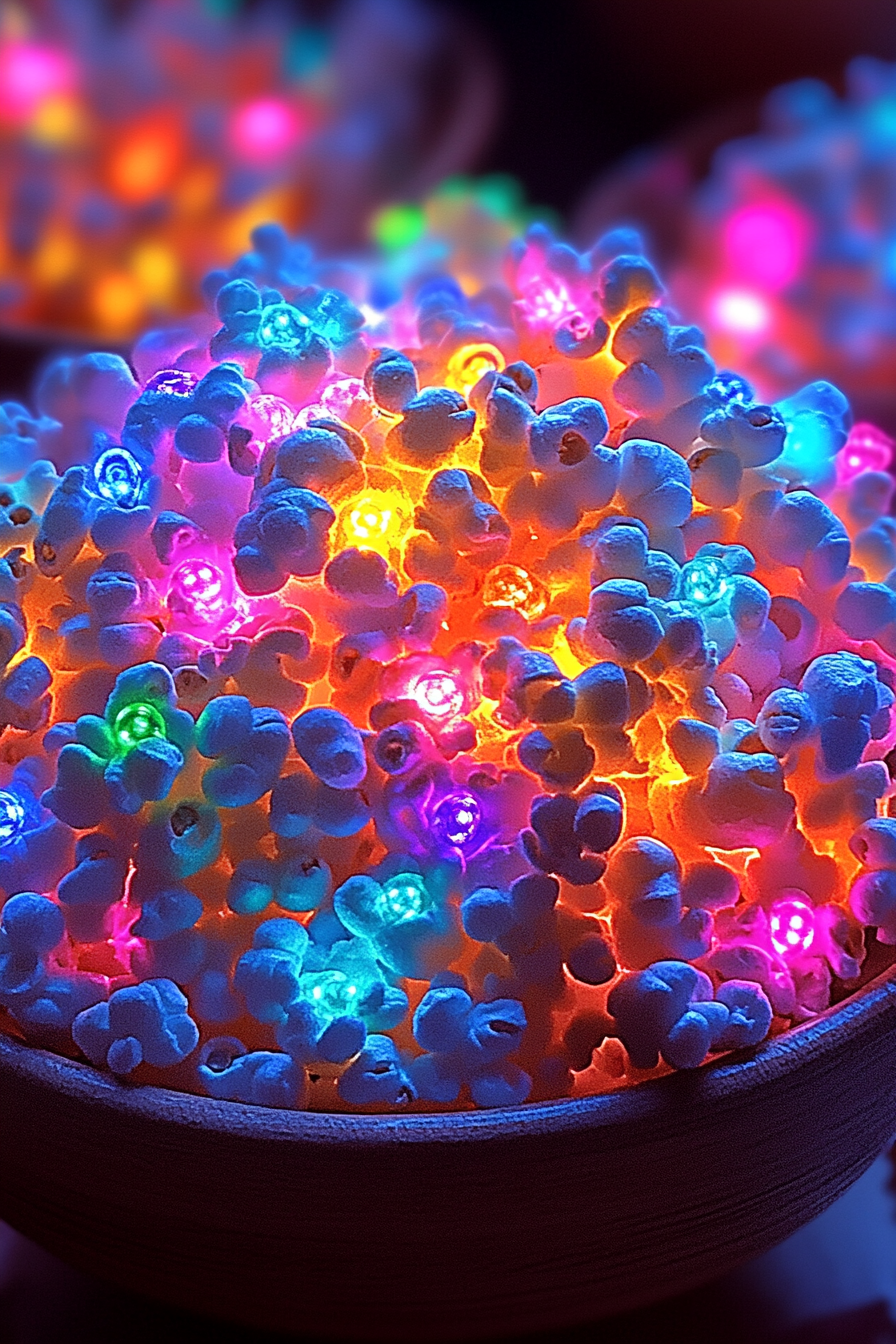
So, what exactly *is* Glow Galaxy Neon Popcorn? Well, the name kind of says it all, doesn’t it? Think of it as gourmet popcorn, but with a fun, vibrant twist. It’s essentially popcorn that’s been coated in a shimmering, sweet glaze that has these incredible, almost iridescent pops of color throughout. It’s not just visually stunning; the flavor is out of this world. It’s that perfect balance of salty crunch from the popcorn itself and a sweet, slightly chewy coating that melts in your mouth. The “galaxy” part comes from the way the colors swirl and blend, making each batch look like a little edible universe. It’s the kind of snack that instantly elevates any gathering, from a casual movie night to a fun birthday party. It’s essentially a celebration in a bowl, and I absolutely adore it.
Why you’ll love this recipe?
What is the secret behind Glow Galaxy Neon Popcorn?flavor is just phenomenal. You get that satisfying salty pop of the popcorn, perfectly complemented by a sweet, slightly caramelized glaze that has just the right amount of chew. It’s a flavor explosion, for real! Then there’s the simplicity. Honestly, this is one of those recipes that looks way more complicated than it actually is. You can whip up a batch in under 20 minutes, and the steps are so straightforward, even the most beginner baker can nail it. It’s a lifesaver when you need a last-minute party snack or a special treat for the kids. And let’s talk about Cost-efficiency: What is the best way to measure cost-efficiency?! Popcorn kernels are incredibly budget-friendly, and the other ingredients are pantry staples. You get a gourmet-level treat without the gourmet price tag. What I love most, though, is its versatility. You can totally customize the colors and flavorings to match any theme or occasion. Want it for a superhero party? Go with red and blue! For a baby shower? Pink and purple! It’s a blank canvas for delicious creativity. It’s definitely my favorite popcorn upgrade, even over my tried-and-true Caramel Corn. This one just has that extra *wow* factor that always gets rave reviews.
How to Make Glow Galaxy Neon Popcorn
Quick Overview
Making this Glow Galaxy Neon Popcorn is surprisingly easy, I promise! We’ll start by popping your popcorn nice and fluffy. Then, we’ll create a simple, shimmering glaze that gets tossed with the popcorn. The magic really happens when we add those pops of neon color, creating that stunning galaxy effect. It’s a straightforward process that results in a show-stopping snack. You’ll be amazed at how quickly you can go from basic kernels to a bowl full of sparkly, delicious fun!
Ingredients
For the Main Batter:
1/2 cup popcorn kernels (plain yellow kernels work best!)
2 tablespoons coconut oil (or other neutral oil for popping)
1/2 cup granulated sugar
1/4 cup light corn syrup (this is key for that smooth, non-crystallized glaze!)
1/4 cup water
1/2 teaspoon salt (don’t skip this, it balances the sweetness!)
1 teaspoon vanilla extract
For the Filling:
(Optional, for extra sparkle!) Edible glitter or sprinkles in various colors
For the Glaze:
Gel food coloring in vibrant neon shades (pink, blue, green, yellow, purple – whatever you love!)
Edible luster dust or edible glitter (for that extra shimmer)
Step-by-Step Instructions
Step 1: Preheat & Prep Pan
First things first, let’s get that popcorn ready. You can pop it on the stovetop or in an air popper. For the stovetop, heat the coconut oil in a large pot over medium-high heat. Add the kernels, cover, and shake the pot gently as they pop. Once popping slows to several seconds between pops, remove from heat. Pour the popped popcorn into a very large bowl, making sure to get rid of any unpopped kernels. You want a good, fluffy base! If you’re using an air popper, just follow its instructions and then transfer to your big bowl.
Step 2: Mix Dry Ingredients
This step is for later, after the popcorn is popped. We’ll be working with the glaze, so make sure your big bowl of popcorn is ready and waiting on the side. No need to mix anything dry just yet!
Step 3: Mix Wet Ingredients
Now for the glaze! In a medium saucepan, combine the granulated sugar, light corn syrup, water, and salt. Stir them together well. Place the saucepan over medium heat and bring the mixture to a boil, stirring constantly until the sugar is completely dissolved. Once it’s boiling, stop stirring and let it simmer for about 5 minutes. You’re looking for it to reach the soft-ball stage, which is around 235-240°F (112-115°C) on a candy thermometer. If you don’t have a thermometer, you can carefully drop a little syrup into a glass of ice water; it should form a soft, pliable ball.
Step 4: Combine
Once the glaze has reached the correct temperature, carefully remove the saucepan from the heat. Stir in the vanilla extract. Now, this is where the magic starts! Let the glaze cool for just a minute or two – you don’t want it piping hot, but you don’t want it to harden either. Drizzle about half of the warm glaze over the popcorn in the large bowl. Use a spatula or two large spoons to gently toss the popcorn, ensuring each piece gets lightly coated. Don’t overmix, or you’ll break the popcorn!
Step 5: Prepare Filling
This is the fun, colorful part! Divide the remaining glaze into separate small bowls, one for each neon color you’re using. Add a few drops of gel food coloring to each bowl and stir until you achieve a vibrant, even color. Gel coloring is best because it’s concentrated and won’t water down your glaze. If you’re using edible glitter or sprinkles, have them ready to go!
Step 6: Layer & Swirl
Now it’s time to create that galaxy effect. Drizzle spoonfuls of the different colored glazes over the already-glazed popcorn in the big bowl. Don’t be too precise; irregular dollops are what give it that beautiful, swirling, nebulae-like look. You can even use a toothpick or a skewer to gently swirl the colors together a bit more, but be careful not to overmix – you want distinct ribbons of color, not a muddy mess. If you’re adding edible glitter or sprinkles, toss them in now for extra sparkle!
Step 7: Bake
This recipe doesn’t actually require baking! The glaze sets as it cools. Spread the coated popcorn in a single layer on baking sheets lined with parchment paper to help prevent sticking and make cleanup a breeze. Let it cool completely at room temperature. This usually takes about 20-30 minutes. Resist the urge to touch it while it’s cooling!
Step 8: Cool & Glaze
As I just mentioned, the cooling is crucial. The glaze will harden slightly, giving the popcorn a nice, crisp coating. Once it’s completely cool and set, you can break apart any large clumps if needed.
Step 9: Slice & Serve
This popcorn is best served at room temperature, once the glaze has fully set. Break it apart into individual clusters or let people dig in right from the bowl! It looks absolutely stunning piled high in a big serving dish, and it’s always a huge hit. The combination of sweet, salty, crunchy, and visually spectacular is a winner every single time!
What to Serve It With
This Glow Galaxy Neon Popcorn is such a versatile treat, it can fit into almost any occasion! For a casual Breakfast, I love having a small bowl with my morning coffee – it’s like a little sweet surprise to start the day. It’s a fun way to add a little sparkle to an otherwise ordinary morning. For Brunch, imagine this piled in a pretty bowl on your buffet table next to some mini quiches or fruit salad. It adds a pop of color and a fun, unexpected element that guests will love. As a special Dessert, this is surprisingly sophisticated, especially if you use more elegant colors like deep purples and blues, maybe with some edible gold dust. It’s a lighter option than a heavy cake and has that delightful crunch that contrasts beautifully with creamy desserts. And of course, for Cozy Snacks, this is my absolute favorite! Movie nights, game nights, or just a random Tuesday afternoon – a big bowl of this popcorn is pure comfort food. My kids always ask for this when we’re having a family movie marathon. I’ve also found it pairs wonderfully with a cold glass of milk, or for the adults, maybe a crisp sparkling cider or even a light, fruity wine. It’s just that good!
Top Tips for Perfecting Your Glow Galaxy Neon Popcorn
I’ve made this Glow Galaxy Neon Popcorn so many times, I’ve picked up a few tricks along the way that I think will really help you achieve popcorn perfection. First, for the Popcorn Prep, always make sure you’re using fresh kernels. Old kernels can result in a lot of unpopped ones, and nobody wants those! Also, when popping on the stovetop, don’t overcrowd the pot. It’s better to do two smaller batches than one giant, unevenly popped batch. Shake the pot constantly to ensure even heating. For Mixing Advice, I can’t stress enough: don’t overmix the popcorn once the glaze is on. You want to coat it evenly, but aggressive stirring will just break your popcorn into tiny pieces. Gentle tossing with a spatula is your best friend here. When it comes to Swirl Customization, experiment with your colors! Don’t be afraid to let them blend a little. The goal is a “galaxy” effect, which means organic, swirly patterns. You can use a toothpick or a wooden skewer to gently guide the colors, but remember, less is often more. For Ingredient Swaps, while light corn syrup is pretty essential for preventing crystallization, if you can’t find it, a bit of golden syrup can sometimes work, though the texture might be slightly different. And for the oil, any neutral oil will do for popping – canola, vegetable, or even avocado oil work well. If you’re worried about sweetness, you can slightly reduce the sugar in the glaze, but it will impact the texture and how well it sets. My personal favorite baking tips (even though it’s not baked!) is all about the cooling. Make sure you spread the popcorn in a single layer on parchment-lined baking sheets. This ensures even drying and prevents clumping. Don’t try to speed up the cooling process by putting it in the fridge; that can sometimes make the glaze sticky. For Glaze Variations, while the neon colors are fun, don’t hesitate to try other color palettes. Pastel shades for Easter, or deeper jewel tones for a more sophisticated look. You can also add a tiny pinch of edible luster dust directly into the colored glaze bowls before swirling for an extra shimmer! I learned the hard way that adding the food coloring too early can sometimes mute the vibrancy, so it’s best added when the glaze is warm but not scalding hot.
Storing and Reheating Tips
Proper storage is key to keeping your Glow Galaxy Neon Popcorn tasting its best. For Room Temperature storage, once completely cooled and set, you can keep it in an airtight container for up to 3-4 days. Make sure it’s truly dry before sealing it up, or condensation can make it soggy. I usually break it into bite-sized clusters before storing. If you need to store it for longer, Refrigerator Storage is your best bet. It can last up to a week in an airtight container in the fridge. The coolness helps maintain its crispness. Just be aware that the glaze might become a little harder when chilled. When it comes to Freezer Instructions, this is great for making ahead! Wrap the cooled popcorn tightly in plastic wrap, then place it in a freezer-safe airtight container or a heavy-duty freezer bag. It can stay frozen for up to 2-3 months. To thaw, simply transfer it to the refrigerator overnight. For the Glaze Timing Advice, if you plan to store it for more than a day, I often find it’s best to apply the glaze a bit more liberally, as the popcorn can absorb some moisture over time. For immediate serving, a lighter coating is perfect. If you’re freezing it, I usually glaze it *before* freezing, as the flavors meld nicely. Just let it come to room temperature completely before serving after thawing.
Frequently Asked Questions
Final Thoughts
I truly hope you give this Glow Galaxy Neon Popcorn a try. It’s one of those recipes that brings so much joy, both in the making and the eating. It’s the perfect blend of sweet, salty, crunchy, and visually stunning that’s guaranteed to impress. If you loved this recipe and are looking for more fun, easy treats, you might also want to check out my Rainbow Layered Cookies or my Sparkle Sprinkle Sugar Cookies. They have that same whimsical, crowd-pleasing vibe! I can’t wait to hear what you think of the Glow Galaxy Neon Popcorn! If you make it, please leave a comment below and let me know how it turned out, or share your own creative color combinations. Your feedback and pictures always make my day! Happy snacking!
Glow Galaxy Neon Popcorn
Ingredients
Main Ingredients
- 0.5 cup popcorn kernels
- 2 tablespoons coconut oil
- 0.5 cup powdered sugar
- 0.25 cup corn syrup
- 0.25 cup butter
- 1 teaspoon vanilla extract
- 0.5 teaspoon salt
- 2 drops neon food coloring (various colors) e.g., blue, green, pink, yellow
Instructions
Preparation Steps
- Pop the popcorn kernels using the coconut oil according to your preferred method (stovetop or air popper). Set aside in a large bowl.
- In a saucepan, combine powdered sugar, corn syrup, and butter. Cook over medium heat, stirring constantly, until the butter is melted and the mixture is smooth.
- Remove from heat and stir in vanilla extract and salt.
- Divide the popcorn into separate bowls for each color of food coloring. Pour a portion of the sugar mixture into each bowl and add a drop or two of a different neon food coloring. Toss gently to coat the popcorn evenly.
- Spread the colored popcorn in a single layer on parchment-lined baking sheets to cool and harden.
- Once cool, gently mix the colors together in a large serving bowl or serve in individual portions.