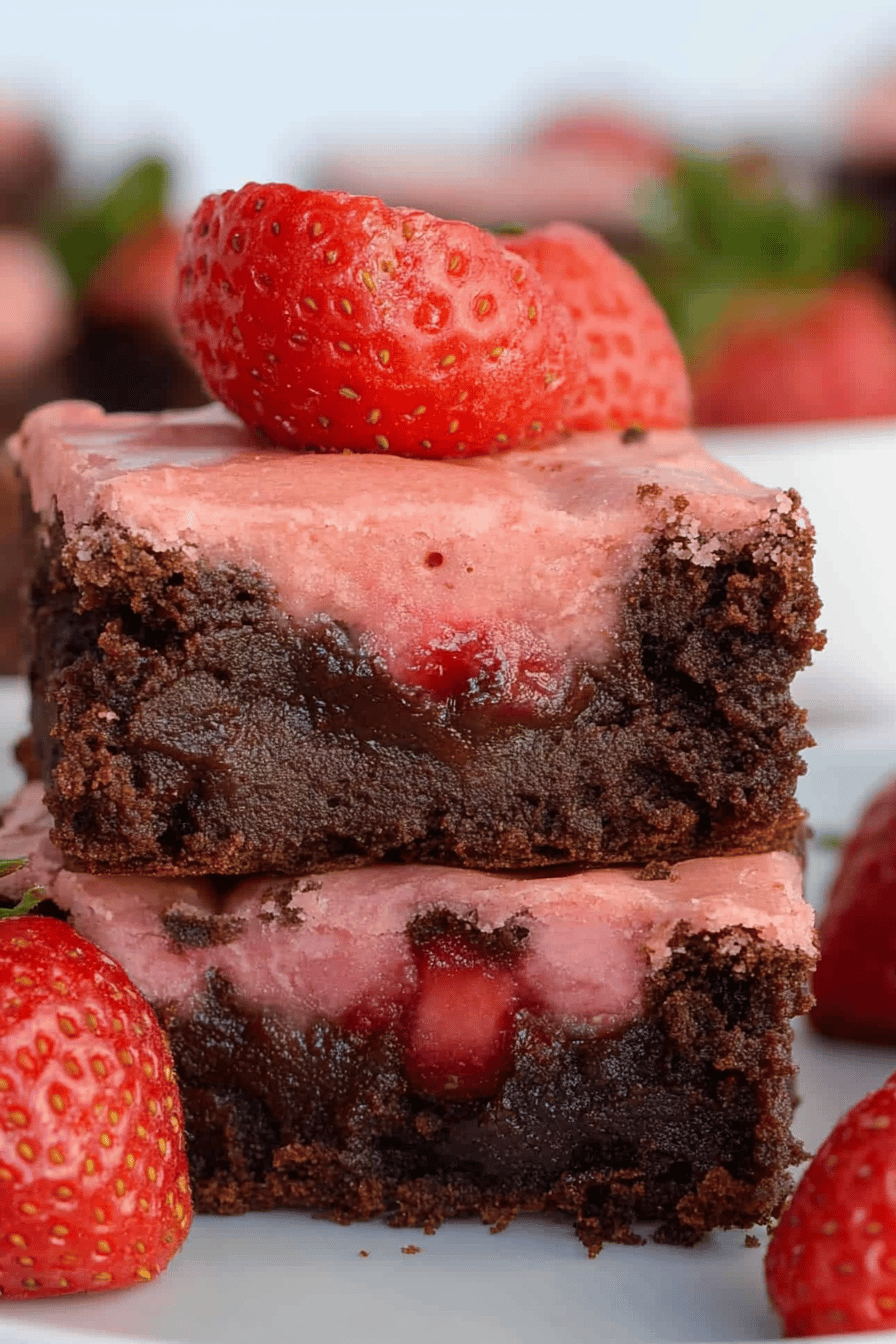
zero sugar brownies
On a quiet Tuesday afternoon, the kitchen smells like a chocolate hug and I’m reminded why this simple batter matters. I’ve been tinkering with desserts that still feel indulgent but don’t leave you dragging through a sugar crash, and this version of zero sugar brownies lands every time. It’s not fussy—just honest cocoa, a little almond warmth, and a gentle sweetness that lets the chocolate shine. I first learned to bake brownies with my grandmother, who swore you could fix almost any day with a pan of good brownies. This one’s a lifesaver on busy weeknights, because you can mix, bake, and slice in under an hour, and you still get that creamy, fudgy center that makes you lick your fingers. My kids actually ask for seconds, and if you’re sipping coffee late at night, trust me—these disappear fast. I’ve tested this with almond milk, with a dash of espresso powder, and even swirled in a tangy Cream Cheese filling, and the result is always the same: a moist, deeply chocolate brownie that feels like a little luxury with every bite. And yes, zero sugar brownies can be decadently satisfying without anyone noticing it’s lighter on sugar.
What is Zero Sugar Brownies?
Zero sugar brownies are basically classic Fudgy Brownies that skip the added table sugar and rely on cocoa, wholesome fats, and a sugar substitute to deliver that rich chocolate punch. Think of it as a grown‑up brownie that keeps the indulgence intact while dialing down the sweetness. The name doesn’t mean they’re dry or flavorless; it means the sweetness comes from carefully chosen substitutes like erythritol, monk fruit, or allulose, which lets the chocolate do the talking. It’s essentially a brownie you can enjoy any time of day without guilt, especially when you’re trying to cut back on sugar without sacrificing satisfaction. This recipe is a comforting blend of almond flour for a tender crumb, cocoa for that deep finish, and a creamy filling that turns an ordinary brownie into a little celebration you can share with family or a close friend over coffee.
Why you’ll love this recipe?
What I love about zero sugar brownies is how forgiving they are without feeling boring.FlavorIs all chocolatey and rich, with a hint of vanilla and a whisper of espresso that just makes the cocoa sing.Simplicity is undeniable: a few pantry staples, a single bowl, and a pan that does most of the heavy lifting. As someone who watches the grocery budget, I appreciate the Cost-efficiency—almond flour and cocoa go a long way when you’re mindful about portions, and you don’t need fancy ingredients to get great results. Finally, the Versatility is where this recipe shines: you can layer in a cream cheese filling for a cheesecake-like swirl, swirl in Peanut Butter for a salty-sweet contrast, or keep it clean and straightforward for a quick weeknight treat. What I love most about this is that you can customize textures—from fudgy to slightly cakey—by tweaking bake time, and you’ll still end up with a brownie that feels like a hug in a pan.
How to Make Zero Sugar Brownies
Quick Overview
This is a simple, two-bowl method that relies on a fudgy center and a little extra moisture from almond milk and eggs. You’ll whisk the dry ingredients together, mix the wet ones separately, then bring them together just until moistened. The magic happens when you pour a smooth filling into half the batter or swirl it into the middle for a creamy surprise. Bake until the edges pull away and a toothpick emerges with a few moist crumbs. The result is a glossy, deeply cocoa-flavored bar that’s easy to slice and even easier to share. It’s a great balance between indulgent and approachable—perfect for a weeknight treat or a last-minute dessert that won’t derail your day.
Ingredients
For the Main Batter:
- 1 cup almond flour
- 1/3 cup unsweetened cocoa powder
- 1/3 cup unsweetened almond milk
- 2 large eggs
- 1/2 cup zero-sugar sweetener (erythritol or allulose work well)
- 1 tsp pure vanilla extract
- 1/4 tsp salt
- 1/4 tsp baking powder
- Optional: 1/2 tsp espresso powder for a deeper chocolate flavor
For the Filling:
- 8 oz cream cheese, softened
- 2–3 tablespoons powdered zero-sugar sweetener (adjust to taste)
- 1 teaspoon vanilla extract
For the Glaze:
- 2 oz sugar-free chocolate, melted (or use 1/4 cup cocoa powder with 2 tablespoons coconut oil)
- 2–3 teaspoons heavy cream or coconut cream
- Extra zero-sugar sweetener to taste, optional
Step-by-Step Instructions
Step 1: Preheat & Prep Pan
Heat your oven to 350°F (175°C). Line an 8×8-inch Baking Pan with parchment paper so you can lift the brownies out in one piece. If you’re not into parchment, a light coating of cooking spray works, but parchment gives you cleaner edges and easier slicing. I always run a quick test with a finger swipe along the edges to ensure nothing sticks. This step keeps the brownie from tearing when you cut it later, which is a tiny but mighty win.
Step 2: Mix Dry Ingredients
Whisk together the almond flour, cocoa powder, salt, and baking powder until there aren’t any lumps. The goal here is a uniform crumb so you don’t end up with pockets of dense flour. If you’re using espresso powder, add it here. The aroma alone starts the happiness train—trust me, it’s a little boost to your afternoon.
Step 3: Mix Wet Ingredients
In a separate bowl, beat the eggs with the almond milk, vanilla, and your chosen zero-sugar sweetener until the mixture is smooth and a touch glossy. The mixture should look like a thin custard—not too thick, not runny. If you’ve never baked with allulose, you’ll notice it dissolves nicely and leaves a clean finish behind, almost like a professional touch you didn’t know you could achieve at home.
Step 4: Combine
Pour the wet mixture into the dry and fold gently until just combined. You’re aiming for a batter that’s thick but spreadable, not overmixed. A few tiny lumps are perfectly fine and often preferable for a moist crumb. If you overmix, you’ll end up with tougher brownies, and nobody wants that.
Step 5: Prepare Filling
Beat the Cream Cheese with powdered sweetener and vanilla until silky. Don’t overbeat; you want the filling to be smooth but not whipped into air. If you prefer a tangier contrast, a teaspoon of lemon zest or a splash of lemon juice works beautifully with the chocolate. I often whisk in a little salt to balance the sweetness and make the flavors pop.
Step 6: Layer & Swirl
Spread about two-thirds of the batter in the pan. Drop dollops of the cream cheese filling across the surface, then drizzle the remaining batter over the top. Using a knife or toothpick, swirl the filling into the batter in broad, lazy strokes to create a marbled pattern. Don’t overdo the swirl—this is meant to be a pretty, ribboned look, not a chaotic swirl storm.
Step 7: Bake
Bake for 20–26 minutes, depending on your oven and how fudgy you like them. Start checking at 20 minutes: the edges should look set, the center may still look a touch soft but will firm up as it cools. A tester inserted into the center should come out with a few moist crumbs, not wet batter. If you prefer a cakier texture, add a few more minutes, but if you love fudgy brownies, pull them sooner. If your oven runs hot, rotate the pan halfway through to ensure even baking.
Step 8: Cool & Glaze
Let the brownies cool completely in the pan for at least 30 minutes before glazing. A proper cool helps set the filling and makes slicing easier. For the glaze, stir the melted sugar-free chocolate with cream until you achieve a glossy, pourable consistency. If it’s too thick, add a touch more cream; if it’s too thin, give it a few minutes to thicken off heat. Drizzle over the cooled bars in a thin, irregular pattern for a homemade look.
Step 9: Slice & Serve
Lift the whole slab from the pan using the parchment overhang, then cut into neat squares. For cleaner edges, wipe your knife between cuts and use a gentle sawing motion rather than pressing straight down. These keep beautifully at room temperature for a day or two and can be stored in the fridge for up to a week. If you’re freezing, wrap individual pieces tightly to protect against freezer burn and thaw at room temperature for a quick treat any time you crave a chocolate fix.
What to Serve It With
Zero sugar brownies are flexible enough to shine in several moments of the day. Here are a few ways I reach for them and love how the flavors play with other foods and drinks.
For Breakfast: A small brownie with a dollop of Greek yogurt and a espresso‑frothed latte makes a satisfying start. The cacao notes wake you up, and the cream cheese swirl adds a gentle tang that pairs surprisingly well with morning coffee. I’ve even tucked a thin slice into a sturdy breakfast sandwich for a playful texture contrast.
For Brunch: Serve with fresh berries and a glass of cold brew. The brightness of berries keeps the chocolate from feeling heavy, and the slight tang from the berries contrasts beautifully with all that fudgy goodness. It’s a crowd-pleaser that feels special without being fussy.
As Dessert: Plate a brownie with a scoop of vanilla bean ice cream and a drizzle of sugar-free chocolate ganache. The contrast between hot and cold, soft and creamy, makes it the kind of dessert that leads to compliments and a few smiles around the table. And yes, you can absolutely layer peanut butter on top before serving for an extra indulgent finish.
For Cozy Snacks: After a long day, I’ll warm a brownie gently in the microwave for 10–15 seconds and top it with a whisper of whipped cream. It’s a tiny, comforting ritual—the smell alone brings everyone to the kitchen. This is the kind of treat that reminds you that sweetness can be simple, not loud or overpowering.
Growing up, we didn’t fuss over desserts; we celebrated with something homemade and comforting. This zero sugar brownies recipe fits that memory perfectly—rich, chocolatey, and wonderfully approachable. It’s the kind of recipe you’ll keep returning to when you want a quick, dependable chocolate fix that won’t derail your day.
Top Tips for Perfecting Your Zero Sugar Brownies
Here are practical tricks I’ve learned over countless batches, organized by technique to keep your kitchen calm and the result delicious.
Sweetener balance: If you’re baking for kids or folks with a low tolerance for bitterness, start with the recommended amount and then adjust by 1–2 tablespoons in future batches. Different zero-sugar sweeteners (erythritol, allulose, monk fruit) can finish slightly differently in texture and aftertaste. I prefer allulose for a mellower finish, especially with a cream cheese filling.
Moisture management: Almond flour absorbs more moisture than wheat flour, so the batter should be thick but stirrable. If your batter seems dry, add a tablespoon or two of milk. If it’s too loose, sprinkle in a spoonful of almond flour until it holds its shape.
Swirl customization: For dramatic marbling, drop the cream cheese filling in random dollops and then swirl gently with a knife. If you want a marble pattern, do a few parallel lines across the batter and drag the knife perpendicularly through them.
Ingredient swaps: You can substitute a portion of almond flour with coconut flour, but remember coconut flour is very absorbent; start with half the amount and add more gradually. For a nut-free option, use sunflower seed flour or a blend designed for baking; expect a slightly different crumb and more moisture control needs.
Baking tips: Oven temperatures vary, so start checking at 20 minutes. If you notice the edges browning too fast, tent with foil and lower the oven temperature by 25°F for the remaining bake time. Rotating the pan halfway through helps you avoid hot spots and yields an even slice.
Glaze variations: If you want a glossy finish with a richer chocolate edge, use a sugar-free chocolate ganache with cream. For a lighter sheen, whisk cocoa powder with a small amount of milk or dairy substitute and a pinch of salt until it coats the back of a spoon. You can even skip the glaze and dust with a light shower of powdered sweetener for a simple finish.
I’ve learned the hard way that letting the filling chill a bit before layering can help keep the swirl intact and prevent the cream cheese from oozing too far into the batter. Little things like that—trust me—make your life easier and your brownies prettier. The result is consistently delicious, with a texture that remains tender and fudgy, never gritty or dry. This is the kind of recipe that makes you smile at the counter and say, “Yep, that’s the one.”
Storing and Reheating Tips
Storage habits matter for keeping the texture and flavor right, especially with a brownie that relies on moisture and cream cheese filling. Here’s how I handle it at home to preserve quality.
Room Temperature: Up to 2 days in an airtight container. Keep the glaze separate if you can and add just before serving to maintain glossiness and prevent sogginess.
Refrigerator Storage: Up to 1 week in an airtight container. The chill can firm up the center a bit, which some people prefer. Let slices sit at room temperature for 10–15 minutes before serving to soften the center.
Freezer Instructions: Freeze individual slices wrapped tightly in plastic wrap and stored in a freezer bag for up to 3 months. Thaw at room temperature or warm gently in the microwave for a quick treat. If you’re freezing, you may want to hold off on the glaze until you’re ready to serve to avoid texture changes.
Glaze Timing Advice: If you’re freezing, glaze after thawing to keep the glaze bright and glossy. For fridge storage, a light glaze can be applied and refreshed the next day if needed.
These storage tips help you always have a little chocolate in reach, whether it’s a last-minute dessert or a comforting snack after a long day. The brownies stay moist, the filling stays creamy, and the glaze remains shiny when you handle them with a bit of care.
Frequently Asked Questions
Final Thoughts
If you’re chasing that classic brownie aroma without the sugar load, this is the version you’ll reach for again and again. The batter stays moist, the filling adds a playful contrast, and the glaze gives you a glossy kiss of chocolate that makes the whole pan feel special. I love how flexible it is for different occasions—a quick after-work treat, a friend’s dinner party, or a weekend bake that fills the house with irresistible scent. The best part? You don’t have to compromise on flavor to keep things lighter. Zero sugar brownies can be deeply satisfying, and they’re downright comforting when life feels busy. I’d love to hear which variation you end up loving most—cream cheese swirl, peanut butter ripple, or a simple, unapologetically chocolate finish. Happy baking, friend, and may your kitchen always smell this good.
Zero Sugar Brownies
Ingredients
Dry Ingredients
- 0.75 cup all-purpose flour
- 0.5 cup unsweetened cocoa powder
- 1.5 teaspoon baking powder
- 0.25 teaspoon salt
Wet Ingredients
- 0.5 cup unsalted butter, melted
- 2 large eggs
- 1 teaspoon vanilla extract
- 0.75 cup erythritol or your favorite zero-calorie sweetener
Instructions
Preparation Steps
- Preheat your oven to 350°F (175°C). Grease and flour an 8x8 inch baking pan, or line it with parchment paper.
- In a medium bowl, whisk together the flour, cocoa powder, baking powder, and salt. Set aside.
- In a large bowl, whisk together the melted butter and sweetener until well combined. Then, whisk in the eggs one at a time, followed by the vanilla extract.
- Gradually add the dry ingredients to the wet ingredients, mixing until just combined. Be careful not to overmix.
- Pour the batter into the prepared baking pan and spread it evenly.
- Bake for 20-25 minutes, or until a toothpick inserted into the center comes out with moist crumbs attached (not wet batter).
- Let the brownies cool completely in the pan before cutting into squares.