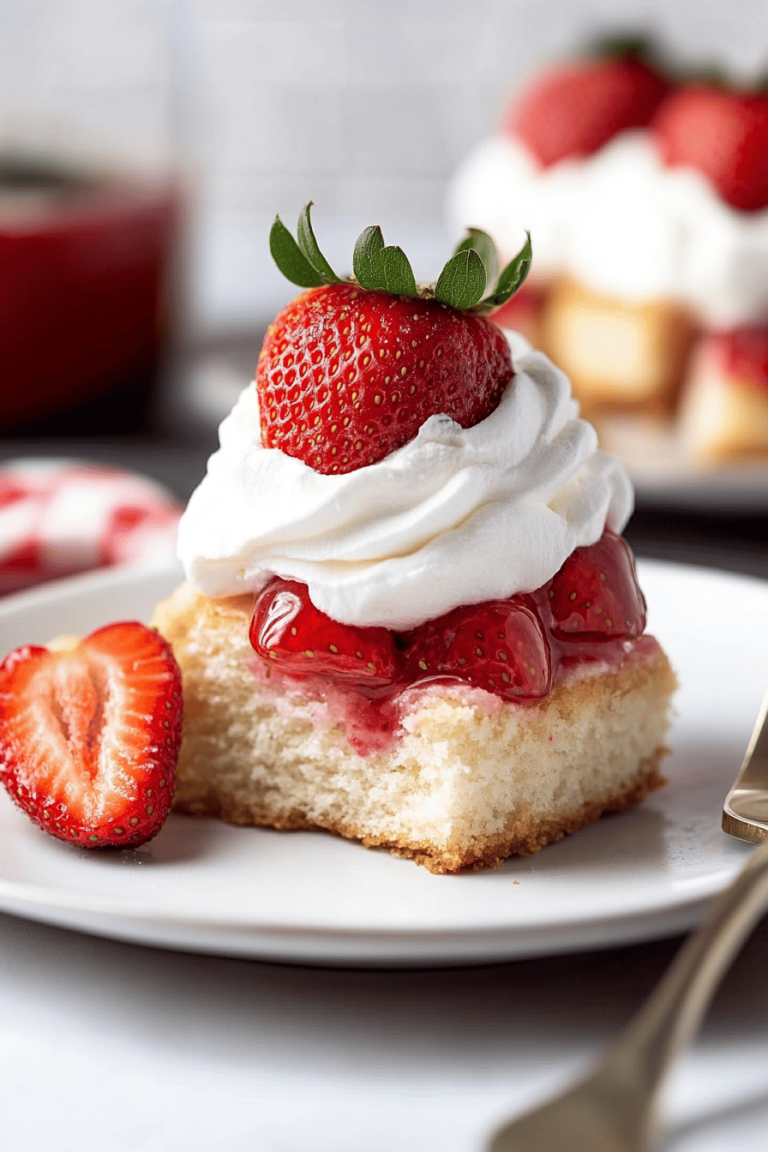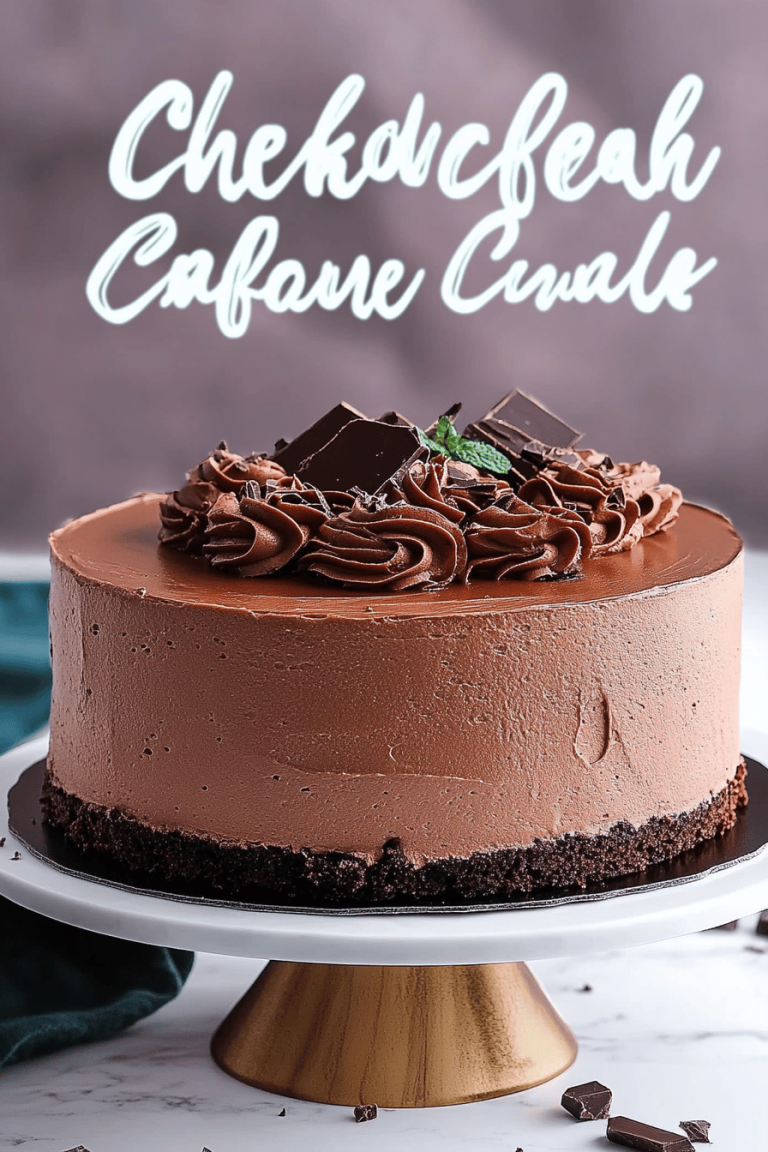
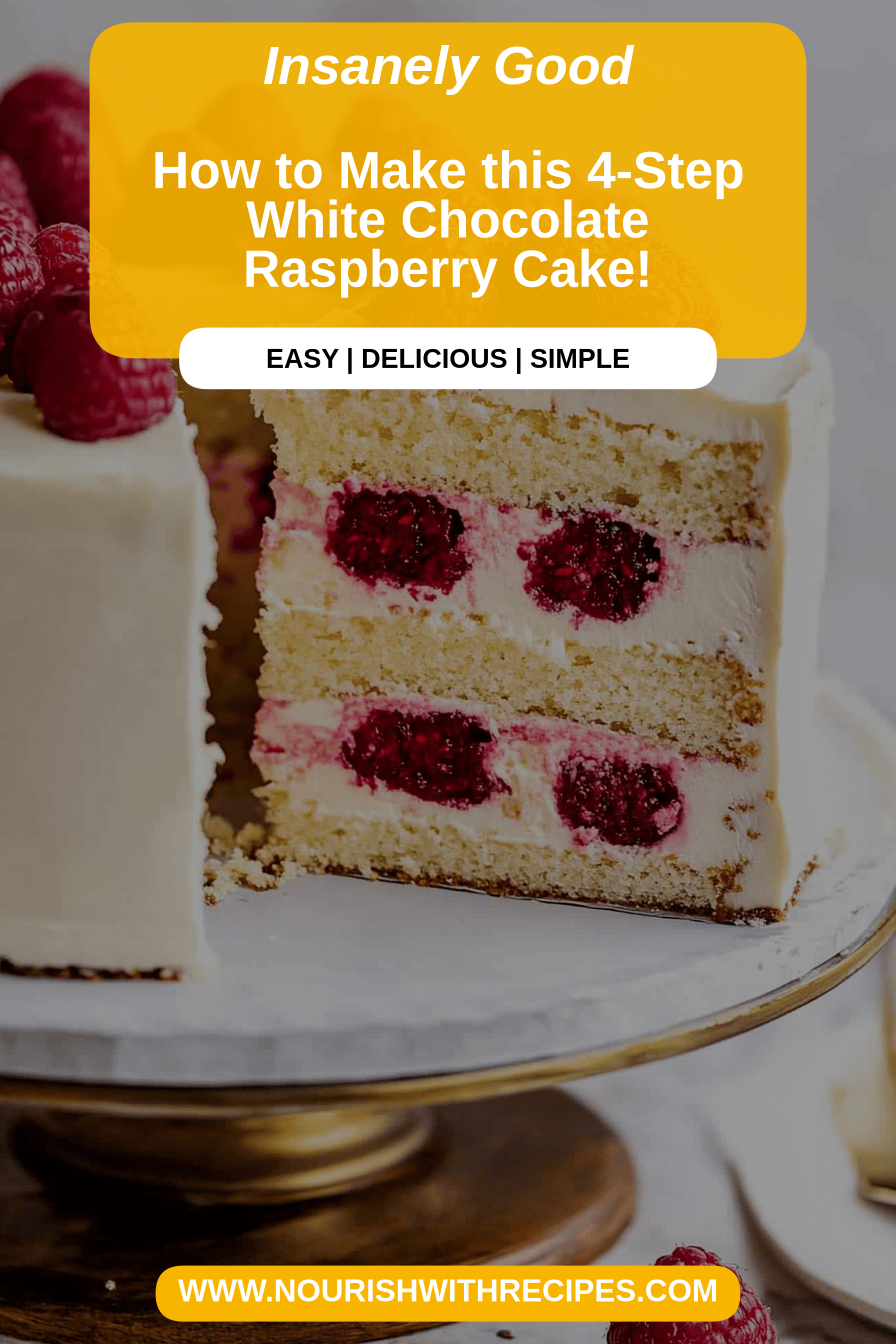
White Chocolate Raspberry Cake
Oh, you guys. I have been so excited to share this recipe with you. This White Chocolate Raspberry Cake isn’t just a cake; it’s a hug in dessert form. It’s the kind of treat that makes you close your eyes and savor every bite, the kind that has everyone asking for the recipe before they’ve even finished their first slice. I remember the first time I made it for a family gathering, and it completely stole the show. My Aunt Carol, who is the ultimate dessert critic in our family, practically inhaled her piece and immediately demanded the details. It’s got that perfect balance of sweet, creamy white chocolate and that bright, slightly tart burst of raspberry that just sings. If you’ve ever loved a really good white chocolate raspberry scone or a slice of cheesecake with that exact flavor combo, then this cake is going to be your new obsession. It’s honestly one of my most requested recipes, right up there with my grandma’s famous apple pie, but somehow, this one feels a little more special, a little more indulgent, and surprisingly, a lot easier to pull off!
What is white chocolate raspberry cake?
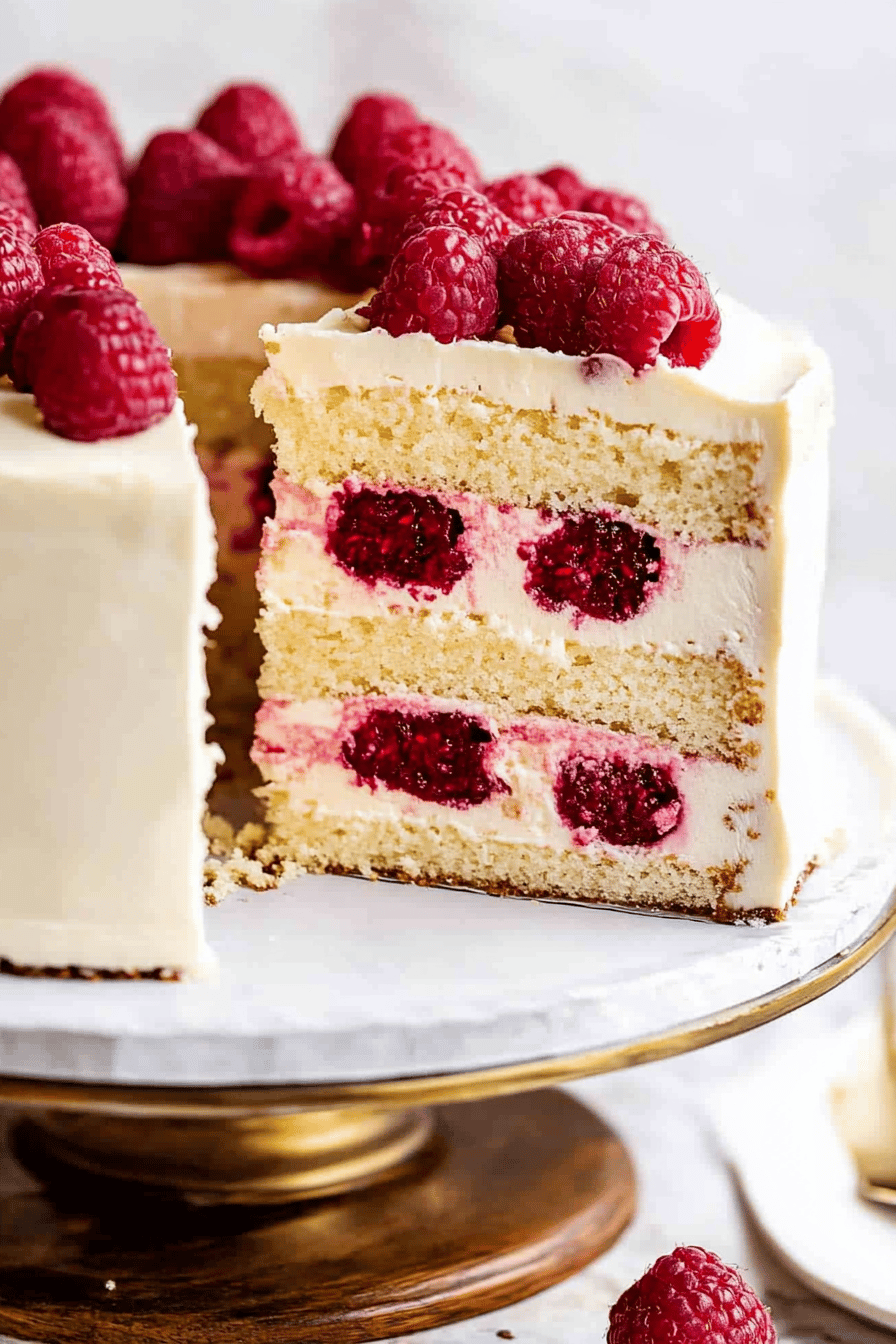
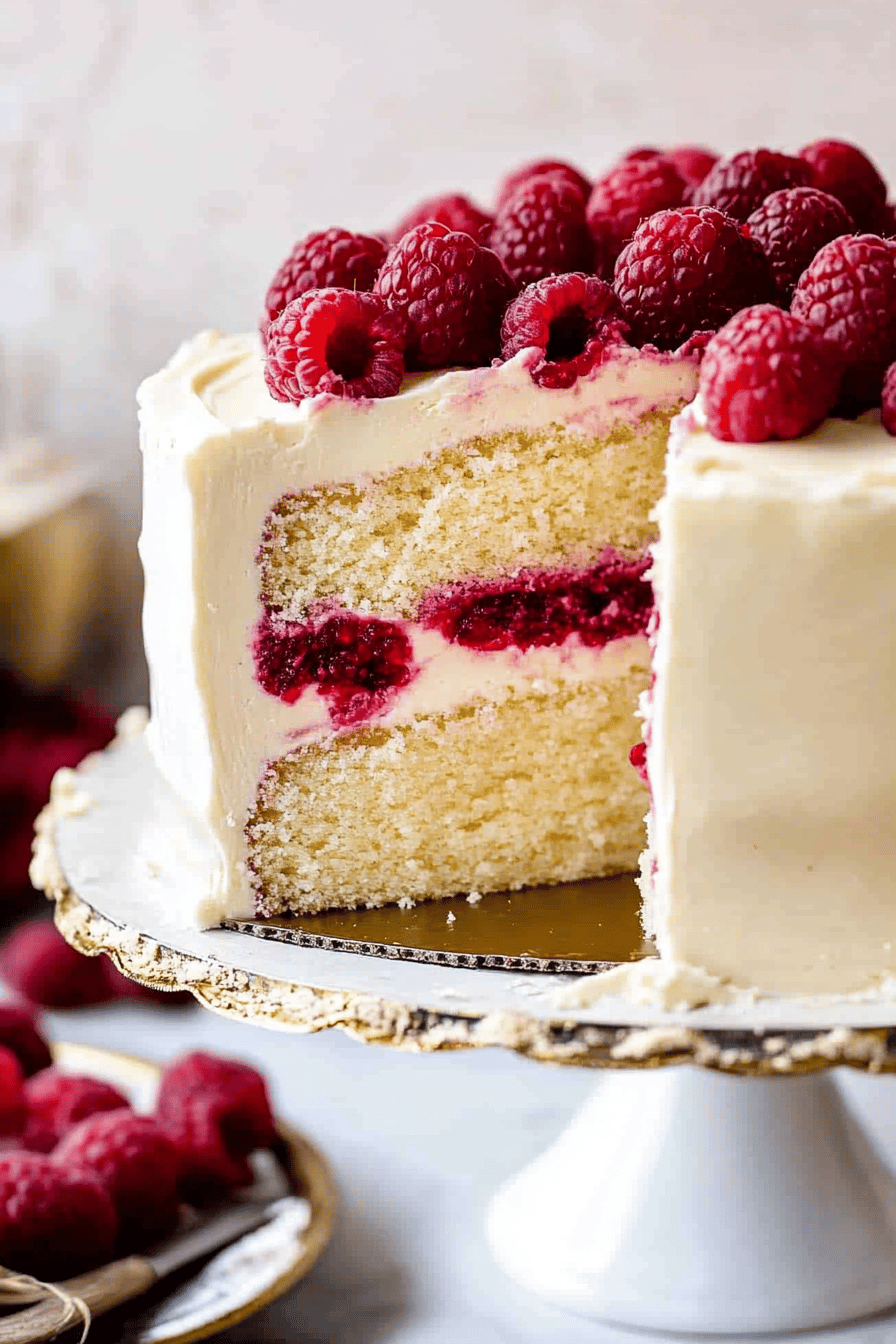
So, what exactly *is* this magical White Chocolate Raspberry Cake? At its heart, it’s a moist, tender cake infused with the delicate sweetness of white chocolate, studded with juicy raspberries, and often finished with a luscious white chocolate glaze or frosting. Think of it as the elegant cousin to a Chocolate Chip Cookie, but in cake form. It’s not overly fussy, but the combination of flavors feels incredibly sophisticated. The white chocolate melts into the batter, creating little pockets of creamy goodness, while the raspberries provide pops of vibrant color and a delightful tang that cuts through the richness. It’s essentially a symphony of sweet and tart, smooth and slightly textured, all coming together in one perfect bite. This isn’t your average birthday cake; it’s more of a celebration cake, something you bake when you want to impress, or just treat yourself (which, let’s be honest, is always a good reason!).
Why you’ll love this recipe?
There are so many reasons why this White Chocolate Raspberry Cake has become a staple in my kitchen, and I just know you’re going to fall in love with it too. First off, the flavor profile is absolutely divine. You get that luxurious, creamy sweetness from the white chocolate that’s never cloying, perfectly balanced by the bright, slightly acidic burst of fresh raspberries. It’s like a flavor party in your mouth! And the texture? Oh, it’s divine. It’s wonderfully moist and tender, with just the right amount of crumb. It’s honestly one of those cakes that tastes like it came from a fancy bakery, but trust me, it’s surprisingly straightforward to make. I also love how budget-friendly it can be. While white chocolate might seem a bit fancy, you don’t need a ton, and raspberries are usually quite accessible, especially when they’re in season. Plus, the other ingredients are pantry staples. This cake is also incredibly versatile. You can serve it for breakfast (yes, I’ve done it!), as a decadent brunch centerpiece, or as the grand finale to a dinner party. It’s also fantastic for a simple afternoon tea or a late-night sweet craving. What I love most, though, is the reaction it gets. It’s a guaranteed crowd-pleaser, and it makes people feel so special. It’s far better than any basic vanilla or Chocolate Cake you might find, and it’s a lovely alternative to a heavier chocolate cake if you’re looking for something a bit lighter, but still utterly satisfying.
How do I make a white chocolate raspberry cake?
Quick Overview
This recipe is all about creating a perfectly balanced batter infused with White Chocolate and pockets of raspberry goodness, then bringing it all together with a simple yet elegant glaze. We’ll mix our dry and wet ingredients separately, gently combine them, fold in the raspberries, and then bake it until golden and fragrant. The key is not to overmix and to handle the raspberries with care so they don’t bleed too much into the batter. It’s a straightforward process that results in a truly show-stopping cake. You’ll be amazed at how quickly it comes together!
Ingredients
For the Main Batter:
For the Filling:
For the Glaze:
Step-by-Step Instructions
Step 1: Preheat & Prep Pan
First things first, get your oven preheated to 350°F (175°C). This is super important so the cake bakes evenly from the moment it goes in. Then, grab your favorite cake pan – I usually use a 9-inch round or an 8×8 inch square pan for this. Grease it really well with butter or cooking spray, and then dust it with a little flour. Tap out any excess flour. This step is crucial for preventing your beautiful cake from sticking. You can also line the bottom with parchment paper if you’re extra cautious, which is what I often do when I’m nervous about a cake sticking.
Step 2: Mix Dry Ingredients
In a medium bowl, whisk together the all-purpose flour, baking powder, and salt. Whisking them together ensures that the leavening agents are evenly distributed throughout the flour. This helps the cake rise beautifully and uniformly. Give it a good whisk for about 30 seconds to really aerate it. I always do this step first to make sure everything is perfectly combined before it even meets the wet ingredients.
Step 3: Mix Wet Ingredients
In a large bowl, cream together the softened unsalted butter and granulated sugar until light and fluffy. This usually takes about 3-5 minutes with an electric mixer. You want it to look pale yellow and airy – this is where a lot of the cake’s tenderness comes from! Beat in the eggs one at a time, making sure each one is fully incorporated before adding the next. Then, stir in the vanilla extract. Now, alternate adding the dry ingredients and the milk to the butter mixture, beginning and ending with the dry ingredients. Mix on low speed just until combined. Don’t overmix here; a few streaks of flour are okay at this stage.
Step 4: Combine
Now it’s time to bring it all together. Add about half of the dry ingredients to the wet ingredients and mix on low speed until *just* combined. Then, add the milk and mix again until *just* combined. Finally, add the remaining dry ingredients and mix on low speed until no dry streaks remain. I really can’t stress enough: do NOT overmix. Overmixing develops the gluten in the flour, which can lead to a tough cake. A few small lumps are perfectly fine! You can even finish this step by hand with a spatula to be sure you don’t overdo it. It’s a common mistake to overmix, and I’ve definitely done it before!
Step 5: Prepare Filling
This is where the magic starts to happen! In a small bowl, gently toss the raspberries with the 2 tablespoons of flour. This might seem a little odd, but the flour helps to absorb some of the excess juice from the raspberries, preventing them from sinking to the bottom of the cake and also helps them distribute a bit more evenly. If you’re using frozen raspberries, this step is especially helpful as they tend to release more liquid. Just a light coating is all you need.
Step 6: Layer & Swirl
Now, pour about two-thirds of your cake batter into your prepared pan. Scatter about half of the floured raspberries evenly over the batter. Then, gently spoon the remaining batter over the raspberries. Finally, scatter the rest of the raspberries over the top. If you want a more marbled effect, you can gently swirl a knife or skewer through the batter, but I often find that just scattering them gives a beautiful rustic look with plenty of flavor pockets. Don’t over-swirl, or you’ll muddy the colors.
Step 7: Bake
Bake in your preheated oven for 30-40 minutes, or until a wooden skewer or toothpick inserted into the center of the cake comes out clean, with perhaps a few moist crumbs attached. Baking time can vary depending on your oven, so start checking around the 30-minute mark. You want the cake to be golden brown and spring back lightly when you gently touch the top.
Step 8: Cool & Glaze
Once baked, let the cake cool in the pan for about 10-15 minutes before inverting it onto a wire rack to cool completely. This is a crucial step! Trying to glaze a warm cake is a recipe for disaster. While the cake is cooling, prepare the glaze. In a bowl, whisk together the sifted powdered sugar, milk or cream, and vanilla extract until smooth. You’re looking for a thick but pourable consistency. Add the melted and slightly cooled white chocolate and whisk until smooth and well combined. Drizzle or spread the glaze over the cooled cake. It will set up slightly as it cools.
Step 9: Slice & Serve
Once the glaze has set, your beautiful White Chocolate Raspberry Cake is ready to be sliced and enjoyed! I like to use a serrated knife for a clean cut. Serve it at room temperature for the best texture and flavor. It’s wonderful on its own, or with a dollop of whipped cream or a scoop of vanilla bean ice cream.
What to Serve It With
This White Chocolate Raspberry Cake is so versatile, it really shines in so many different settings! For breakfast, I absolutely love a slice with a strong cup of coffee. The sweetness of the cake and the richness of the coffee are a match made in heaven. You can even just warm up a slice slightly in the toaster oven for an extra treat. For a more elegant brunch, I like to serve it on a pretty platter, maybe with a side of fresh berries or a light fruit salad. A mimosa or a sparkling rosé would be the perfect beverage pairing to make it feel extra special. As a dessert, it’s phenomenal. It’s rich enough to stand on its own, but if you want to go all out, a small scoop of raspberry sorbet or a spoonful of unsweetened whipped cream can be delightful accompaniments. It’s perfect after a lighter meal, like a grilled chicken or fish dish. And for cozy snacks? Honestly, this cake is the ultimate cozy snack. I love pairing it with a warm cup of herbal tea or even a glass of milk. It’s the perfect treat for an afternoon pick-me-up or a late-night indulgence when you’re curled up with a good book. My family has a tradition of having a slice with hot chocolate on snowy days – it’s pure comfort!
Top Tips for Perfecting Your White Chocolate Raspberry Cake
I’ve made this White Chocolate Raspberry Cake more times than I can count, and over the years, I’ve picked up a few tricks that really make a difference. For the raspberries, whether you use fresh or frozen, tossing them with that little bit of flour (as mentioned in the ingredients) is a game-changer. It really helps them hold their shape and keeps them from sinking. If you’re using fresh raspberries, gently rinse and pat them completely dry before tossing them with the flour. For the white chocolate, always, always use good quality baking bars, not white chocolate chips. The chips often have stabilizers that prevent them from melting smoothly and can make your cake texture a bit grainy. Chop the bars finely so they melt evenly into the batter. When it comes to mixing the batter, the biggest lesson I learned the hard way is to avoid overmixing. Seriously, as soon as you don’t see any more dry flour streaks, stop! Overmixing is the enemy of tender cake. If you’re concerned about getting the swirl just right, don’t stress too much. A light swirl is often more beautiful than a deeply marbled one, and you’ll still get those delicious pockets of raspberry. For baking, ovens can be so finicky. If you know yours runs hot, maybe err on the side of checking earlier than the recipe suggests. A toothpick test is your best friend here – it should come out with just a few moist crumbs, not wet batter. If your cake is browning too quickly on top but the center isn’t done, you can loosely tent it with foil. For ingredient swaps, I’ve successfully used almond milk in place of regular milk, and it actually made the cake even creamier! If you don’t have white chocolate for the glaze, a simple vanilla or lemon glaze would also be lovely, or even just a dusting of powdered sugar. Remember, baking is an art, but it’s also a science, and these little tweaks can elevate your cake from good to absolutely unforgettable.
Storing and Reheating Tips
One of the best things about this White Chocolate Raspberry Cake is how well it stores! If you happen to have any leftovers (which is rare in my house!), you can keep it at room temperature for up to 2 days. Make sure it’s in an airtight container or well-covered with plastic wrap. The flavors actually tend to meld and get even better overnight! If you need to store it for longer, pop it into the refrigerator. In the fridge, it will stay fresh for about 4-5 days. Again, make sure it’s sealed tightly to prevent it from drying out or absorbing other odors. When you’re ready to eat it from the fridge, I find it tastes best if you let it sit at room temperature for about 30 minutes to an hour to take the chill off. For freezing, this cake does wonderfully! You can freeze it either unfrosted or frosted with a buttercream (a glaze is best applied after thawing). Wrap the cooled cake tightly in plastic wrap, then in a layer of aluminum foil. It can stay frozen for up to 2-3 months. To thaw, unwrap it and let it come to room temperature on a wire rack. If you’re glazing it after thawing, apply the glaze once the cake is completely cool and at room temperature. Avoid reheating it in the microwave, as this can make the cake dry and rubbery, unless you’re just warming up a tiny slice for a few seconds.
Frequently Asked Questions
Final Thoughts
I really hope you give this White Chocolate Raspberry Cake a try. It’s more than just a recipe for me; it’s about creating moments, sharing joy, and making memories in the kitchen. It’s the kind of cake that feels both special and approachable, perfect for any occasion, or no occasion at all! The way the white chocolate melts into the tender cake and the burst of tart raspberries is just pure bliss. It’s a recipe that has consistently brought smiles to faces at my house, and I have a feeling it will do the same for you. If you love this flavor combination, you might also enjoy my White Chocolate Raspberry Scones or my Raspberry Swirl Cheesecake. They offer similar delightful tastes in different forms! I can’t wait to hear how your White Chocolate Raspberry Cake turns out! Please, don’t hesitate to leave a comment below with your thoughts, any variations you tried, or if you have any questions. And if you share your creation on social media, be sure to tag me – I’d absolutely love to see it! Happy baking, my friends!

White Chocolate Raspberry Cake
Ingredients
Cake Layers
- 2.5 cups all-purpose flour
- 1.5 cups granulated sugar
- 0.5 cups white chocolate chips melted
- 0.5 cups unsalted butter softened
- 2 large eggs
- 1 teaspoon vanilla extract
- 0.5 teaspoon baking soda
- 0.25 teaspoon salt
- 1 cup buttermilk
Raspberry Filling
- 2 cups fresh raspberries
- 0.25 cups granulated sugar
- 1 tablespoon lemon juice
White Chocolate Buttercream
- 1 cup unsalted butter softened
- 4 cups powdered sugar
- 0.5 cups white chocolate melted and slightly cooled
- 0.25 cup heavy cream
- 1 teaspoon vanilla extract
Instructions
Preparation Steps
- Preheat oven to 350°F (175°C). Grease and flour two 8-inch round cake pans.
- In a large bowl, cream together the softened butter and granulated sugar until light and fluffy.
- Beat in the eggs one at a time, then stir in the vanilla extract and melted white chocolate.
- In a separate bowl, whisk together the flour, baking soda, and salt.
- Gradually add the dry ingredients to the wet ingredients, alternating with the buttermilk, beginning and ending with the dry ingredients.
- Divide the batter evenly between the prepared cake pans. Bake for 30-35 minutes, or until a wooden skewer inserted into the center comes out clean.
- Let the cakes cool in the pans for 10 minutes before inverting them onto a wire rack to cool completely.
- To make the raspberry filling, combine raspberries, sugar, and lemon juice in a small saucepan. Cook over medium heat, stirring occasionally, until raspberries break down and the mixture thickens, about 10-15 minutes. Let cool.
- To make the white chocolate buttercream, beat softened butter until creamy. Gradually add powdered sugar, alternating with heavy cream, until smooth and spreadable. Beat in melted white chocolate and vanilla extract.
- Assemble the cake: Place one cake layer on a serving plate. Spread a generous amount of raspberry filling over the cake. Top with the second cake layer. Frost the entire cake with white chocolate buttercream.