Snowball Cookies
Oh, you guys. I’ve been meaning to share this one for ages, and I’m so excited it’s finally time! When the first chill hits the air and the leaves start doing their dazzling autumn dance, my mind automatically drifts to one thing: Snowball Cookies. These aren’t just cookies to me; they’re a warm hug, a nostalgic trip back to Grandma’s kitchen, and the absolute best way to kick off the holiday season. They’re those melt-in-your-mouth little delights that are perfectly sweet, a little bit nutty, and dusted with powdered sugar like they just rolled in a fresh snowfall. Honestly, if you’ve ever had a classic shortbread cookie, imagine that buttery goodness but with an extra layer of delightful texture and a flavor that just *sings*. They’re so simple, yet so incredibly satisfying, and they disappear faster than you can say “winter wonderland” at my house!
What are snowball cookies?
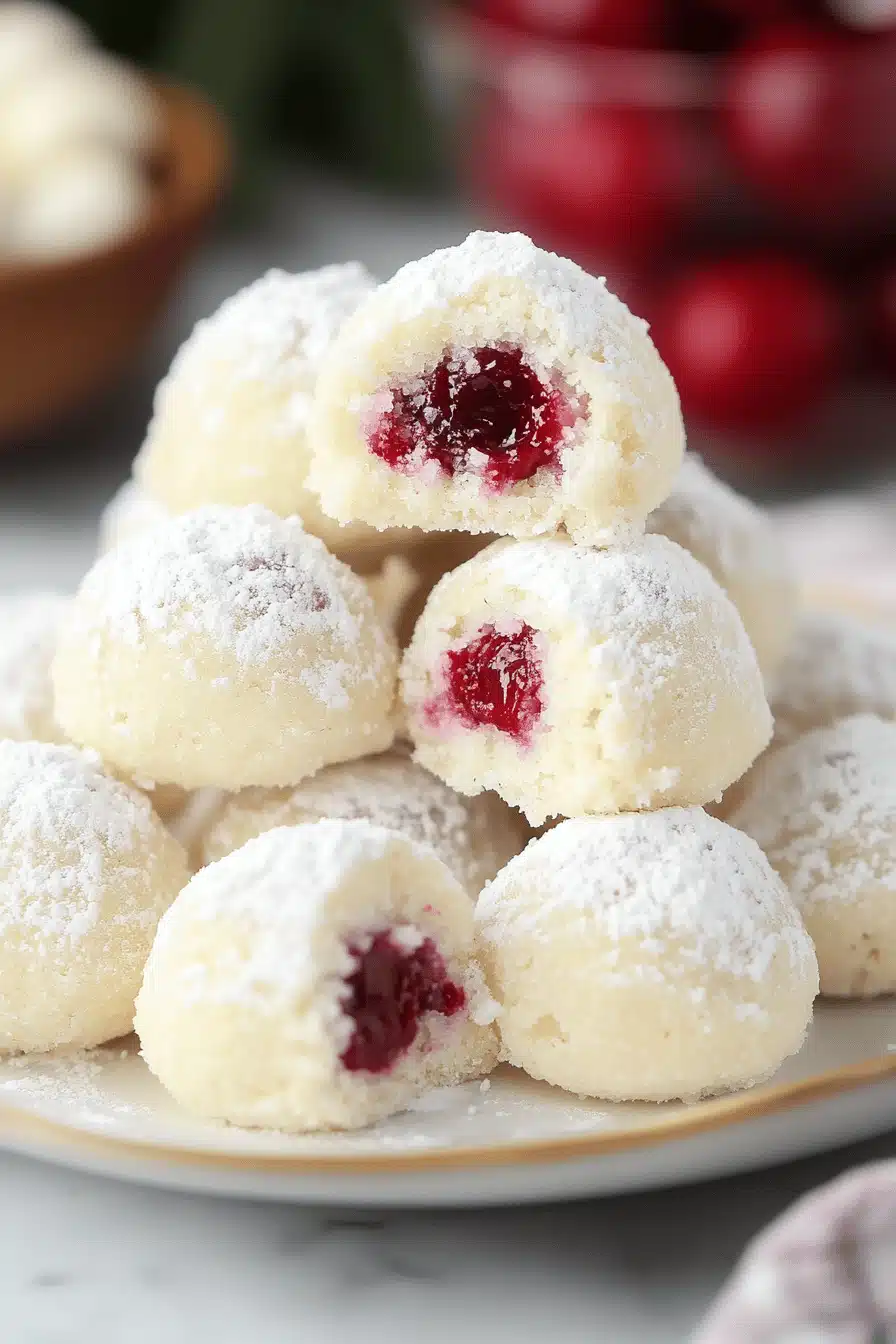
So, what exactly are these magical little treats? Snowball cookies, sometimes called Mexican wedding cookies or Russian tea cakes, are essentially delicate, buttery cookies packed with finely chopped nuts (usually pecans or walnuts) and then rolled in a generous coating of powdered sugar once they’ve cooled a bit. Think of them as the ultimate little crumbly, melt-in-your-mouth bites of joy. The name “snowball” comes from that beautiful, fluffy coating of powdered sugar that makes them look exactly like tiny snowballs, perfect for a winter treat or a holiday spread. They’re not overly sweet on their own, which is brilliant because the powdered sugar coating adds just the right amount of sweetness without being cloying. They’re wonderfully simple, relying on basic pantry staples and a bit of nutty goodness to make them truly special.
Why you’ll love this recipe?
There are so many reasons why this snowball Cookie Recipe holds such a special place in my heart (and my recipe binder!). For starters, the flavor is just out of this world. That rich, buttery base combined with the subtle crunch and earthy notes from the finely chopped nuts is pure perfection. It’s that irresistible combination of tender, crumbly texture and a sweet, sugary finish that makes you want to keep reaching for just one more. And speaking of irresistible, the simplicity of this recipe is a major win. You don’t need any fancy equipment or a degree in pastry arts to whip these up. I’ve made them countless times on busy afternoons, and they always come together so easily. The ingredients are all pretty standard, too, meaning you likely have most of what you need right in your pantry already. That makes them incredibly budget-friendly, which is always a bonus, especially during the holidays when expenses can pile up. What I truly love, though, is their versatility. While they’re a classic for Christmas, they’re also fantastic for any occasion where you want a delicate, crowd-pleasing cookie. They look beautiful on a cookie platter, and they’re always a hit at bake sales or potlucks. My kids, who can be a bit picky, absolutely adore these, and they’re the first to volunteer to help roll them in powdered sugar. It’s a fun activity for the little ones, too! Compared to some other holiday cookies that can be finicky or time-consuming, these snowball cookies are a lifesaver. They bake up relatively quickly and the cooling and rolling process is straightforward, meaning you get maximum deliciousness for your effort.
How do you make snowball cookies?
Quick Overview
Making these snowball cookies is a breeze! We’ll start by creaming butter and sugar, then gently incorporating the dry ingredients and finely chopped nuts. The dough comes together beautifully and is then shaped into small balls. After a short bake, they’re cooled and then rolled in a snowy blanket of powdered sugar. It’s a simple, almost meditative process that results in utterly delightful cookies. Trust me, even if you’re new to baking, you’ll nail these on the first try!
Ingredients
For the Main Batter:
1 cup (2 sticks or 226g) unsalted butter, softened. Make sure it’s really softened, not melted. This is key for a tender cookie.
1/2 cup (100g) granulated sugar. This is for the base of the cookie.
1 teaspoon vanilla extract. Don’t skimp here; good vanilla makes a difference!
2 cups (250g) all-purpose flour. Spooned and leveled, not scooped, to avoid dense cookies.
1/4 teaspoon salt. It balances the sweetness and enhances the nutty flavor.
1 cup (about 100-120g) finely chopped pecans or walnuts. I personally love pecans for their slightly sweeter flavor, but walnuts work wonderfully too. Chop them nice and fine – you want little bits, not big chunks. You can even pulse them a few times in a food processor!
For the Coating:
1 1/2 to 2 cups (150-200g) powdered sugar (also known as confectioners’ sugar or icing sugar). You’ll need a good amount for that signature snowball look!
Step-by-Step Instructions
Step 1: Preheat & Prep Pan
First things first, let’s get your oven preheated to 350°F (175°C). You’ll want to line a couple of baking sheets with parchment paper. This is a trick I learned early on; it prevents sticking and makes cleanup a breeze. Parchment paper is your best friend here!
Step 2: Mix Dry Ingredients
In a medium bowl, whisk together the all-purpose flour and the salt. Give it a good whisk to make sure the salt is evenly distributed. Set this aside for a moment.
Step 3: Mix Wet Ingredients
In a large bowl, using an electric mixer (or a stand mixer with the paddle attachment), cream together the softened unsalted butter and granulated sugar until light and fluffy. This usually takes about 3-4 minutes. Then, beat in the vanilla extract until it’s well combined. The mixture should look pale yellow and be nice and creamy.
Step 4: Combine
Gradually add the dry ingredients (the flour and salt mixture) to the wet ingredients, mixing on low speed just until combined. Be careful not to overmix here! Overmixing can lead to tough cookies, and we want these to be tender and melt-in-your-mouth. Once the flour is just incorporated, gently fold in the finely chopped nuts with a spatula or wooden spoon. The dough will be soft and a little crumbly, but it should hold together when you squeeze it.
Step 5: Prepare Filling
(Note: This section is relevant for more complex snowball recipes that might have a filling. For this classic version, there isn’t a separate filling to prepare. The nuts are incorporated directly into the dough.)
Step 6: Shape the Snowballs
Now for the fun part! Roll the dough into small balls, about 1-inch in diameter. You can use a cookie scoop for consistency, or just your hands. Place the balls about 1-2 inches apart on your prepared baking sheets. They don’t spread much, so you don’t need a ton of space.
Step 7: Bake
Bake for 10-12 minutes, or until the edges are *just* beginning to turn a very pale golden brown. They shouldn’t get much color at all, as we want them to stay light and almost white. Keep a close eye on them; they can go from perfect to overbaked quickly! My oven tends to run a bit hot, so I often check mine around the 10-minute mark.
Step 8: Cool & Glaze
Let the cookies cool on the baking sheets for about 5 minutes. They’ll be delicate at this stage. Then, carefully transfer them to a wire rack to cool completely. This is super important! Trying to roll warm cookies in powdered sugar will result in a sticky, messy disaster. Once they are *completely* cool, put your powdered sugar in a shallow bowl or a pie plate. Roll each cookie gently in the powdered sugar until it’s fully coated, like a perfect little snowball. You might need to re-coat them for an extra snowy look!
Step 9: Slice & Serve
These are best served at room temperature. Once they’re coated in powdered sugar, they’re pretty much ready to go! They don’t need to be sliced, as they’re already individual cookie size. Just arrange them on a plate and watch them disappear!
What to Serve It With
These snowball cookies are so versatile, they’re welcome pretty much anywhere! For breakfast, they are an absolute dream alongside a hot cup of coffee or tea. Imagine a little sweet bite to start your day, without being overly heavy. For a more leisurely brunch spread, they add an elegant touch nestled amongst fruit salads and other pastries. They look so pretty on a tiered stand. As a dessert, they’re a perfect light ending to a hearty meal, especially if you’ve had something rich and savory. I love serving them alongside a simple scoop of vanilla bean Ice Cream for a fun contrast. And for those cozy, late-night cravings when you just need something sweet? They are absolutely perfect with a glass of cold milk, curled up on the couch with a good book. My family has a tradition of having these with hot cocoa on the first snowy day of the year. It just feels so festive and comforting.
Top Tips for Perfecting Your Snowball Cookies
Over the years, I’ve picked up a few tricks that I think really make a difference in getting these snowball cookies just right. First, about the nuts: make sure they’re chopped very finely. If they’re too large, the cookies won’t have that classic delicate texture, and they might even fall apart. I often give them a quick pulse in my food processor to get them to a fine, almost meal-like consistency. For mixing, pay close attention to the “just combined” stage. Overworking the dough develops the gluten in the flour, which will make your cookies tough. Stop mixing as soon as you don’t see any dry flour pockets. When shaping, try to make the balls as uniform as possible. This ensures they bake evenly. My biggest tip for the powdered sugar coating is patience! Make sure those cookies are *completely* cool before you roll them. If they’re even slightly warm, the powdered sugar will melt and form a sticky glaze instead of that beautiful, powdery coating. For an extra snowy look, you can roll them twice! Let them sit in the first coating for a minute, shake off the excess, and then give them a second roll. If you’re feeling adventurous with ingredient swaps, I’ve experimented with a touch of almond extract instead of vanilla, and it’s divine! Just be careful, as almond extract is potent. Also, I’ve found that using a good quality butter really does impact the flavor, so splurge if you can! For baking, if your cookies tend to spread a lot, chilling the dough balls for about 15-20 minutes before baking can help. And remember, oven temperatures can vary, so keep an eye on them. The goal is a very pale cookie, so don’t be tempted to bake them until golden brown!
Storing and Reheating Tips
These snowball cookies are pretty forgiving when it comes to storage. Once they are completely cooled and coated in powdered sugar, you can store them at room temperature in an airtight container for up to 3-4 days. I like to line the container with parchment paper to prevent them from sticking together too much. If you find they’re getting a little dry after a couple of days, you can place a small piece of bread in the container; it helps keep them soft. For longer storage, you can keep them in the refrigerator for up to a week, although they might lose a little bit of their delicate texture. Just be sure to bring them back to room temperature before serving for the best eating experience. If you want to freeze them, I recommend freezing them *before* rolling them in powdered sugar. Wrap the cooled, un-dusted cookies tightly in plastic wrap, then place them in a freezer-safe bag or container. They’ll stay good in the freezer for up to 2-3 months. When you’re ready to enjoy them, thaw them at room temperature overnight, then roll them in fresh powdered sugar just before serving. For reheating, they generally don’t need it, as they’re best enjoyed at room temperature. If you do want to warm them up slightly, a few seconds in a very low oven (like 200°F/95°C) might work, but be extremely careful not to melt the powdered sugar coating or overcook the cookie.
Frequently Asked Questions
Final Thoughts
I truly hope you get a chance to make these snowball cookies. They’re more than just a recipe to me; they’re a connection to my past, a way to bring a little bit of everyday magic into the kitchen, and a surefire way to make anyone’s day a little sweeter. The way they crumble so delicately and that burst of nutty sweetness is just something special. If you love buttery, melt-in-your-mouth cookies, you’re going to adore these. They’re also fantastic paired with some of my other favorite holiday treats, like my Gingerbread Cut-Out Cookies or my Chewy Chocolate Chip Cookies – perfect for building your ultimate cookie platter! Please, please let me know in the comments below if you try these snowball cookies and how they turn out for you! I absolutely love hearing your feedback and seeing your creations. Happy baking, everyone!