seven layer dip
There’s something about that first scoop of seven layer dip that instantly transports me back to family gatherings filled with laughter, clinking glasses, and the irresistible hum of conversation. It’s the kind of dish that disappears so fast, you’ll swear it has a magnetic pull. I remember the very first time I made this at a casual weekend potluck — my friends practically begged me for the recipe. Maybe it’s the way the fresh, creamy layers blend with the crunchy tortilla chips or how it’s the perfect mingling spot for flavors you didn’t think would play so well together. If you’ve ever made classic guacamole or simple bean dips but want to take things to the next level, seven layer dip is your new kitchen MVP. I’ve perfected mine with little tweaks that make it both a crowd-pleaser and a quick fix when you need something show-stopping on a dime.
What is Seven Layer Dip?
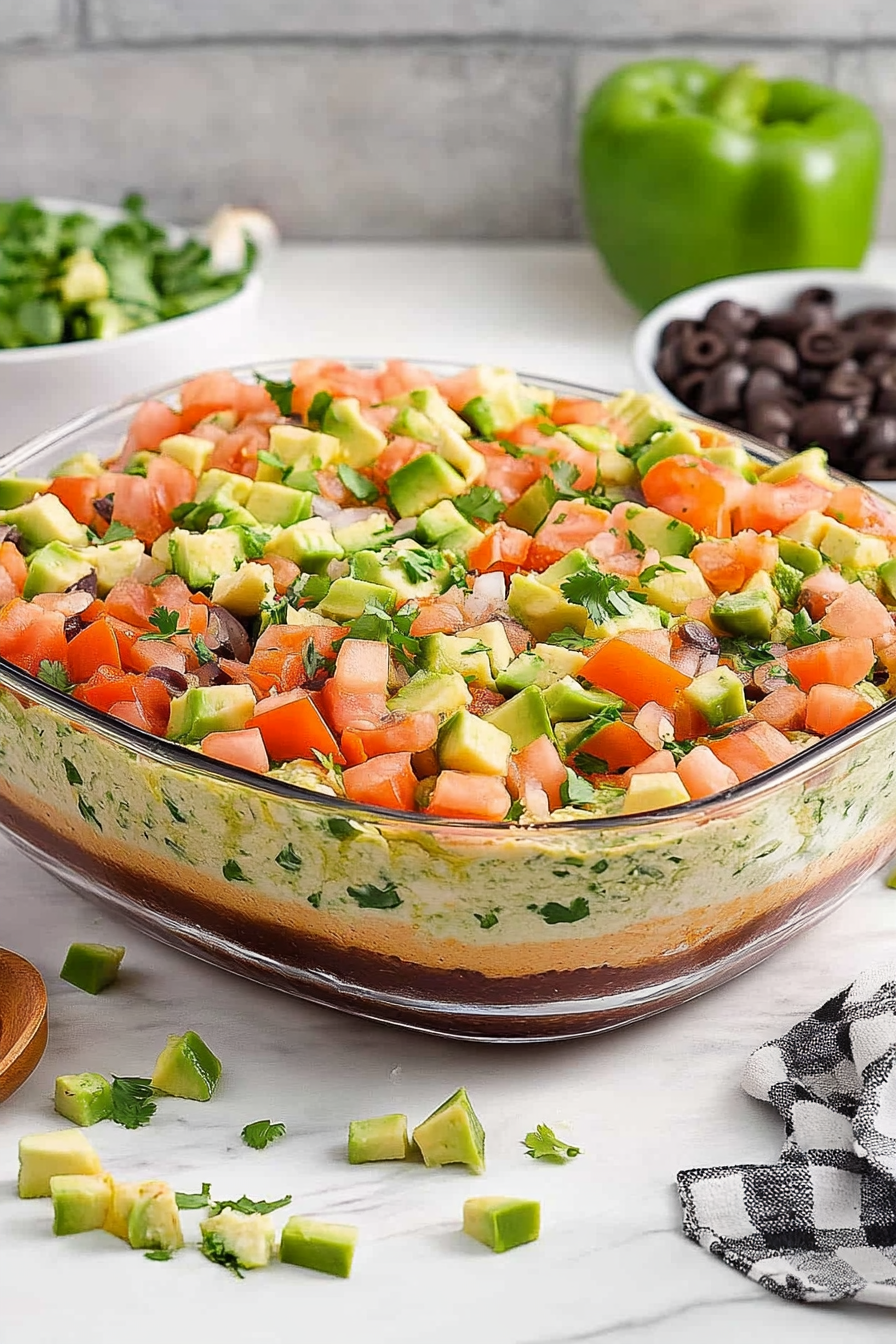
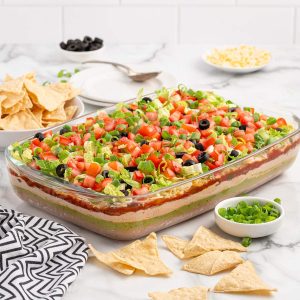
Think of seven layer dip as a colorful, flavor-packed party packed into one dish. It’s essentially a layered dip that traditionally includes beans, guacamole, sour cream, cheese, and other tasty toppings, stacked up to create a beautiful mosaic of texture and taste. The name simply comes from its seven distinct layers, each bringing a unique flair — some creamy, some crunchy, others tangy or spicy. It’s much like a seven-layer salad’s fun cousin, but much more casual and totally perfect for sharing. The beauty is in the simplicity and the contrast: smooth refried beans, fresh guac, zesty salsa, melted cheese, and a sprinkle of olives or green onions on top. It’s a fail-safe dish, super easy to assemble, and delivers big on flavor without any complicated cooking involved.
Why you’ll love this recipe?
Honestly, I could go on forever about why this seven layer dip is a keeper. First off, the flavor — it’s like a fiesta on your tongue! The creaminess of sour cream mixes with the tang of salsa and the richness of melted cheddar (or your favorite cheese), while the beans and guacamole add that hearty, fresh balance. What I absolutely adore is how every bite can be a little different depending on where your chip lands. It’s the kind of mix that keeps you coming back for just one more nibble even though you promised you wouldn’t anyone.
This isn’t just a hit at parties; it’s a lifesaver on busy nights when you want something fast but impressive. Plus, it’s ridiculously budget-friendly since most of the ingredients are pantry staples or easy to grab on a quick store run. And while some dips get boring after a while, seven layer dip feels like it can turn into anything — swap in black beans, make it spicier with jalapeños, or sneak in some corn kernels. My family especially loves this because it’s so versatile — great as a snack, appetizer, or even a light lunch with a salad on the side. If you’ve ever tried a simple bean dip or guacamole and wished it had more personality, trust me, this will change the game.
How do I make seven layer dip?
Quick Overview
Making seven layer dip is surprisingly quick and satisfying — you’re basically stacking flavor bombs on top of each other, no fancy cooking skills required. I start by prepping each layer separately, which helps everything come together beautifully and keeps everything fresh. My favorite part is how customizable it is, but the secret weapon is building it just right so every scoop tastes balanced. I’ll share my personal tips so you won’t end up with a soggy dip or a bland one. This method is fool-proof, and honestly, once you try it you’ll have this recipe memorized for every get-together and snack craving!
Ingredients
For the Bean Layer:
- 1 can (15 oz) refried beans – I like to use homemade if I have time, but canned works just fine
- A pinch of cumin and chili powder for extra depth (optional)
For the Guacamole Layer:
- 2 ripe avocados – smooth and creamy, not too brown
- 1 small tomato, finely diced
- 1 tablespoon lime juice – this keeps the guac fresh and tangy
- Salt, pepper, and a pinch of garlic powder
- A handful of chopped cilantro if you’re feeling fancy
For the Sour Cream Layer:
- 1 cup sour cream – for that rich, cool contrast
- 1 teaspoon taco seasoning (optional, but trust me, it adds a nice kick)
For the Salsa Layer:
- 1 cup chunky salsa – homemade or store-bought, whatever you prefer
For the Cheese Layer:
- 1 cup shredded sharp cheddar cheese – melty and perfect
- Or a mix of cheddar and Monterey Jack for a milder touch
For the Toppings:
- 1 small bunch of green onions, thinly sliced
- 1/4 cup sliced black olives
- Optional: jalapeño slices or diced red pepper for heat and color
Step-by-Step Instructions
Step 1: Prep Your Dish
I like to use a clear glass pie dish or a wide shallow bowl so you can actually see all those beautiful layers. It’s a simple step but trust me, the presentation makes a big difference once the dip hits the table. No need to grease it or anything — just make sure it’s clean and ready!
Step 2: Mix the Bean Layer
Open your refried beans and stir in that pinch of cumin and chili powder if you’re using it. This little addition takes it from canned to crave-worthy. Spread the beans evenly at the bottom of your dish with the back of a spoon. The beans provide the hearty base for what’s to come.
Step 3: Make the Guacamole
In a bowl, mash your avocado with lime juice, salt, pepper, and garlic powder. Stir in the diced tomato and cilantro if you have it. The key to a good guac layer is not to over-mix — you want it chunky and fresh. Gently spread this over the beans, covering them completely.
Step 4: Add the Sour Cream
Mix your sour cream with taco seasoning for a subtle boost, then dollop it over the guac. Use a spatula to spread this layer smoothly and evenly. This sour cream layer is what gives the dip that cool creaminess that balances all the bold flavors.
Step 5: Pour the Salsa
Next comes the salsa – spread it evenly over the sour cream. I’ve found that chunky salsa works better than smooth for texture contrast. Bonus points if you stir in a little extra diced onions or peppers here for that crunch.
Step 6: Sprinkle on the Cheese
Shred your cheese fresh — nothing beats the flavor of freshly shredded cheddar. Sprinkle a generous layer over the salsa. This should cover the surface evenly but feel free to pile it high if you’re feeling indulgent.
Step 7: Finish With Toppings
Scatter green onions, olives, and jalapeño slices if you want the heat. This not only adds a pop of color but a fresh zing with every bite. The olives bring a slight brininess that really wakes up the flavors.
Step 8: Chill Before Serving
I always pop mine in the fridge for at least 30 minutes — this lets the layers meld together and the flavors get really harmonious. Plus, a chilled dip just feels so much more refreshing and perfect for dunking!
Step 9: Serve Immediately With Chips
Grab your favorite sturdy tortilla chips — no flimsy ones here! A good chip can hold up to all those layers and deliver a satisfying crunch that’s the perfect partner to this creamy overload.
What to Serve It With
For Breakfast: I know it sounds wild, but seven layer dip as a breakfast side with scrambled eggs and fresh coffee can be a game changer. The fresh and savory layers wake you right up without being too heavy. Plus, it pairs wonderfully with a homemade breakfast margarita if you’re feeling fancy on the weekend.
For Brunch: Serve seven layer dip alongside fresh-cut veggies and a bright, citrusy sangria. I like to add a colorful salsa verde or a mango pico de gallo on the side, which really elevates the whole spread. Presentation-wise, a wooden board dotted with bowls of the dip and crackers makes for a charming setup.
As Dessert: Okay, not dessert exactly, but if you want a little twist, try swapping the guacamole and beans for layers of sweetened cream cheese and fruit preserves. It’s a fun spin for a brunch crowd who likes a bit of savory and sweet combined.
For Cozy Snacks: This dip is unbeatable on game nights or movie marathons. I always keep a jar of my favorite pickled jalapeños on the side and some extra cheese for sprinkling on top — it’s the kind of snack that makes everyone gather around and linger longer.
Top Tips for Perfecting Your Seven Layer Dip
Avocado Prep: Use ripe but firm avocados — soft ones turn mushy too quickly, and unripe ones taste bland. Remove excess moisture from diced tomatoes by draining before adding to guac to avoid watery layers.
Mixing Advice: Don’t rush the mixing, especially when blending the sour cream and salsa layers. Smooth and even spreading keeps each layer defined and prevents them from merging into a blob. Also, be gentle when layering to avoid mixing flavors too early.
Layering Tricks: I learned early on that thicker layers hold up better and give richer flavor. Avoid skimping on the guacamole or cheese layers — they’re the flavor stars. For a fun swirl effect, gently drag a toothpick through the cheese and salsa to create a marbled look.
Ingredient Swaps: Don’t have sour cream? Greek yogurt is a fantastic substitute with extra tang and fewer calories. For beans, black beans puree adds a nice alternative to refried beans with a bit more texture. I once tried vegan cheese and it actually worked surprisingly well to keep it dairy-free.
Baking Tips: If you want a warm version, pop the layered dip under the broiler for 3-4 minutes until bubbly and golden. Watch carefully so it doesn’t scorch, and cool briefly before serving — this changes the whole vibe and makes it truly comforting.
Glaze Variations: While traditional seven layer dip doesn’t usually call for a glaze, I sometimes drizzle a chipotle-lime crema on top for smoky zing. Homemade ranch dressing or a light sprinkle of hot sauce also amps up flavor beautifully.
One lesson I learned the hard way was to chill the dip before serving. I used to serve it room temp and got lots of “too runny” comments. Now, the fridge waiting game is sacred and totally worth it.
Storing and Reheating Tips
Room Temperature: If you’re serving within a couple of hours, keep the dip covered with plastic wrap or a loosely fitted lid to keep it fresh. It’ll be perfectly fine for up to 4 hours like this, but longer and you risk drying out the guacamole or shifting layers.
Refrigerator Storage: Leftovers go straight into an airtight container in the fridge. I find that the dip keeps well for 2-3 days, though the guacamole layer might darken a bit. To avoid that, give it a quick stir before serving or freshly mash another avocado to top it off. Don’t forget to cover tightly to prevent fridge odors from sneaking in.
Freezer Instructions: This dip isn’t great for freezing because fresh avocado and sour cream textures don’t survive the cold well. But if you really want to, freeze in smaller portions without toppings and thaw overnight. Add fresh guac and toppings before serving.
Chilling & Glaze Timing: Always add your final drizzle or fresh toppings right before serving. If you add them too early and store, they’ll lose their pop or get soggy, especially green onions and olives.
Frequently Asked Questions
Final Thoughts
Honestly, seven layer dip has become my go-to for any casual gathering or last-minute snack, and it’s so simple that it barely feels like cooking — more like building tasty layers of sunshine. I love the way everyone always heads straight for it, whether it’s game night, a potluck, or just a quiet Sunday afternoon on the porch. It’s a crowd magnet, a comfort dish, and a testament to how simple ingredients can pack so much punch when put together right. If you enjoyed this, you might want to peek at some of my other layered dips or backyard-friendly party recipes — the mojo is all in easy, fresh flavors that bring people together. Don’t be shy about leaving a comment or sharing your own twists on this classic — I’m always excited to see how you make it your own. Happy dipping and here’s to many shared moments built around bowls of goodness!
Easy Seven Layer Fiesta Dip Recipe
Ingredients
Main Ingredients
- 32 ounces canned refried beans 2 cans, 16 ounces each
- 3 tablespoons water
- 1.5 cups premade mild guacamole
- 2 cups sour cream
- 1 ounce mild taco seasoning 1 packet
- 16 ounces chunky mild salsa drained through a mesh strainer
- 2 cups shredded lettuce
- 2 cups fiesta blend shredded cheese
- 2.25 ounces sliced black olives well drained
- 1 cup chopped roma tomatoes pat excess juice
- 0.5 cup thinly sliced green onions
Instructions
Preparation Steps
- Add the canned refried beans to a small mixing bowl. Add the water and stir until completely combined and smooth.
- Use a silicone or offset spatula to evenly spread the refried beans into the bottom of a 9x13 baking dish.
- Evenly spread the premade guacamole over the refried beans layer.
- In a small bowl, combine sour cream and taco seasoning. Whisk until well incorporated.
- Spread the sour cream mixture evenly over the guacamole layer.
- Drain excess liquid from the chunky salsa, then spread salsa over the sour cream layer.
- Sprinkle the shredded fiesta blend cheese over the salsa layer.
- Layer shredded lettuce over the cheese.
- Sprinkle drained sliced black olives over the lettuce layer.
- Sprinkle chopped roma tomatoes on top, patting off excess juice if needed.
- Top with thinly sliced green onions. Cover tightly and chill in the refrigerator for 1 hour before serving with tortilla chips.