pumpkin dog treats
If you’ve ever caught your dog giving you those soulful eyes while you’re munching on your pumpkin bread, then you’ll totally understand why I’m so excited to share this recipe. I got inspired during one chilly fall afternoon—there’s something about the scent of pumpkin and cinnamon wafting through the house that screams cozy, right? These pumpkin dog treats were born from my desire to whip up something tasty and healthy that my furry friend could enjoy alongside us. They’ve become a little ritual in our home, especially when the leaves turn golden. Unlike fancy store-bought options loaded with unpronounceable ingredients, these treats are super simple, wholesome, and frankly, my pup can’t get enough. Plus, they’re budget-friendly and perfect for busy days when I want to show some extra love without spending hours in the kitchen.
What are some good pumpkin dog treats?
Okay, so pumpkin dog treats are exactly what they sound like — little bites packed with pumpkin and other dog-safe goodies that your pup will absolutely drool over. Think of it as a homemade snack specially crafted for your fur baby’s taste buds and health. The name comes from the star ingredient, pumpkin, which offers a host of benefits for dogs, like fiber, vitamins, and a subtle sweetness dogs love. It’s essentially a way to sneak some nutrient-rich pumpkin into a crunchy, chewy treat that’s perfect for training, rewarding good behavior, or just spoiling your best friend. I like to think of these as the canine equivalent of pumpkin muffins — without the sugar, of course! Since many dogs adore the mild, natural sweetness of pumpkin, it’s a winning ingredient every time.
Why you’ll love this recipe?
What I love most about these pumpkin dog treats is how incredibly straightforward and fuss-free they are. You don’t need any fancy ingredients or kitchen gadgets — just a few wholesome pantry staples and that comforting pumpkin puree you can grab from any store. The flavor is mild, naturally sweet, and just earthy enough to get tails wagging. Plus, since I’m using pure pumpkin (not pie filling!), the treats stay healthy and do a great job soothing your dog’s tummy — a little gift from nature itself.
The simplicity is a lifesaver on busy nights when I want to treat my dog without reaching for processed snacks from the store. These treats bake up with a satisfying crunch that my dog finds absolutely irresistible. And here’s a little secret — they also double great as gifts for friends who are dog parents. Everyone always asks for the recipe. What’s extra cute? The kids pitch in, and their little faces light up every time when they see the finished treats lined up, ready to go. If you’re into other dog treat recipes or even swapping in seasonal flavors, you can look into peanut butter dog biscuits or sweet potato treats, but honestly, pumpkin’s my forever favorite. It’s pure magic, especially during autumn.
How do I make pumpkin dog treats?
Quick Overview
This recipe is all about mixing a few simple ingredients, rolling the dough out, cutting it into fun shapes, and letting your oven do the rest. What makes this method special is that you get a crunchy exterior with a slightly tender middle — my dog LOVES the texture. It’s quick, no-fuss, and you don’t have to worry about awkward baking temps or weird mixing steps. You just combine your dry and wet ingredients separately, then bring ‘em together gently — no overworking the dough here! After baking, they cool down quickly so your pup won’t have to wait long to get a taste.
Ingredients
For the Main Batter:
– 1 cup pumpkin puree (make sure it’s 100% pumpkin, not pie filling!)
– 2 1/2 cups whole wheat flour (or oat flour for a gentler option)
– 1/4 cup rolled oats (optional for a little extra texture)
– 1 egg (helps bind everything)
– 1 tablespoon natural peanut butter (no xylitol! This is super important for dog safety)
– 1/2 teaspoon cinnamon (just a touch for flavor)
For the Filling:
Optional if you want to add a little treat surprise inside!
– A spoonful of unsweetened pumpkin puree mixed with a sprinkle of ground flaxseed or crushed dog biscuits
– Or a dollop of peanut butter if your pup loves it extra messy
For the Glaze:
Just a simple wash, but totally optional!
– 1 egg white beaten with a teaspoon of water (helps give a slight shine and crisp finish)
– Or skip it altogether to keep it all-natural and rustic
Step-by-Step Instructions
Step 1: Preheat & Prep Pan
Start by heating your oven to 350°F (175°C). Line a baking sheet with parchment paper or a non-stick silicone mat — trust me, cleanup gets way easier this way. If you don’t have those, lightly oil the pan but keep it super thin so the treats don’t get greasy.
Step 2: Mix Dry Ingredients
In a large bowl, sift together the whole wheat flour, rolled oats (if using), and cinnamon. Mixing these dry ingredients evenly is key to preventing dense spots in your dough. This step is where your future treat’s texture starts to take shape, so take a moment to whisk them well — it smells so comforting already!
Step 3: Mix Wet Ingredients
In another bowl, combine the pumpkin puree, peanut butter, and egg until smooth and creamy. If your peanut butter is thick, warming it just a smidge in the microwave (10 seconds) makes it easier to mix. This wet mix is where all the moisture and warmth come from — perfect for binding your batter beautifully.
Step 4: Combine
Pour the wet ingredients into the dry and stir gently with a spatula or wooden spoon. You want everything just incorporated; it’s okay if the dough looks a bit shaggy and sticky. Resist the urge to overmix — I learned the hard way once that overworked dough turns tough and crumbly after baking. If it feels too sticky, sprinkle in a little more flour, a tablespoon at a time.
Step 5: Prepare Filling
If you’re adding a filling, mix a bit of pumpkin puree with your chosen ingredient, like flaxseed or peanut butter, until smooth. This little step takes it from boring to exciting for your pup and adds a surprise burst of flavor when they bite into the treat.
Step 6: Layer & Swirl
Roll out half of the dough to about 1/4 inch thickness on a floured surface. Drop spoonfuls of your filling on top, then carefully cover with the second half of dough. Use a knife or a skewer to gently swirl the layers together. It creates this lovely marbled effect and gives you a hint of what’s inside. If you want, get out cookie cutters and make fun shapes — my dog thinks the bone shapes are extra special!
Step 7: Bake
Lay your treats on the lined baking sheet, about an inch apart. Brush with the egg white glaze if you’re using. Pop them in the oven for 25-30 minutes until golden brown and firm. To check doneness, tap one — it should sound slightly hollow and feel crisp on the outside but still slightly chewy inside. Ovens vary, so keep an eye after 20 minutes to avoid overbaking.
Step 8: Cool & Glaze
Once baked, let the treats cool on a wire rack (or just the baking sheet if you don’t have one) for at least 15 minutes. This is crucial because warm treats are too soft to cut or handle. If you want to glaze after baking, a thin coat of plain pumpkin puree brushed on top adds a nice shine and extra scent that dogs can’t resist.
Step 9: Slice & Serve
If you went with a slab approach, slice into bite-sized cubes or rectangles with a sharp knife. Serve at room temperature — cold treats tend to hide the aroma. For extra flair, you can sprinkle a pinch of cinnamon on top, but keep it light since it’s just a treat, not dessert. My dog absolutely perks up the moment I bring these out!
What to Serve It With
For Breakfast: These pumpkin dog treats are a charming complement to your morning coffee routine. While you sip your latte, toss a few treats into a small dish beside your pup’s breakfast bowl. It’s a cozy way to start the day together.
For Brunch: If you’re hosting a weekend brunch, pop the treats in a little decorative bowl next to your charcuterie or fresh fruit platter. A crisp apple cider pairs nicely for humans, while pups get their pumpkin fix. It’s festive and casual, but thoughtful.
As Dessert: When the family indulges in pumpkin pie or spiced cupcakes, these little bites make for a perfect after-dinner nod to your pup — without the sugar or harmful ingredients. I often place a treat near the kids’ dessert plates so everyone’s included in the pumpkin celebration.
For Cozy Snacks: On chilly evenings when we’re curled on the couch watching a movie, I love tossing a few pumpkin dog treats into a jar nearby. My dog will sneak over every so often for a crunchy handful of goodness, sharing the comfort of the moment.
Over the years, these have become a staple not just because they’re healthy, but because they bring a small, joyful pause to our daily rhythm. My dog’s excited sniffs and happy tail wags make me feel like a rockstar chef every single time.
Top Tips for Perfecting Your Pumpkin Dog Treats
Pumpkin Quality: Always use pure pumpkin puree — the canned kind meant for pies works in a pinch but can be sweeter or spiced, which isn’t ideal. Fresh pumpkin puree is even better if you can manage it. The fresher, the more natural flavor your pup gets.
Flour Facts: Whole wheat flour gives a nice hearty taste and crunch, but if your dog has sensitivities, oat or rice flour work beautifully. Just swap it cup for cup but expect slightly different textures. I’ve tried both, and oat flour makes the treats a bit lighter.
Peanut Butter Safety: Seriously, always check that your peanut butter doesn’t have xylitol. It’s toxic to dogs and not listed on every label clearly. Natural, unsweetened peanut butter is best — the taste is pure and addicting.
Mix Gently: Overmixing is my nemesis. The first few times, I overworked the dough and got tough treats no dog wanted near. Just stir until everything’s combined, then stop.
Swirling Magic: For a fun look, don’t be shy to mix and swirl your filling with the dough. Sometimes I do a bold peanut butter swirl on top — it’s a visual treat for me and a flavor bonus for the dog.
Baking Know-How: Check your oven’s actual temperature with a thermometer. I burned my first batch because my oven runs hot. Rotate pans halfway if you’re making multiple batches for even cooking.
Glaze Groove: The egg wash isn’t necessary, but it does give a lovely shiny finish and that slightly crisp bite my dog enjoys. If your pup has allergies, skip it or try brushing on some pure pumpkin puree for a soft finish.
These tips come straight from my well-loved kitchen test runs, and honestly, they’re the little things that make the biggest difference. You’ll be a pumpkin treat pro before you know it!
Storing and Reheating Tips
Room Temperature: Store your pumpkin dog treats in an airtight container or glass jar at room temp for up to 5 days. This keeps them crisp but fresh enough to smell irresistible.
Refrigerator Storage: For longer-lasting treats, pop them in the fridge inside a sealed container or zip-top bag. They’ll stay good for up to 2 weeks and even firm up a bit more, which some pups prefer.
Freezer Instructions: If you want to make a big batch and stash for later, freeze treats in freezer-safe bags or containers. I like wrapping some in parchment paper first to avoid sticking. They last for about 3 months frozen. Thaw in the fridge overnight or at room temp for a few hours before giving them to your pup.
Glaze Timing Advice: If you plan to glaze, it’s best to do it before baking. Glazing post-baking works only if you use a pumpkin puree wash and store in the fridge, but it won’t crisp up the same way. I usually skip glazing if freezing, as the texture can change a bit.
Frequently Asked Questions
Final Thoughts
Honestly, these pumpkin dog treats have become one of the coziest parts of my baking routine — a simple way to show love to the furry family member who’s always close by. The scent alone fills the kitchen with comforting warmth that reminds me of crisp autumn walks and snug wool sweaters. If you’re anything like me, you’ll delight in the moment your pup gobbles one up with a wagging tail and those happy eyes that say, “More, please!” These treats are nutritious, easy, and downright fun to make. If you’re ready to experiment, maybe try swapping pumpkin for sweet potato next time or dipping treats in peanut butter for a double dose of delicious. I’d love to hear how yours turn out — don’t hesitate to drop a comment, share pictures, or rate the recipe. Happy baking, and here’s to many happy tails enjoying these pumpkin-packed goodies with you!
Autumnal Dog Treats How to Bake Them
Ingredients
Main Ingredients
- 0.5 cup pumpkin puree
- 0.25 cup applesauce
- 3 tablespoon peanut butter unsweetened, natural
- 1 large egg
- 2 cup whole wheat flour can be substituted with oat flour for allergies
- 0.25 teaspoon salt
- 0.25 teaspoon baking soda
Instructions
Preparation Steps
- Preheat the oven to 350 degrees Fahrenheit and line a baking sheet with parchment paper.
- In a mixing bowl, combine pumpkin puree, applesauce, peanut butter, and egg until smooth.
- Add whole wheat flour, salt, and baking soda to the wet ingredients and mix until just combined. Roll out dough on a floured surface and knead if needed.
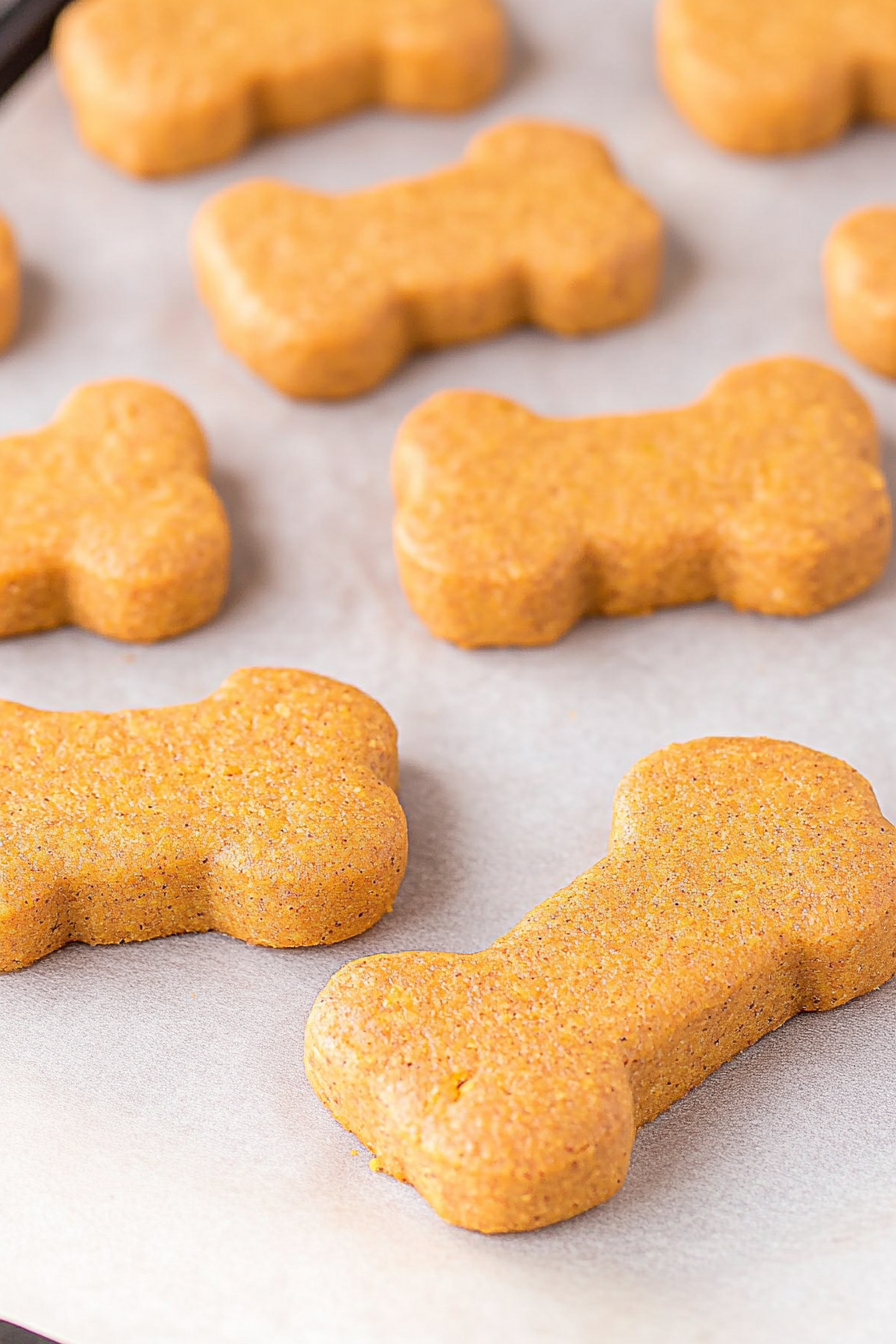
- Use a bone-shaped cookie cutter to cut the dough and place the treats evenly on the prepared baking sheet.
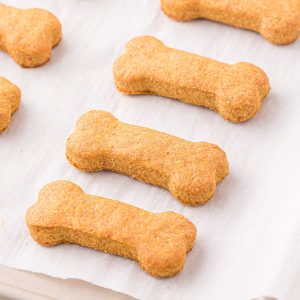
- Bake in the oven for 15-25 minutes until the treats reach your desired hardness.
- Allow the treats to cool completely before serving to your dog.