pumpkin chocolate chip muffins
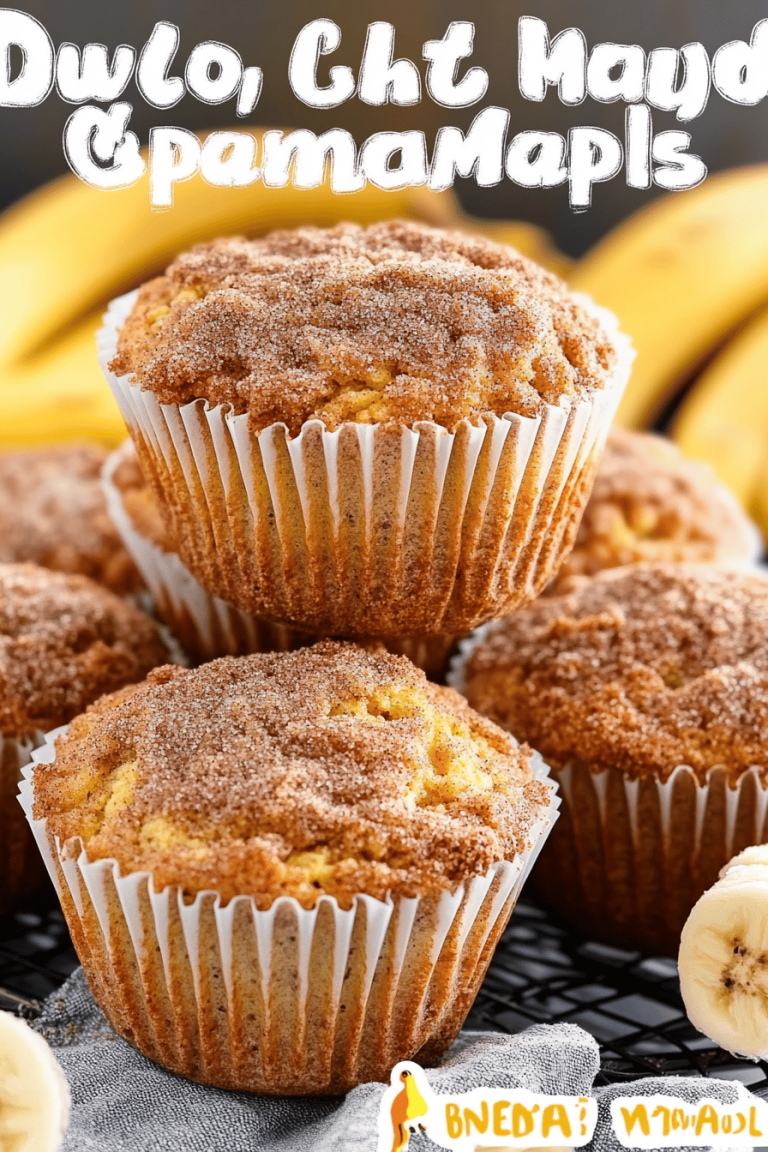
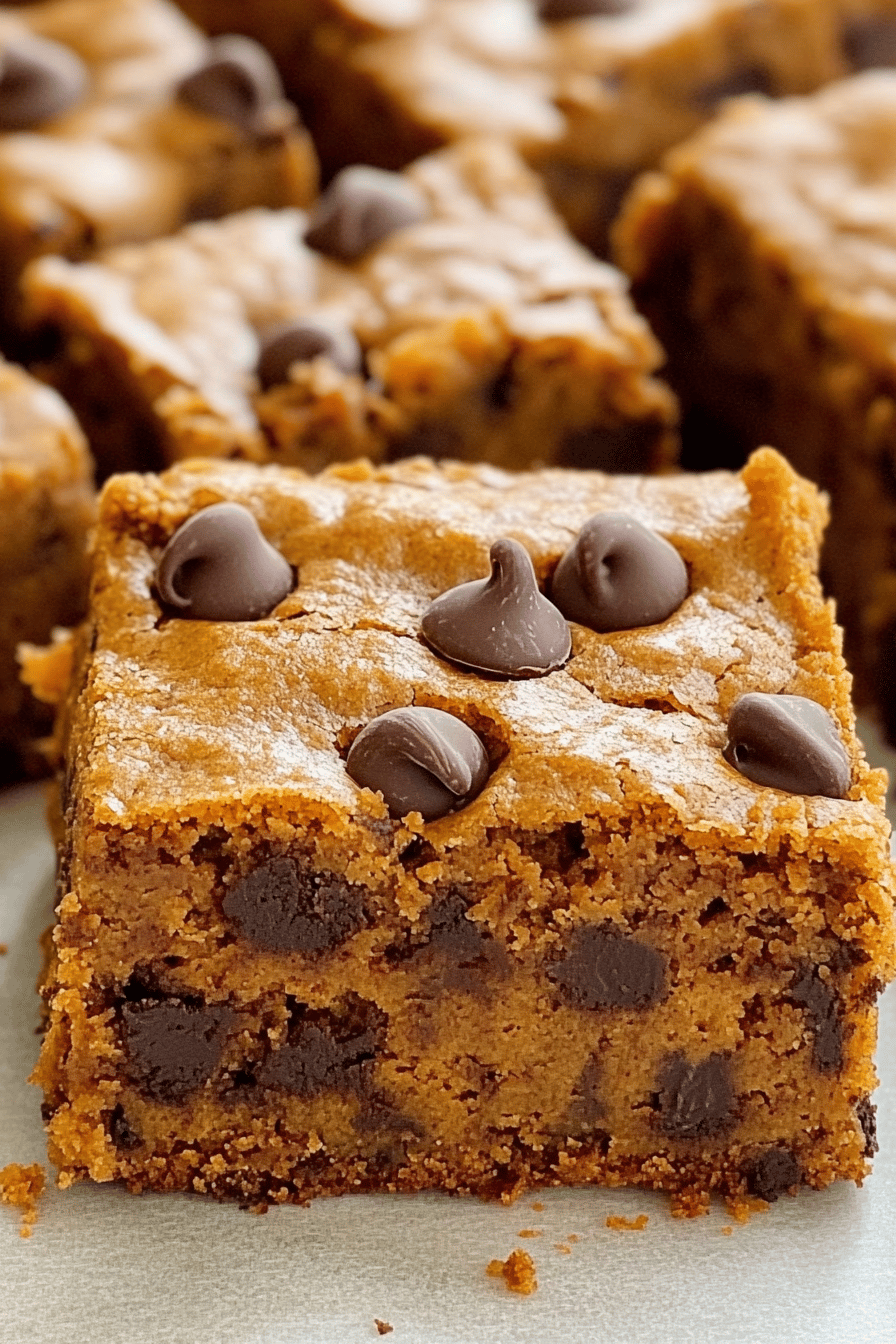
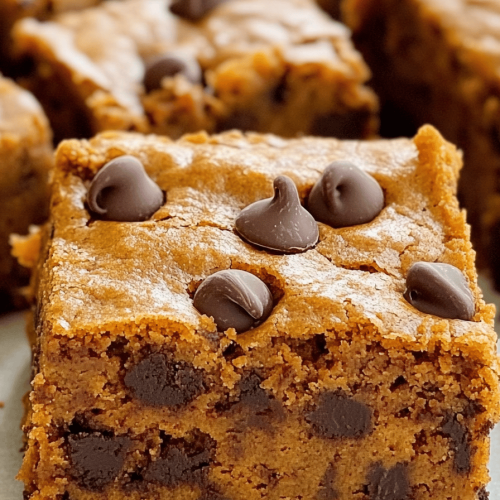
Oh, you guys. If there’s one thing that instantly transports me back to crisp autumn days, cozy sweaters, and the smell of my mom baking, it’s the scent of pumpkin and chocolate mingling in the air. And when I say pumpkin and chocolate, I’m not just talking about any old baked good. I’m talking about my absolute, hands-down, can’t-live-without Pumpkin Chocolate Chip Muffins. Seriously, these aren’t just “good” muffins; they’re the kind that make your neighbors peek out their windows wondering what delicious magic is happening. They’re incredibly moist, bursting with warm spices, and studded with melty pockets of chocolate that are just pure heaven. Forget those dry, crumbly excuses for muffins; this recipe is the real deal. It’s like a hug in muffin form, and honestly, it’s what I crave every single year when the leaves start to turn. If you’re a fan of my apple cinnamon crumble bars, you’re going to adore these pumpkin chocolate chip muffins even more!
What is Pumpkin Chocolate Chip Muffins?
So, what exactly makes these pumpkin Chocolate Chip Muffins so special? Think of them as the ultimate autumn comfort food in portable, bite-sized form. They’re essentially fluffy, tender muffins infused with real pumpkin puree and a blend of warm spices like cinnamon, nutmeg, and cloves, all studded with generous amounts of rich chocolate chips. It’s a classic flavor combination that just works, but my recipe takes it to the next level by ensuring they’re never dry or dense. It’s the perfect balance of sweet pumpkin goodness and decadent chocolate, designed to be a treat that’s both comforting and utterly delicious. No fancy techniques needed here; it’s just pure, unadulterated fall joy baked into every single muffin.
Why you’ll love this recipe?
Honestly, the list of reasons why I’m obsessed with these Pumpkin Chocolate Chip muffins could go on forever, but let me break down the highlights for you. First and foremost, the flavor is just out of this world. The pumpkin puree, when combined with the spices, creates this wonderfully warm and comforting taste that’s quintessentially fall. Then you get those delightful bursts of melted chocolate – it’s the perfect sweet contrast! What I love most about this recipe, though, is its simplicity. You don’t need any special equipment or advanced baking skills. It’s genuinely straightforward, which is a lifesaver on busy mornings or when you get a sudden craving for something sweet. And the cost-efficiency? Amazing! The ingredients are super affordable, making it a budget-friendly way to enjoy a gourmet treat. Plus, they’re incredibly versatile. They’re perfect for a quick breakfast on the go, a delightful addition to a weekend brunch spread, or even a lovely dessert after dinner. My kids ask for these pumpkin chocolate chip muffins all the time, and I feel good about giving them a treat that’s packed with wholesome pumpkin. Compared to other pumpkin baked goods I’ve tried, this recipe consistently delivers that perfect tender crumb and rich flavor that makes it a true winner in my kitchen.
How do I make pumpkin chocolate chip muffins?
Quick Overview
Making these amazing pumpkin Chocolate Chip muffins is surprisingly simple! We’ll whisk together our dry ingredients, then our wet ingredients, combine them just enough to mix, fold in those glorious chocolate chips, and bake them until they’re perfectly golden and fragrant. The beauty of this method is how it ensures a tender crumb every single time. It’s all about gentle mixing and letting the quality ingredients shine. You’ll be amazed at how quickly you can go from pantry staples to a batch of warm, delicious muffins. No fuss, no stress – just pure baking satisfaction!
Ingredients
For the Main Batter:
This is where the magic starts! I always recommend using good quality pumpkin puree, not pumpkin Pie Filling. You want that pure, earthy pumpkin flavor. Make sure your eggs and butter (or oil) are at room temperature; it really helps everything emulsify beautifully. And for the flour, all-purpose is perfect here, but if you want to experiment later, I’ve had great success with a 1:1 gluten-free blend too. The spices are key for that quintessential fall flavor. Don’t skimp on them!
- 2 cups all-purpose flour
- 1 teaspoon baking soda
- 1/2 teaspoon baking powder
- 1 teaspoon ground cinnamon
- 1/2 teaspoon ground nutmeg
- 1/4 teaspoon ground cloves
- 1/2 teaspoon salt
- 1/2 cup (1 stick) unsalted butter, softened (or 1/2 cup neutral oil like vegetable or canola)
- 1 cup granulated sugar
- 1/2 cup packed light brown sugar
- 2 large eggs, room temperature
- 1 teaspoon vanilla extract
- 1 cup pumpkin puree (not pie filling)
- 1/4 cup milk (any kind works, I often use whole milk for richness)
For the Chocolate Chips:
Now for my favorite part! I’m a classic semi-sweet chocolate chip kind of person, but feel free to go wild. Dark chocolate chips, milk chocolate chips, or even a mix! Some people love adding a few chopped pecans or walnuts in here too, which is a great textural addition. The key is to use good quality chocolate chips that melt beautifully.
- 1 cup semi-sweet chocolate chips (plus a few extra for topping, if you like!)
For the Optional Glaze:
This is totally optional, but oh-so-good! It adds an extra touch of sweetness and makes them look extra special. A simple powdered sugar glaze is perfect, but you can also do a cream cheese glaze or even a spiced maple glaze if you’re feeling fancy. I usually keep it simple for everyday baking.
- 1 cup powdered sugar
- 2-3 tablespoons milk (or water)
- 1/2 teaspoon vanilla extract (optional)
Step-by-Step Instructions
Step 1: Preheat & Prep Pan
First things first, let’s get our oven prepped. Preheat it to 375°F (190°C). While the oven is warming up, grab your muffin tin. I like to use paper liners for easy cleanup, but if you prefer, you can lightly grease and flour the muffin cups. If you’re using liners, I usually line all 12 cups. This step is crucial for ensuring even baking and that beautiful, golden-brown crust we all love.
Step 2: Mix Dry Ingredients
In a large bowl, whisk together the all-purpose flour, baking soda, baking powder, cinnamon, nutmeg, cloves, and salt. Whisking them together ensures that all the leavening agents and spices are evenly distributed throughout the batter. This is important because you don’t want pockets of baking soda or areas that aren’t spiced enough. You’re looking for a well-combined, fragrant mixture. Give it a good whisk until it all looks uniformly blended.
Step 3: Mix Wet Ingredients
In a separate, medium-sized bowl, cream together the softened butter (or oil) and both the granulated and brown sugars until light and fluffy. If you’re using butter, this is where you really want to get it nice and smooth. Then, beat in the eggs one at a time, making sure each is fully incorporated before adding the next. Stir in the vanilla extract. Next, add the pumpkin puree and milk, and whisk until everything is just combined. Don’t worry if it looks a little streaky; we’ll smooth it out when we combine it with the dry ingredients.
Step 4: Combine
Now for the crucial part: combining the wet and dry ingredients. Pour the wet ingredients into the bowl with the dry ingredients. Using a spatula or a wooden spoon, mix until *just* combined. It’s super important not to overmix here! A few lumps are totally okay – even desirable! Overmixing develops the gluten in the flour, which can lead to tough muffins, and we definitely don’t want that. Stop mixing as soon as you don’t see any large streaks of dry flour.
Step 5: Prepare Filling
This step is more about preparing the chocolate chips to be added! If you’re adding nuts or anything else, have them ready. This is also where I often tell people to reserve a few chocolate chips for sprinkling on top if they want that extra decorative touch. It’s a small thing, but it makes them look so appealing when they come out of the oven.
Step 6: Layer & Swirl
Gently fold in the chocolate chips into the batter. Again, be gentle! You don’t want to overmix. The batter should be thick and luscious, with those gorgeous chocolate chips peeking through. If you’re feeling fancy and want extra marbling, you can spoon half the batter into your prepared muffin cups, sprinkle some extra chocolate chips, and then add the rest of the batter. Or, just mix them all in – it’s delicious either way!
Step 7: Bake
Spoon the batter evenly into your prepared muffin cups, filling each about two-thirds to three-quarters full. Sprinkle a few extra chocolate chips on top of each muffin if you like! Pop the muffin tin into your preheated oven. Bake for 18-22 minutes, or until a wooden skewer or toothpick inserted into the center of a muffin comes out clean (or with just a few moist crumbs attached). The tops should be beautifully golden brown and spring back slightly when gently touched.
Step 8: Cool & Glaze
Once they’re baked to perfection, remove the muffin tin from the oven. Let the muffins cool in the tin for about 5-10 minutes before carefully transferring them to a wire rack to cool completely. This step is important so they don’t get soggy on the bottom. If you’re planning to glaze them, it’s best to do it once they’ve cooled down a bit, but still slightly warm for the glaze to set nicely. To make the glaze, whisk together the powdered sugar, milk (start with 2 tablespoons and add more if needed for desired consistency), and vanilla extract until smooth. Drizzle or spoon the glaze over the cooled muffins.
Step 9: Slice & Serve
And there you have it! Your incredible pumpkin chocolate chip muffins are ready to be devoured. They are absolutely divine served warm, but they’re also fantastic at room temperature. I love breaking one open when it’s still a little warm, letting that chocolate ooze out. They’re perfect for breakfast, a snack, or even a simple dessert. Enjoy every single bite!
What to Serve It With
These pumpkin chocolate chip muffins are pretty much a complete package on their own, but if you want to elevate your experience or pair them with something special, I’ve got some ideas!
For Breakfast: They’re perfect with a hot cup of coffee or a steaming mug of tea. I sometimes serve them alongside a bowl of plain Greek yogurt or a small fruit salad to add some freshness to the morning. My kids love them with a glass of cold milk, of course!
For Brunch: On a brunch table, these muffins are a star. They pair beautifully with quiches, savory breakfast casseroles, or even just a platter of fresh fruit. A mimosa or a spiced apple cider would be lovely beverages to complement them.
As Dessert: If you’re serving these as a dessert, consider a scoop of vanilla bean ice cream or a drizzle of caramel sauce. They’re also fantastic alongside a warm apple crisp or a slice of pecan pie for an ultimate fall feast.
For Cozy Snacks: Honestly, the best way to enjoy these is with absolutely nothing else but pure enjoyment. Grab one (or two!) with a book and a cozy blanket. They are the epitome of comfort on a chilly afternoon. My family tradition is to have one with a glass of warm spiced cider on the first truly cold day of fall.
Top Tips for Perfecting Your Pumpkin Chocolate Chip Muffins
Over the years, I’ve learned a few tricks that really make these pumpkin chocolate chip muffins sing. Here are my best tips:
Pumpkin Prep: Always, always use pure pumpkin puree, not pumpkin pie filling. The filling has added sugar and spices that will throw off the flavor balance. Make sure your puree isn’t watery; you can even give it a gentle squeeze through cheesecloth if it seems particularly wet. Freshness matters, so check the date on your can!
Mixing Advice: This is probably the most critical tip. Do NOT overmix the batter after adding the dry ingredients to the wet. Mix only until the flour streaks disappear. A few lumps are a good thing! Overmixing leads to tough, rubbery muffins, and that’s a baking tragedy. Gently fold in the chocolate chips. The batter will be thick, and that’s exactly what you want for moist muffins.
Swirl Customization: While these muffins don’t have a separate swirl filling, the chocolate chips themselves create delightful pockets of flavor. For visual appeal, I often reserve a tablespoon or two of chocolate chips to sprinkle on top of each muffin before baking. It makes them look so inviting!
Ingredient Swaps: For the butter, you can absolutely use a neutral oil like vegetable or canola oil. The texture might be slightly different, a bit more tender, but equally delicious. If you don’t have milk, water or even a non-dairy milk like almond or soy milk will work in a pinch. For the spices, feel free to adjust them to your preference. If you love cinnamon, add a little extra!
Baking Tips: Make sure your oven is accurately preheated. An oven thermometer is a great investment if you’re unsure about your oven’s temperature. Avoid opening the oven door too early in the baking process, as this can cause the muffins to deflate. Test for doneness by inserting a toothpick into the center; it should come out clean or with a few moist crumbs. If the tops are browning too quickly, you can loosely tent them with foil.
Glaze Variations: If you’re not a fan of a sweet glaze, consider a light dusting of powdered sugar or a drizzle of melted chocolate. For a cream cheese glaze, simply beat together cream cheese, powdered sugar, and a little milk until smooth. A spiced maple glaze is also divine – just whisk maple syrup with powdered sugar until you reach your desired consistency.
Storing and Reheating Tips
One of the best things about these pumpkin chocolate chip muffins is how well they store. They stay wonderfully moist for days, making them perfect for meal prep or stashing away for unexpected cravings.
Room Temperature: Once completely cooled, store the muffins in an airtight container at room temperature. They’ll stay delicious for about 2-3 days. I like to line the container with a paper towel to absorb any excess moisture, which helps keep them from getting soggy.
Refrigerator Storage: If you want them to last a bit longer, or if your kitchen is particularly warm, you can store them in the refrigerator. Place them in an airtight container, and they should be good for up to 5 days. Just be aware that refrigeration can sometimes slightly alter the texture, making them a bit firmer.
Freezer Instructions: For longer storage, these muffins freeze beautifully! Let them cool completely, then wrap each muffin individually in plastic wrap, followed by a layer of aluminum foil or place them in a freezer-safe bag or container. They’ll keep well in the freezer for up to 2-3 months. When you’re ready to enjoy them, you can thaw them overnight at room temperature, or warm them up gently in a microwave or oven.
Glaze Timing Advice: If you’ve glazed your muffins, it’s best to store them at room temperature as the glaze can become sticky or melt in the fridge. If freezing, I recommend glazing them *after* thawing and reheating, just before serving, for the best appearance and texture of the glaze.
Frequently Asked Questions
Final Thoughts
So there you have it – my ultimate pumpkin chocolate chip muffins recipe! I truly hope you give these a try. They’re more than just a treat; they’re a little piece of autumn comfort that I’ve come to rely on year after year. They’re simple enough for a weeknight bake but special enough for guests. The way the warm spices meld with the sweet pumpkin and melty chocolate is just pure bliss. If you love this recipe, you might also enjoy my spiced pear bread or my classic chocolate chip cookies. Happy baking, and I can’t wait to hear how your pumpkin chocolate chip muffins turn out! Let me know in the comments below if you try them or if you have any special variations you love!
Pumpkin Chocolate Chip Muffins How To
Ingredients
Main Ingredients
- 1 package pumpkin bread or muffin mix
- 0.67 cup water
- 0.25 cup oil
- 2 large eggs
- 0.75 cup chocolate chips
Instructions
Preparation Steps
- Preheat oven to 350°F. Line a 12-cup muffin pan with liners.
- Place mix in bowl and add water, oil, and eggs. Stir until smooth, then stir in chocolate chips.
- Portion batter into prepared pan, about 3-4 tablespoons of batter per muffin liner (⅔ full).
- Bake for 15-20 minutes, or until a toothpick comes out clean. Cool slightly before eating.