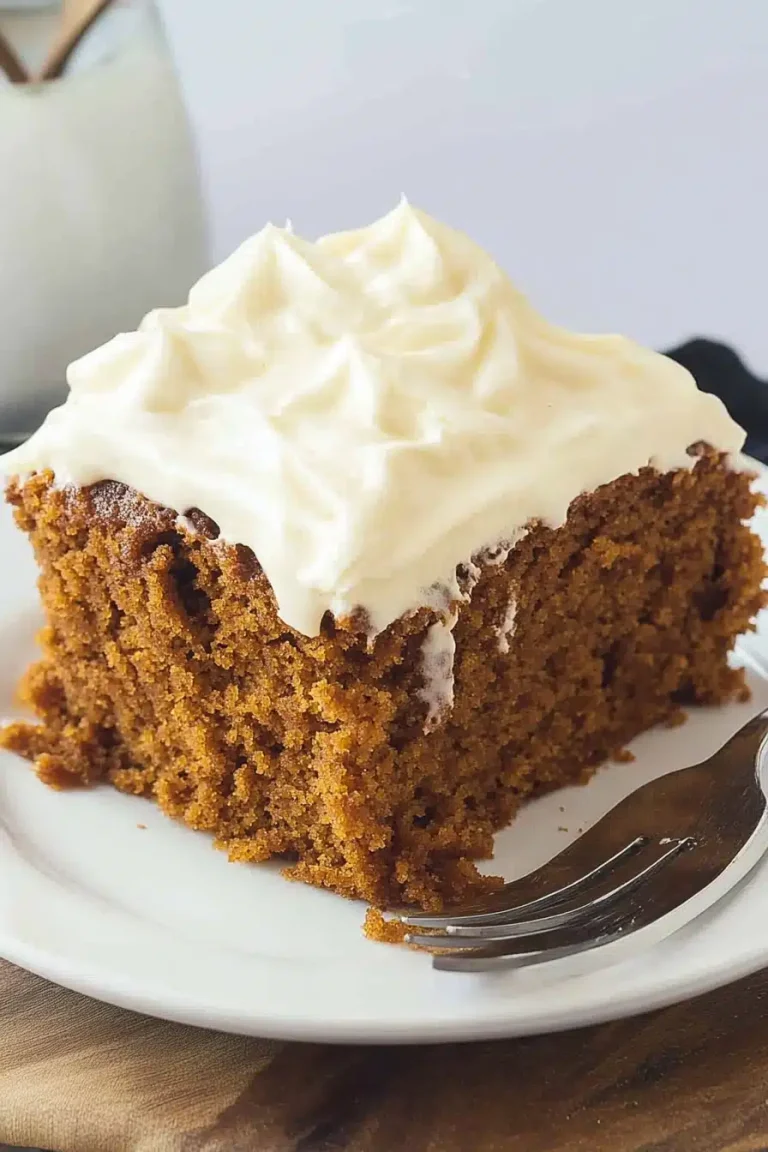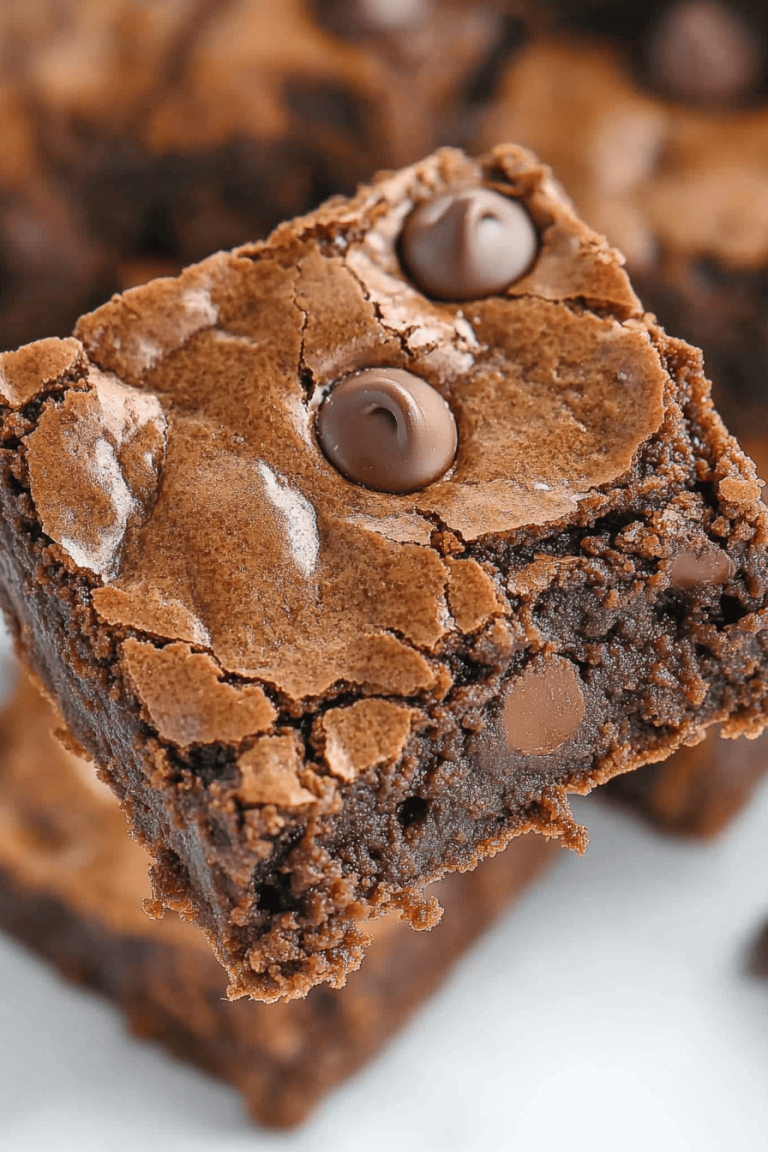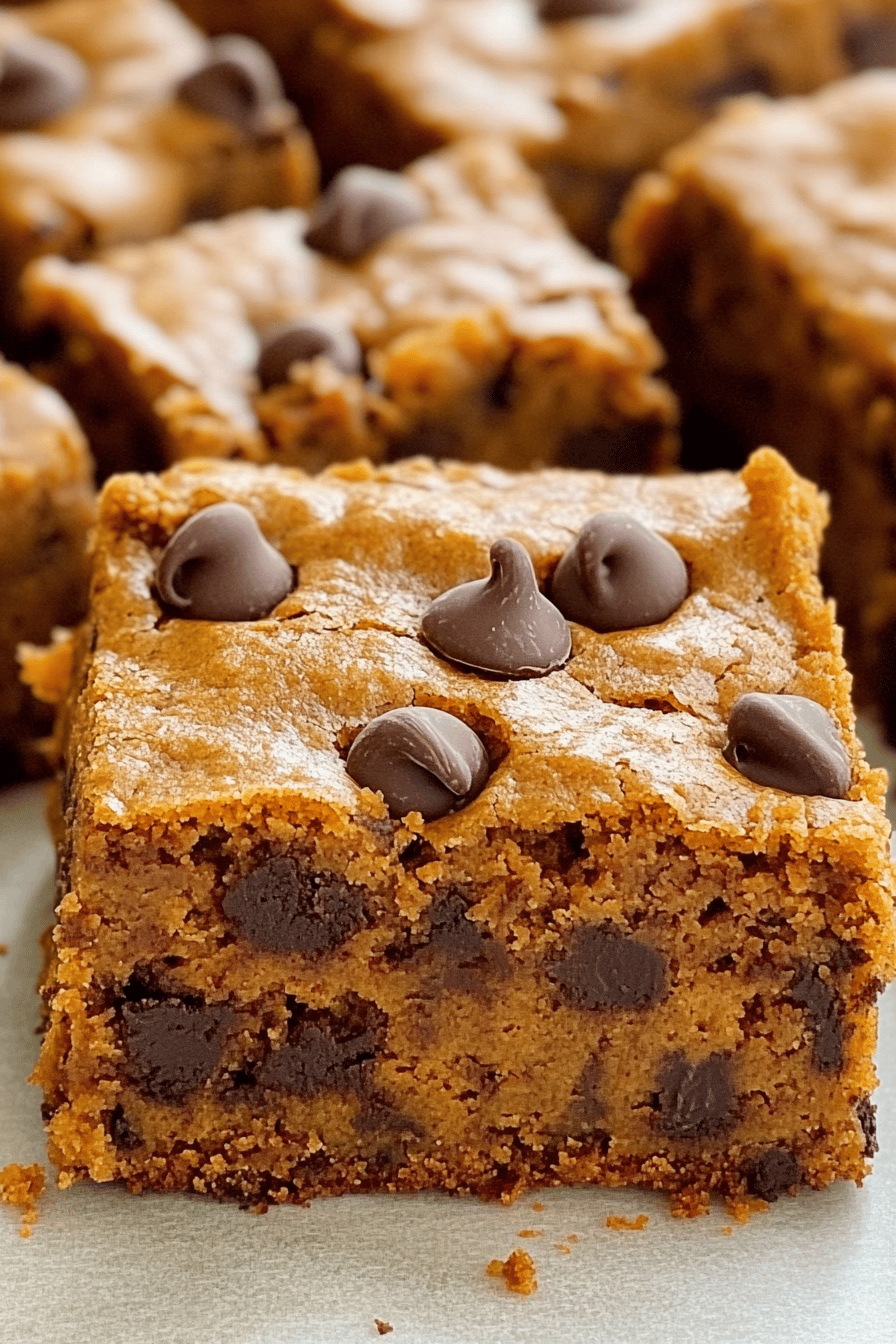
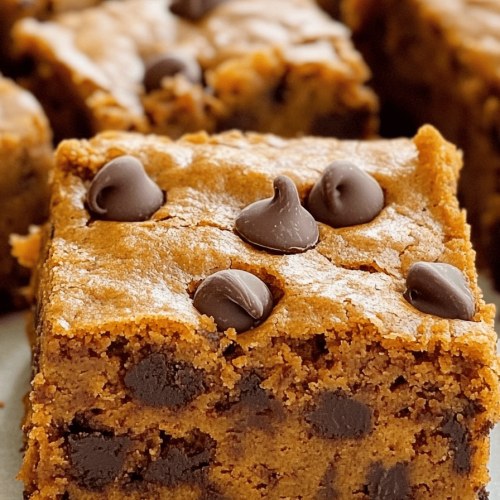
pumpkin chocolate chip cake
You know those recipes that just feel like a warm hug on a crisp autumn day? The ones that fill your home with the most incredible, comforting aroma and disappear from the cake stand faster than you can say “second slice”? Well, this Pumpkin Chocolate Chip cake is exactly that. I’ve been making variations of this for years, tweaking it here and there until it became the absolute, no-questions-asked, family-favorite that it is today. It’s not quite a dense quick bread, and it’s definitely not a light, airy sponge – it sits in that magical sweet spot of being incredibly moist, tender, and packed with all the best fall flavors. Think of it as your go-to for cozy weekends, unexpected guests, or honestly, just because you deserve a treat. It’s the kind of cake that makes people ask, “Who made this?” with genuine awe, and when you sheepishly admit it was you, they look at you like you’ve got a secret superpower. And you do, because you’ve got this recipe!
What is Pumpkin Chocolate Chip Cake?
So, what exactly *is* this glorious creation? At its heart, it’s a wonderfully moist cake that leverages the natural moisture and subtle earthy flavor of pumpkin puree to create an incredibly tender crumb. We then amp up the deliciousness factor with plenty of melty chocolate chips – because, let’s be honest, what’s better than warm chocolate? The “cake” part means it’s a bit more refined than a simple quick bread, often using leavening agents like baking soda and baking powder to give it a lovely rise. It’s the perfect marriage of my childhood love for pumpkin pie and my lifelong obsession with anything Chocolate Chip. It’s that comforting, familiar flavor profile that just screams autumn, but the chocolate chips add that exciting, indulgent twist that makes it feel special and a little bit decadent. It’s the kind of dessert that appeals to everyone, from the pickiest eaters in my family to my grown-up friends who think they’re too cool for “basic” baked goods. They always change their tune once they take a bite!
Why you’ll love this recipe?
Honestly, where do I even begin with why this pumpkin chocolate chip cake is such a winner? Let me count the ways! First, the FLAVOR. Oh, the flavor! It’s this perfect symphony of warm, spiced pumpkin mingling with pockets of gooey, melted chocolate. It’s not overly sweet, letting the natural flavors of the pumpkin and spices shine through, but the chocolate chips add those delightful bursts of pure bliss. It’s the kind of cake that makes you close your eyes after the first bite. Then there’s the SIMPLICITY. I’ve said it before, and I’ll say it again: this is a lifesaver on busy weeknights or when you need a last-minute dessert that looks and tastes like you spent hours in the kitchen. You basically just mix the wet ingredients, mix the dry ingredients, combine them, stir in the chocolate chips, and bake. That’s it! No fancy techniques, no weird ingredients you can’t find at your local grocery store. It’s genuinely straightforward, and even if you’re a beginner baker, you’ll nail this. And let’s talk about COST-EFFICIENCY. Pumpkin puree is super affordable, most of the other ingredients are pantry staples, and the yield is fantastic. You get a big, beautiful cake that feeds a crowd without breaking the bank. It’s also incredibly VERSATILE. While I adore it just as is, you can easily adapt it. Add some chopped pecans or walnuts for an extra crunch, a sprinkle of cinnamon on top before baking, or even a swirl of Cream Cheese Frosting if you’re feeling extra fancy. It’s perfect for breakfast, brunch, dessert, or even just a mid-afternoon pick-me-up with a cup of coffee. What I love most about this particular recipe, though, is the texture. It’s unbelievably moist, thanks to the pumpkin, and stays that way for days. It’s not dry or crumbly like some other cakes can be. It’s just… perfect. It’s the kind of cake that makes you feel proud when you serve it, knowing you’ve created something truly delicious and special with minimal fuss.
How do I make pumpkin chocolate chip cake?
Quick Overview
This recipe is all about combining simple wet and dry ingredients to create a lusciously moist batter, folding in generous amounts of chocolate chips, and letting the oven do its magic. The key is not to overmix, ensuring a tender crumb every single time. It comes together in under 20 minutes of active prep time, making it ideal for those moments when a craving strikes or guests are on their way. You’ll be amazed at how something so easy can yield such incredible results. The aroma alone as it bakes is worth the effort!
Ingredients
For the Main Batter:
2 cups all-purpose flour
1 ½ teaspoons ground cinnamon
½ teaspoon ground nutmeg
½ teaspoon ground ginger
¼ teaspoon ground cloves
1 teaspoon baking soda
½ teaspoon salt
1 ½ cups granulated sugar
¾ cup unsalted butter, softened (I always use good quality butter for the best flavor)
2 large eggs, at room temperature (this really helps them incorporate better)
1 teaspoon vanilla extract
1 cup pumpkin puree (NOT pumpkin Pie Filling – make sure it’s pure pumpkin! This is crucial for the texture and flavor.)
½ cup buttermilk (or you can use ½ cup milk with ½ tablespoon lemon juice or vinegar, let it sit for 5 minutes)
For the Filling:
2 cups semi-sweet chocolate chips (you can absolutely use milk chocolate or Dark Chocolate if that’s your preference! I like a mix.)
For the Glaze:
1 cup powdered sugar
2-3 tablespoons milk or cream
½ teaspoon vanilla extract
Step-by-Step Instructions
Step 1: Preheat & Prep Pan
First things first, let’s get our oven preheating to 350°F (175°C). You’ll want to grab a 9×13 inch baking pan. I like to grease mine really well with butter or cooking spray and then dust it lightly with flour. This ensures that the cake pops out cleanly after baking, without any stubborn bits sticking to the pan. For an extra measure, you can also line the bottom with parchment paper – I do this if I have it on hand, especially if I plan on serving it right out of the pan.
Step 2: Mix Dry Ingredients
In a large bowl, whisk together the all-purpose flour, cinnamon, nutmeg, ginger, cloves, baking soda, and salt. Give it a really good whisk until everything is evenly distributed. This step is super important because it ensures that your leavening agents and spices are spread throughout the batter, so you don’t end up with a bite that’s too salty or too spicy. You want those warm flavors to be consistent!
Step 3: Mix Wet Ingredients
In a separate, medium-sized bowl, cream together the softened butter and granulated sugar until light and fluffy. This usually takes a good 2-3 minutes with an electric mixer, or a bit longer by hand. Then, beat in the eggs one at a time, making sure each is fully incorporated before adding the next. Stir in the vanilla extract. Now, add the pumpkin puree and the buttermilk. Mix until everything is just combined. Don’t worry if it looks a little separated at this stage; it will come together in the next step.
Step 4: Combine
Now for the magic! Gradually add the dry ingredients to the wet ingredients, mixing on low speed (or gently by hand) until *just* combined. I cannot stress this enough: do NOT overmix! Overmixing develops the gluten in the flour, which can lead to a tough cake. Stop mixing as soon as you don’t see any more streaks of dry flour. A few small lumps are perfectly fine and actually preferable. This is where the tender texture comes from!
Step 5: Prepare Filling
This is the easiest part! Simply pour your chocolate chips into a bowl. If you want to prevent them from sinking too much, you can toss them with a tablespoon of the flour mixture from Step 2. It’s a little trick I learned years ago that really helps distribute them more evenly throughout the cake. But honestly, even if they sink a bit, they’ll still be delicious!
Step 6: Layer & Swirl
Pour about half of the batter into your prepared baking pan and spread it evenly. Sprinkle about half of the chocolate chips over the batter. Then, dollop the remaining batter over the chocolate chips and spread it as best you can to cover them. Finally, sprinkle the rest of the chocolate chips over the top. You can gently swirl them in with a knife or toothpick if you like, but I usually just let them nestle in. The goal is to get chocolate goodness in every bite!
Step 7: Bake
Pop that pan into your preheated oven and bake for 30-40 minutes. The baking time can vary depending on your oven, so start checking around the 30-minute mark. You’ll know it’s done when a toothpick inserted into the center comes out clean, or with just a few moist crumbs attached. If it comes out with wet batter, it needs more time. Be careful not to overbake, as this can dry out the cake!
Step 8: Cool & Glaze
Once it’s baked to perfection, take the cake out of the oven and let it cool in the pan on a wire rack for at least 20-30 minutes. This is important for the cake to set properly. While the cake is cooling, whisk together the powdered sugar, 2 tablespoons of milk or cream, and the vanilla extract until you have a smooth, pourable glaze. If it’s too thick, add a little more milk, a teaspoon at a time, until it’s the consistency you like. Once the cake has cooled sufficiently, drizzle the glaze all over the top. It’s going to look beautiful!
Step 9: Slice & Serve
After the glaze has set a bit (or while it’s still slightly wet, if you’re impatient like me!), slice the cake into squares and serve. This cake is absolutely divine served warm, but it’s also wonderful at room temperature. I often find myself sneaking a piece an hour or two after it comes out of the oven, when the chocolate chips are still melty. Pure bliss!
What to Serve It With
This pumpkin chocolate chip cake is so wonderfully versatile, it honestly fits into any occasion! For a simple, cozy BREAKFAST, I love to just slice off a piece and pair it with a strong cup of coffee. It’s rich enough to feel like a treat but wholesome enough to start the day. Sometimes I’ll even toast a slice lightly – the edges get a little crisp, and the chocolate chips become even more melty. When we have family for BRUNCH, I’ll serve it on a pretty cake stand with a dusting of powdered sugar on top, alongside fresh berries and maybe a dollop of whipped cream. It feels a little more elegant but still super approachable. As a DESSERT, it’s a guaranteed crowd-pleaser. I love serving it warm with a scoop of vanilla bean ice cream or a drizzle of salted caramel sauce. The contrast of warm cake, cold ice cream, and rich chocolate is just heavenly. And for those times when you just need a COZY SNACK? This cake is your answer. Grab a slice, curl up on the couch with a mug of hot chocolate or spiced apple cider, and just enjoy. My kids always ask for this when they’re doing homework or just need a little energy boost. It’s that perfect sweet treat that feels both comforting and celebratory, no matter the time of day.
Top Tips for Perfecting Your Pumpkin Chocolate Chip Cake
Over the years, I’ve learned a few things that really elevate this cake from good to absolutely spectacular. For the pumpkin, always use pure pumpkin puree and NOT pumpkin pie filling. The filling has added sugar and spices, which will throw off the flavor balance and texture of your cake. Make sure your pumpkin is well-drained if it seems watery – a quick squeeze through cheesecloth can help if it’s very wet. When it comes to mixing the batter, the golden rule is don’t overmix! Seriously, just mix until the dry ingredients are *barely* incorporated. A few streaks of flour are okay. Overmixing develops the gluten and will result in a tough, dense cake. We want tender and moist! If you’re worried about the chocolate chips sinking, a light coating of flour (about a tablespoon from your measured flour) tossed with the chips can help them stay suspended better. For the swirl, I usually just sprinkle them on top and let them sink a little during baking. If you really want a marbled effect, you could divide the batter and chocolate chips into thirds, layering them up, and then gently swirl with a knife. For ingredient swaps, if you don’t have buttermilk, the milk and lemon juice/vinegar trick works like a charm. It adds a little tang that balances the sweetness beautifully. Some people also swear by using melted butter instead of softened, but I find softened butter creamed with sugar gives a lighter texture. When it comes to baking, ovens can be finicky! Get to know yours. If you find your cakes tend to brown too quickly on top, you can loosely tent it with aluminum foil during the last 10-15 minutes of baking. And for doneness, the toothpick test is your best friend, but remember a few moist crumbs clinging to it are good; wet batter means it needs more time.
Storing and Reheating Tips
This pumpkin chocolate chip cake is surprisingly forgiving when it comes to storage, which is another reason I love it so much. At ROOM TEMPERATURE, as long as it’s not too warm in your house, it will stay wonderfully fresh for up to 2-3 days. Just make sure to cover it tightly with plastic wrap or place it in an airtight container. The moisture from the pumpkin helps keep it from drying out. If you live in a warmer climate or plan on keeping it longer than a few days, REFRIGERATOR STORAGE is your best bet. I wrap it well in plastic wrap, then foil, or place it in a good airtight container. It will stay delicious for up to 5 days in the fridge. When you’re ready to enjoy a slice, you can eat it cold, or let it come to room temperature for about 30 minutes, which I find is the best way to enjoy the flavors and texture. If you want to get fancy, a quick 10-15 second zap in the microwave can revive that melty chocolate chip goodness! FREEZER INSTRUCTIONS are also a lifesaver. You can freeze the whole cake (undecorated with glaze) or individual slices. Wrap them *very* tightly in plastic wrap, then in a layer of foil or a freezer-safe bag. It will keep well for up to 3 months. To thaw, transfer the cake or slices to the refrigerator overnight, then bring to room temperature before serving. For the glaze, I always recommend waiting until the cake has cooled completely before drizzling it on, especially if you plan on freezing it. The glaze can sometimes get a little gummy if frozen, so if you’re freezing, it’s often best to glaze it *after* thawing. Or, you can make a fresh batch of glaze to pour over once it’s thawed and at room temp. Just remember, proper storage is key to keeping this cake moist and delicious!
Frequently Asked Questions
Final Thoughts
So there you have it – my go-to pumpkin chocolate chip cake recipe. It’s the kind of dessert that brings smiles, warms up a room, and makes even a Tuesday feel a little bit special. I genuinely hope you give this a try, because it’s more than just a recipe to me; it’s a little piece of home, a reminder of cozy evenings, and the joy of sharing something delicious with the people you love. The balance of spice, sweet pumpkin, and rich chocolate is just perfection, and the moist, tender crumb makes it utterly irresistible. If you love this recipe, you might also enjoy my Double Chocolate Pumpkin Bread or my Spiced Pear Cake – they have that same comforting vibe! I can’t wait to hear what you think, so please, if you make this, leave a comment below and tell me all about it! I’d love to see your creations and hear about your own personal twists. Happy baking, my friends!
Delicious Pumpkin Chocolate Chip Cake
Ingredients
Main Ingredients
- 2 large eggs
- 1 cup granulated sugar
- 1 cup pumpkin puree
- 0.5 cup canola or vegetable oil
- 2 teaspoons pumpkin pie spice
- 1 teaspoon ground cinnamon (or to taste)
- 1 teaspoons vanilla extract
- 1 cup all-purpose flour
- 1 teaspoon baking powder
- 0.5 teaspoon baking soda
- 0.5 teaspoon salt (or to taste)
- 0.75 cup mini semi-sweet chocolate chips (See NOTE below)
Instructions
Preparation Steps
- Preheat oven to 350F. Line an 8x8-inch pan with aluminum foil for easier cleanup and spray with cooking spray; set aside.
- To a large bowl, add the eggs, sugar, pumpkin, oil, pumpkin pie spice, cinnamon, vanilla, and whisk to combine.
- Add the flour, baking powder, baking soda, salt, and stir until just combined, don’t overmix.
- Add the chocolate chips and stir to combine.
- Turn batter out into prepared pan, smoothing the top lightly with a spatula. Bake for about 35 to 40 minutes (I baked 36 minutes) or until center is set and a toothpick inserted in the center comes out clean or with a few moist crumbs, no batter.
- Allow cake to cool in the pan for at least 1 hour before slicing and serving.