pretzel salad pie
You know, there are some recipes that just feel like a warm hug from your grandma, and this pretzel salad pie is absolutely one of them for me. It’s not really a pie in the traditional sense, more like a layered dessert bar that’s become legendary in my family. I remember the first time I ever tasted it – it was at a potluck, and I swear I went back for seconds (and maybe thirds!) before anyone even noticed. The combination of salty, crunchy pretzels with a creamy, tangy filling and that sweet glaze… it’s just pure magic. It reminds me a bit of a cheesecake crossed with a fancy bar cookie, but somehow even better. If you’ve ever loved those classic ambrosia salads or even just a really good Caramel Cheesecake, you’re going to adore this pretzel salad pie. It’s one of those rare treats that somehow manages to be both incredibly decadent and surprisingly easy to whip up, which is why it’s become my go-to for pretty much any gathering, or honestly, just when I need a serious mood boost.
What is a Pretzel Salad Pie?
So, let’s break down what this “pretzel salad pie” actually is, because the name can be a little confusing! Think of it as a delightful layered dessert that starts with a base made from crushed pretzels mixed with butter and a touch of sugar, all baked until golden and slightly crisp. It’s like a sturdy, sweet-and-salty crust. On top of that, you spread a luscious, creamy filling that’s usually a mix of Cream Cheese, whipped topping, and often some fruit for a pop of flavor and color – hence the “salad” part of the name, though it’s definitely not a savory dish! It’s often studded with things like mandarin oranges, pineapple, or even berries, giving it that refreshing, slightly fruity twist. Finally, it’s all drizzled with a simple, sweet glaze, sometimes made with powdered sugar and milk, or even a caramel sauce. It’s essentially a no-bake cheesecake-like dessert with a fantastic, unexpected crust. It’s more like a no-bake tart or a layered bar, but “pretzel salad pie” just has such a fun, nostalgic ring to it, doesn’t it?
Why you’ll love this recipe?
Why is this Pretzel Salad pie in my binder?flavor profile is just out of this world. You get that perfect balance of sweet and salty that is so incredibly satisfying. The crunchy, buttery pretzel crust is just divine, and it pairs beautifully with the creamy, slightly tangy filling. Then you have those little bursts of fruit – whether it’s the bright citrus of mandarin oranges or the tropical sweetness of pineapple, it just cuts through the richness so perfectly.
What is the taste of food?simplicity of it all. This is the kind of recipe that makes you look like a baking genius without actually requiring you to be one. Most of the magic happens in a bowl and then chilling in the fridge. There’s no complicated pastry making, no water baths for cheesecakes, none of that stress. It’s incredibly forgiving, too. I’ve definitely had nights where I was short on time, and this recipe has been a lifesaver.
And let’s talk about cost-efficiency. The ingredients are all super common and budget-friendly. You probably have half of them in your pantry right now! It’s a fantastic way to create a show-stopping dessert without breaking the bank.
What really sets it apart, though, is its incredible versatility. While I have my favorite fruit combinations, you can totally play around with it. Love blueberries? Toss them in! Feeling a bit more tropical? Add some shredded coconut. It’s also amazing for any occasion. It’s perfect for a summer barbecue because it’s served chilled, but it’s also elegant enough for a holiday gathering. My kids devour it, my husband requests it for his birthday every year, and my friends always ask for the recipe. It’s just one of those universally loved desserts. It’s truly a winner in my book, and I think you’ll agree once you try it!
How to Make Pretzel Salad Pie
Quick Overview
Making this pretzel salad pie is surprisingly straightforward, which is one of its biggest selling points, if you ask me. You’ll start by creating that irresistible pretzel crust by crushing pretzels, mixing them with melted butter and a touch of sugar, and then pressing it into your pan before a quick bake. While that cools slightly, you’ll whip up the creamy, dreamy filling, usually involving Cream Cheese and whipped topping, plus your chosen fruit. Then, it’s just a matter of layering that filling over the crust, chilling it until firm, and finishing it off with a sweet glaze. It’s a blessedly simple process, perfect for when you want something impressive without all the fuss. Trust me, the minimal effort is so worth the incredible payoff!
Ingredients
For the Pretzel Crust:
You’ll need about 2 cups of finely crushed pretzels. I usually toss mine into a zip-top bag and give them a good bash with a rolling pin – it’s quite therapeutic! Make sure they’re finely crushed, almost like coarse breadcrumbs, so they bind together nicely. Then, you’ll need about 1/2 cup of unsalted butter, melted. And just a whisper of sweetness with 2 tablespoons of granulated sugar. This little bit of sugar helps the crust get that lovely golden hue and a nice crunch.
For the Creamy Filling:
Here’s where the magic really happens! You’ll need two 8-ounce packages of cream cheese, softened to room temperature. This is crucial for a smooth filling, so don’t skip it! You’ll also want one 8-ounce container of whipped topping, thawed if it was frozen. For that bright, fruity element, I often use one 11-ounce can of mandarin oranges, drained very well, and sometimes a small can of crushed pineapple, also well-drained. If you’re feeling adventurous, you could even add a cup of Fresh Berries, chopped if they’re large. And for a touch of sweetness and tang, about 1/2 cup of powdered sugar is usually just right, but you can adjust this to your liking.
For the Sweet Glaze:
This is the crowning glory! You can keep it simple with a powdered sugar glaze by whisking about 1 cup of powdered sugar with 2-3 tablespoons of milk until it’s smooth and pourable. Some people love a drizzle of melted caramel sauce, which is also divine! Or even a simple fruit jam thinned with a tiny bit of water. The key is to have it at a consistency that’s easy to drizzle but won’t completely run off the pie.
Step-by-Step Instructions
Step 1: Preheat & Prep Pan
First things first, preheat your oven to 350°F (175°C). You’ll want to grab an 8×8 inch or 9×9 inch baking pan – a square pan works best for this kind of layered dessert, in my opinion. You don’t need to grease it; the butter in the crust will handle all the lubrication you need. Just have it ready to go.
Step 2: Mix Dry Ingredients
In a medium bowl, combine your finely crushed pretzels and the granulated sugar. Give them a good stir to make sure the sugar is evenly distributed throughout the pretzel crumbs. This ensures every bite of the crust has that lovely sweet note.
Step 3: Mix Wet Ingredients
Pour the melted butter into the pretzel and sugar mixture. Use a fork or a spatula to stir everything together until the pretzel crumbs are thoroughly moistened. It should look a bit like wet sand. This is the stage where you can really feel the crust coming together.
Step 4: Combine
Once your pretzel mixture is evenly coated with butter, press it firmly and evenly into the bottom of your prepared baking pan. Use the back of a spoon or a flat-bottomed glass to get it nice and compact. This helps it hold together beautifully once baked. Then, pop it into your preheated oven and bake for about 8-10 minutes, or until it’s lightly golden brown around the edges. You want it to smell deliciously toasty!
Step 5: Prepare Filling
While the crust is baking and then cooling slightly, let’s get that glorious filling ready. In a large bowl, beat the softened cream cheese with an electric mixer until it’s completely smooth and creamy. There should be absolutely no lumps! This is super important for a silky texture. Gently fold in the thawed whipped topping until it’s just combined. Be careful not to overmix at this stage, as you don’t want to deflate the whipped topping too much. Then, gently fold in your drained mandarin oranges and pineapple (or any other fruit you’re using) and the powdered sugar. Stir until everything is just incorporated and you have a lovely, creamy mixture with pops of fruit.
Step 6: Layer & Swirl
Once your pretzel crust has cooled for about 10-15 minutes (you don’t want it piping hot, but it doesn’t need to be completely cold either), carefully spoon the creamy filling evenly over the top. Gently spread it out with a spatula to create a smooth, even layer. If you want a bit of a swirl effect, you can sometimes gently drag a toothpick through the filling and crust mixture, but honestly, just spreading it is perfectly fine and delicious!
Step 7: Bake
Actually, this step isn’t a bake! Once the filling is spread, you’re going to cover the pan loosely with plastic wrap or foil and place it in the refrigerator. Let it chill for at least 4 hours, or ideally overnight. This is key for the filling to set up properly and for the flavors to meld together beautifully. Patience is a virtue here, my friends!
Step 8: Cool & Glaze
Once the pretzel salad pie has set and is firm to the touch, it’s time for the final flourish! Remove it from the refrigerator. If you’re using a powdered sugar glaze, whisk together the powdered sugar and milk until smooth and pourable, then drizzle it artfully over the chilled pie. If you’re using caramel sauce, warm it slightly so it’s easy to drizzle. Let the glaze set for about 10-15 minutes before slicing.
Step 9: Slice & Serve
Now for the best part! Using a sharp knife, slice the pretzel salad pie into squares. I find it’s easiest to wipe the knife clean between cuts for nice, neat slices. Serve chilled. This pie is best enjoyed cold, straight from the fridge, where all those textures and flavors are at their peak. It’s a refreshing, satisfying treat that’s perfect for any occasion.
What to Serve It With
This pretzel salad pie is so wonderfully versatile, it can truly fit into any meal or occasion you can imagine!
For Breakfast: You might think this is strange for breakfast, but hear me out! If you have a smaller piece alongside your morning coffee, it’s a delightful sweet treat. Think of it as a fancy pastry. I sometimes serve a tiny sliver with a fresh cup of coffee on a weekend morning when I want a little indulgence. The slight tanginess of the filling cuts through the richness of the coffee beautifully.
For Brunch: This is where it really shines! It’s a showstopper. Serve it in neat squares on a pretty platter. It pairs wonderfully with mimosas or fresh orange juice. I love to add a few fresh berries or a sprig of mint as a garnish for an elegant touch. It’s a perfect addition to a spread with quiches, fruit salads, and other brunch favorites.
As Dessert: Of course, this is its natural habitat! After dinner, it’s a fantastic alternative to heavier cakes or pies. It’s refreshing and satisfying without being overly filling. I often serve it with a dollop of extra whipped cream or a drizzle of chocolate sauce if I’m feeling extra decadent. It’s also a great accompaniment to a lighter fruit salad if you want to extend the fruit theme.
For Cozy Snacks: On a lazy afternoon or a quiet evening, a piece of this is just pure comfort. It’s perfect with a glass of cold milk or a cup of tea. It’s satisfying enough to curb a sweet craving but light enough that you don’t feel weighed down. It’s my go-to when I’m curled up with a good book or watching a movie. My kids also adore it as an after-school treat! It’s truly a crowd-pleaser that brings smiles every time.
Top Tips for Perfecting Your Pretzel Salad Pie
I’ve made this pretzel salad pie more times than I can count, and over the years, I’ve picked up a few little tricks that really help ensure it turns out perfectly every single time.
Pretzel Prep: The key here is really to crush those pretzels finely. If they’re in large chunks, the crust won’t bind as well and can be crumbly. I like to use a food processor for a super fine, consistent texture, but a zip-top bag and a rolling pin works just as well and is a lot more fun! Make sure to get them to a breadcrumb-like consistency. Also, be sure to use salted pretzels; that salt is crucial for balancing the sweetness.
Mixing Advice: When you’re making the filling, the most important thing is to ensure your cream cheese is completely softened. If it’s even a little bit cold, you’ll end up with lumps, and nobody wants a lumpy pretzel salad pie! Beat it until it’s super smooth and creamy before you add anything else. And when you fold in the whipped topping and fruit, be gentle! You want to keep that airy, fluffy texture. Overmixing will deflate it and make the filling dense.
Swirl Customization: While not strictly necessary, if you want that pretty swirl, don’t go crazy with it. A few gentle drags of a toothpick or skewer will create a lovely pattern without making the filling mushy. Remember, the filling is delicate. For extra visual appeal, you can sometimes reserve a few small pieces of fruit to scatter on top before glazing.
Ingredient Swaps: This recipe is quite adaptable! If you don’t have mandarin oranges, canned peaches (drained and diced) or even canned pears can work. For the whipped topping, if you’re feeling a bit fancy and have the time, homemade stabilized whipped cream is divine! Just ensure you have enough cream cheese to provide structure. For the crust, you can experiment with crushed graham crackers or even shortbread cookies, but honestly, the pretzel crust is what makes this so unique. If you find you want it a bit sweeter, you can always add a little more powdered sugar to the filling, or a tablespoon or two more sugar to the crust mixture.
Baking Tips: While the crust only needs a short bake, don’t skip it! It helps to toast the pretzels slightly and ensures the crust holds together. Keep an eye on it so it doesn’t burn; a light golden brown is perfect. For the chilling part, patience is truly your best friend. The longer it chills, the firmer it will set, and the better the flavors will meld. I often make mine the day before to ensure it’s perfectly set.
Glaze Variations: The glaze is where you can really play! If you want a thinner glaze, just add a tiny bit more milk. For a thicker glaze, add more powdered sugar. A swirl of melted white chocolate or even a thin layer of raspberry jam brushed over the top can also be delicious alternatives to the standard powdered sugar or caramel glaze. Just ensure whatever you choose complements the sweet and salty elements of the pie.
Storing and Reheating Tips
One of the best things about this pretzel salad pie is how well it stores, making it perfect for making ahead.
Room Temperature: For short periods, say an hour or two if it’s not too warm, you can leave it out. However, due to the cream cheese and whipped topping, it’s really best to keep it chilled for safety and to maintain its texture. If you’re serving it at a party, just bring it out about 30 minutes before you plan to cut into it.
Refrigerator Storage: This is where it truly shines. Once it’s chilled and set, cover the pan tightly with plastic wrap or aluminum foil. It will stay delicious in the refrigerator for up to 3-4 days. The pretzel crust might soften a tiny bit over time, but it still tastes amazing. I often find the flavors actually meld and deepen even more on the second day!
Freezer Instructions: Yes, you can freeze this! It’s a great make-ahead strategy. Before glazing, wrap the chilled pie very tightly in a layer of plastic wrap, followed by a layer of aluminum foil. Freeze it for up to 1-2 months. When you’re ready to serve, transfer it to the refrigerator to thaw completely, which will take several hours or overnight. Once thawed, you can add the glaze just before serving. The texture might be slightly different once thawed, but it’s still wonderfully tasty.
Glaze Timing Advice: It’s generally best to add the glaze right before you plan to serve the pretzel salad pie, especially if it’s a powdered sugar glaze. If you glaze it too far in advance and store it in the fridge, the glaze can sometimes become a bit too hard or even start to weep. For caramel sauce, it’s usually okay to apply it a bit earlier, as it tends to stay more pliable.
Frequently Asked Questions
Final Thoughts
So there you have it – my beloved pretzel salad pie! I really hope you give this recipe a try. It’s more than just a dessert for me; it’s a recipe that brings people together, sparks smiles, and creates wonderful memories. It’s that perfect blend of sweet, salty, creamy, and crunchy that just hits all the right notes. What I love most is that it looks and tastes so impressive, yet it’s genuinely easy to make, which is always a win in my kitchen.
If you enjoyed this pretzel salad pie, you might also love my No-Bake Raspberry Cheesecake Bars or my Classic Ambrosia Salad – they have that same kind of delightful, retro-dessert charm that I adore.
I can’t wait to hear what you think of this pretzel salad pie! Please leave a comment below to share your experience, any variations you tried, or just to let me know how much you loved it. Your feedback truly makes my day! Happy baking (or rather, no-baking)!
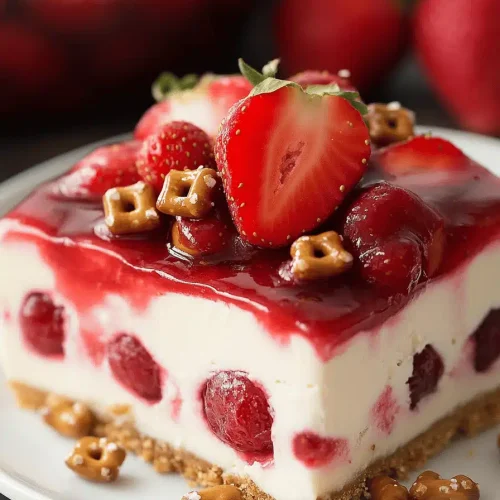
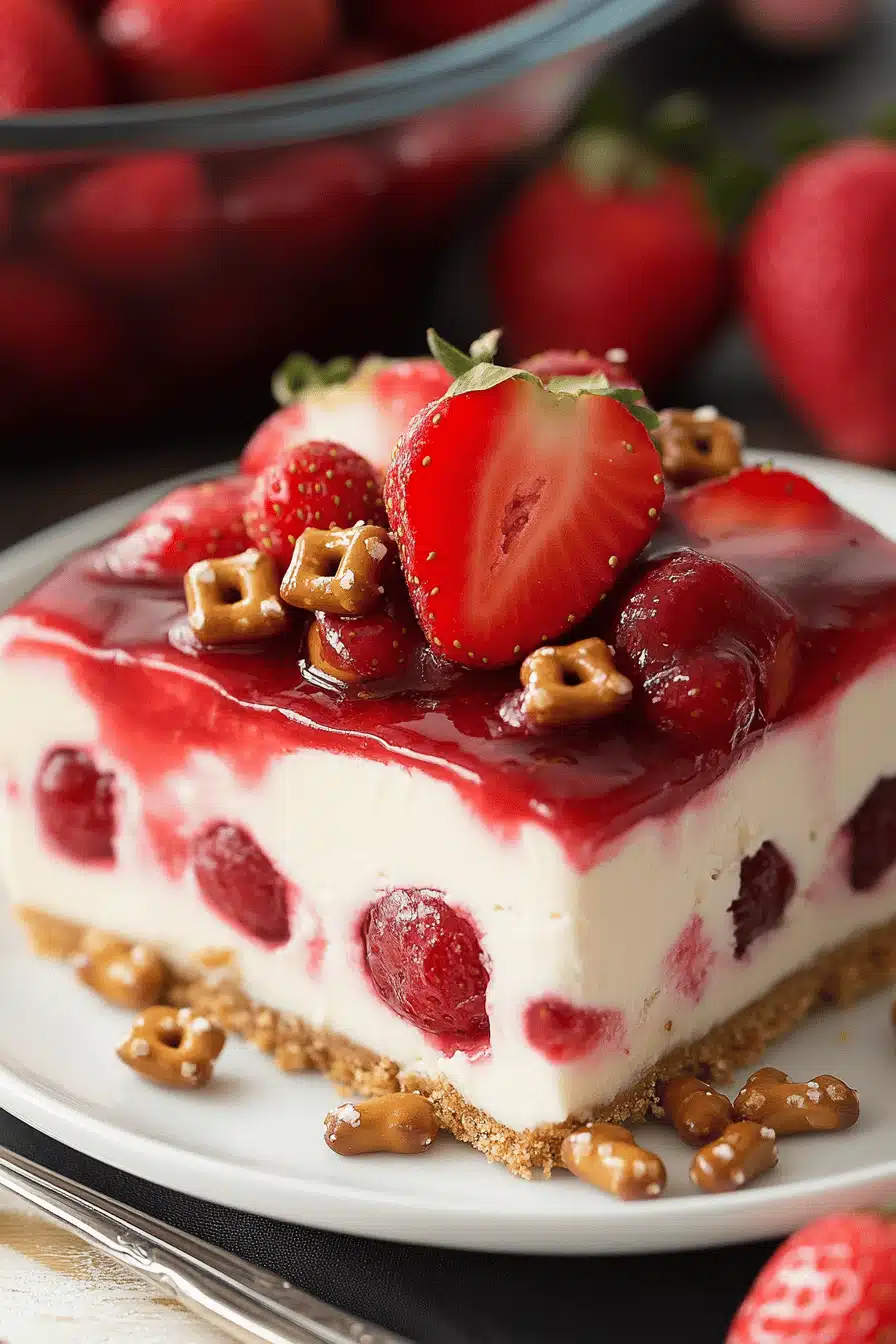
Strawberry Pretzel Salad Pie
Ingredients
Crust
- 1.5 cups Crushed Pretzels (about 3 cups pretzel twists)
- 0.25 cup Granulated Sugar
- 8 tablespoons Unsalted Butter Melted
Filling
- 8 ounces Cream Cheese
- 0.25 cup Granulated Sugar
- 1 teaspoon Vanilla Extract
- 8 ounces Whipped Topping
Topping
- 1 20 ounce can Strawberry Pie Filling or use fresh strawberries
Instructions
Preparation Steps
- Make the crust: Stir finely crushed pretzels and sugar with melted butter. Press into a 9" pie plate. Chill until ready to fill.
- Make the filling: Beat cream cheese, sugar, and vanilla until smooth. Whisk or fold in whipped topping until no lumps remain. Spread in prepared crust.
- Chill for at least 2 hours before serving.
- When ready to serve: top with strawberry pie filling or chopped strawberries.