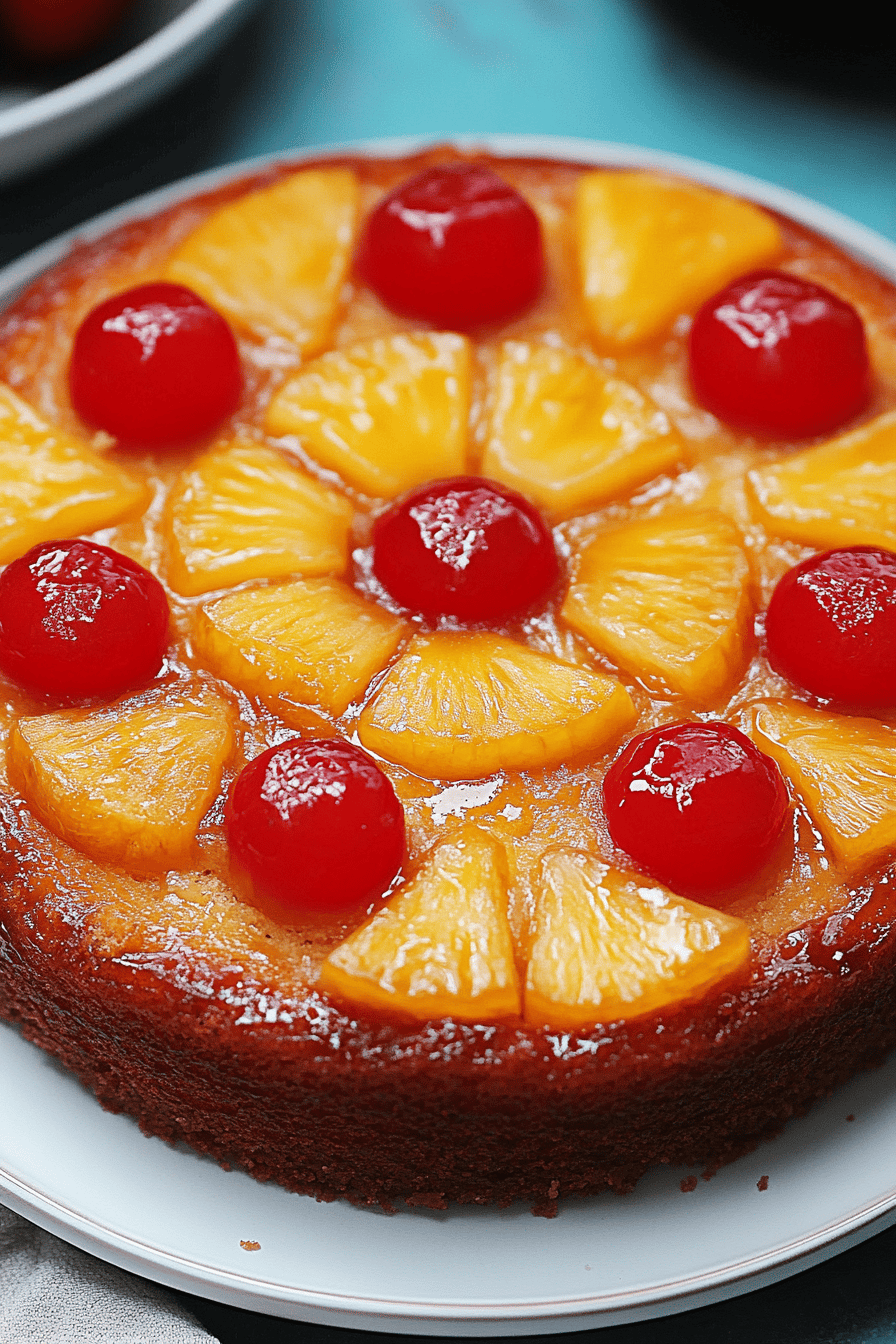
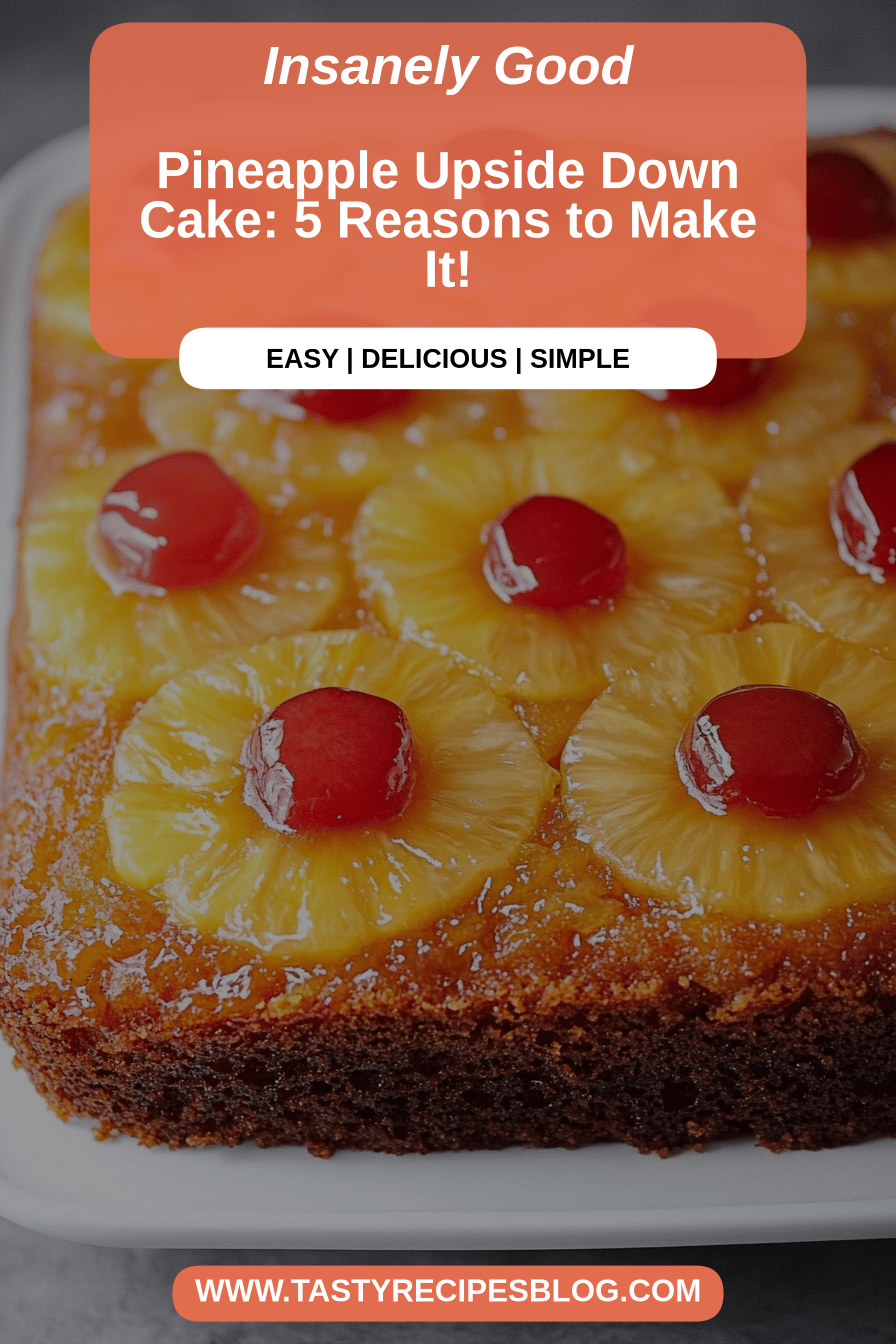
Pineapple Upside Down Cake
What are some recipes that feel like a warm hug? The ones you pull out when you want to impress, or maybe just because you’re craving a little bit of something. What is sunshine on a plate? What is the recipe for Pineapple Upside Down Cake? Is it a staple in my kitchen for years? I remember the first time I made it. I was convinced it was going to be way too complicated, but it turned out surprisingly simple. The result was magical. What do you want in a dessert? The caramelized pineapple rings, the moist, buttery cake. Is there a better way to serve layered cake than my other cakes? If you’ve ever been intimidated by a Pineapple Upside Down Cake, or if you’ve had an not-so-great cake, then you know it’s delicious. But hey, you have to If you’ve had experience before, please stick with me here. What’s a game changer?
What is a Pineapple Upside Down Cake?
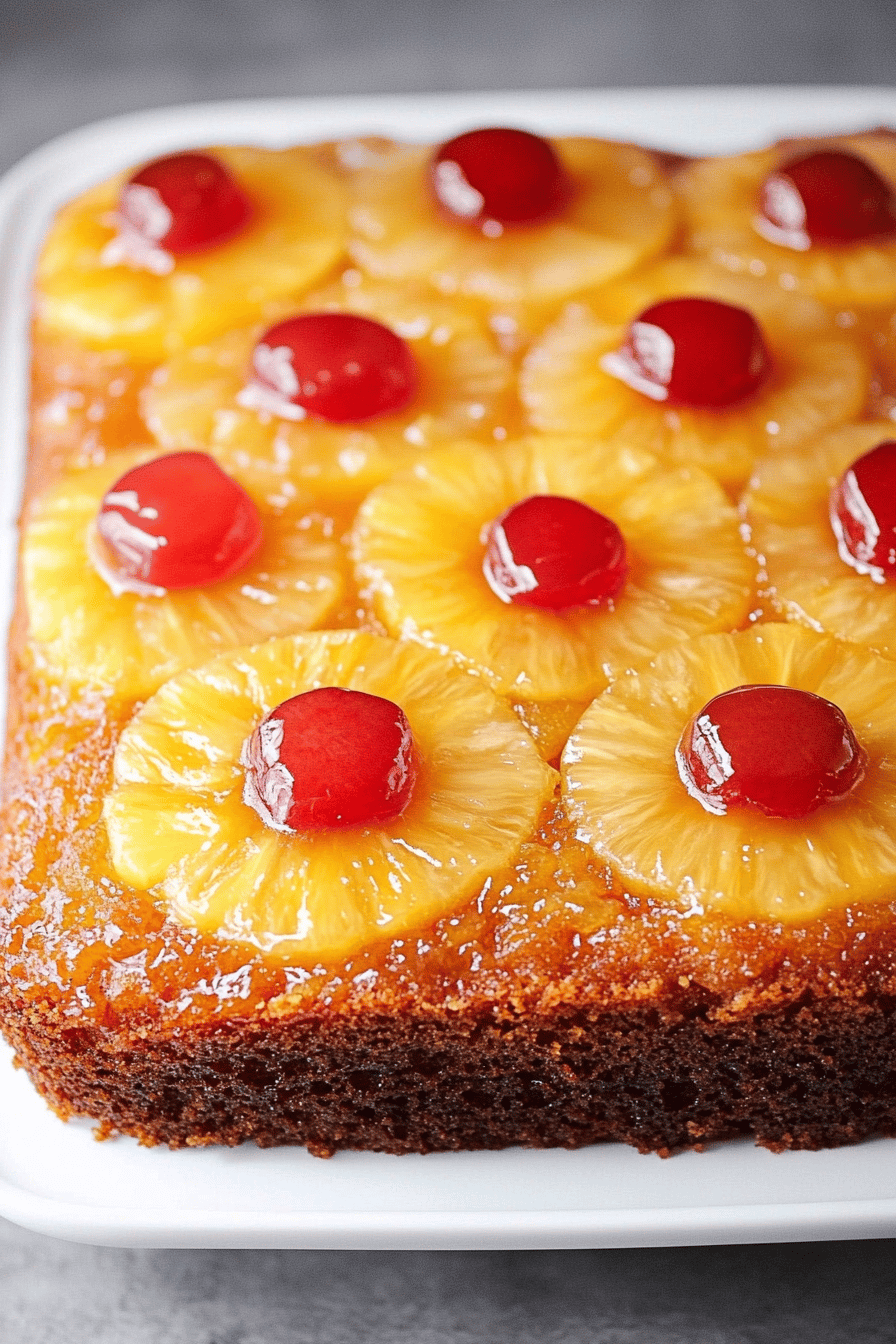
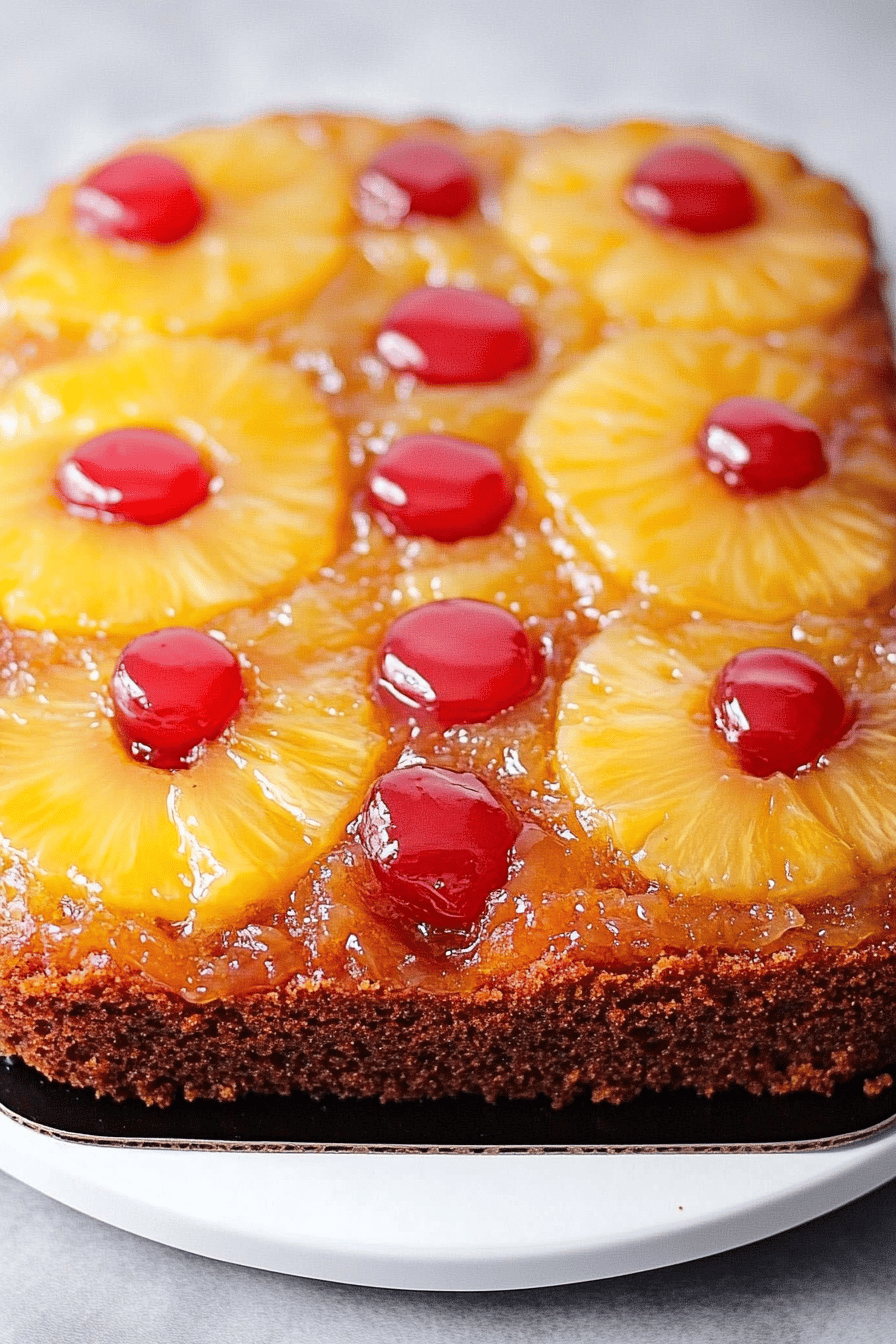
What is this glorious creation? At its heart, Pineapple Upside Down Cake is a classic upside down cake where the fruit topping is the same. How do I pour the batter into a baking pan? When it’s baked and then, as the name suggests, flipped over onto a serving platter, the fruit ends. Up on top, glistening and caramelized. What is a beautiful, edible arrangement of pineapple rings and maraschino cherries nestled in an eggshell? What are some of the best buttery cakes? What happens in the oven? The sugar and pineapple juice create this incredible, syrupy glaze that coats the fruit and the juice. What is the bottom of a cake? Is it the contrast of the sweet, slightly tart pineapple with the tender, golden cake that makes it so good? Isn’t it irres It’s not just a cake. It is more than It’s an experience, a little bit of retro charm baked into Ice Cream that is both comforting and delicious.
Why you’ll love this recipe?
Oh, where do I even begin with why you’ll adore this Pineapple Upside Down Cake? First off, the flavor is just out of this world. You get that intense, sweet-tart punch from the caramelized pineapple, perfectly balanced by the rich, buttery vanilla cake. It’s not overly sweet, which is something I really appreciate, and the texture is just divine – moist, tender crumb that melts in your mouth. What I love most about this recipe, besides the taste, is its surprising simplicity. I know, I know, the “upside down” part sounds fancy, but honestly, it’s just a matter of layering ingredients in the pan. It’s truly a lifesaver on those nights when you want something homemade and special without spending hours in the kitchen. Plus, the ingredients are super budget-friendly – you probably already have most of them in your pantry. It’s also incredibly versatile; it’s fantastic served warm with a scoop of vanilla Ice Cream or a dollop of whipped cream, but it’s also lovely at room temperature. It’s the kind of cake that makes a statement without demanding a ton of effort, which is exactly what I look for in a go-to recipe. It reminds me a bit of my mom’s upside down apple cake, another family favorite, but this pineapple version has a special place in my heart.
How do I make a Pineapple Upside Down Cake?
Quick Overview
What is the secret of a Pineapple Upside Down Cake? How do I make a caramel base in frying pan? You’ll start with butter and Brown Sugar. Then arrange pineapple rings and cherries. What is the best way to make a cake batter? Is it worth it to flip a banana? What a delicious, perfectly glazed cake that’s incredibly easy to achieve.
Ingredients
For the Main Batter: What is the purpose of
- 2 1/4 cups all-purpose flour. 1 cup sourd
- 1 1/2 teaspoons baking powder
- 1/2 teaspoon salt.
- 1 cup (2 sticks) unsalted butter, softened.
- 1 3/4 cups granulated sugar. 1 1/4 cups water.
- 2 large eggs
- 1 teaspoon vanilla extract. 1 tsp.
- 1 cup milk (whole milk works best for richness, but 2% is fine too)
For the Filling:
- 1/2 cup (1 stick) unsalted butter.
- 1 cup packed light brown sugar. 1 teaspoon packed black sugar, 1 tablespoon packed dark
- 1 can (20 ounces) sliced pineapple, drained well (reserve the juice for another use!
- 12 maraschino cherries, drained
For the Glaze:
- Already part of the filling’s brown sugar and butter mixture.
What are the steps in
Step 1: Preheat & Prep Pan
First things first, get your oven preheated to a cozy 350°F (175°C). I like to use a 9-inch round cake pan for this, but a 9×13 inch rectangular pan also works beautifully, you’ll just have a slightly thinner cake. Melt the 1/2 cup of butter right in the pan – I usually do this over low heat on the stovetop, but you can also melt it in a microwave-safe bowl and then pour it into the pan. Sprinkle the packed light brown sugar evenly over the melted butter. Give the pan a gentle swirl to make sure the butter and sugar are well combined and coat the bottom nicely. This is going to form our glorious caramel topping, so don’t skip this step!
Step 2: Mix Dry Ingredients
In a medium-sized bowl, whisk together the 2 1/4 cups of all-purpose flour, 1 1/2 teaspoons of baking powder, and 1/2 teaspoon of salt. Whisking them together ensures that the leavening agent and salt are evenly distributed throughout the flour, which helps the cake rise evenly and have a consistent flavor. You want to avoid any dense pockets of flour. Just a good, thorough whisking is all it takes.
Step 3: Mix Wet Ingredients
In a separate, larger bowl, cream together the softened 1 cup of unsalted butter and 1 3/4 cups of granulated sugar until it’s light and fluffy. This usually takes a few minutes with an electric mixer. Make sure your butter is properly softened – not melted, but spreadable. This step incorporates air, which is key for a tender cake. Beat in the 2 large eggs, one at a time, mixing well after each addition. Then, stir in the 1 teaspoon of vanilla extract. In a small bowl or measuring cup, measure out your 1 cup of milk.
Step 4: Combine
Now, we’re going to alternate adding the dry ingredients and the milk to the creamed butter-sugar mixture. Start by adding about one-third of the dry ingredients and mix on low speed until just combined. Then, add half of the milk and mix. Repeat this process, adding another third of the dry ingredients, then the remaining milk, and finally the last of the dry ingredients. Make sure you don’t overmix here! Overmixing develops the gluten in the flour too much, which can lead to a tough cake. Mix only until the flour streaks have just disappeared. Scrape down the sides of the bowl as needed.
Step 5: Prepare Filling
This is the fun part where we create the beautiful topping. Once your pan is prepped with the melted butter and brown sugar, it’s time to arrange the pineapple. Lay the drained pineapple rings evenly over the brown sugar mixture in the pan. Try to get them as close together as possible to create a solid layer. Then, place a maraschino cherry in the center of each pineapple ring, and tuck a few more in the spaces between the rings. This is where you can really get creative with the pattern!
Step 6: Layer & Swirl
Gently pour the cake batter you made in Step 4 over the arranged pineapple and cherries. Use a spatula to spread the batter evenly, making sure it covers all the fruit. You want to be gentle so you don’t disturb the pineapple too much. The batter will seem thick, which is exactly what you want for this cake.
Step 7: Bake
Place the pan in your preheated oven. Bake for 35-45 minutes, or until a wooden skewer or toothpick inserted into the center of the cake comes out clean. The top of the cake should be golden brown and spring back slightly when gently pressed. Keep an eye on it towards the end of the baking time, as oven temperatures can vary.
Step 8: Cool & Glaze
This is probably the most crucial step for that perfect flip! Let the cake cool in the pan on a wire rack for about 10-15 minutes. This allows the caramel glaze to set up just enough so it doesn’t all run off, but it’s still warm enough to slide out easily. Don’t let it cool too long, or the glaze might stick. After that short cooling period, place a serving platter over the cake pan and carefully, but confidently, flip the whole thing over. Give the pan a few gentle shakes, and lift it away. The cake should slide out beautifully, revealing the glistening pineapple topping.
Step 9: Slice & Serve
Once the cake is flipped, let it cool a little more before slicing. It’s absolutely divine served warm, especially with a scoop of vanilla Ice Cream or a dollop of freshly whipped cream. The warm, gooey caramel and fruit combination is pure bliss. You can also serve it at room temperature, and it’s still absolutely delicious. Enjoy every bite!
What to Serve It With
This Pineapple Upside Down Cake is so versatile, it genuinely works for any meal or occasion! For breakfast, it’s a decadent treat alongside a strong cup of coffee. Imagine a slice of this warm, caramelized goodness to start your day – it’s pure joy. At brunch, it really shines. I love presenting it with a few extra fresh pineapple slices and a sprig of mint for a pop of color. A light, bubbly mimosa or a sparkling cider pairs beautifully. When it’s time for dessert, it’s a showstopper. A scoop of high-quality vanilla bean Ice Cream is my absolute favorite pairing; the contrast of the warm cake and cold ice cream is heavenly. A drizzle of caramel sauce can also take it to the next level, though it’s rarely needed because the cake’s topping is so luscious on its own. For cozy snacks, it’s perfect with a glass of milk or a cup of tea. My kids particularly love it this way after school; they swear it makes homework disappear faster! My Aunt Carol always insisted on serving it with a spoonful of sweetened ricotta cheese, which was surprisingly delicious. Whatever you choose, this cake always feels a little bit special.
How do I make a Pineapple Upside Down Cake?
I’ve made this Pineapple Upside Down Cake more times than I can count, and over the years, I’ve picked up a few tricks that really make a difference. When you’re prepping the pineapple, make sure those rings are really well-drained. Any excess juice can make the caramel topping a bit too watery. I usually pat them dry with a paper towel too, just to be sure. For the brown sugar in the topping, pack it down firmly into the butter in the pan. This helps it melt evenly into a lovely, smooth caramel. Don’t be shy with the cherries; they add a little burst of sweetness and a gorgeous pop of color in the center of each pineapple ring. When you’re mixing the cake batter, resist the urge to overmix once you add the flour. Just mix until everything is *just* combined. A few tiny streaks of flour are better than a tough cake! I’ve found that using room temperature eggs and milk helps everything incorporate smoothly, leading to a better cake texture. For the baking itself, the toothpick test is your best friend. Every oven is a little different, so trust that visual cue and the way the cake springs back when lightly touched. The most important tip for the flip: don’t wait too long after taking it out of the oven. Those 10-15 minutes are crucial. If you let it cool too much, that gorgeous caramel can harden and stick to the pan, making for a messy (though still delicious) situation. I learned that the hard way once and had to scrape some of the topping off to reapply it. Trust me, the timing is key! If you’re feeling adventurous, you can try adding a pinch of cinnamon or a dash of ground ginger to the cake batter for a little extra warmth. It’s a subtle change, but it adds a lovely complexity. And if you don’t have maraschino cherries, candied cherries or even a few fresh cranberries can be used, though the classic cherry is pretty hard to beat for that retro charm.
What are some Storing and Reheating Tips?
This Pineapple Upside Down Cake is so good, you might actually have leftovers – though I can’t promise that! If you do, storing it properly is key to keeping it delicious. At room temperature, it should be fine for about 1-2 days, as long as your kitchen isn’t too warm. I usually cover it loosely with plastic wrap or a cake dome to keep it from drying out. For longer storage, the refrigerator is your best bet. I like to place it in an airtight container or wrap it well in plastic wrap and then foil. It’ll stay good in the fridge for up to 4-5 days. When you’re ready to enjoy a slice from the fridge, it’s lovely served cold, but if you prefer it warm, you can gently reheat it. I usually pop a slice in the microwave for about 15-20 seconds, just to take the chill off and revive that beautiful gooeyness. You can also warm it in a low oven (around 300°F or 150°C) for about 5-10 minutes. For the freezer, I wrap individual slices tightly in plastic wrap, then place them in a freezer-safe bag or container. It can stay frozen for up to 2-3 months. To thaw, simply move a frozen slice to the refrigerator overnight, and then warm it up as you normally would. The glaze timing advice is important: never add the glaze if you’re planning to freeze or refrigerate the cake immediately after baking. The initial glaze forms as it cools in the pan. If you need to add a touch more glaze after refrigerating or freezing, you can quickly melt a little extra butter and brown sugar on the stovetop and drizzle it over the warm slice. It’s a little extra step, but it brings back that fresh-from-the-oven magic!
What are the most frequently asked questions on
Final Thoughts
Honestly, there’s just something so wonderfully nostalgic and comforting about a Pineapple Upside Down Cake. It’s a dessert that feels like a celebration, whether it’s a big occasion or just a Tuesday evening. The vibrant pineapple, the rich caramel, the tender cake – it all comes together in a way that’s truly special. I hope you feel inspired to give this recipe a try. It’s one of those recipes that truly earns its keep in any baker’s repertoire. If you’re a fan of classic, comforting desserts with that perfect balance of sweet and tart, you’re going to absolutely fall in love with this one. It’s also a fantastic starting point if you’re new to baking or looking for a crowd-pleasing recipe that’s not overly complicated. For those who enjoy this, you might also like my classic Yellow Cake with Chocolate Frosting or my Moist Blueberry Muffins for more home-baked goodness. I can’t wait to hear how yours turns out! Don’t be shy about sharing your experience in the comments below – I love hearing your variations and success stories. Happy baking, everyone!