Peanut Butter Cookies
Oh, Peanut Butter Cookies. Just saying the name brings back a flood of memories. Growing up, my grandma had a secret stash of these, always tucked away in a tin, and whenever I was allowed one, it felt like winning the lottery. They weren’t fancy, no sprinkles or elaborate swirls, just pure, unadulterated peanut butter goodness. And let me tell you, that’s exactly what this recipe delivers. Forget those sometimes-crumbly, sometimes-too-hard versions you find elsewhere. This is the real deal. It’s the kind of cookie that makes your kitchen smell like pure comfort and disappears from the plate faster than you can say “second helping.” If you’re anything like me, you probably have a go-to peanut butter cookie recipe, but I promise, once you try these, they’ll be the only peanut butter cookies you’ll ever need. They’re incredibly straightforward, perfect for those moments when a craving hits hard and you need something delicious *now*, but they also feel special enough for a bake sale or a holiday cookie platter. I’ve tried so many peanut butter cookies over the years, seeking that perfect balance of chewy, soft, and bursting with peanut butter flavor, and I can honestly say, this one hits every single mark. It’s the kind of recipe you’ll find yourself coming back to again and again, maybe even passing down yourself someday.
What is the perfect peanut butter cookie?
So, what makes a Peanut Butter Cookie *perfect*? For me, it’s a delicate dance between a few key elements. It needs to have that unmistakable, rich, roasted peanut butter flavor that truly sings. It should be wonderfully soft and chewy in the center, with just a hint of crispness around the edges – that slight resistance when you bite into it is pure magic. It’s not overly sweet, allowing the nutty notes to really shine. Think of it as a hug in cookie form. It’s essentially a classic cookie base, elevated by the star ingredient: peanut butter. We’re not talking about those shortbread-like cookies that are hard as rocks, nor are we going for something so cakey it crumbles with a breath. These are the kind of cookies that leave a delightful smear of peanut butter on your fingers and make you close your eyes in pure bliss with the first bite. It’s that satisfying texture, that deep flavor, and that undeniable comfort that defines what I consider a truly great peanut butter cookie. It’s simple, honest, and incredibly delicious.
Why you’ll love this recipe?
Honestly, there are so many reasons why this recipe has become a staple in my kitchen, and I just know you’re going to fall in love with it too. First and foremost, the flavor is absolutely out of this world. That deep, roasted Peanut Butter taste is so prominent, it’s almost nutty and caramelized. It’s not just a faint whisper of peanut butter; it’s a full-on declaration! Then there’s the texture – oh, the texture! They are perfectly chewy on the inside, with those signature fork marks that hold just a touch of deliciousness, and a delightful, slightly crisp edge. It’s that perfect balance that makes you reach for another one before you’ve even finished the first. And the simplicity! Seriously, you can whip these up with ingredients you probably already have in your pantry. There’s no chilling required, no complicated techniques, just straightforward mixing and baking. It’s genuinely one of the easiest cookies I’ve ever made, making it a lifesaver on busy weeknights or when unexpected guests pop over. Plus, they’re incredibly budget-friendly. Peanut butter, flour, sugar – these are all pantry staples that don’t break the bank. And their versatility? Amazing! You can enjoy them plain, dip them in chocolate, or even sandwich two together with a bit more peanut butter. What I love most about this recipe, though, is the sheer joy it brings. The smell that fills the house while they’re baking is pure happiness, and seeing the smiles on my family’s faces when they take their first bite? Priceless. They’re truly a crowd-pleaser, whether it’s for my kids, my husband, or friends gathering for coffee. They’re far superior to anything you’d find at a chain bakery and have that wonderful homemade charm that just can’t be replicated.
How do I make peanut butter cookies?
Quick Overview
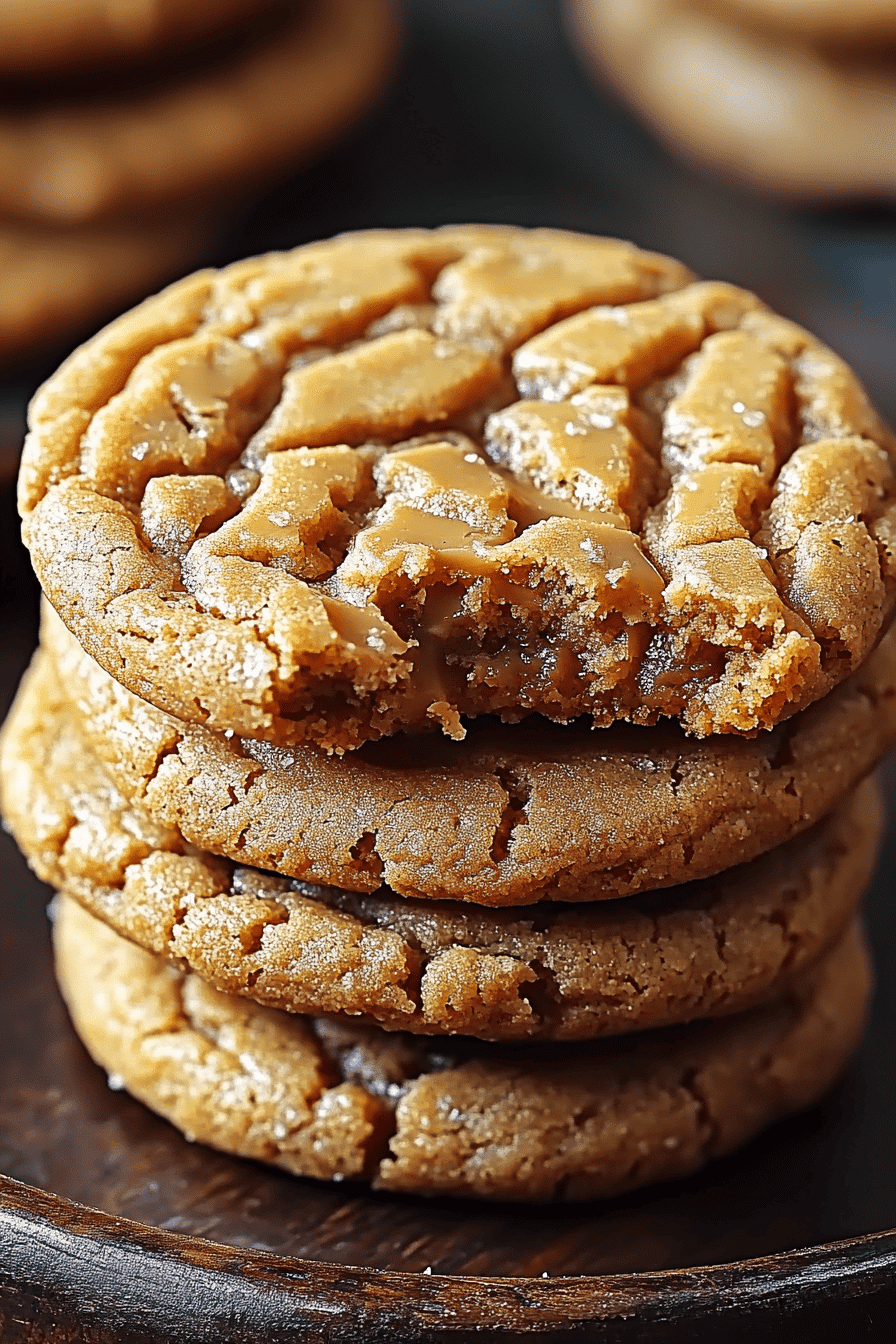
Making these perfect Peanut Butter Cookies is a breeze! You’ll simply cream together your butter and sugars, add in the egg and vanilla, then mix in your dry ingredients. No complicated steps, just straightforward mixing until you have a lovely, cohesive dough. The key is not to overmix, which ensures that tender, chewy texture we all crave. Once the dough is ready, you’ll roll it into balls, press them down (I always love making those classic crosshatch marks with a fork!), and bake them until they’re golden around the edges. They’ll seem a little soft when they come out of the oven, but that’s exactly what you want – they firm up beautifully as they cool. It’s a foolproof method that guarantees delicious results every single time.
Ingredients
For the Cookie Dough: For the Cookie Dough: For the Cookie Dough: For the Cookie Dough: For the Cookie Dough: For
* 1 cup (2 sticks) unsalted butter, softened: Make sure your butter is truly softened, not melted. This is crucial for proper creaming and a tender cookie texture. I like to leave mine on the counter for about an hour before I start. If you’re in a rush, you can cut it into cubes.
* 1 cup packed light brown sugar: The brown sugar is what gives these cookies their signature chewiness and a lovely caramel note. Don’t substitute with granulated sugar if you can help it.
* 1/2 cup granulated sugar: This adds a touch of sweetness and helps with the cookie’s structure.
* 1 large egg: At room temperature, please! It incorporates much better into the batter.
* 1 teaspoon vanilla extract: Use a good quality vanilla extract; it really makes a difference in the overall flavor profile.
* 2 1/4 cups all-purpose flour: Spooned and leveled, not scooped! Scooping can lead to too much flour, resulting in dry cookies.
* 1 teaspoon baking soda: This is our leavening agent, crucial for getting that slight puff and chew. Make sure it’s fresh!
* 1/2 teaspoon salt: Salt balances the sweetness and enhances the peanut butter flavor. If you’re using salted butter, you might want to reduce this slightly.
* 1 cup Creamy Peanut Butter: I always opt for creamy, natural-style peanut butter (the kind where the oil separates). It gives the best flavor and texture. If you use the kind with added sugars and oils, the texture might be a little different, but it will still be delicious! Jif or Skippy work well too if that’s what you have on hand.
Step-by-Step Instructions
Step 1: Preheat & Prep Pan
First things first, get your oven preheated to 375°F (190°C). This ensures the oven is at the perfect temperature when your cookies are ready to go in, helping them bake evenly. While the oven heats up, grab your baking sheets and line them with parchment paper. Parchment paper is your best friend here – it prevents sticking, makes for easy cleanup, and helps the cookies bake without getting too brown on the bottom. If you don’t have parchment, you can lightly grease your baking sheets, but I highly recommend parchment.
Step 2: Mix Dry Ingredients
In a medium bowl, whisk together the all-purpose flour, baking soda, and salt. Whisking them thoroughly ensures that the leavening agent and salt are evenly distributed throughout the flour. This is super important for consistent baking and flavor in every single cookie. Once they’re well combined, set this bowl aside. We’ll bring it back into play in just a moment!
Step 3: Mix Wet Ingredients
In a large bowl (or the bowl of your stand mixer if you have one and want to make life even easier!), cream together the softened unsalted butter, packed light brown sugar, and granulated sugar. Beat them together on medium speed until the mixture is light, fluffy, and pale in color. This step is called creaming, and it incorporates air into the dough, which helps give your cookies a lovely texture. Next, add in the large egg and the vanilla extract. Beat again until everything is well combined and smooth. Don’t worry if it looks a little lumpy; as long as it’s mostly combined, you’re golden.
Step 4: Combine
Now it’s time to bring the wet and dry ingredients together! Gradually add the flour mixture to the wet ingredients, mixing on low speed (or by hand with a spatula) until just combined. Be careful not to overmix at this stage! Overmixing can develop the gluten in the flour too much, leading to tougher cookies. We want tender, chewy cookies, so stop mixing as soon as you no longer see streaks of dry flour. Then, stir in your creamy peanut butter. Mix until it’s just incorporated into the dough. You should have a beautiful, slightly sticky cookie dough that smells heavenly.
Step 5: Shape the Cookies
This is where the fun really begins! Drop rounded tablespoons of dough onto your prepared baking sheets, leaving about 2 inches between each cookie to allow for spreading. I usually use a cookie scoop for consistent size, but two spoons work just as well. Once they’re dropped, take a fork and gently press down on each cookie to flatten them slightly and create that classic crisscross pattern. Some people like to dip the fork in a little extra peanut butter or sugar before pressing, which is a nice touch, but I usually do it dry.
Step 6: Bake
Pop those baking sheets into your preheated oven. Bake for 9 to 11 minutes, or until the edges are lightly golden brown and the centers still look a little soft. Seriously, resist the urge to overbake! They will continue to cook on the baking sheet after you take them out of the oven, and that slight underbaking in the center is what gives them that perfect chewy texture. Oven temperatures can vary, so keep an eye on them, especially the first time you make them.
Step 7: Cool and Enjoy
Once they’re done baking, carefully remove the baking sheets from the oven. Let the cookies cool on the baking sheets for about 5 minutes. This allows them to set up properly. After 5 minutes, transfer them to a wire rack to cool completely. This is the hardest part – waiting for them to cool! But trust me, they’re worth it. Once they’re cooled, they’re ready to be devoured. The aroma alone is enough to make your mouth water, and the taste? Pure peanut butter perfection.
What to Serve It With
These peanut butter cookies are so versatile, they’re perfect for almost any occasion, really! But if you want to take things up a notch or pair them with something special, here are a few ideas that I’ve tried and loved.
For Breakfast: While they might seem like an indulgence, these cookies can totally work as a special breakfast treat! I love them with a hot cup of coffee, black or with a splash of cream. The rich coffee flavor really complements the nutty sweetness of the cookies. You could also serve them alongside some fresh fruit, like berries or a sliced banana, for a more balanced start to the day. They’re also surprisingly good crumbled over a bowl of yogurt or oatmeal for a bit of texture and flavor!
For Brunch: If you’re hosting a brunch, these peanut butter cookies are a guaranteed hit. Arrange them on a nice platter alongside other pastries, muffins, or even some mini quiches. They look so inviting with their classic fork marks. For beverages, a nice cold glass of milk is always a classic, but you could also offer a sparkling cider or a light, fruity tea. They add a wonderful touch of homemade comfort to any spread.
As Dessert: These cookies are fantastic on their own, but they can also be part of a more elaborate dessert. Imagine serving them alongside a scoop of vanilla or chocolate ice cream – pure bliss! Or, you could even use them as the base for mini ice cream sandwiches. Drizzle them with a little melted dark chocolate for an extra decadent touch. They’re also lovely served with a warm cup of hot chocolate on a chilly evening. It’s the perfect sweet ending to any meal.
For Cozy Snacks: This is honestly how we eat them most often in my house! They’re the perfect companion for an afternoon cup of tea, or just a little something sweet to chase away the 3 pm slump. My kids love them after school with a big glass of cold milk. They’re just comforting and satisfying, making them ideal for those moments when you need a little pick-me-up or just want to enjoy a quiet moment with something delicious.
Top Tips for Perfecting Your Peanut Butter Cookies
I’ve made this recipe so many times that I’ve picked up a few little tricks along the way that really help ensure they turn out absolutely perfect every single time. These aren’t complicated, just small adjustments that make a big difference!
Peanut Butter Choice Matters: I mentioned this in the ingredients, but it’s worth repeating. Using a good quality creamy peanut butter, especially one that’s a bit more natural and less processed, really gives the best flavor. The oil separation is a sign of good quality. If you use the super-stabilized kind, your dough might be a bit stiffer, and the peanut butter flavor might not be as pronounced. I’ve found that brands like Jif or Skippy work great if you can’t find a natural variety, but they tend to yield a slightly softer cookie. Just something to keep in mind!
Don’t Overmix the Dough: This is probably the most critical tip for chewy cookies. Once you add the flour, mix *just until combined*. A few tiny streaks of flour are okay; they’ll disappear during baking. Overmixing develops the gluten in the flour, which can make your cookies tough and cakey instead of tender and chewy. I often finish mixing the dough by hand with a spatula to better control it and ensure I don’t overdo it.
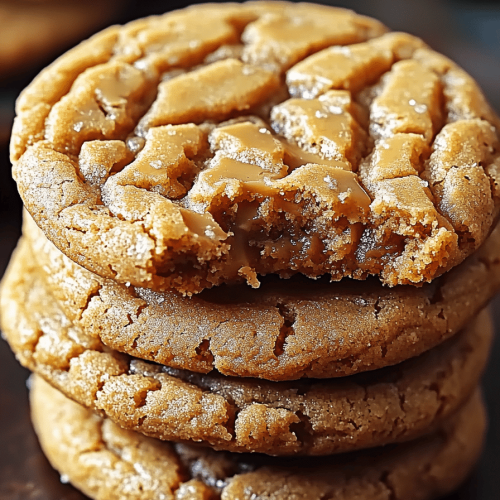
The Fork Marks Are More Than Just Pretty: While the classic crisscross pattern looks great, it also serves a purpose! Pressing the cookies down with a fork helps them spread more evenly during baking. This ensures that you get that wonderful chewy center and slightly crisp edge we’re aiming for. If you leave them as little balls, they’ll stay thicker and might not bake through as nicely.
Watch for Doneness, Not Just Time: Baking times are always estimates because ovens vary. The best indicator that your peanut butter cookies are ready is when the edges are just starting to turn golden brown, but the centers still look a little soft and slightly underbaked. They will continue to firm up on the hot baking sheet as they cool. If you bake them until the centers look completely done, they will likely be dry and crumbly by the time they cool down. Trust the visual cues!
Room Temperature Ingredients are Key: I know it can be tempting to just grab ingredients straight from the fridge, but using softened butter and room temperature eggs makes a world of difference. Softened butter creams much better with the sugars, incorporating more air for a lighter texture. Room temperature eggs emulsify better into the batter, creating a smoother, more cohesive dough. It’s a small step that truly elevates the final cookie.
Consider a Different Peanut Butter: While creamy is my go-to, I’ve experimented with crunchy peanut butter, and it adds a fantastic texture! You’ll still want to cream the butter and sugars first, then incorporate the crunchy peanut butter. The chunks of peanuts add little surprises of nutty goodness throughout the cookie. Just make sure it’s a type of peanut butter that holds up well to baking.
Storing and Reheating Tips
One of the best things about these peanut butter cookies is how well they store, meaning you can enjoy that deliciousness for days! Here’s how I keep them fresh and tasty:
Room Temperature Storage: Once your cookies have completely cooled (and I really mean *completely* cooled – warm cookies can get soggy when stored), you can store them in an airtight container at room temperature for up to 3-4 days. They usually stay wonderfully chewy and soft during this time. Just make sure the container is truly airtight to prevent them from drying out. I often just use a good quality plastic container with a lid, or a decorative cookie tin.
Refrigerator Storage: If you live in a very warm or humid climate, or if you just want them to last a bit longer, you can store them in the refrigerator for up to a week. The texture might become a little firmer, but they’ll still be delicious. When you want to enjoy one, you can eat it cold (some people actually prefer them this way!) or let it sit at room temperature for about 15-20 minutes to soften up. Again, keep them in an airtight container to prevent them from absorbing odors from other foods.
Freezer Instructions: For longer storage, these peanut butter cookies freeze beautifully! You can freeze them either baked or as dough balls.
For baked cookies: Let them cool completely, then wrap them individually in plastic wrap, and then place them in a freezer-safe bag or container. They’ll stay good in the freezer for up to 3 months.
For dough balls: Roll your cookie dough into balls, place them on a baking sheet lined with parchment paper, and freeze until firm (about 1-2 hours). Once frozen, transfer the dough balls to a freezer-safe bag or container. You can bake them directly from frozen, just add a couple of extra minutes to the baking time.
To thaw baked cookies, simply take them out of the freezer and let them come to room temperature. For thawed dough, bake as directed, adding that extra time.
Glaze Timing Advice: If you decide to add a glaze (which is entirely optional but delicious!), I always recommend doing it right before serving or storing at room temperature. Glaze can become sticky or gooey if stored in the refrigerator for too long, especially in an airtight container. If you’re freezing them with glaze, it’s best to add the glaze *after* thawing. This way, it remains fresh and visually appealing.
Frequently Asked Questions
Final Thoughts
So there you have it – my absolute favorite peanut butter cookie recipe. I truly believe these cookies are special because they deliver that authentic, comforting peanut butter flavor and a perfectly chewy texture without any fuss. They’re the kind of treat that brings smiles, sparks joy, and makes any day a little brighter. Whether you’re a lifelong peanut butter lover or looking for a new go-to cookie, I really hope you give these a try. They’re a testament to how simple ingredients, prepared with a little care, can create something truly magical. They’re perfect for sharing, for snacking, or for simply treating yourself. If you do bake them, please, please, *please* let me know how they turn out! I absolutely love hearing about your baking adventures and seeing your creations. Drop a comment below or share your photos – I can’t wait to see them! Happy baking, my friends!
Easy Peanut Butter Cookie Bliss
Ingredients
Main Ingredients
- 1 cup unsalted butter, softened
- 1 cup peanut butter creamy or chunky
- 1 cup granulated sugar
- 1 cup packed brown sugar
- 2 large eggs
- 2 teaspoons vanilla extract
- 3 cups all-purpose flour
- 1 teaspoon baking soda
- 0.5 teaspoon baking powder
- 1 teaspoon salt
Instructions
Preparation Steps
- Preheat oven to 350°F (175°C). Line baking sheets with parchment paper.
- In a large bowl, cream together the softened butter, peanut butter, granulated sugar, and brown sugar until light and fluffy.1 cup unsalted butter, softened
- Beat in the eggs one at a time, then stir in the vanilla extract.1 cup unsalted butter, softened
- In a separate bowl, whisk together the flour, baking soda, baking powder, and salt.1 cup unsalted butter, softened
- Gradually add the dry ingredients to the wet ingredients, mixing until just combined. Do not overmix.
- Roll the dough into 1-inch balls and place them on the prepared baking sheets.
- Using a fork, press down on each cookie in a crisscross pattern to flatten slightly.
- Bake for 9-12 minutes, or until the edges are lightly golden and the centers are still slightly soft.
- Let the cookies cool on the baking sheets for a few minutes before transferring them to a wire rack to cool completely.