Peanut Butter Burgers
You know those dishes that just *feel* like home? The ones that bring everyone to the table with happy sighs and requests for seconds before the first bite is even finished? Well, this is one of those for us. I remember the first time I tried to make something akin to these Peanut Butter Burgers. It was a complete accident, a happy culinary mishap born out of a need to use up some overripe bananas and a lingering craving for something sweet. Little did I know, I was on the cusp of creating a recipe that would become a staple in our kitchen, a true crowd-pleaser that even my pickiest eaters adore. It’s funny how sometimes the best things happen when you’re just playing around in the kitchen, isn’t it? This recipe is like a warm hug, comforting and satisfying in a way that few other things are. If you’ve ever loved a good banana bread, or a rich, fudgy brownie, you’re going to fall head over heels for these Peanut Butter Burgers. They’re not *actual* burgers, of course, but the name just stuck because they’re so perfectly portioned and satisfying, like a mini meal you can devour. I’m so excited to share this with you!
What is peanut butter burger?
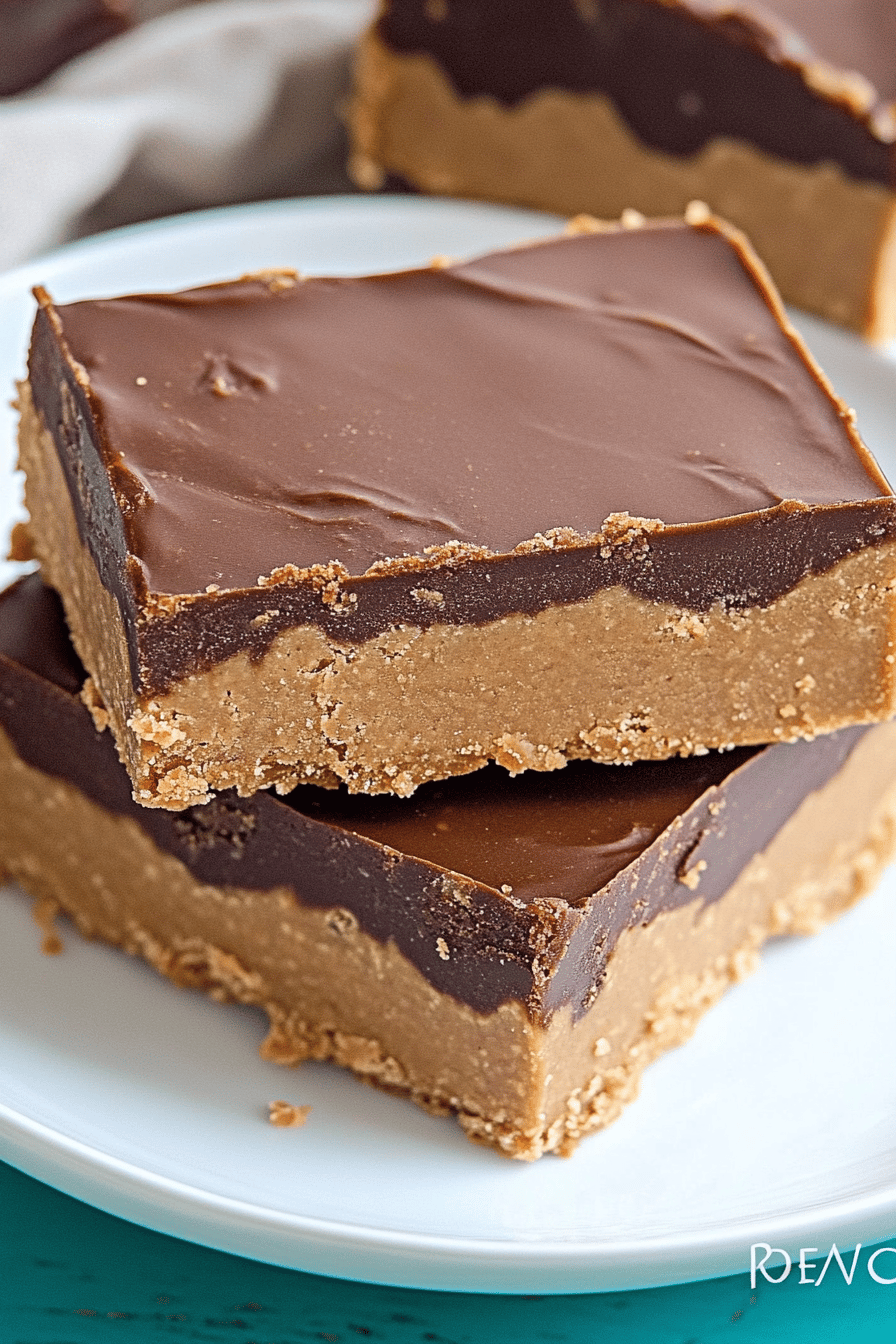
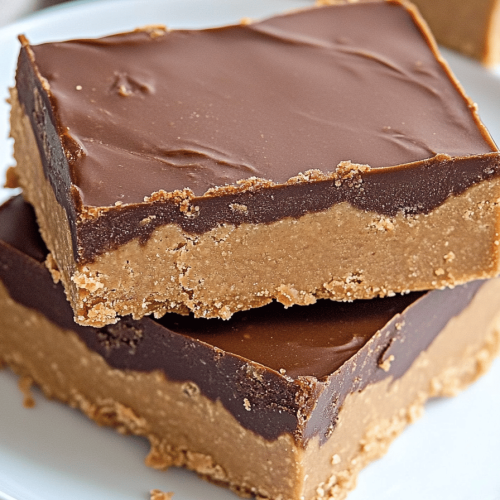
So, what exactly are these “Peanut Butter Burgers”? Don’t let the name fool you – there’s no ground beef or grill involved! Think of them as incredibly moist, dense, and utterly delicious little bars or fudgy bites, packed with the irresistible combo of Creamy Peanut Butter and sweet, ripe bananas. They’re basically a brownie-meets-blondie situation, but with a wholesome twist that makes them feel a little more virtuous. The “burger” part comes from how we cut them – into neat squares or rectangles, giving them a satisfying, substantial feel. They’re essentially a perfectly balanced treat: not too cakey, not too dense, but just right. It’s that perfect blend of simple ingredients coming together to create something truly special. They’re the kind of thing you can whip up when you need a quick dessert, a sweet breakfast treat, or even a pick-me-up snack that feels a little more grown-up than a handful of candy.
Why you’ll love this recipe?
Honestly, I could rave about these Peanut Butter Burgers all day, but let me try to sum up why they’ve become my go-to recipe. First off, the flavor is absolutely divine. That deep, nutty richness of peanut butter paired with the natural sweetness and moisture of bananas is a match made in heaven. It’s comforting, nostalgic, and just plain delicious. And the texture? Oh my goodness. They’re incredibly moist and tender, with a slightly chewy edge and a fudgy center that just melts in your mouth. It’s the kind of texture that’s hard to achieve, but this recipe nails it every single time.
Then there’s the simplicity. This is a lifesaver on busy weeknights or when unexpected guests pop by. You likely have most of the ingredients in your pantry right now. There are no complicated steps, no fancy equipment needed – just a bowl, a whisk, and a baking pan. I’ve made these more times than I can count, and they never fail to impress. Plus, they are incredibly cost-efficient. Bananas and Peanut Butter are budget-friendly staples, making this a sweet treat that won’t break the bank. It’s so much better than buying expensive pre-made bars or desserts when you can create something this amazing yourself for a fraction of the cost.
And the versatility! While they’re perfect on their own, I love experimenting with them. You can add chocolate chips, chopped nuts, or even a swirl of jam. They’re fantastic served warm with a scoop of ice cream, or just as they are with a cup of coffee. What I love most about this recipe is that it’s so forgiving. Even if you’re a beginner baker, you can make these and feel like a pro. It’s the kind of recipe that builds confidence in the kitchen. If you’re looking for a healthier-ish dessert option that still feels indulgent, these Peanut Butter Burgers are your answer. They’re a step above your average banana bread and way more exciting than a plain cookie, offering that perfect sweet spot for any craving.
How to Make Peanut Butter Burgers
Quick Overview
In a nutshell, you’ll be mashing ripe bananas, mixing them with peanut butter and a few other wet ingredients, then combining that with your dry ingredients. The batter will be thick and rich, almost like a cookie dough. You’ll spread it evenly into a prepared pan, maybe swirl in some extra peanut butter or chocolate chips if you’re feeling fancy, and bake until golden and set. The result is a dense, moist, and incredibly satisfying bar that tastes like pure comfort. It’s a straightforward process that guarantees delicious results, even if you’re short on time.
Ingredients
For the Main Batter:
3 very ripe bananas, mashed (about 1 ½ cups) – The riper, the sweeter and more flavorful! Look for those with plenty of brown spots. If your bananas aren’t super ripe, your bars might be a little less sweet and moist, so don’t skimp here.
1 cup creamy peanut butter, natural is best – Natural peanut butter (just peanuts and salt) tends to give the best flavor and texture without added sugars or oils. Make sure it’s well-stirred before measuring.
½ cup unsalted butter, melted – You can use salted butter if that’s what you have, just be mindful of the salt in the overall recipe.
1 teaspoon vanilla extract – This really rounds out the flavors and adds that lovely baked good aroma.
2 large eggs – Room temperature eggs incorporate better into the batter.
1 ½ cups all-purpose flour – I’ve tested this with a good quality gluten-free blend, and it works well, just expect a slightly different texture.
½ cup granulated sugar – You can adjust this slightly based on how sweet your bananas are and your personal preference.
1 teaspoon baking soda – This helps give them a little lift and tender texture.
½ teaspoon salt – Crucial for balancing the sweetness and bringing out the flavors.
½ cup milk (any kind works) – I’ve used whole milk, almond milk, and even oat milk, and they all work beautifully, adding to the moisture.
For the Filling (Optional, but highly recommended!):
¼ cup creamy peanut butter – For swirling extra peanut butter goodness throughout.
½ cup chocolate chips (semi-sweet or dark) – Because who doesn’t love chocolate with peanut butter?
For the Glaze (Optional):
½ cup powdered sugar
2-3 tablespoons milk or cream
½ teaspoon vanilla extract
Step-by-Step Instructions
Step 1: Preheat & Prep Pan
Preheat your oven to 350°F (175°C). Grease and flour an 8×8 inch baking pan, or line it with parchment paper, leaving an overhang on the sides for easy removal. This step is crucial to prevent sticking and ensure your beautiful Peanut Butter Burgers come out in one piece.
Step 2: Mix Dry Ingredients
In a medium bowl, whisk together the flour, granulated sugar, baking soda, and salt. Give it a good whisk to ensure everything is evenly distributed. This prevents pockets of baking soda or salt in your finished product and ensures a consistent texture throughout. Make sure there are no clumps!
Step 3: Mix Wet Ingredients
In a large bowl, mash your ripe bananas until mostly smooth. You can leave a few small lumps if you like a bit of texture. Add the peanut butter (1 cup), melted butter, vanilla extract, and eggs. Whisk everything together until well combined and smooth. It might look a little thick at this stage, which is totally fine.
Step 4: Combine
Pour the dry ingredients into the wet ingredients. Add the milk. Stir with a spatula or wooden spoon until *just* combined. Be careful not to overmix! Overmixing can lead to tough bars. A few streaks of flour are okay; they’ll disappear as it bakes. The batter should be thick and fudgy.
Step 5: Prepare Filling (If using)
If you’re adding chocolate chips, stir them into the batter now. If you want to swirl in extra peanut butter, microwave the ¼ cup of peanut butter for about 15-20 seconds until it’s slightly softened and pourable. This makes it easier to swirl.
Step 6: Layer & Swirl
Spread about two-thirds of the batter evenly into your prepared baking pan. Dollop spoonfuls of the extra peanut butter (if using) over the batter. Then, spread the remaining batter on top. If you’re using chocolate chips, you can sprinkle some more on top now. Use a knife or skewer to gently swirl the peanut butter through the batter, creating beautiful patterns. Don’t over-swirl, or the colors will just blend together. Just a few gentle passes are enough!
Step 7: Bake
Bake for 25-35 minutes, or until a toothpick inserted into the center comes out with moist crumbs attached (not wet batter). The edges should be golden brown. Baking time can vary depending on your oven, so keep an eye on them. I usually start checking around the 25-minute mark.
Step 8: Cool & Glaze
Let the Peanut Butter Burgers cool in the pan for at least 15-20 minutes before attempting to remove them or cut them. This allows them to set up properly. If you’re adding the glaze, whisk together the powdered sugar, milk, and vanilla until smooth. It should be pourable but not too thin. Drizzle it over the cooled bars. Allow the glaze to set before slicing.
Step 9: Slice & Serve
Once cooled (and glazed, if using), use the parchment paper overhang to lift the entire block out of the pan onto a cutting board. Slice into squares or rectangles. Serve warm or at room temperature. They are absolutely divine when they’re still slightly warm!
What to Serve It With
These Peanut Butter Burgers are incredibly versatile and can be enjoyed in so many ways! They truly fit into any meal or snack occasion.
For Breakfast: They make a fantastic, satisfying breakfast treat. Serve them warm with a strong cup of coffee. They’re more substantial than a typical pastry and offer a good mix of protein and carbs to start your day. Sometimes I’ll even pop one in a toaster oven for a minute to warm it up in the morning!
For Brunch: Elevate them for a brunch spread by serving them alongside fresh fruit, yogurt parfaits, or even a savory egg dish. A sprinkle of chopped peanuts on top or a dusting of powdered sugar can make them look extra special. Pair them with a mimosa or a fancy latte for a celebratory feel.
As Dessert: This is where they really shine! They are decadent on their own, but serving them warm with a scoop of vanilla bean ice cream is pure bliss. A drizzle of extra chocolate sauce or a dollop of whipped cream takes them over the top. They’re perfect for satisfying that late-night sweet craving without feeling too heavy.
For Cozy Snacks: This is probably how we eat them most often. Grab a mug of tea or hot chocolate and a Peanut Butter Burger for a comforting afternoon pick-me-up. They’re perfect for sharing with the kids after school, or just for a quiet moment of indulgence for yourself. My husband loves them with a cold glass of milk, which always reminds me of my own childhood!
My kids genuinely ask for these all the time, especially when they see those brown spots on the bananas. It’s become our little family tradition to turn those bananas into these delightful treats. They’re a hug in every bite, and that’s the best kind of food, don’t you think?
Top Tips for Perfecting Your Peanut Butter Burgers
I’ve made these Peanut Butter Burgers countless times, and over the years, I’ve picked up a few little tricks that I think make a big difference. So, lean in, because I’m sharing my secrets!
Zucchini Prep: Wait, I mean Banana Prep! Ha! I almost said zucchini there, that’s from another recipe I love. For these bars, the key is really, truly ripe bananas. Don’t try to use those slightly yellow ones; you need those black spots, people! The browner and softer, the better. They’ll mash up easier and give you that perfect sweetness and moisture. I sometimes even freeze overripe bananas, then thaw them out to use in baking – they get even mushier and sweeter that way. Just make sure to drain any excess liquid after thawing.
Mixing Advice: The biggest mistake I see people make with recipes like this is overmixing. When you combine the wet and dry ingredients, mix *just* until you don’t see any dry flour streaks. Seriously, a few little lumps are fine. Overmixing develops the gluten in the flour, which can make your bars tough and dense, kind of like a brick. We want them tender and fudgy, remember?
Swirl Customization: Don’t be afraid to get creative with the swirl! If you’re swirling extra peanut butter, warming it up slightly in the microwave makes it much easier to spread and swirl evenly. For the pattern, I like to dollop it randomly and then use a toothpick or a thin knife to make gentle figure-eights or swirls. You can also add chocolate chips to the batter, or even a swirl of jam for a PB&J version. The possibilities are endless!
Ingredient Swaps: I’ve experimented a lot! For a dairy-free version, I’ve used melted coconut oil instead of butter and plant-based milk, and it works wonderfully. You can also swap out some of the all-purpose flour for whole wheat or oat flour for a nuttier flavor and added fiber, though it might make them a little denser. If you’re out of eggs, you can try a flax egg (1 tablespoon flaxseed meal + 3 tablespoons water, let sit for 5 minutes), but the texture might be slightly different. For sweetness, if your bananas are super ripe, you might be able to reduce the sugar by a tablespoon or two, or try using a liquid sweetener like maple syrup, but adjust the liquid in the recipe accordingly.
Baking Tips: Ovens can be tricky! I always recommend using the toothpick test. If it comes out with wet batter, it needs more time. If it comes out completely clean, it might be overbaked and could turn out dry. Moist crumbs clinging to the toothpick are your golden ticket to perfectly baked bars. Also, make sure your oven rack is in the center position for even baking.
Glaze Variations: The glaze is totally optional, but it adds a lovely sweet finish. If you want a thinner glaze, add a tiny bit more milk, a teaspoon at a time, until it reaches your desired consistency. For a chocolate glaze, melt some chocolate chips with a tablespoon of butter or coconut oil. You can also skip the glaze altogether and just dust the cooled bars with powdered sugar or a little cinnamon.
These are the little things I’ve learned that make all the difference in turning a good recipe into a truly great one. Trust me on these!
Storing and Reheating Tips
One of the best things about these Peanut Butter Burgers is how well they store. This means you can make a batch and have delicious treats ready to go for days!
Room Temperature: If you plan to eat them within 1-2 days, you can store them right in an airtight container at room temperature. Make sure they are completely cooled before sealing them up. They stay surprisingly moist at room temp. I usually just leave them in their baking pan, covered tightly with plastic wrap or foil.
Refrigerator Storage: For longer storage, up to about a week, keep them in an airtight container in the refrigerator. They’ll become a little firmer when chilled, which is actually quite nice if you prefer a denser, fudgier texture. When you want one, you can eat it cold, or pop it in the microwave for about 10-15 seconds to soften it up.
Freezer Instructions: These freeze beautifully! Once completely cooled, cut them into individual portions. Wrap each piece tightly in plastic wrap, then place them in a freezer-safe bag or airtight container. They’ll stay good in the freezer for up to 2-3 months. To thaw, simply unwrap them and let them come to room temperature, or microwave them for a minute or two. They really do hold up well!
Glaze Timing Advice: If you’ve added a glaze, it’s best to store the bars at room temperature or in the refrigerator, as the glaze can get sticky or melt in warmer conditions. If freezing, I often prefer to add the glaze *after* thawing, so it stays fresh and pretty. Otherwise, the glaze might get a little soft during freezing and thawing. If you do freeze with glaze, make sure they are well-wrapped to protect it.
I find that the quality holds up incredibly well with all these storage methods, which is why I often make a double batch and freeze half for when those cravings strike unexpectedly!
Frequently Asked Questions
Final Thoughts
I really hope you give these Peanut Butter Burgers a try. They’re more than just a recipe to me; they’re a little bit of comfort, a memory of simple joys, and a testament to how delicious and satisfying homemade treats can be. The combination of creamy peanut butter and sweet bananas is just magical, and the texture is something truly special – moist, dense, and utterly satisfying. They’re proof that you don’t need complicated ingredients or fancy techniques to create something that tastes absolutely incredible and brings a smile to everyone’s face.
If you love this recipe, you might also enjoy my Chewy Chocolate Chip Cookies or my Classic Fudgy Brownies. They share that same spirit of simple, comforting deliciousness that I think you’ll appreciate. These Peanut Butter Burgers are the perfect answer to any sweet craving, a delightful breakfast addition, or a satisfying dessert. They’re forgiving, easy to make, and always a hit.
I can’t wait to hear what you think! If you make them, please leave a comment below and let me know how they turned out, or share your own creative variations. Happy baking, my friends!
Peanut Butter Burgers
Ingredients
Burgers
- 1.5 lb ground beef
- 0.25 cup breadcrumbs
- 1 large egg
- 0.5 teaspoon salt
- 0.25 teaspoon black pepper
Peanut Butter Sauce
- 0.5 cup creamy peanut butter
- 2 tablespoons ketchup
- 1 tablespoon soy sauce
- 1 teaspoon honey
- 0.5 teaspoon sriracha (optional)
For Serving
- 4 slices cooked bacon
- 0.5 cup shredded lettuce
- 0.5 cup sliced pickles
Instructions
Preparation Steps
- In a large bowl, gently combine the ground beef, breadcrumbs, egg, salt, and pepper. Do not overmix.
- Form the mixture into 4 equal-sized patties.
- In a small bowl, whisk together all the peanut butter sauce ingredients until smooth.
- Heat a grill or skillet over medium-high heat. Cook the burgers for about 4-5 minutes per side, or until cooked to your desired doneness.
- During the last minute of cooking, spread some of the peanut butter sauce on top of each burger patty.
- Toast the burger buns lightly if desired.
- Assemble the burgers by placing a patty on the bottom half of each bun, topping with bacon, lettuce, and pickles, and then the top bun. Drizzle with extra peanut butter sauce if desired.