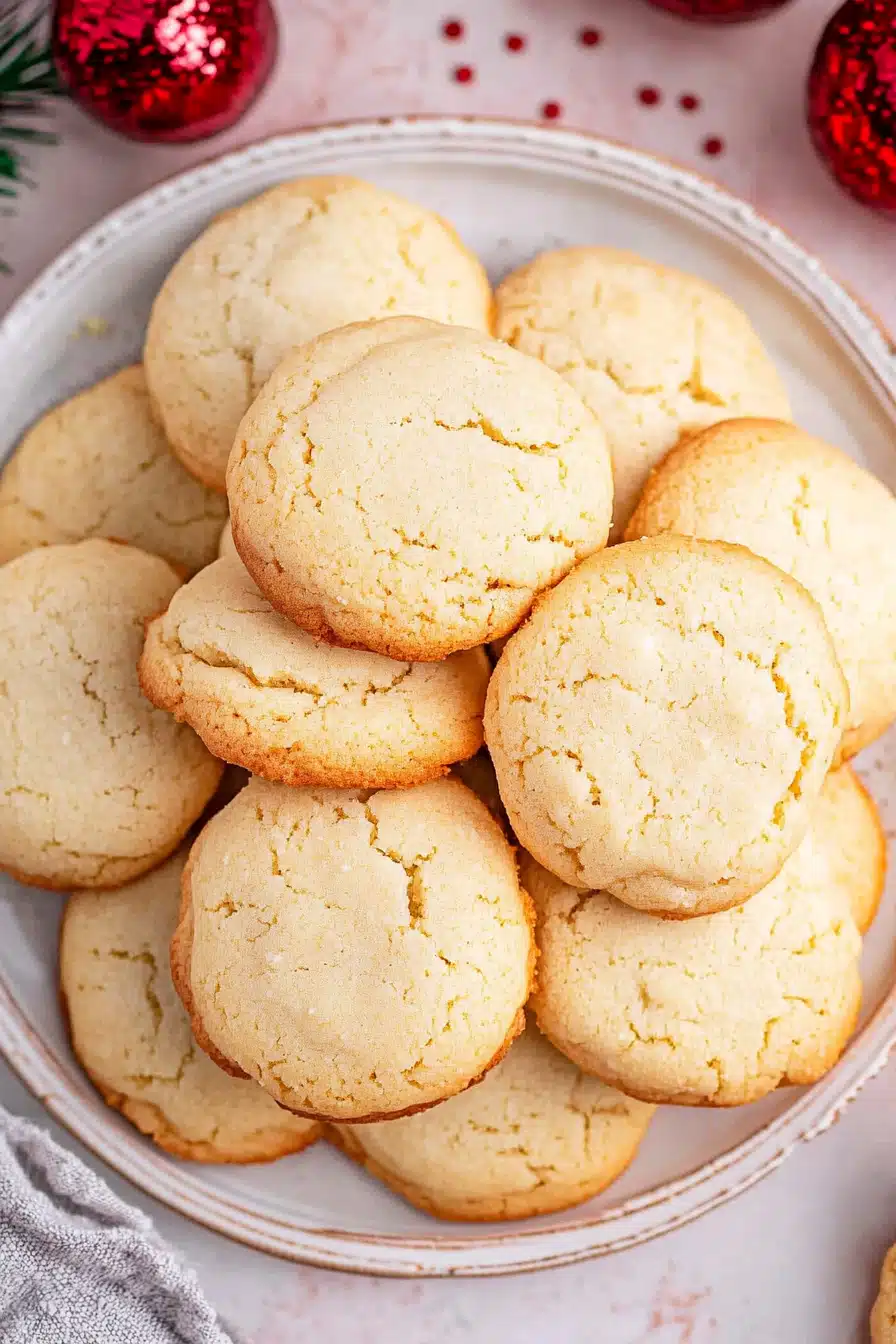
Oreo cheesecake cookies
Okay, so you know how sometimes you’re just *craving* something decadent, something that feels like a serious treat but you don’t have hours to bake a fancy cake? That’s exactly where these Oreo cheesecake cookies come in. Honestly, I’ve been making variations of these for years, and they always, *always* disappear in minutes. They’re like a hug in cookie form. They have that wonderful, slightly tangy cream cheese base that you get in a really good cheesecake, but it’s all wrapped up in a soft, chewy cookie packed with chunks of everyone’s favorite chocolate sandwich cookie. If you love a classic cheesecake and can’t resist a good Oreo, these Oreo cheesecake cookies are basically your wildest dreams come true. They’re not *quite* a cookie, and not *quite* a cheesecake, but a perfect, glorious mashup of both. It’s the kind of dessert that makes you close your eyes with the first bite.
What Are Oreo Cheesecake Cookies?
So, what exactly are we talking about when I say Oreo cheesecake cookies? Think of it as a seriously delightful fusion. At its heart, it’s a super-moist, tender cookie dough, but instead of just plain sugar and butter, we’re incorporating softened cream cheese right into the dough. This gives the cookies an incredibly rich, slightly tangy, and super creamy texture that’s totally reminiscent of cheesecake. Then, the magic happens: we fold in plenty of chopped-up Oreo cookies. These aren’t just for decoration; they bake right into the cookie, adding pockets of that familiar chocolatey crunch and creamy filling. The result is a cookie that’s soft, chewy, slightly dense, and bursting with that iconic Oreo flavor, all while having that dreamy cheesecake essence. It’s really the best of both worlds, condensed into a perfectly portioned, easy-to-eat cookie.
Why you’
There are so many reasons I’ve come back to this recipe time and time again, and I just know you’re going to fall in love with it too. First off, the flavor is just out of this world. You get that wonderful tang from the cream cheese, which perfectly balances the sweetness and the rich chocolate flavor from the Oreos. It’s complex and satisfying without being overwhelmingly sweet, which I really appreciate. Then there’s the texture: these aren’t your average flat, crispy cookies. They’re thick, wonderfully soft, and have this incredible chewy center that melts in your mouth. Seriously, the texture is pure bliss.
And get this – they’re surprisingly simple to make! I know it sounds fancy, with the cream cheese and all, but the steps are really straightforward. It’s mostly just mixing ingredients together. This is one of those recipes that feels impressive without requiring you to be a pastry chef. My kids can actually help with this one, which is always a win. Plus, it’s incredibly cost-effective. Cream cheese, butter, flour, sugar, and Oreos are pretty standard pantry staples or easy to grab at any grocery store. You don’t need any super-special ingredients to create something truly spectacular.
What I love most about these Oreo cheesecake cookies, though, is their versatility. They’re perfect for a casual cookie swap, a potluck, or just when you need a little pick-me-up. They’re also fantastic for holidays – you can even drizzle them with a little white chocolate for a festive touch. Honestly, they stand out on a dessert table because they’re a little different, a little unexpected, but so, so delicious. They remind me a bit of my grandmother’s no-bake cheesecake, but in a much more portable, fun format. If you’ve ever tried my classic chocolate chip cookies, these offer a similar comforting chewiness, but with a delightful cheesecake twist.
How to Make Oreo Cheesecake Cookies
Quick Overview
Making these dream cookies is actually way simpler than you might think! The whole process involves creaming together softened butter and cream cheese, adding sugar and eggs, then stirring in your dry ingredients and chopped Oreos. You’ll chill the dough briefly to make it easier to handle, then scoop and bake until they’re golden brown and gloriously gooey. A simple glaze is the perfect finishing touch, but they’re utterly delicious even without it. It’s a fuss-free method that yields incredibly impressive results, perfect for those moments when you want something special without the stress.
Ingredients
For the Main Batter:
You’ll need unsalted butter, softened (about 1/2 cup or 1 stick). Make sure it’s properly softened, not melted, for the best texture. Then, about 4 ounces of full-fat cream cheese, also softened. Using full-fat really gives you that rich, authentic cheesecake flavor. For sweetness, we’ll use granulated sugar (about 3/4 cup) and a bit of packed light brown sugar (about 1/4 cup) to help with that lovely chewy texture. Two large eggs are essential for binding, and make sure they’re at room temperature! For that subtle vanilla essence, grab your trusty vanilla extract (1 teaspoon). And of course, our dry ingredients: all-purpose flour (about 2 1/4 cups), a teaspoon of baking soda for a little lift, and a pinch of salt to balance everything out.
For the Filling:
This is the star of the show! You’ll need about 1 1/2 cups of your favorite Oreo cookies. I usually just grab a standard-sized package. You can use regular Oreos, double stuf if you’re feeling extra decadent, or even the golden Oreos for a different look. Roughly chop them up – I like to leave some bigger chunks and some smaller pieces for variety in every bite. You don’t want to turn them into dust!
For the Glaze:
This is optional, but highly recommended for that extra touch of magic. You’ll need about 1 cup of powdered sugar, sifted to avoid lumps. Then, just a tablespoon or two of milk (or even a little heavy cream for extra richness!) to get the right drizzling consistency. A tiny splash of vanilla extract can also be nice here.
Step-by-Step Instructions
Step 1: Preheat & Prep Pan
First things first, get your oven preheating to 350°F (175°C). While that’s warming up, line a couple of baking sheets with parchment paper. This is super important because it prevents sticking and makes for easy cleanup. Parchment paper is your best friend in the cookie-making world, trust me!
Step 2: Mix Dry Ingredients
In a medium bowl, whisk together your all-purpose flour, baking soda, and salt. Give it a good whisk so everything is evenly distributed. Set this aside for a moment; we’ll use it soon.
Step 3: Mix Wet Ingredients
In a large bowl, beat the softened butter and softened cream cheese together until they are nice and creamy. You can use an electric mixer for this, which makes it a breeze. Then, gradually beat in the granulated sugar and brown sugar until the mixture is light and fluffy. Beat in the eggs, one at a time, making sure each is incorporated before adding the next. Finally, stir in the vanilla extract.
Step 4: Combine
Now, gradually add the dry ingredients to the wet ingredients, mixing on low speed or by hand until just combined. Be careful not to overmix here! Overmixing can lead to tough cookies, and we want these to be tender and chewy. Once it’s *just* combined, stir in your chopped Oreo cookies. Fold them in gently until they’re evenly distributed throughout the dough.
Step 5: Prepare Filling
You’ve already chopped your Oreos in the ingredients step! So, this part is done. Just make sure they’re roughly chopped, with some chunks and some smaller bits. This gives you a nice texture distribution when you bite into the cookies.
Step 6: Layer & Swirl
This step is more about how we scoop and bake the cookies to get that cheesecake look. I like to use a cookie scoop to get uniform rounds of dough. Place these dough balls onto your prepared baking sheets, leaving about 2 inches between them because they will spread. For an extra cheesecake-like appearance, I sometimes press down slightly on the top of each dough ball with my palm or the bottom of a glass. This helps them spread into those irresistible cookie shapes.
Step 7: Bake
Bake for 10-12 minutes, or until the edges are lightly golden brown and the centers still look a little soft. They’ll continue to cook and set up on the baking sheet after you take them out, so it’s better to underbake slightly than overbake. This ensures that gooey, cheesecake-like center!
Step 8: Cool & Glaze
Let the cookies cool on the baking sheets for about 5 minutes before transferring them to a wire rack to cool completely. While they’re cooling, you can whip up the glaze if you’re using it. Whisk together the powdered sugar, milk (start with a tablespoon and add more as needed), and vanilla until you have a smooth, drizzle-able consistency. Once the cookies are completely cool, drizzle the glaze over the tops.
Step 9: Slice & Serve
Once the glaze has set a bit, these Oreo cheesecake cookies are ready to be devoured! I usually slice them with a sharp knife if I want really clean edges, but honestly, just grabbing one (or two!) right off the rack is perfect too. They’re best enjoyed slightly warm or at room temperature.
What to Serve It With
These Oreo cheesecake cookies are so wonderfully versatile, they fit into almost any occasion. For a simple breakfast treat, they’re absolutely divine paired with a hot cup of coffee. The slight tang of the cookie and the sweetness is just the perfect wake-up call, especially if you’ve had a bit of a rough morning. My kids love them with a glass of cold milk, and they’re gone before you can say “seconds!”
If you’re hosting a brunch, these cookies add a touch of elegance without any fuss. Arrange them on a pretty platter, maybe with some fresh berries on the side for a pop of color. They pair wonderfully with mimosas or a sparkling cider. For dessert, they’re an absolute showstopper. Serve them alongside a scoop of vanilla bean ice cream, or with a rich hot chocolate on a chilly evening. They have that satisfying “dessert” feel that’s perfect for satisfying a serious sweet tooth.
And for those cozy snack times? They’re perfect. Curl up on the couch with a good book and a cookie (or three!). They’re incredibly comforting. My family tradition is to have one after Sunday dinner – it’s our little sweet reward for the week. They also make a fantastic addition to a cookie exchange or a bake sale because they’re always a crowd-pleaser and a little unexpected.
Top Tips for Perfecting Your Oreo Cheesecake Cookies
I’ve made these Oreo cheesecake cookies enough times to have a few tricks up my sleeve that make a big difference. First, about the cream cheese and butter: make sure they are truly softened. This is non-negotiable! If they’re too cold, you’ll end up with lumps, and if they’re too warm and melty, your dough will be greasy and spread too much. I usually take them out of the fridge about an hour before I plan to bake.
When you’re mixing the dry ingredients into the wet, seriously, *do not overmix*. This is probably the most common mistake people make with cookies. Mix until *just* combined, meaning you don’t see big streaks of flour anymore. A few little bits are fine. Overmixing develops the gluten in the flour, which leads to tough, dense cookies. We want tender and chewy here!
For the Oreo chunks, I highly recommend chopping them yourself rather than buying pre-chopped. You get to control the size of the pieces. I like a mix of smaller bits and some larger chunks, about half an inch or so. This gives you pockets of Oreo goodness throughout the cookie. Also, don’t be tempted to put too many Oreos in; you want them to be well distributed, not one giant clump.
If your dough feels a little too soft to handle, don’t worry! Chilling it for about 30 minutes in the refrigerator will make a world of difference. It firms up the fats and makes the dough much easier to scoop and shape. It also helps prevent the cookies from spreading too much in the oven, resulting in those thicker, more satisfying cookies we love.
Baking is also key. Keep an eye on them! Ovens can vary, so the 10-12 minute timeframe is a guideline. You’re looking for edges that are just starting to turn golden, and a center that still looks a little soft and slightly underbaked. They will continue to set up as they cool on the baking sheet. If you bake them until the centers look completely done, they’ll likely be overbaked and dry.
For the glaze, consistency is everything. Start with the minimum amount of liquid and add more tablespoon by tablespoon until you reach your desired drizzling consistency. If you accidentally make it too thin, you can always whisk in a little more powdered sugar. If it’s too thick, add a tiny bit more milk. Drizzling it over completely cooled cookies is important so the glaze doesn’t just melt off. These little tips have taken my Oreo cheesecake cookies from good to absolutely phenomenal!
Storing and Reheating Tips
One of the best things about these Oreo cheesecake cookies is how well they store. If you happen to have any leftovers (which is rare in my house!), you can keep them at room temperature for about 2-3 days. Just make sure they’re in an airtight container to keep them fresh and prevent them from drying out. I usually stack them, separated by parchment paper if they’re glazed, or just in a single layer.
For longer storage, the refrigerator is your best bet. They’ll stay fresh and delicious in an airtight container in the fridge for up to a week. The texture might firm up a bit in the fridge, but honestly, they’re still amazing. Just let them sit at room temperature for about 15-20 minutes before you want to enjoy them, or give them a quick 10-second zap in the microwave if you like them a little warm.
If you want to make a big batch and freeze them for later, that’s totally doable! I like to freeze them *before* glazing, just in case the glaze gets a bit weird after thawing. Place the cooled cookies in a single layer on a baking sheet and freeze until solid. Then, transfer them to a freezer-safe bag or airtight container. They’ll keep well in the freezer for up to 2-3 months. To thaw, just transfer them to the refrigerator overnight, and then let them come to room temperature.
Regarding the glaze timing, if you’re planning to store them for more than a day or two, I actually recommend glazing them *after* they’ve been thawed or brought back to room temperature. This keeps the glaze looking its best. If you’re eating them within a day or two and storing at room temp, glazing them before storing is fine.
Frequently Asked Questions
Final Thoughts
There you have it – my absolute favorite Oreo cheesecake cookies! I really hope you give these a try. They’re more than just a dessert; they’re a little bit of pure joy. The way they combine that comforting cookie texture with the creamy tang of cheesecake and the irresistible crunch of Oreos is just perfection. They’re surprisingly easy, incredibly forgiving, and always a huge hit. Whether you’re baking for family, friends, or just for yourself (because you absolutely deserve it!), these cookies are a guaranteed winner.
If you enjoy these, you might also love my classic no-bake cheesecake bars or my super fudgy brownie cookies! They’re in a similar vein of comforting, decadent treats. I can’t wait to hear what you think of these Oreo cheesecake cookies! Please leave a comment below and let me know how yours turned out, or if you have any fun variations you tried. Happy baking, and enjoy every single bite!
Easy Oreo Dream Cheesecake Cookies
Ingredients
Main Ingredients
- 0.5 cup unsalted butter softened to room temperature
- 8 oz cream cheese softened to room temperature
- 2 large egg whites
- 1 tsp vanilla extract
- 1 box white cake mix
- 15 count Oreo cookies crushed
Instructions
Preparation Steps
- Preheat oven to 350 degrees F. Line a cookie sheet with parchment paper and set aside.
- Crush Oreos in a ziplock bag by smashing each one once with a meat tenderizer; coarse pieces are fine.
- In a mixing bowl, beat butter and cream cheese together until creamy. Add egg whites and vanilla extract, then mix until combined.
- Add white cake mix and beat just until combined, scraping down the bowl as needed. Fold in all but a few tablespoons of the crushed Oreos.
- Use a 2 tablespoon cookie scoop to drop dough onto cookie sheet about 2 inches apart. Press a few reserved Oreo crumbs onto the top of each cookie.
- Bake cookies for 12 to 14 minutes until bottoms are lightly browned but centers remain soft. Do not overbake.
- Remove from oven and cool cookies on a wire rack before serving.