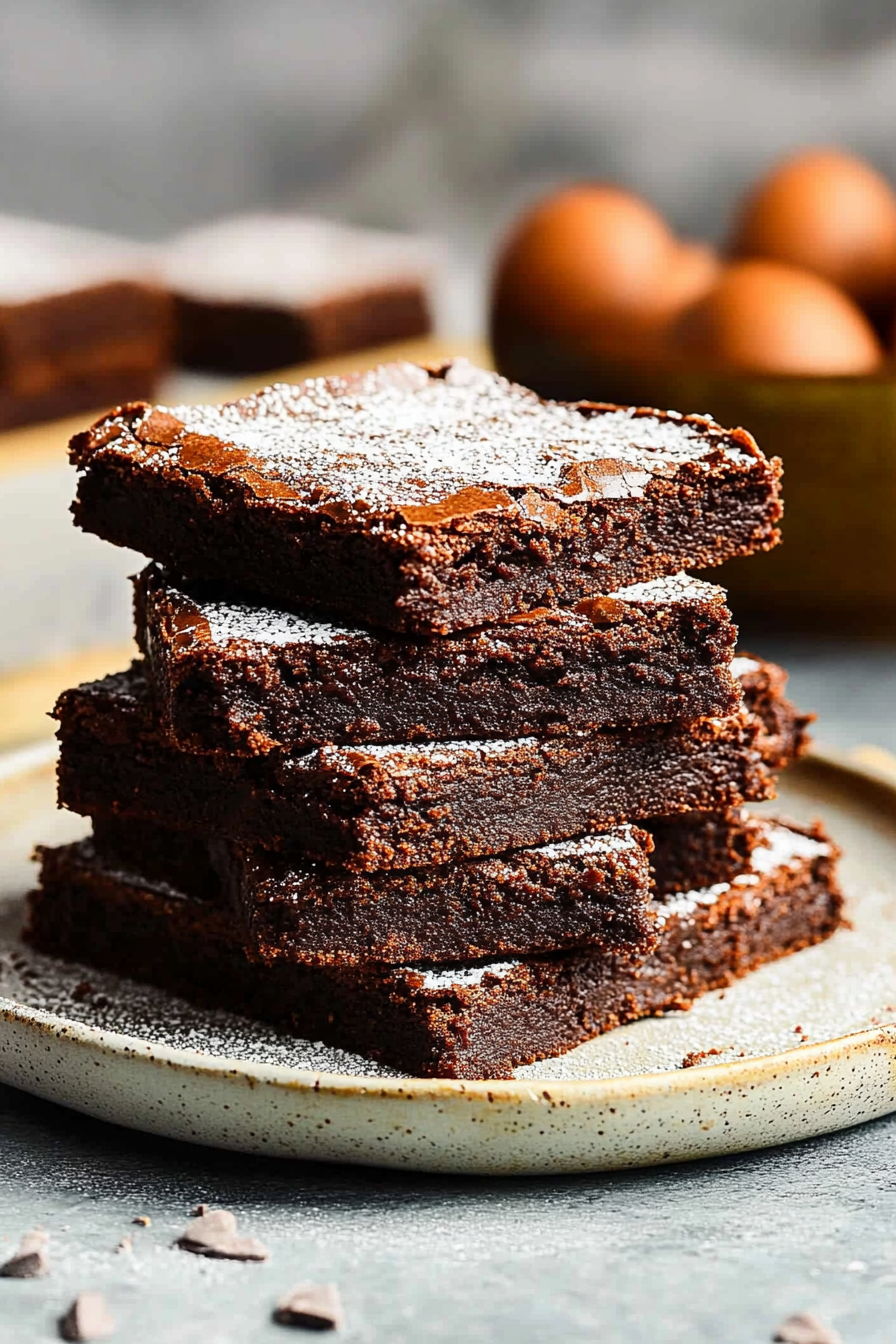
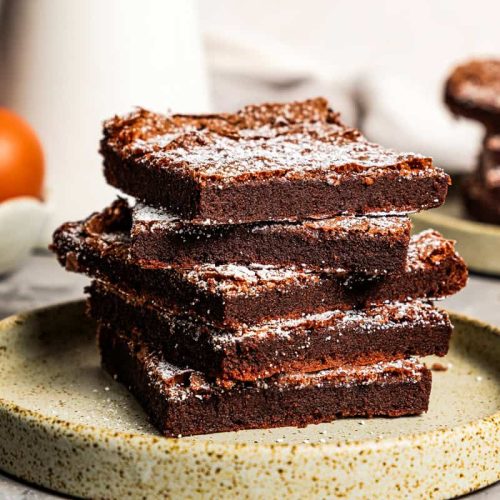
Nutella brownies
There’s something magical about the first warm bite of a gooey, rich brownie that melts in your mouth and beckons for just one more. Now, imagine that classic brownie experience, but with that unmistakable swirl of Nutella—creamy, nutty, and irresistibly chocolate-hazelnutty. I remember the first time I sneaked a spoonful of Nutella from the jar, right before making these brownies, and how the kitchen smelled heavenly for hours afterward. Nutella brownies quickly became the go-to treat in my house—so simple yet feels so indulgent. Honestly, they’re a game-changer for those evenings when you want something sweet without the fuss of complicated baking. Kind of like a fudge brownie meets hazelnut dream. Trust me, once you try these, your regular brownies will feel a bit plain!
What is Nutella Brownies?
Nutella brownies are essentially classic chocolate brownies with an extra special twist: swirls or layers of creamy Nutella baked right in. Think of it as the lovechild of two beloved treats—a fudgy, chewy brownie wed with that luscious, hazelnut-chocolate spread we all secretly want to eat straight from the jar. Some folks swirl Nutella on top; others fold it into the batter; I like to do both to get the best of both worlds. The name says it all, but what makes it so special is that gooey, stretchy texture and deep nutty flavor that takes a brownie from good to unforgettable. It’s easy to think of Nutella as just a topping, but in these brownies, it feels like the star of the show, sneaking in that irresistible richness with every bite.
Why you’ll love this recipe?
What I really adore about this Nutella brownies recipe is how effortlessly it nails that balance between chocolatey and nutty—without feeling heavy or overcomplicated. First off, the flavor is just pure joy. You get the deep cocoa notes from the brownie base, but the Nutella brings its own creamy, almost caramelized nuttiness that’s impossible to put down. The texture? Fudgy, with just the right ‘stick-to-your-fingers’ gooeyness that reminds me of cozy afternoons baking with my mom.
Now, here’s where the magic happens: this recipe is surprisingly simple. No fancy equipment, no exotic ingredients—just a handful of pantry staples and your trusty jar of Nutella. I appreciate how it lets me pull something decadent out of the oven in less than an hour, which means more time to enjoy and less time stressing. And it’s wallet-friendly too; Nutella might feel like a treat, but you don’t need much, so it stretches the ingredients nicely.
Another thing I love is how versatile these brownies are. Add a sprinkle of sea salt on top for a grown-up twist, fold in chopped hazelnuts for extra crunch, or drizzle melted chocolate after baking for show-stopping presentation. We often serve them for birthday parties, but I’ve also wrapped a batch as a gift, and it’s always met with wide eyes and grateful smiles. If you’re a fan of chocolate-hazelnut combos, you might also want to peek at my recipe for Nutella swirl cheesecake—though that one’s a little more involved. But if you want something quick and addictive, these Nutella brownies will steal your heart every time.
How do I make Nutella Brownies?
Quick Overview
Making these Nutella brownies is as comforting as the smell of fresh brownies wafting through your kitchen. Start by whipping up a simple chocolate batter, mix up the dry and wet ingredients separately for the best texture, then gently fold them together. The secret? Layering or swirling that silky Nutella midway to give each bite a little surprise. You’ll bake them until the edges are set but the center still feels fudgy—because brownies should never be dry, right? Finally, a quick glaze or simple dusting seals the deal. Honestly, you don’t need to be a pro baker to nail this; it’s one of those recipes that feels fancy but comes together like second nature.
Ingredients
For the Main Batter:
- 1 cup all-purpose flour — I always sift to keep things light
- 1/2 cup unsweetened cocoa powder — Dutch-processed for richer flavor if you have it
- 1/4 teaspoon salt — balances the sweetness like a charm
- 3/4 cup granulated sugar — enough to sweeten without overpowering
- 1/4 teaspoon baking powder — just a touch for that fudgy lift
- 2 large eggs — room temp, they make the batter smoother
- 1/2 cup unsalted butter, melted and slightly cooled — for butter lovers, substitute with neutral oil if you prefer
- 1 teaspoon vanilla extract — never skip; it deepens the chocolate flavor
For the Filling:
- 1/2 cup Nutella — the heart and soul of the recipe
- Optional: 1/4 cup chopped hazelnuts or walnuts — for a nice crunch and contrast
For the Glaze:
- 1/4 cup Nutella — warmed slightly for easy spreading
- 1-2 tablespoons milk (or cream) — to thin the glaze if needed
- Pinch of flaky sea salt — optional, but adds wow factor
Step-by-Step Instructions
Step 1: Preheat & Prep Pan
Start by heating your oven to 350°F (175°C). I line an 8×8-inch pan with parchment paper, leaving an overhang on the sides so you can lift the brownies out easily when they’re done. If you’re short on parchment, greasing the pan works okay, but the paper helps with super clean edges and quick cleanup. Pro tip: I like to lightly butter the parchment to help the Nutella swirl slide around deliciously.
Step 2: Mix Dry Ingredients
In a medium bowl, sift together the flour, cocoa powder, baking powder, and salt. Sifting helps prevent lumps and keeps the batter smooth, which is key for fudgy brownies. Mix these dry ingredients to evenly distribute the cocoa and leavening—this way, every bite has the same chocolate punch.
Step 3: Mix Wet Ingredients
In a separate large bowl, beat together the eggs, sugar, and vanilla extract until the mixture looks glossy and slightly thickened—this usually takes about 2-3 minutes by hand or a bit less with a mixer. Slowly drizzle in the melted butter while stirring gently; the butter should be warm, but not hot, or you’ll cook the eggs prematurely. The batter will look shiny and velvety, which makes me drool just thinking about it.
Step 4: Combine
Gradually fold the dry ingredients into the wet batter using a spatula. The key here is to combine just until the flour disappears. It’s tempting to mix longer, but overmixing will make the brownies cakey instead of fudgy. The batter should be thick and smooth, kind of like soft cookie dough. If you see a few little flour streaks, don’t fret—those’ll bake out.
Step 5: Prepare Filling
Warm your Nutella in the microwave for about 20 seconds, just enough to make it more fluid but not hot. If your Nutella is thick or chilled, it won’t swirl nicely and you’ll lose that gorgeous marbled effect. You can also fold some chopped nuts into this if you fancy a bit of crunch.
Step 6: Layer & Swirl
Spread half of the chocolate batter evenly into the prepared pan. Dollop spoonfuls of warm Nutella all over the batter. Next, drop spoonfuls of the remaining batter right on top of the Nutella—don’t smooth it completely; you want those uneven pockets for a marble swirl. Then, grab a butter knife or skewer and gently swirl through the batter and Nutella. I always do a figure-eight motion to create pretty, organic swirls. It’s honestly one of the most fun parts, like painting, but edible.
Step 7: Bake
Pop it into the oven for about 25-30 minutes. Here’s where I always keep an eye on it—edges should look set but the center will still be soft and a bit jiggly if you gently shake the pan. Insert a toothpick into the center and expect a few moist crumbs to stick; this means fudgy perfection. If it comes out clean, you’ve baked it a touch too long. Ovens vary, so I recommend checking after 20 minutes and every few minutes after.
Step 8: Cool & Glaze
Once baked, let the brownies cool completely in the pan on a wire rack. This patience is worth it—cutting them too soon will just turn them gummy and messy. For the glaze, stir the warmed Nutella with milk or cream until spreadable but still thick. Spread it evenly over the cooled brownies and sprinkle a pinch of flaky sea salt on top. The salt really highlights the nutty-sweet contrast and makes them taste more “bakery professional.”
Step 9: Slice & Serve
Use the parchment overhang to lift the brownies gently out of the pan. For clean slices, I like to use a sharp knife and wipe it between cuts. Serve them slightly warmed or at room temperature; either way, they’re addictive. My kids always insist on microwaving theirs for a few seconds with a scoop of vanilla ice cream. Honestly, so do I—it’s the ultimate cozy combo.
What to Serve It With
For Breakfast: Nutella brownies with a strong cup of black coffee or a frothy cappuccino make for a cheeky weekend indulgence. I like chopping one into small squares and pairing with creamy yogurt and fresh berries for a balanced brunch treat.
For Brunch: Arrange these brownies on a pretty platter with slices of fresh fruit like strawberries and apples. Pair with a chilled sparkling water with lemon or a light white wine if you’re feeling fancy. I’ve done this for family gatherings, and it feels unexpectedly sophisticated.
As Dessert: Warm a brownie up slightly and serve with whipped cream or a scoop of vanilla bean ice cream. Add a drizzle of caramel or chocolate sauce to impress guests effortlessly. It’s easily the star of the table without stealing hours of prep time.
For Cozy Snacks: Straight from the baking pan, these brownies are a comforting pick-me-up with a cold glass of milk or hot cocoa. I keep a batch ready in the fridge for those afternoons when everyone needs a little chocolate comfort.
Over the years, we’ve made these brownies a staple at birthdays, holiday parties, and random Tuesday nights when someone needs a little sunshine on their plate. It’s funny how something so simple can bring so much joy—this recipe has that magic.
Top Tips for Perfecting Your Nutella Brownies
Nutella Prep: If your Nutella is too thick, warming it gently on low power in the microwave or placing the jar in warm water works wonders. This ensures smooth swirling and an even distribution of that luscious flavor.
Mixing Advice: When folding the dry ingredients into the wet, think gentle hugs, not rough shoves. Overmixing will lead to cakey brownies, which is fine if that’s your vibe, but I prefer them fudgy and dense. The batter should look just combined with no flour pockets.
Swirl Customization: For a dramatic marbled look, use a toothpick or skewer and drag it slowly through the batter in loops and figure-eights. Don’t overwork it, or the swirl will disappear. Alternatively, dollop more Nutella on top after baking for an extra glossy finish.
Ingredient Swaps: I’ve tried this with almond milk instead of butter, and it actually made the texture even creamier. Coconut oil is another great swap, especially if you want a slightly tropical hint. For a gluten-free version, I use a 1:1 baking flour blend with good success—expect a slightly different crumb but same decadence.
Baking Tips: Oven temps vary, so trust your senses—edges browned and firm, center soft to the touch. I recommend baking on the middle rack to avoid scorching. If the top browns too quickly, tent loosely with foil.
Glaze Variations: Try adding a teaspoon of espresso powder or cinnamon to your glaze for a flavor twist. You can also swap Nutella glaze for a simple chocolate ganache or dust with powdered sugar for a lighter finish.
One lesson I learned the hard way was rushing to cut them while still warm—you end up with a sticky, messy nightmare rather than neat squares! Waiting is tempting but worth every minute.
Storing and Reheating Tips
Room Temperature: Store your brownies in an airtight container at room temp for up to 3 days. Keeping the container sealed prevents them from drying out, though they honestly won’t last that long in my house.
Refrigerator Storage: For longer shelf life, wrap brownies tightly in plastic wrap or place them in an airtight container and refrigerate for up to a week. Bring them back to room temp or pop a piece in the microwave for 10-15 seconds to revive that fudgy feel.
Freezer Instructions: Brownies freeze beautifully. Wrap individual squares tightly in plastic wrap and foil, and place in a freezer-safe container or bag. They keep for up to 3 months. Thaw overnight in the fridge or leave out for a couple of hours before enjoying. I often stash extras in the freezer for “just in case” moments.
Glaze Timing Advice: For storage, I recommend adding the Nutella glaze right before serving. Glaze left on during refrigeration can become a bit firm and snap when cutting, but you could warm slightly before slicing for a softer finish.
Storing these brownies properly keeps them tasting fresh and decadent—always a crowd-pleaser whenever I open the container.
Frequently Asked Questions
Final Thoughts
I honestly can’t say enough good things about these Nutella brownies. They’re that rare treat that’s both simple enough to whip up on a whim and decadent enough to impress guests or calm a sweet tooth at midnight. I love how they bring together the best of both worlds—classic fudgy chocolate brownie with that unmistakable hazelnut twist that makes every bite special. Whether you’re an experienced baker looking for an easy “wow” recipe, or just someone who craves that chocolate comfort, this is the one to keep in your arsenal.
If you decide to try them, I’m betting they’ll disappear just as fast in your house as they do in mine—and maybe, like me, you’ll start dreaming up your own Nutella remix ideas. Don’t be shy—drop a comment, share how yours turned out, or tell me your favorite tweaks. I love hearing your stories and baking adventures!
Happy baking, friends. Can’t wait to hear how yours turns out!
Easy Hazelnut Brownies Two Ingredients Only
Ingredients
Main Ingredients
- 4 large eggs at room temperature
- 1 cup Nutella
Instructions
Preparation Steps
- Preheat the oven to 350°F and line an 8x8 inch brownie pan with parchment paper; set aside.
- In a mixing bowl, beat the eggs on high speed for 5 to 8 minutes, or until they have tripled in size and are fluffy.
- Warm the Nutella in the microwave for 60 seconds, then stir until smooth.
- Gradually pour the warm Nutella into the whipped eggs while gently folding until fully combined.
- Pour the batter into the prepared pan and bake for 30 to 35 minutes, or until a toothpick inserted in the center comes out with a few moist crumbs.
- Remove from the oven and allow to cool completely in the pan before slicing into 9 brownies.
- Optional: Dust brownies with powdered sugar before serving.