nut-free chocolate
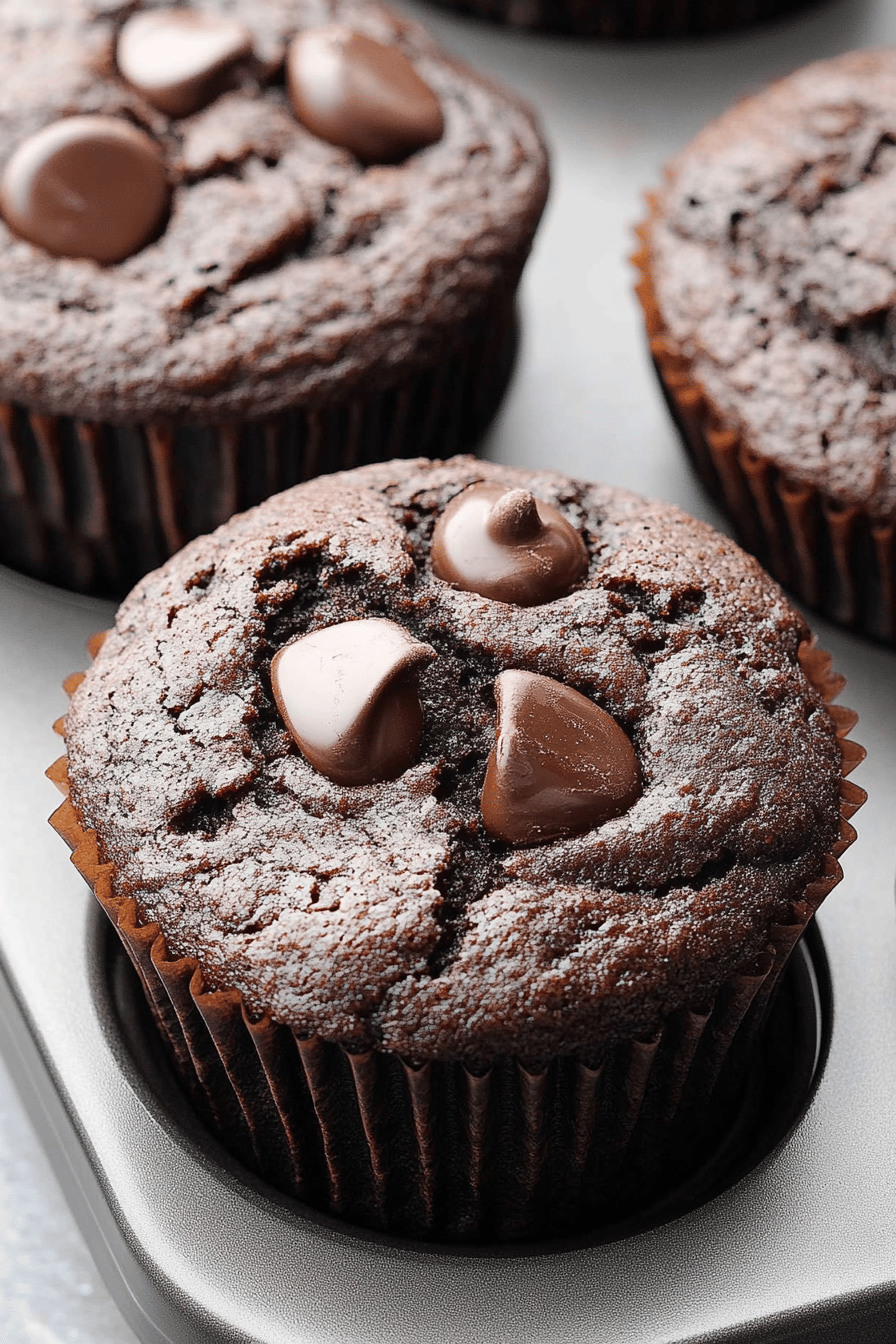
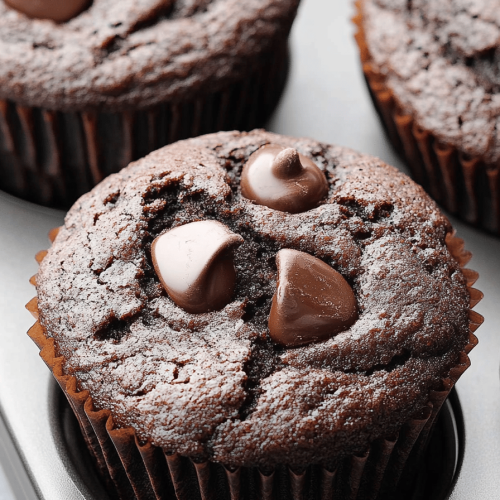
On rainy Saturday mornings, the kitchen smells like melted chocolate and vanilla. This nut-free chocolate treat has become a ritual at my house: a quick whisk, a gentle fold, and suddenly the whole family drifts in from all corners of the apartment, noses twitching at the scent. It’s basically a brownie-cake hybrid—dense and fudgy, with a glossy glaze that catches the light and makes you feel like you baked something a little fancy. The best part? It’s completely nut-free, so I can share it with neighbors, my niece, and anyone with nut allergies without a second thought. It’s incredibly forgiving, which is a huge win on busy nights when I’m juggling homework, after-school snacks, and a stubborn craving for something chocolate. I always test tweaks, and this version has a trick I keep coming back to: a splash of oat milk in the batter to boost creaminess while keeping the flavor pure. The fragrance alone makes the kitchen feel warm, and the first bite—rich, cocoa-forward, with a hint of vanilla—brings smiles to every face. It’s simple, cozy, and honestly, it vanishes fast.
What is Nut-Free Chocolate?
Think of nut-free chocolate as the friendly, all-ages side of chocolate desserts: deeply chocolatey, irresistibly satisfying, and safe for folks who need to avoid tree nuts and peanuts. It’s essentially a chocolate-baked treat that celebrates luscious cocoa with simple, pantry-friendly ingredients and no hidden nut ingredients. The name is a reminder about what it isn’t as much as what it is: no chopped nuts baked in, no nut butters folded through, and careful labeling to avoid cross-contamination. When I say nut-free chocolate, I mean a dessert you can hand to a neighbor who has an allergy, a kid wondering if dessert can be both comforting and safe, or a friend who’s cutting back on dairy without sacrificing flavor. The concept here is comfort-forward chocolate that’s incredibly forgiving—one-bowl mixing, quick batter, and a glossy glaze that feels celebratory without being fussy. It’s essentially a crowd-pleaser that travels well to potlucks, school events, and weekend movie nights. If you’ve ever wished for a chocolate dessert that tastes rich and indulgent, yet remains straightforward and allergy-conscious, this is nut-free chocolate at its best.
Why you’ll love this recipe?
What I love most about this nut-free chocolate is how reliably comforting it is. The flavor profile is all about cocoa depth—think dark, slightly bittersweet with a whisper of vanilla and a touch of sweetness that lingers on the tongue. The texture is another win: a dense, fudgy crumb with a tender crumb that doesn’t crumble apart when you cut into it. It’s not dry or crumbly; it stays moist and sliceable, which makes it ideal for sharing planks of cake at gatherings or tucking into lunch boxes. The simplicity earns a lot of praise too: you mix, you swirl, you bake, and you glaze. I’ve found that the glaze—shiny and just barely sweet—takes this dessert from everyday to “carry-me-to-the-table-and-cut-a-slice-now” status in minutes. Cost-wise, it’s friendly: pantry staples, no exotic ingredients, and a flexible format that lets you use what you already have. Versatility is a big part of its charm. You can fold in a swirl of Cream Cheese for a tangy bite, swap the glaze for a glossy ganache, or add a pinch of espresso powder to intensify the chocolate notes. What I love most about this is its ability to travel from casual weeknight dessert to party-worthy centerpiece without losing its cozy vibe. My kids ask for this all the time, and friends who aren’t big bakers feel confident making it too. It’s a recipe you reach for again and again, because it’s reliable, delicious, and safe for those who need nut-free options.
How do I make Nut-Free Chocolate?
Quick Overview
This is a one-bowl, easy-to-follow chocolate bake with a creamy filling and a glossy glaze. You’ll whisk dry ingredients, whisk wet ingredients, combine, and then swirl in a creamy center before baking. The result is a fudgy slice with a pretty marbled look from the swirl, finished with a silky chocolate glaze. It’s the kind of recipe you can prep in under 15 minutes and bake in about 25–30, with a total time that still leaves you with warm kitchen hugs and hungry helpers nearby. If you’re short on time, you can skip the filling or glaze and still end up with a satisfying chocolate treat that tastes like a big, comforting hug. This approach keeps nut-free chocolate approachable for busy cooks while delivering a dessert you’ll reach for again and again.
Ingredients
For the Main Batter:
- 2 cups all-purpose flour (or 1 3/4 cups all-purpose plus 1/4 cup unsweetened cocoa powder for a richer chocolate base)
- 3/4 cup unsweetened cocoa powder (Dutch-processed preferred for a smoother, deeper color)
- 1 1/2 cups granulated sugar
- 1/2 cup neutral oil (like vegetable or canola) or 1/2 cup melted butter
- 2 large eggs
- 1 teaspoon vanilla extract
- 1 teaspoon baking powder
- 3/4 cup milk of choice (dairy or oat milk works great)
<1/2 teaspoon salt
For the Filling:
- 8 ounces cream cheese, softened
- 1/4 cup granulated sugar
- 1 teaspoon vanilla extract
- Optional: a pinch of espresso powder to deepen the chocolate notes
For the Glaze:
- 1/2 cup semisweet chocolate chips
- 2 tablespoons unsalted butter
- 1 tablespoon cream or milk (adjust for desired gloss)
- Optional: a pinch of flaky sea salt for a finishing kick
Step-by-Step Instructions
Step 1: Preheat & Prep Pan
Preheat your oven to 350°F (175°C). Lightly grease a 9×13-inch pan and line with parchment for easy removal. If you’re worried about sticking, give the pan a quick spray with nonstick spray and a light dusting of flour. This is one of those tiny steps I always do because it saves me from crumbling a perfect slice later.
Step 2: Mix Dry Ingredients
In a large bowl, sift together flour, cocoa powder, baking powder, and salt. Sifting may feel fussy, but it’s worth it for that ultra-smooth batter and even rise. Whisk until well combined and free of any lumps. I love the way the cocoa bloots the bowl and makes the kitchen smell like a chocolate shop—this is the moment I know I’m in for something good.
Step 3: Mix Wet Ingredients
In a separate bowl, whisk the sugar with the oil (or melted butter) until it looks glossy. Add the eggs one at a time, whisking well after each addition, then stir in the vanilla and the milk. If you’re using oat milk, you’ll notice it adds a gentle creaminess without dulling the color. I’ve found that starting with wet and then adding dry helps keep the batter from over-mixing, which keeps the crumb tender.
Step 4: Combine
Pour the wet into the dry and mix just until combined. A few streaks are perfectly fine; you don’t want to overwork the batter here. If you’ve ever over-mixed a brownie or cake and ended up with a dense, heavy slice, you know why I’m stressing this. The goal is a smooth, cohesive batter that pours easily into the prepared pan.
Step 5: Prepare Filling
In a small bowl, beat the Cream Cheese with sugar and vanilla until silky and free of lumps. If you like a little tang, you can add a teaspoon of lemon zest to brighten the flavor, which pairs beautifully with the chocolate. Don’t overbeat—silky is the target. If you want a more pronounced swirl, reserve the filling and spread a thin line across the batter in the pan before layering the rest.
Step 6: Layer & Swirl
Spread about two-thirds of the batter into the pan, smoothing the surface. Drop dollops of the Cream Cheese filling over the batter, then swirl gently with a knife to create ribbons. Pour the remaining batter over the top and swirl again to form a marbled look that’s pretty enough to serve at a party. The key is to do gentle swirls so you don’t completely mix the layers; you want pockets of creamy goodness for contrast in every bite.
Step 7: Bake
Bake in the preheated oven for 25–30 minutes, or until a toothpick inserted into the center comes out with a few moist crumbs. If you love a fancier glaze, you can bake a touch longer for a thinner, crisper crust on top, but I prefer a slightly fudgier center, so I pull it at the first sign of doneness. Oven temps vary, so start checking at 25 minutes and watch for that glossy top to set and the edges to pull away just a touch from the pan.
Step 8: Cool & Glaze
Let the pan rest on a wire rack for at least 20 minutes, then lift the slab out with the parchment and let it cool completely before glazing. For the glaze, melt chocolate chips with butter and a splash of cream until glossy and smooth. Drizzle over the cooled surface in slow, swooping lines that mimic the swirls inside. If you want a more intense shine, add a teaspoon of corn syrup to the glaze. A pinch of flaky salt on top right after glazing makes the chocolate pop even more.
Step 9: Slice & Serve
Use a sharp knife warmed under hot water for clean slices. Wipe the blade between cuts to keep the pieces neat, especially if you’ve got a crowded dessert table. Serve at room temperature for the best texture, or chill for a firmer slice that slices extra cleanly. I love a generous square with a scoop of vanilla Ice Cream on the side—the contrast between the hot/off-chilled glaze and cold ice cream is heavenly. My kids call this “the chocolate hug,” and trust me, it lives up to that nickname every single time.
What to Serve It With
This nut-free chocolate slice shines in many contexts, and I’ve found a few pairing ideas that make the dish feel extra special.
For Breakfast: A small warm square beside a latte or a mug of strong coffee. It doubles as a quick morning treat when you’re running late but still craving something chocolatey. If you’re feeling fancy, toast a thin slice briefly to re-soften the center, then pair with a dollop of whipped cream.
For Brunch: Layer thin slices on a platter with Fresh Berries and a light dusting of powdered sugar. A drizzle of orange glaze adds a fresh kick that keeps the rich chocolate from feeling one-note.
As Dessert: Pair with a scoop of vanilla bean ice cream or a spoonful of raspberry coulis for a bright, fruity contrast. A tiny spritz of espresso near the plate makes the chocolate taste even deeper and more luxurious.
For Cozy Snacks: Warm, with a cozy blanket and a mug of milk or tea. It’s the kind of treat you can cut into small squares and nibble thoughtfully while listening to rain on the windows. We often have these as a post-dinner bite while the kids finish homework—no one ever complains about the extra chocolatey moment before bed.
Top Tips for Perfecting Your Nut-Free Chocolate
These are the little things I’ve learned after making this recipe countless times. They’ll help you push the flavor and texture toward perfection without extra fuss.
Mixing & Texture: Sift dry ingredients to keep the crumb ultra-smooth, and mix wet ingredients until just combined. Overmixing is the thief of tenderness in a chocolate bake, so keep your motions gentle. If you see a few dry streaks, a quick fold will often do the trick without overworking the batter.
Flavor Boosts: A tiny amount of espresso powder or coffee concentrate enhances the chocolate without tasting like coffee. If you’re not into coffee notes, skip it or substitute with a pinch of cinnamon for a warm spice note.
Swirl & Pattern: For a dramatic marbled effect, layer the batter and cream cheese filling in alternating dollops. Use a skewer or knife to gently swirl from the center outward, letting the lines cohere rather than run wild. A neat swirl makes for a prettier slice and a bigger “wow” at the table.
Ingredient Swaps: Want dairy-free? Use a dairy-free cream cheese in the filling and a plant-based milk in the batter. To keep the glaze glossy, a tablespoon of corn syrup or honey can be added, but you can skip it if you prefer a simpler finish. For a nuttier-free upgrade, a touch of almond extract is a no-go if you’re strictly nut-free; instead, use vanilla and a hint of orange zest to brighten the chocolate.
Baking Tips: If your oven runs hot, drop the temp to 340°F (170°C) and bake a little longer. If you like a more pronounced center, bake closer to 30 minutes; for a fudgier interior, pull around 25 minutes and let it rest—carryover heat will finish the bake nicely. A toothpick test is a reliable guide: moist crumbs cling to the toothpick, not wet batter.
Glaze Variations: For a shiny, mirror-like finish, add a teaspoon of light corn syrup to the glaze. If you’re avoiding dairy entirely, use coconut cream in place of cream and a dairy-free chocolate. A pinch of flaky salt on top brings out the chocolate flavor and makes it feel more like a special treat.
My favorite trick is to test the batter with a splash more milk if the batter looks stiff; a little extra liquid makes for a silkier crumb. And if you’re ever tempted to skip the glaze, don’t—the glaze is what makes the dessert feel complete, like you’ve tucked in a little extra love for the table. This recipe has become a slow-blooming favorite in my kitchen because it’s so forgiving yet still deliciously indulgent. I’ve learned to lean into the little mistakes (like a slightly over-swirled layer) and turn them into charming touches that friends notice and compliment.
Storing and Reheating Tips
Storage is where this nut-free chocolate really shines because it stays moist and delicious for days, which means you can bake once and enjoy it multiple times, even as a quick grab-and-go option.
Room Temperature: Store covered at room temperature for up to 3 days. The glaze will stay glossy, and the center remains fudgy when kept in a cool place away from direct sunlight.
Refrigerator Storage: If you’re living in a warm climate or want to extend the freshness, refrigerate for up to a week. Bring slices to room temperature before serving for the best texture and flavor release.
Freezer Instructions: Wrap slices tightly in plastic wrap and place in a freezer bag for up to 2 months. Thaw overnight in the fridge or on the counter for a faster option. If the glaze has softened or separated a little on thawing, give it a gentle re-warm in a low-temp bath or microwave with short bursts to maintain shine and texture.
Glaze Timing Advice: If you’re freezing, consider glaze-tasting after thawing; you might want to re-glaze lightly to restore that glossy finish. The filling will stay pleasantly creamy, and the marbled layers remain visible and enticing.
Frequently Asked Questions
Final Thoughts
This nut-free chocolate recipe is the kind of dessert that earns a place on your regular rotation, not just for the taste but for the simplicity and warmth it brings to the table. It’s humble enough for weeknights, but the glaze and the marbled swirl make it feel like a celebration. I love that it accommodates nut allergies without sacrificing depth or charm, and I’ve learned to lean on small tweaks—like oat milk for creaminess or espresso powder for a subtle edge—to tailor it to our moods and seasons. If you’re new to baking, this is the perfect entry point: straightforward ingredients, forgiving textures, and a finish that feels special. If you’re a seasoned baker, you’ll appreciate the way the classic brownie-cake line shows up in a completely nut-free, weeknight-friendly form. I hope you’ll try it, adapt it, and make it your own. Happy baking! And please, tell me in the comments what twist you try or what you serve it with. I can’t wait to hear how yours turns out!
Nut-Free Chocolate Bliss Balls
Ingredients
Main Ingredients
- 1 cup Medjool dates pitted
- 0.5 cup rolled oats
- 0.25 cup unsweetened cocoa powder
- 2 tablespoons coconut oil melted
- 0.5 teaspoon vanilla extract
- 0.25 teaspoon salt
Instructions
Preparation Steps
- Soak dates in warm water for 5-10 minutes if they are not soft. Drain well.
- Combine pitted dates, rolled oats, cocoa powder, melted coconut oil, vanilla extract, and salt in a food processor.
- Process until a sticky dough forms. It should be moist enough to hold together when pressed.
- Roll the mixture into small balls, about 1 inch in diameter.
- Place the bliss balls on a baking sheet lined with parchment paper and refrigerate for at least 30 minutes to firm up.
- Store in an airtight container in the refrigerator.