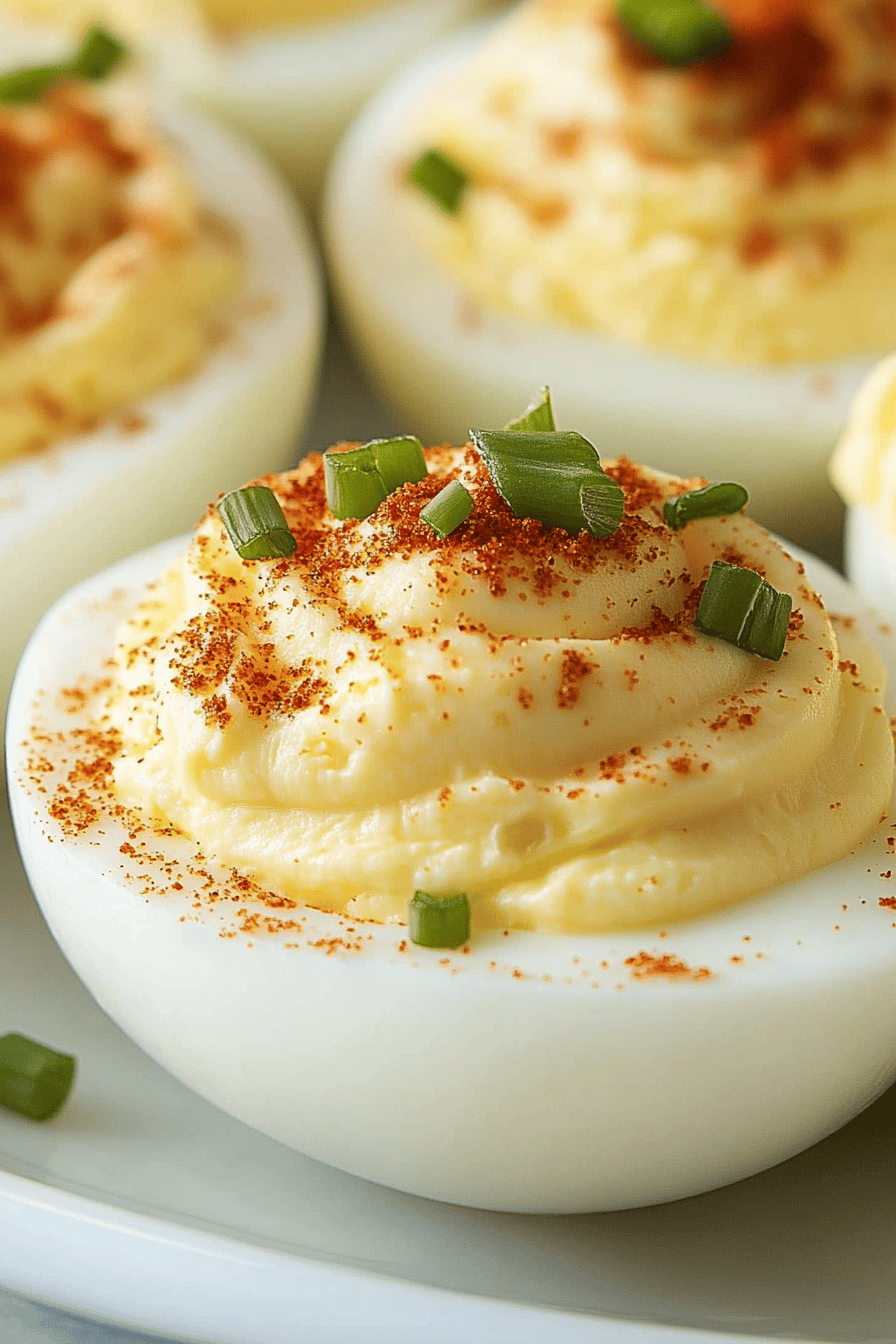
Loaded Deviled Eggs
Okay, confession time. You know how some recipes just have that *magic*? The kind that instantly transports you back to grandma’s kitchen, or makes your entire house smell like pure comfort? Well, for me, that recipe is these loaded deviled eggs. Seriously, if you’ve ever had a less-than-stellar Deviled Egg experience, forget all about it. This is not your average party appetizer; this is an *event*. I remember the first time I made them for a family picnic, and people were practically fighting over the last one. My aunt, who is notoriously picky, declared them the best she’d ever had, and that’s saying something! They’re sort of like the fancy cousin of a regular deviled egg, if you will, but without all the fuss. They’re so ridiculously good, I often find myself making a batch just for a late-night snack when I’m craving something satisfying and a little bit special.
What are loaded dal eggs?
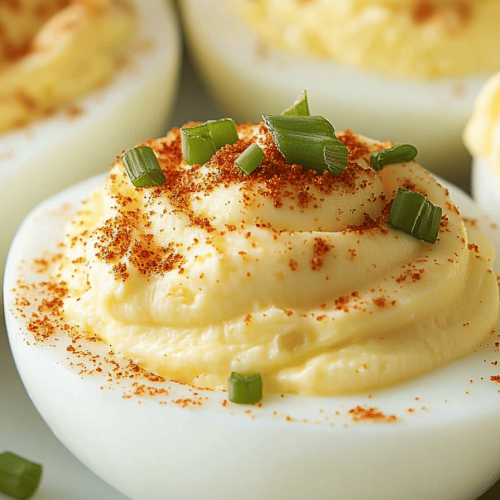
So, what exactly makes these Deviled Eggs “loaded”? Think of it as taking that classic, creamy, tangy deviled egg and giving it a whole new personality. Instead of just the standard filling, we’re adding in all sorts of delicious little surprises that create layers of flavor and texture. It’s essentially a supercharged deviled egg, packed with more deliciousness than you can shake a celery stick at! The “loaded” part usually refers to the mix-ins you fold into the creamy yolk mixture – things like finely chopped bacon, chives, a hint of spice, maybe even some sharp cheddar. It’s still got that familiar, comforting deviled egg base, but with exciting twists that make each bite an adventure. It’s the kind of dish that makes people stop and say, “Wow, what’s in these?”
Why you’ll love this recipe?
Honestly, where do I even begin? First off, the flavor is just out of this world. You get that rich, creamy yolk, a tangy kick from the mustard and vinegar, and then BAM! You hit those little pockets of crispy bacon, the fresh bite of chives, and maybe a subtle warmth from a dash of hot sauce. It’s a symphony in your mouth! And the best part? They’re surprisingly simple to whip up. I know it sounds fancy, but I promise, even if you’re a beginner in the kitchen, you can totally nail this. The ingredients are all pretty budget-friendly too, which is always a win in my book, especially when you want to make a big batch without breaking the bank. I love how versatile they are, too. They’re perfect for a potluck, a holiday gathering, or even just a special treat for your family on a Tuesday night. What I love most about this recipe is that it feels indulgent without being complicated. It’s the kind of dish that impresses your guests but also feels completely comforting and familiar to you. They are truly a standout, unlike any other appetizer you’ll find on a crowded appetizer table!
How do you make a loaded egg?
Quick Overview
The process is wonderfully straightforward. You’ll boil and peel your eggs, then whip up a luxuriously creamy yolk filling loaded with flavorful additions. Once that’s mixed, you’ll artfully pipe or spoon it back into the egg white halves, sprinkle with a little something extra, and voila! You’ve got a batch of deviled eggs that are anything but ordinary. It’s all about getting that perfect, smooth filling and then loading it up with all the good stuff.
Ingredients
For the Main Batter:
6 large eggs (I find farm-fresh ones give the best color and flavor, but any good quality eggs will do!)
1/4 cup mayonnaise (use your favorite, but I swear by a good full-fat mayo for creaminess)
1 tablespoon Dijon mustard (adds a nice tang without being too sharp)
1 teaspoon yellow mustard (for a little extra punch)
1 teaspoon white vinegar (just a touch to brighten everything up)
Salt and freshly ground Black Pepper to taste (don’t be shy with this!)
For the Filling:
4 slices of thick-cut bacon, cooked until crispy and finely crumbled (this is non-negotiable for me!)
2 tablespoons fresh chives, finely chopped (adds a beautiful color and oniony freshness)
1 tablespoon sweet pickle relish (optional, but I love the sweet little crunch it adds)
1/2 teaspoon paprika (for color and a hint of smokiness)
A pinch of cayenne pepper or a dash of your favorite hot sauce (for a subtle kick – adjust to your preference!)
For the Glaze:
A tiny sprinkle of extra paprika or chives for garnish (just for looks, really!)
Step-by-Step Instructions
Step 1: Preheat & Prep Pan
This step isn’t really about preheating a pan, but it’s about getting your eggs ready! You’ll want to start by hard-boiling your eggs. I like to place them gently in a saucepan, cover them with about an inch of cold water, and bring it to a rolling boil over high heat. Once it’s boiling, I immediately turn off the heat, cover the pot, and let them sit for about 10-12 minutes. This method usually gives me perfectly cooked eggs that aren’t rubbery and are super easy to peel. After they’ve sat, I drain the hot water and plunge them into an ice bath for at least 10 minutes. This stops the cooking and helps the shells release more easily. Trust me, easy-peeling eggs are a game-changer!
Step 2: Mix Dry Ingredients
This is where we get the flavor base going! Once your eggs are cooked, cooled, and you’ve peeled them carefully (tip: peel them under running water if the shells are being stubborn!), slice them in half lengthwise. Gently scoop out the yolks into a medium-sized bowl. You can use a fork to mash them up, or if you’re feeling fancy, a potato masher works great for a super smooth texture. Now, add your Dijon mustard, yellow mustard, white vinegar, salt, and Black Pepper to the mashed yolks. Give it all a good whisk until it’s well combined and starts to look nice and creamy.
Step 3: Mix Wet Ingredients
In a separate small bowl, combine your mayonnaise. This is where we add that luscious creaminess that makes deviled eggs so irresistible. Measure out your mayonnaise and add it to the bowl with the mashed yolk mixture. Whisk it all together until it’s super smooth and homogenous. You want a consistency that’s creamy and spreadable, not too stiff and not too runny.
Step 4: Combine
Now for the magic! Gently fold the mayonnaise mixture into the yolk mixture until everything is perfectly combined and incredibly smooth. Be careful not to overmix, as this can sometimes make the filling a bit gummy. You’re aiming for a luscious, creamy consistency that’s ready to be loaded up. Taste it here and adjust the salt, pepper, or tanginess if you think it needs it. This is your moment to perfect the base!
Step 5: Prepare Filling
This is the “loaded” part! Take your beautifully crumbled crispy bacon, your finely chopped chives, the optional sweet pickle relish, paprika, and that pinch of cayenne or dash of hot sauce. Add these delightful bits into your creamy yolk mixture. Gently fold everything together until it’s just combined. You want to see those little pops of color and texture throughout the filling. Don’t overmix here either; you want to keep the texture of the additions intact.
Step 6: Layer & Swirl
Now for the fun part – filling the egg whites! You have a couple of options here. You can carefully spoon the filling into each egg white half using a small spoon, or for a really pretty presentation, you can transfer the filling to a piping bag fitted with a star tip (or even just a ziplock bag with a corner snipped off). Pipe the filling into each egg white cavity, filling them generously. Make them look pretty! It’s totally okay if they’re not perfectly uniform; that’s part of the charm.
Step 7: Bake
You actually don’t bake these loaded deviled eggs at all! They are served chilled or at room temperature, which makes them a lifesaver for parties because you can make them ahead of time. No oven required, which is a huge bonus on busy days!
Step 8: Cool & Glaze
These are best served chilled or at room temperature. Once filled, I like to arrange them on a platter and then, just before serving, add a tiny sprinkle of paprika or some extra chives on top for a beautiful garnish. It really makes them pop visually! You can let them sit in the fridge for about 30 minutes before serving to let the flavors meld, but they’re also delicious made just a couple of hours ahead.
Step 9: Slice & Serve
Serve these beauties chilled or at room temperature. Arrange them on a nice platter, perhaps with some extra greens like parsley or a few more chives sprinkled around. They are perfect as is, or alongside some crusty bread or a light salad. They disappear so fast, I always make more than I think I’ll need!
What to Serve It With
These loaded deviled eggs are incredibly versatile! For breakfast, I sometimes have a couple with a side of fresh fruit and a strong cup of coffee; it’s a surprisingly satisfying start to the day. For brunch, they are an absolute star! I’ll serve them on a tiered stand with mini quiches, fruit salad, and perhaps some smoked salmon. They add such an elegant touch. As a dessert, while unconventional, a couple with a really good white wine can be a delightful, lighter end to a meal, especially if you’ve had a big main course. And for cozy snacks? Oh, they are perfect! I’ll whip up a batch while watching a movie with my family, and we’ll just graze on them. My kids especially love them when we have a casual movie night – they’re so much more interesting than plain chips!
Top Tips for Perfecting Your Loaded Deviled Eggs
Egg Prep: I’ve found that the ice bath method is key for easy peeling. Don’t rush that step! Also, make sure your eggs are fully cooled before you try to peel them, otherwise, you’ll end up with torn whites. My kids sometimes get impatient and try to peel warm eggs, and it’s always a mess!
Mixing Advice: The secret to a super creamy filling is to mash those yolks really well. I sometimes use a sieve if I want an absolutely silken texture, but mashing with a fork is usually sufficient and less fuss. And remember not to overmix after adding the mayo and seasonings; you want it to be smooth but still have some body.
Swirl Customization: Don’t be afraid to play around with the mix-ins! If you’re not a bacon person (I can’t imagine!), finely chopped ham or even smoked salmon can be delicious. For a vegetarian option, finely chopped pickles or even some sun-dried tomatoes can add a great texture and flavor. I once made a batch with finely diced jalapeños and cheddar cheese, and they were a huge hit!
Ingredient Swaps: If you’re out of Dijon, a good quality spicy brown mustard can work in a pinch, but it will change the flavor profile a bit. For the vinegar, APPLE CIDER vinegar can be used, but white vinegar is classic for its clean tang. And don’t skimp on the mayo; a good quality, full-fat mayo really makes a difference in the texture.
Baking Tips: As mentioned, there’s no baking involved! They are best served at room temperature or slightly chilled. If you’re making them for a picnic on a hot day, keep them in a cooler until serving time to ensure they stay fresh and safe.
Glaze Variations: The paprika and chive garnish is just for a little visual appeal. You could also add a tiny sprinkle of smoked paprika for a more intense smoky flavor, or even a few tiny capers for a salty burst. Honestly, the filling is so good, they don’t really need much more!
Storing and Reheating Tips
Room Temperature: Because of the mayonnaise, it’s best not to leave these out at room temperature for more than two hours, especially in warm weather. If you’re serving them at a picnic, make sure they stay in a cooler. They are at their best when eaten the same day they are made.
Refrigerator Storage: If you have leftovers, store them in an airtight container in the refrigerator. They will stay good for about 2-3 days. The texture might change slightly after the first day, but they’ll still be delicious. I often find that any leftovers get eaten up by my husband or kids as a quick snack the next day.
Freezer Instructions: I don’t recommend freezing loaded deviled eggs. The texture of the creamy filling and the egg whites can get a bit watery and mushy upon thawing, which really ruins the appeal. They are best enjoyed fresh!
Glaze Timing Advice: If you are storing them in the fridge, I recommend adding the garnish (paprika, chives) just before serving them again. The chives can get a little sad and wilted if they sit in the fridge for too long on top of the filling.
Frequently Asked Questions
Final Thoughts
There you have it – my absolute favorite loaded deviled eggs! They’re proof that sometimes, the simplest ingredients can come together to create something truly extraordinary. They’re creamy, they’re tangy, they’re packed with flavor, and they are guaranteed to be a hit at any gathering (or just for a sneaky midnight snack, no judgment here!). I really hope you give these a try. They’re a little bit nostalgic, a whole lot delicious, and honestly, just plain fun to make and eat. If you love these, you might also enjoy my recipe for classic potato salad, which is another potluck essential in my family. Can’t wait to hear what you think! Let me know in the comments below how yours turn out, or if you have your own special twist on these loaded deviled eggs. Happy cooking!
Loaded Deviled Eggs
Ingredients
Main Ingredients
- 6 large eggs
- 0.5 cup mayonnaise
- 1 tablespoon Dijon mustard
- 0.5 teaspoon white vinegar
- salt to taste
- black pepper to taste
Toppings
- 4 strips bacon cooked and crumbled
- 2 tablespoons chives chopped fresh
- 2 tablespoons shredded cheddar cheese
- paprika for garnish
Instructions
Preparation Steps
- Place eggs in a saucepan and cover with cold water. Bring to a boil, then remove from heat, cover, and let stand for 12 minutes. Drain and rinse with cold water. Peel and slice in half lengthwise.
- Scoop out the yolks and place them in a small bowl. Mash the yolks with a fork until smooth.
- Add mayonnaise, Dijon mustard, and white vinegar to the mashed yolks. Season with salt and pepper. Stir until well combined and creamy.
- Spoon or pipe the yolk mixture back into the egg white halves.
- Top with crumbled bacon, chopped chives, and shredded cheddar cheese.
- Garnish with a sprinkle of paprika, if desired.
- Serve immediately or chill until ready to serve.

