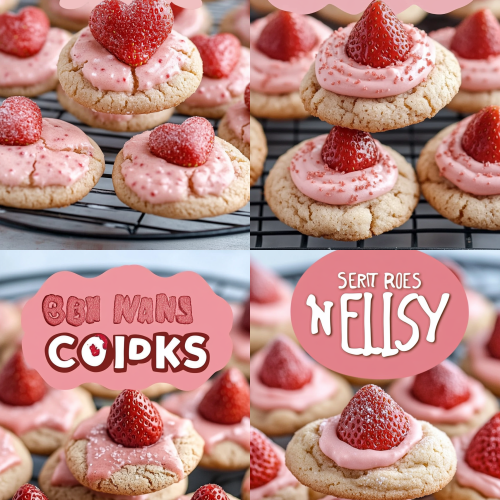
Kiss Cookies Recipe
There are certain smells that just transport me back in time, and the scent of these Kiss Cookies baking is one of them. It’s the smell of my Grandma Eleanor’s kitchen, a place that always felt warm, welcoming, and perpetually filled with deliciousness. I remember being a tiny thing, perched on a stool, watching her hands work their magic, dusting flour and creaming butter with such practiced ease. These Kiss Cookies are more than just a treat; they’re little bites of pure nostalgia, sunshine on a plate, and honestly, they’re surprisingly simple to whip up, even on a chaotic weeknight. They’re like a hug in cookie form, and once you try them, you’ll understand why they’ve been a family favorite for generations. Forget those elaborate layered cakes for a moment; sometimes, the simplest things are the most profound, and these cookies are proof of that. If you’ve ever loved a classic thumbprint cookie or a tender shortbread, you’re going to fall head over heels for this Kiss Cookies Recipe.
What are Kiss Cookies?
So, what exactly are these magical little treats I call Kiss Cookies? Think of them as the most delightful, tender, melt-in-your-mouth butter cookies you’ve ever had, with a sweet surprise tucked right in the center. They get their name from the way they’re formed – a gentle press into the dough creates a perfect little “kiss” or hollow, which we then fill with a luscious, sweet center. It’s not quite a jam, not quite a frosting, but something utterly unique and incredibly yummy. They’re essentially a perfected version of those classic butter cookies your grandma might have made, but with an extra layer of decadence and charm. The dough itself is so buttery and delicate, it practically dissolves on your tongue, and that burst of sweet filling is just the cherry on top. They’re approachable, elegant, and guaranteed to make anyone who tries them feel a little extra special.
Why you’ll love this recipe?
Oh, where do I even begin with why this Kiss Cookies Recipe is an absolute keeper? First off, the flavor is just out of this world. It’s that perfect balance of buttery richness from the cookie dough and a bright, sweet pop from the filling. It’s not overly sweet, which I appreciate, but it has just enough “oomph” to satisfy any craving. And let’s talk about simplicity! I’ve tried my fair share of fussy recipes, and this one is a lifesaver. The ingredients are all pantry staples, and the steps are so straightforward, you can practically make them with your eyes closed (though I wouldn’t recommend that!). This recipe is incredibly cost-effective too; you can make a huge batch without breaking the bank, which is always a win in my book. What I love most about these Kiss Cookies, though, is their incredible versatility. They’re fantastic for a quick breakfast treat with coffee, they dress up any brunch table beautifully, and they’re simply divine as a little pick-me-up in the afternoon. They also hold up wonderfully for gift-giving, and the smell as they bake? Pure magic. Seriously, the entire house smells like a bakery. They’re the kind of cookie that makes people say, “Wow, you made these?” and you can proudly say, “Yep, and it was easy!”
How do I make Kiss Cookies?
Quick Overview
Making these beloved Kiss Cookies is surprisingly simple! You’ll essentially cream together your butter and sugar until light and fluffy, then mix in your wet ingredients and flour. The dough comes together beautifully, and then you’ll form little balls, press an indentation in the center, fill it with a delectable mixture, and bake until golden. The whole process, from start to finish, is less intimidating than you might think, and the result is a cookie that looks and tastes like it came from a fancy patisserie. It’s perfect for when you want to impress without the stress!
Ingredients
For the Main Batter:
You’ll need 1 cup (2 sticks) of unsalted butter, softened to room temperature. Make sure it’s good quality butter; it really makes a difference in the flavor and texture. I always use unsalted so I can control the saltiness myself. Then, we have 3/4 cup of granulated sugar, which gives us that lovely sweetness. And don’t forget 1 large egg, also at room temperature – this helps bind everything together beautifully. For that hint of vanilla that makes everything taste like home, you’ll want 1 teaspoon of pure vanilla extract. And finally, the dry ingredients: 2 1/4 cups of all-purpose flour, which gives the cookies structure, and 1/2 teaspoon of salt to balance out the sweetness. I also add a tiny pinch of baking soda, about 1/4 teaspoon, which helps with tenderness without making them spread too much.
For the Filling:
This is where the magic happens! You’ll need about 1/2 cup of your favorite jam or preserves. My absolute favorite is raspberry for these, as the tartness cuts through the richness of the cookie perfectly, but strawberry, apricot, or even cherry work wonderfully. Some people also love a chocolate ganache or a Cream Cheese filling – the possibilities are endless! If you’re going for a simple jam, make sure it’s not too runny; a thicker jam will hold its shape better. If it’s a bit loose, you can simmer it down gently for a few minutes to thicken it up.
For the Glaze:
This is optional, but it really adds a professional touch and extra sweetness. You’ll want about 1 cup of powdered sugar. For the liquid, you can use 2-3 tablespoons of milk (or almond milk for a slightly different flavor – I tested this and it was surprisingly creamy!). A splash of lemon juice or even some orange juice can also be a delightful twist, adding a bright, zesty note. A teaspoon of vanilla extract in the glaze is always a good idea, too.
Step-by-Step Instructions
Step 1: Preheat & Prep Pan
First things first, let’s get our oven ready. Preheat it to 350 degrees Fahrenheit (175 degrees Celsius). While the oven is warming up, grab a couple of baking sheets and line them with parchment paper. This is a total game-changer; it prevents sticking and makes cleanup a breeze. Trust me on this one – no one wants to scrub baked-on cookie bits!
Step 2: Mix Dry Ingredients
In a medium bowl, whisk together your 2 1/4 cups of all-purpose flour, 1/2 teaspoon of salt, and 1/4 teaspoon of baking soda. Give it a good whisk to make sure everything is evenly distributed. This ensures your cookies have a consistent texture and rise. Set this bowl aside for now.
Step 3: Mix Wet Ingredients
In a large bowl, using an electric mixer (or a stand mixer with the paddle attachment), cream together your 1 cup of softened unsalted butter and 3/4 cup of granulated sugar. Beat them on medium speed until the mixture is light and fluffy, and pale yellow in color. This usually takes about 3-5 minutes. Then, beat in the 1 large egg and 1 teaspoon of pure vanilla extract until well combined. Scrape down the sides of the bowl as needed to make sure everything is incorporated.
Step 4: Combine
Now, gradually add the dry ingredients to the wet ingredients, mixing on low speed until just combined. Be careful not to overmix here! Overmixing can lead to tough cookies, and we want these to be tender and delicate. Stop mixing as soon as you no longer see streaks of flour. The dough will be soft and slightly sticky, which is exactly what we’re looking for. It should hold its shape when you scoop it.
Step 5: Prepare Filling
If you’re using jam, give it a quick stir. If it seems a little thick or stiff, you can warm it very gently in a small saucepan or in the microwave for just a few seconds to make it more spreadable. You want it to be easily spoonable but not so runny that it spills out of the cookie. If you’re using a different filling, like a Cream Cheese mixture or ganache, make sure it’s prepared and ready to go.
Step 6: Layer & Swirl
Now for the fun part! Take about 1 tablespoon of dough and roll it into a ball. Place the dough ball onto your prepared baking sheet, leaving about 2 inches between cookies. Using your thumb or the back of a small spoon, gently press an indentation into the center of each ball, creating a little well. Don’t press all the way through to the bottom. Then, spoon about 1 teaspoon of your chosen filling into each indentation. You want to fill the well, but don’t overfill, or it might bubble over during baking. Some people like to gently swirl the filling in a bit, but I usually just let it sit there, waiting to be baked!
Step 7: Bake
Bake your Kiss Cookies in the preheated oven for 10-14 minutes, or until the edges are lightly golden brown and the centers are set. Keep an eye on them, as ovens can vary. You don’t want them to get too dark; a gentle golden hue is perfect. They might look a little soft in the center when you take them out, but they will continue to firm up as they cool.
Step 8: Cool & Glaze
Let the cookies cool on the baking sheets for about 5 minutes. This is important because they’re delicate when hot and could break if you try to move them too soon. After 5 minutes, carefully transfer them to a wire rack to cool completely. Once they’re completely cool, you can prepare the glaze. In a small bowl, whisk together your 1 cup of powdered sugar with 2-3 tablespoons of milk (or your liquid of choice) and 1 teaspoon of vanilla extract until smooth and drizzle-able. You want it thick enough to coat the cookie but thin enough to drip slightly. Drizzle the glaze over the cooled cookies. Let the glaze set completely before serving or storing.
Step 9: Slice & Serve
Once the glaze has set, your beautiful Kiss Cookies are ready to be enjoyed! They’re best served at room temperature. You can slice them in half if you want a closer look at the delicious filling, or just serve them whole. They look absolutely stunning on a platter and are always a crowd-pleaser. Enjoy every single buttery, sweet bite!
What to Serve It With
These Kiss Cookies are so wonderfully versatile, they fit into almost any occasion. For a simple breakfast, they’re divine alongside a hot cup of coffee or a steaming mug of tea. I love to arrange a few on a small plate with a fresh fruit salad for a little something sweet to start the day. For a more elegant brunch, they can be a lovely addition to a pastry basket or a dessert tray. I like to dust them with a little extra powdered sugar or arrange them artfully around a bowl of fresh berries. As a dessert, they’re perfect for capping off a meal. I often serve them with a scoop of vanilla bean ice cream or a small glass of dessert wine. They also make for a comforting, cozy snack anytime you need a little pick-me-up. My family loves them with a tall glass of cold milk. We have a tradition of making these when we watch movies on a rainy afternoon, and they never disappoint.
Top Tips for Perfecting Your Kiss Cookies
Zucchini Prep: While these aren’t zucchini cookies, I think you might have gotten that mixed up. For these Kiss Cookies, the key is really in the butter temperature. Make sure it’s softened, not melted. Softened butter creams with sugar to incorporate air, which makes the cookies tender. If it’s too cold, it won’t cream properly; if it’s melted, your cookies will spread too much and be greasy. I usually leave my butter on the counter for about an hour before I plan to bake.
Mixing Advice: The biggest mistake people make with cookies is overmixing the dough after adding the flour. Once the flour is incorporated, you just want to mix until *just* combined. You don’t want to develop the gluten too much, or you’ll end up with tough, dense cookies. I always stop mixing as soon as I don’t see any dry flour pockets. A few little streaks are okay; they’ll get mixed in when you form the dough balls.
Swirl Customization: Don’t be afraid to get creative with your filling! If you’re using a jam that’s a little firm, you can warm it slightly in the microwave for 10-15 second bursts until it’s just spreadable. This makes filling the little indentations much easier. For a different look, you can slightly swirl the jam with a toothpick once it’s in the cookie, but be careful not to disturb the dough too much.
Ingredient Swaps: If you don’t have all-purpose flour, you can try a good quality gluten-free all-purpose flour blend. You might need a touch more liquid or a different baking time, but it’s definitely doable. For the egg, a flax egg or a commercial egg replacer can work, but the texture might be slightly different. For the dairy in the glaze, almond milk or even a little bit of orange juice can be lovely substitutes.
Baking Tips: I always bake cookies on the middle rack of my oven. This helps them cook evenly on both the top and bottom. If your oven tends to run hot, consider lowering the temperature by about 10-15 degrees Fahrenheit and checking them a little earlier. A good way to test if they’re done is to gently press the edge of a cookie; if it springs back slightly, it’s ready.
Glaze Variations: If you’re not a fan of super-sweet glaze, you can simply dust the cooled cookies with powdered sugar. Or, for a little tang, add a few drops of lemon juice to the powdered sugar and water mixture instead of milk. A drizzle of melted chocolate over the top of the set glaze is also a decadent touch!
Storing and Reheating Tips
These Kiss Cookies are pretty robust when it comes to storage, which is fantastic. For storing at room temperature, make sure they are completely cool, especially if you’ve added glaze. Store them in an airtight container, and they should stay fresh and delicious for about 3-4 days. I usually layer them between sheets of parchment paper to prevent the glaze from sticking, or if they don’t have glaze, they can just be stacked. If you’re planning to keep them longer, the refrigerator is your best bet. In an airtight container in the fridge, they’ll last for up to a week. They might firm up a bit in the fridge, so I usually let them come to room temperature for about 15-20 minutes before enjoying them for that perfect tender texture. For longer storage, you can absolutely freeze these cookies! Once completely cooled and the glaze is set (or if they’re unfrosted), wrap them tightly in plastic wrap, then place them in a freezer-safe bag or container. They’ll keep well in the freezer for up to 2-3 months. To thaw, simply transfer them to the refrigerator overnight, and then let them sit at room temperature for a bit before enjoying. If you’re storing unfrosted cookies and want to reheat them slightly, you can pop them in a low oven (around 300°F/150°C) for just a few minutes to warm them up and bring back that fresh-baked aroma.
Frequently Asked Questions
Final Thoughts
I really hope you give this Kiss Cookies recipe a try. It’s one of those recipes that feels special and homemade, but is totally achievable for even beginner bakers. The blend of buttery, tender cookie with that sweet, delightful filling is just pure bliss. They’re perfect for holidays, birthdays, or just a Tuesday when you need a little something sweet. I love seeing how everyone personalizes them with their favorite jams or drizzles. If you end up making them, please, please let me know how they turn out! I’m always so curious to hear about your baking adventures. Leave a comment below or share a photo if you can – I’d be thrilled to see your creations! Happy baking, and enjoy every single delicious bite!
Kiss Cookies Recipe
Ingredients
Cookie Dough
- 0.5 cup unsalted butter softened
- 0.5 cup granulated sugar
- 0.25 cup brown sugar packed
- 1 teaspoon vanilla extract
- 1.75 cup all-purpose flour
- 0.5 teaspoon baking soda
- 0.25 teaspoon salt
For Rolling and Topping
- 0.5 cup chopped pecans
- 24 Hershey's Kisses unwrapped
Instructions
Preparation Steps
- Preheat oven to 350°F (175°C). Line baking sheets with parchment paper.
- In a large bowl, cream together the softened butter, granulated sugar, and brown sugar until light and fluffy.
- Beat in the egg and vanilla extract until well combined.
- In a separate bowl, whisk together the flour, baking soda, and salt.
- Gradually add the dry ingredients to the wet ingredients, mixing until just combined. Do not overmix.
- Place the chopped pecans in a shallow dish.
- Roll the cookie dough into 1-inch balls. Roll each ball in the chopped pecans.
- Place the pecan-coated balls on the prepared baking sheets, about 2 inches apart.
- Bake for 8-10 minutes, or until the edges are lightly golden.
- Remove the baking sheets from the oven. Immediately press one Hershey's Kiss into the center of each warm cookie. The heat will help it melt slightly and adhere.
- Let the cookies cool on the baking sheets for a few minutes before transferring them to a wire rack to cool completely.