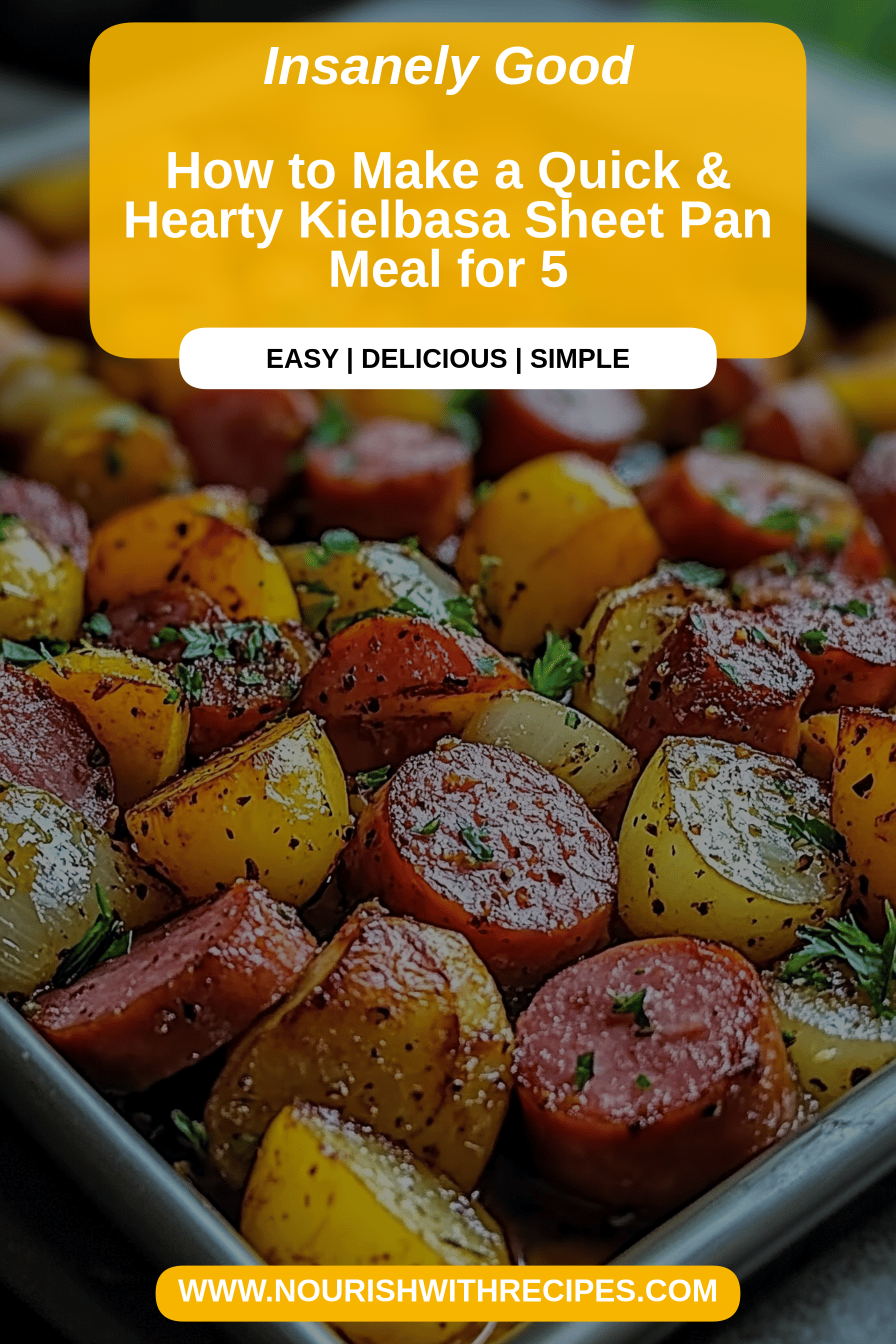
Kielbasa Sheet Pan Meal
You know those nights? The ones where the clock is ticking, the kids are asking “What’s for dinner?” for the tenth time, and your brain feels like it’s run a marathon? Yeah, I have those nights. A LOT. And that’s precisely why this kielbasa Sheet Pan meal has become my absolute culinary superhero. It’s the kind of dish that saves the day without making you feel like you’ve spent hours slaving away. Seriously, it’s so ridiculously simple, yet the flavors are just out-of-this-world good. It reminds me a little bit of those hearty, comforting meals my grandma used to make, but with a modern, weeknight-friendly twist. If you’re looking for something that’s as satisfying as a slow-cooked stew but as quick as a flash, you’ve stumbled upon something truly special. This isn’t just dinner; it’s a sigh of relief on a plate. My family devours it, and I love that it’s packed with veggies and flavor. It’s the kind of meal that makes everyone happy, including me!
What is Kielbasa sheet pan meal?
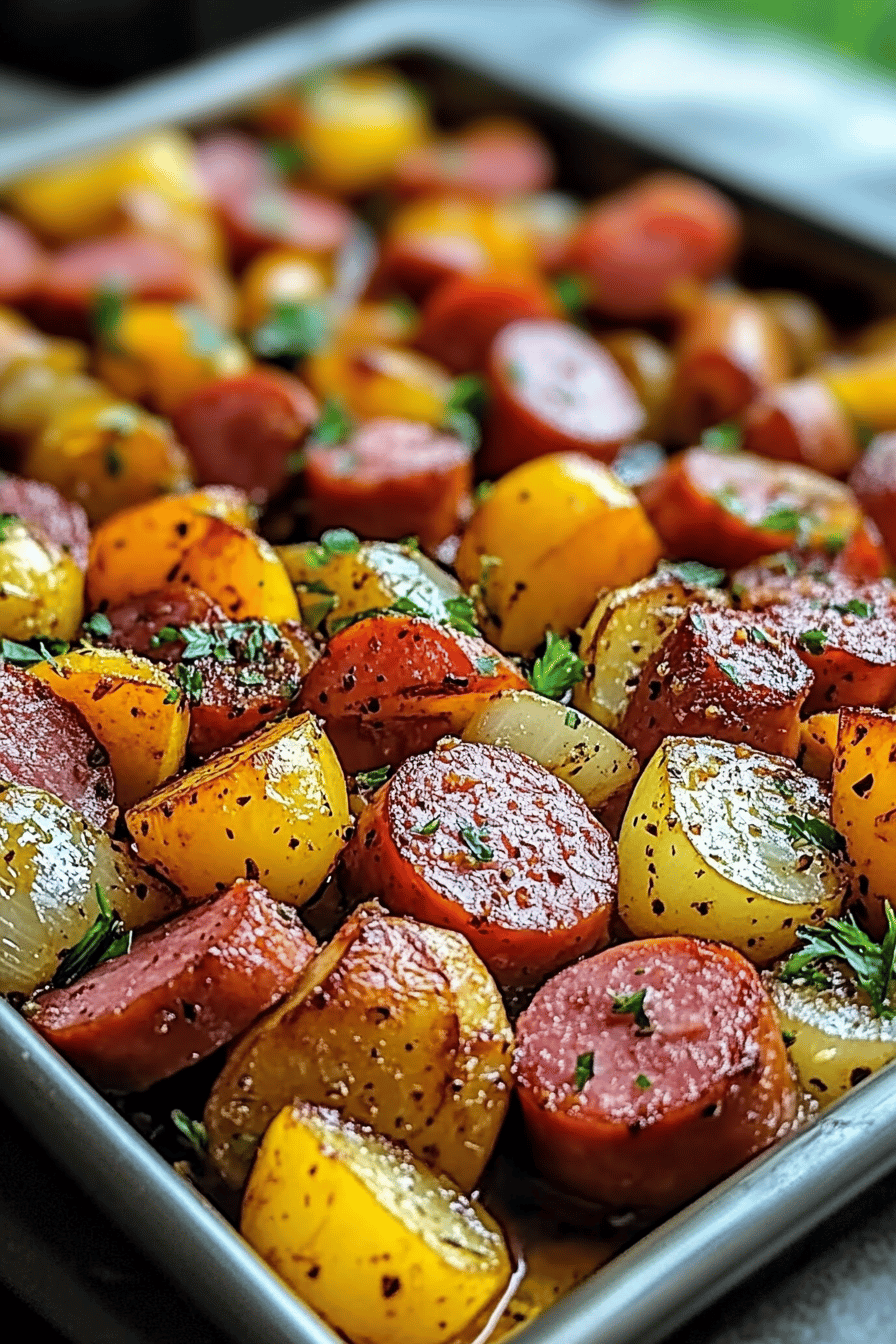
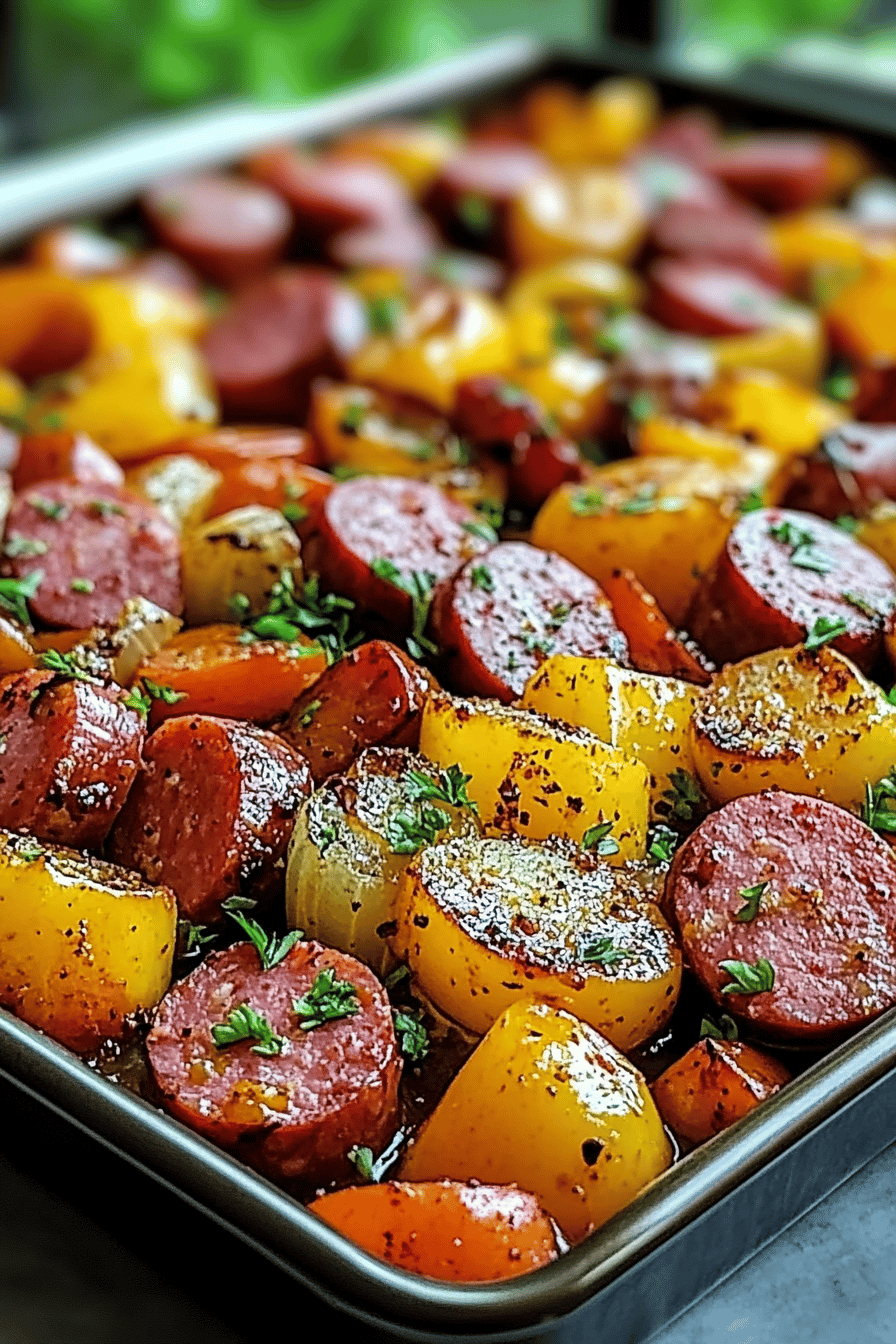
So, what exactly is this magical kielbasa sheet pan meal? Think of it as your culinary best friend for those busy evenings. At its heart, it’s a simple yet incredibly flavorful combination of hearty kielbasa sausage, an assortment of colorful vegetables, all roasted together on a single sheet pan. It’s essentially a one-pan wonder that minimizes cleanup while maximizing taste. We’re talking about smoky, savory kielbasa sliced and tossed with your favorite veggies – think crisp bell peppers, sweet onions, tender broccoli florets, and maybe even some hearty potatoes or Brussels sprouts. Everything gets a little toss in a simple, delicious seasoning blend and maybe a drizzle of Olive Oil, then into a hot oven it goes. The magic happens in the oven: the kielbasa gets beautifully browned and slightly caramelized, the vegetables soften and roast to perfection, and all those wonderful flavors meld together. It’s a complete, balanced meal that requires minimal effort but delivers maximum deliciousness. It’s not fancy, but it’s honest-to-goodness good food.
Why you’ll love this recipe?
Oh, where do I even begin with why this kielbasa sheet pan meal is a staple in my kitchen? First off, the FLAVOR. It’s just incredible. The kielbasa, when roasted, develops this amazing depth of flavor – it gets slightly crispy on the edges and incredibly juicy inside. When it mingles with the roasted vegetables, which become tender and a little sweet from the heat, it’s a match made in heaven. The smoky notes of the sausage just sing with the roasted goodness. Then there’s the SIMPLICITY. This is what truly makes it a lifesaver. You chop, you toss, you bake. That’s it! No complicated steps, no multiple pots and pans to wash, just one sheet pan to deal with. For busy weeknights, this is a game-changer. My kids actually ask for this all the time, which is a miracle in itself! The COST-EFFICIENCY is another big win. Kielbasa is generally an affordable protein, and you can use whatever vegetables you have on hand, making it super budget-friendly. It’s also incredibly VERSATILE. While I have my go-to vegetable combinations, you can swap them out based on what’s in season or what you’re craving. I love it because it’s a complete meal all on its own, but it also pairs beautifully with a simple side of rice or a crusty bread. What I love most about this is that it feels like a hearty, home-cooked meal without the fuss. It’s a step up from a quick sandwich but requires barely more effort. It’s the perfect balance of delicious, easy, and economical. It truly stands out because it delivers on all fronts without compromise.
How do I make Kielbasa sheet pan meal?
Quick Overview
The beauty of this kielbasa sheet pan meal lies in its straightforward approach. You’ll simply chop your kielbasa and vegetables, toss them together with a simple seasoning blend on a baking sheet, and roast until everything is beautifully tender and slightly caramelized. The oven does all the heavy lifting, transforming humble ingredients into a flavorful feast with minimal intervention from you. It’s the kind of recipe that makes you feel like a culinary genius with hardly any effort. The key is getting your ingredients prepped and then letting the heat work its magic. It’s truly as easy as it sounds, and the results are always impressive.
Ingredients
For the Main Event (Kielbasa & Veggies):
- 1 pound kielbasa sausage, sliced into ½-inch rounds
- 1 large red bell pepper, seeded and chopped into 1-inch pieces
- 1 large green bell pepper, seeded and chopped into 1-inch pieces
- 1 large yellow onion, cut into 1-inch chunks
- 2 cups broccoli florets
- 1 cup baby carrots (or chopped regular carrots)
- 2 tablespoons olive oil
- 1 teaspoon dried Italian seasoning
- ½ teaspoon garlic powder
- Salt and freshly ground black pepper to taste
For the Optional Flavor Boost (Glaze):
- 2 tablespoons Dijon mustard
- 1 tablespoon honey (or maple syrup for a dairy-free option)
Step-by-Step Instructions
Step 1: Preheat & Prep Pan
First things first, let’s get that oven humming! Preheat your oven to 400°F (200°C). This temperature is perfect for getting a nice roast on the vegetables and a lovely sear on the kielbasa without burning. Now, grab a large, rimmed baking sheet. If you want to make cleanup even easier, line it with parchment paper or foil. Trust me, it’s a lifesaver. Make sure your pan is large enough to hold all the ingredients in a single layer. Overcrowding will steam your veggies instead of roasting them, and nobody wants soggy-bottomed broccoli!
Step 2: Mix Dry Ingredients
In a small bowl, combine your dried seasonings: the Italian seasoning, garlic powder, and a good pinch of salt and pepper. This is where we build the flavor foundation. Whisk them together so they’re evenly distributed. It’s this simple blend that transforms plain ingredients into something truly delicious. Don’t skip this step! It ensures every bite gets a little burst of flavor.
Step 3: Mix Wet Ingredients
In a separate small bowl, whisk together the Olive Oil. If you’re planning to add the optional glaze later, you can also mix the Dijon mustard and honey (or maple syrup) together now and set it aside. This is a simple step, but having your wet ingredients ready makes tossing everything together a breeze.
Step 4: Combine
Now for the fun part! Place your sliced kielbasa, chopped bell peppers, onion chunks, broccoli florets, and carrots into a large bowl. Drizzle the Olive Oil over everything. Sprinkle the dry seasoning mix over the ingredients in the bowl. Toss everything gently with your hands or a large spoon until the kielbasa and vegetables are evenly coated with the oil and seasonings. Make sure every piece gets a little love!
Step 5: Prepare Filling
This step is technically already done as we’ve combined everything in the bowl. The “filling” here is really the star of the show – the kielbasa and its medley of roasted vegetables. I always opt for robust veggies that hold up well to roasting, like bell peppers, onions, broccoli, and carrots. They offer a fantastic contrast in textures and flavors. Feel free to add other sturdy vegetables like Brussels sprouts or chunks of Sweet Potato if you have them on hand. Just make sure they are cut to a size that will cook evenly with the kielbasa.
Step 6: Layer & Swirl
Spread the seasoned kielbasa and vegetable mixture evenly in a single layer onto your prepared baking sheet. This is crucial for even cooking and achieving those lovely roasted edges. Don’t pile them up! If your pan is too crowded, use a second pan. You want air to circulate around each piece. Ensure the kielbasa slices are nestled amongst the vegetables, not all clumped together. This allows everything to caramelize beautifully.
Step 7: Bake
Pop the baking sheet into your preheated oven. Bake for 20-25 minutes, or until the vegetables are tender and slightly browned, and the kielbasa is heated through and has a nice char on the edges. Halfway through the baking time (around 10-12 minutes), I like to give everything a good stir on the pan to ensure even roasting. This also helps prevent any one side from getting too dark. Keep an eye on it, as oven temperatures can vary.
Step 8: Cool & Glaze
Once your kielbasa and veggies are beautifully roasted, carefully remove the baking sheet from the oven. If you’re using the optional glaze, this is the time to drizzle it over the hot mixture. Give everything a gentle toss right on the pan to coat. The residual heat will help the glaze thicken slightly and adhere beautifully. Let it sit for just a couple of minutes before serving. This allows the flavors to meld and everything to settle.
Step 9: Slice & Serve
Serve this gorgeous kielbasa sheet pan meal directly from the pan, or plate it up with your favorite sides. The pieces should be tender enough to cut with a fork. I love seeing the vibrant colors all together – it’s a feast for the eyes before it even hits your plate. The aroma filling your kitchen is just incredible. Enjoy it while it’s hot!
What to Serve It With
This kielbasa sheet pan meal is so versatile, it can truly be a star at any meal. For a hearty **Breakfast**, I love serving it alongside some fluffy scrambled eggs or a perfectly poached egg on top. The savory, smoky flavors are just divine first thing in the morning. A mug of strong coffee is a must! For a more substantial **Brunch**, consider serving it with some oven-toasted baguette slices or a dollop of sour cream or Greek yogurt. It looks elegant and feels like a treat. If you’re looking for something lighter for **Dessert** – yes, dessert! – this works surprisingly well too, especially if you lean into sweeter elements like adding some roasted apples or pears to the pan. But usually, I see this as a fantastic main course. For **Cozy Snacks** or a light lunch, it’s perfect on its own or served over a bed of fluffy white rice or quinoa. My kids love it with a side of mashed potatoes – a true comfort food pairing! I’ve also tried serving it with a simple side salad for a lighter feel, and it’s delicious. It’s really about what you’re craving!
Top Tips for Perfecting Your Kielbasa Sheet Pan Meal
I’ve made this kielbasa sheet pan meal more times than I can count, and along the way, I’ve picked up a few tricks that really elevate it from good to absolutely amazing. For the **Vegetable Prep**, I always make sure my vegetables are cut into roughly uniform sizes. This is key for ensuring they all cook at the same rate. If you’re using harder vegetables like potatoes or sweet potatoes, cut them a bit smaller than the softer ones like broccoli or peppers so everything is perfectly tender at the same time. Don’t be afraid to get a little char on the vegetables; that’s where so much of the flavor comes from! When it comes to **Mixing Advice**, I always stress not overcrowding the pan. This is probably the single most important tip for achieving that delicious roasted texture. If your pan is too full, the veggies will steam rather than roast, and you won’t get those lovely caramelized edges. Use two pans if you have to! For **Swirl Customization**, while this recipe isn’t a swirl in the traditional sense, you can play with how you arrange the ingredients. For instance, you can keep the kielbasa slightly separated from the vegetables for distinct flavors, or mix them all together for a more integrated dish. I also find that a good quality kielbasa makes a big difference; a really flavorful sausage means a more flavorful dish. For **Ingredient Swaps**, don’t be afraid to experiment! If you don’t have bell peppers, use zucchini or cherry tomatoes. If broccoli isn’t your favorite, try cauliflower or green beans. The world of **Baking Tips** is all about oven accuracy. Make sure your oven is truly preheated to 400°F (200°C). If your oven tends to run hot or cold, you might need to adjust the cooking time slightly. I usually check for doneness around the 20-minute mark and add a few more minutes if needed. For **Glaze Variations**, the Dijon-honey combo is classic, but you can totally switch it up. A balsamic glaze adds a wonderful tang, or a swirl of BBQ sauce can give it a smoky, sweet kick. Just remember to add the glaze towards the end of cooking so it doesn’t burn.
Storing and Reheating Tips
This kielbasa sheet pan meal is fantastic because it leftovers just as well as it does fresh! If you have any (which is rare in my house!), store them in an airtight container in the refrigerator. It should stay fresh for about 3 to 4 days. For **Room Temperature** storage, it’s best to let it cool completely before covering. Don’t leave it out for too long, though – perishable food should only be at room temperature for a maximum of two hours. For **Refrigerator Storage**, a good quality airtight container is your best friend. This will prevent the food from drying out and absorbing any other odors in the fridge. When it comes to **Freezer Instructions**, this dish freezes surprisingly well. Wrap individual portions tightly in plastic wrap, then place them in a freezer-safe bag or container. It can stay frozen for up to 2-3 months. To thaw, transfer it to the refrigerator overnight. Reheating is a breeze! The best way to reheat is back in the oven or a toaster oven at around 350°F (175°C) for about 10-15 minutes, or until heated through. This helps revive that lovely roasted texture. You can also reheat it in the microwave, but be aware that the vegetables might become a bit softer. For the **Glaze Timing Advice**, if you plan to store leftovers, it’s often best to add the glaze *after* reheating to maintain its best texture and flavor, unless you added it when it was hot and it sealed the food nicely. If you know you’ll be reheating, maybe save a little glaze to add fresh at the end!
Frequently Asked Questions
Final Thoughts
There you have it – my absolute favorite kielbasa sheet pan meal! I truly hope you give this a try. It’s one of those recipes that just makes life a little bit easier and a whole lot tastier. The combination of smoky kielbasa and perfectly roasted vegetables is something truly special, and the fact that it all cooks on one pan makes cleanup a breeze. It’s the kind of meal that brings smiles to faces, from the pickiest eaters to the most discerning foodies. If you love this, you might also enjoy my [Link to another related recipe, e.g., “Roasted Sausage and Peppers”] or my [Link to another related recipe, e.g., “One-Pan Chicken and Veggies”]. Let me know in the comments below how your kielbasa sheet pan meal turns out! I’d love to hear about any variations you try or what your family’s favorite vegetable combinations are. Happy cooking, and happy eating!

Kielbasa Sheet Pan Meal
Ingredients
Main Ingredients
- 1 pound Kielbasa sausage Sliced into 1-inch pieces
- 1 pound Broccoli florets
- 0.5 pound Baby red potatoes Halved or quartered
- 1 medium Red onion Cut into wedges
- 2 tablespoon Olive oil
- 0.5 teaspoon Garlic powder
- 0.5 teaspoon Paprika
- 0.25 teaspoon Black pepper
- 0.25 teaspoon Salt
Instructions
Preparation Steps
- Preheat your oven to 400°F (200°C). Line a large baking sheet with parchment paper for easy cleanup.
- In a large bowl, combine the kielbasa sausage, broccoli florets, potatoes, and red onion.
- Drizzle the olive oil over the ingredients in the bowl. Sprinkle with garlic powder, paprika, black pepper, and salt. Toss everything together until well coated.
- Spread the mixture in a single layer on the prepared baking sheet.
- Roast in the preheated oven for 25-30 minutes, or until the vegetables are tender and slightly browned, and the kielbasa is cooked through. Flip the ingredients halfway through cooking for even browning.
- Serve hot and enjoy!