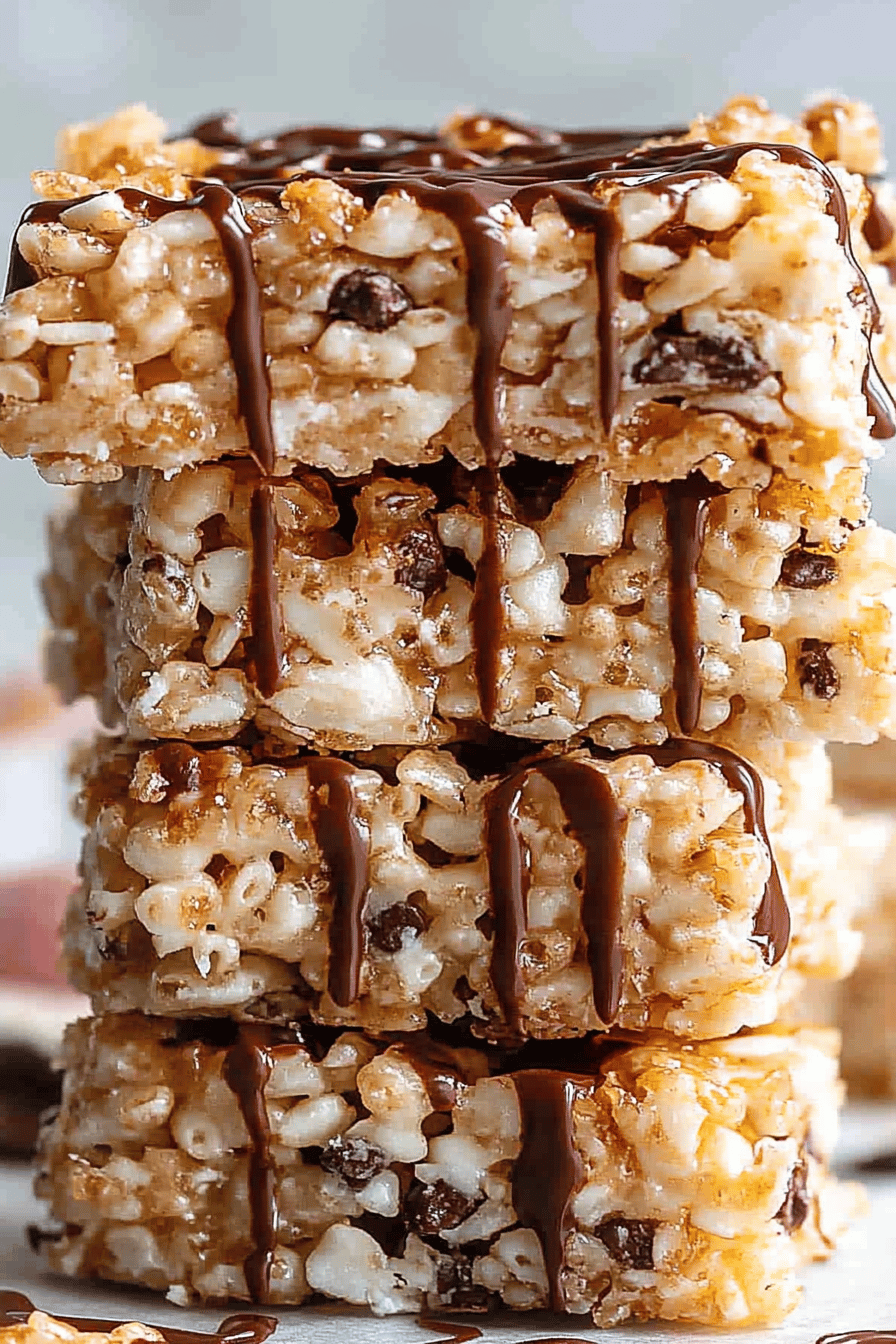
fruity cereal krispie treats
I’ve been making these since college mornings turned into chaotic afternoons, and somehow that oak-table kitchen still smells like melted marshmallows and vanilla. The first bite of fruity cereal Krispie Treats always takes me back to cozy Saturdays with my siblings, the TV buzzing softly in the living room, and syrupy laughter filling the air. This version is a little brighter, a little punchier—because we’re tossing in a colorful fruity cereal that makes the whole sheet pan look like a rainbow. It’s incredibly forgiving, ridiculously quick, and it somehow tastes like a celebration in every bite. If you’ve ever compared a classic Rice Krispies treat to a more kid-friendly version, you know what I mean: this fruity twist is a breezy, crowd-pleasing upgrade that still tastes like nostalgia in a square. I’m talking teary-eyed memories with a spoonful of crunch—fruity cereal krispie treats that disappear in minutes at my house and always spark a chorus of “Can we have seconds?”
What is Fruity Cereal Krispie Treats?
Think of Fruity Cereal Krispie Treats as the punchy, candy-colored cousin of the humble marshmallow-and-cereal bar. It’s essentially the same idea as the famous Rice Krispies Treats: a warm marshmallow-and-butter mixture folded through crisped cereal until everything sticks together in a sweet, chewy slab. The twist here comes from the fruity cereal you stir in and, if you like, a playful swirl or glaze that echoes your favorite breakfast flavors. The name itself tells you everything you need to know: fruity cereal adds color, a pop of flavor, and a sense of playful indulgence. It’s a treat you can pull together in minutes, and it tastes like a celebration you baked with love. This variation is perfect for busy weeknights, bake-sale fundraisers, or a snack that somehow makes a picnic feel extra joyful. Think of it as a kid-friendly dessert that adults secretly love, too—because who doesn’t want a little sunshine in every bite?
Why you’ll love this recipe?
What I love most about these Fruity Cereal Krispie Treats is how forgiving they are without losing their charm. You can customize with whatever fruity cereal you have on hand, which makes this a lifesaver on busy nights. The flavor is bright and comforting at the same time—the butteriness from the marshmallows balances the tangy creaminess of a glaze (or the subtle sweetness if you skip the glaze). The simplicity is unbeatable: melt, mix, press, set. It’s that easy. And the cost? You’re basically paying for cereal and marshmallows, which means you can feed a crowd with a modest grocery run. The flexibility is the kicker, too. I’ve tested these with all sorts of fruity cereals—Froot Loops, Fruity Pebbles, even a mix of Crunch Berries—and they all shine in their own way. This recipe is a kitchen-friendly canvas, inviting you to swap, swirl, and sprinkle until your heart (and your budget) are happy. If you’re after a straightforward dessert that feels like a hug, this is it. What I love most about this is how it invites creativity: a LEMON GLAZE for bright mornings, a strawberry swirl for date-night treats, or a sprinkle of edible glitter for a party platter. And yes, my kids actually ask for seconds, which is basically a stamp of approval in our house.
How do I make fruity cereal Krispie treats?
Quick Overview
Here’s the quick version: melt butter with marshmallows, stir in a big bowl of cereals, press into a pan, then drizzle with a glaze or swirl with a filling if you like. It’s a one-pan moment, a crowd-pleaser, and a no-fuss project that fills the kitchen with that marshmallowy aroma you can’t resist. What makes this method special is that you can tailor the ratio of cereal to marshmallow to get your desired chewiness—less marshmallow for a crunchier bite, more for a chewy, fudgy feel. And if you’re short on time, you can skip the filling and glaze and still walk away with a tray of irresistibly tasty treats. Trust me, this is a lifesaver on busy nights when you need something sweet that doesn’t require turning on the oven for hours.
Ingredients
[Organize ingredients by purpose with detailed explanations:]
For the Main Batter:
– 6 cups crisped cereal (a mix of Rice Krispies and a fruity cereal like Froot Loops works beautifully)
– 10 oz mini marshmallows (or about 40 large marshmallows)
– 2 tablespoons unsalted butter
– 1 teaspoon vanilla extract
– pinch of salt
For the Filling:
– Optional fruity yogurt swirl: 1/2 cup plain or vanilla yogurt, 2 tablespoons powdered sugar, 1/2 teaspoon vanilla, and a few drops of lemon or berry juice for brightness
– Optional fruit jam ribbon: 2 tablespoons berry jam stirred with 1 teaspoon lemon juice
For the Glaze:
– 1/2 cup White Chocolate chips (or milk/dairy-free white chocolate)
– 1–2 teaspoons milk or dairy-free milk, as needed
– 1/4 teaspoon vanilla extract
– Optional: a pinch of pink or yellow food coloring for a sunny look
Step-by-Step Instructions
Step 1: Preheat & Prep Pan
Preheat your oven? Not this time! We’re not baking—just a quick melt-and-press job. Line a 9×13-inch pan with parchment or lightly butter it so you can lift the slab out later. If you’re short on parchment, a nonstick spray works, but parchment helps with clean slices. I like to have a spatula ready and a big mixing bowl nearby, because once those marshmallows melt, you’ll be pouring fast.
Step 2: Mix Dry Ingredients
In a large bowl, whisk together the 6 cups of cereal. If you’re using a mix of Rice Krispies and fruity cereal, give them a gentle toss so every bite has a little color. The goal here is even distribution of color and flavor, so every square feels special. A few extra toasted cereal pieces are totally fine; they add texture and a toasty aroma that makes these irresistible.
Step 3: Mix Wet Ingredients
In a heavy saucepan over low heat, melt the butter. Add the marshmallows and a pinch of salt, stirring constantly until glossy and smooth. Don’t rush this—low and slow is the name of the game. Once melted, stir in the vanilla extract. The scent of vanilla will bloom as the mix comes together, and that warmth pairs perfectly with the bright fruitiness you’ll find in the cereal.
Step 4: Combine
Pour the melted marshmallow mixture over the dry cereal. Use a silicone spatula to fold everything together gently—you want to coat every piece without crushing the cereal into mush. If you’re aiming for a chewier bite, go easy on the stirring. If you love a bit more snap, give it a light fold until the cereal is evenly coated and speckled with shiny marshmallow.
Step 5: Prepare Filling
If you’re adding a filling, this is the moment to swirl it through. Dollop the fruit yogurt swirl in a few ribbons across the surface and, with a knife or skewer, create delicate marbling. If you prefer a jam ribbon, spoon it in thinly and swirl as well. The surface should still reveal pockets of color and a hint of pattern after you press it. The filling is optional, but it adds a playful contrast in both texture and tangy-sweet flavor.
Step 6: Layer & Swirl
Spread the coated cereal in the prepared pan. Use a flat spatula to press down firmly into an even layer. For a more compact bar, press with the bottom of a glass or measuring cup to ensure everything stays together. If you’re going for an artsy look, you can sprinkle a little extra cereal on top and press gently to create a mosaic effect. A quick swirl with a toothpick or knife will leave pretty lines that look almost fancy once cut.
Step 7: Bake
No bake here, remember! You’ll just set the bars by letting them sit at room temperature for about 1 hour, or until they’re firm enough to cut cleanly. If you’re in a hurry, you can refrigerate for 30 minutes to speed things up. The goal is a stable, sliceable slab, not a puddle of melted marshmallow, so give it time to settle if your kitchen is warm.
Step 8: Cool & Glaze
Once set, lift the slab from the pan using the parchment ends and place it on a cutting board. For a glaze, melt the White Chocolate with a teaspoon of milk and vanilla, stirring until smooth. Drizzle over the surface in a quick, generous stream, letting it pool in some spots and thin out in others for an appealing finish. If you prefer a lighter look, skip the glaze and dust with a tiny bit of powdered sugar or a whisper of edible glitter. The glaze sets fairly quickly, so have your slicing knife ready.
Step 9: Slice & Serve
Slice into bars or squares using a sharp knife. A quick wipe between cuts keeps the edges clean. Once cut, you can let them sit a few minutes to firm up further, which makes them easier to pick up without crumbling. Serve at room temperature for a chewy bite, or refrigerate for a firmer crunch. These fruity cereal krispie treats look festive on a platter—perfect for a kid’s party, a potluck, or a Sunday movie marathon with the family. If you want to get fancy, place a few slices on a dessert board alongside fresh berries and a dollop of whipped cream. The colors shine, and so does the nostalgia.
What to Serve It With
These fruity cereal krispie treats are incredibly versatile, so they pair with a lot depending on the moment.
For Breakfast: Pair with a strong, dark coffee or a creamy latte. A few lemon zest curls in the glaze add a bright morning twist. Serve alongside yogurt cups and fresh fruit for a balanced start to the day.
For Brunch: Present them on a pastel cake stand with a light fruit salad and a pitcher of orange juice or sparkling water with berries. A mini spritz of edible flowers on the tray makes the whole spread feel brunchy and fun.
As Dessert: They’re sturdy enough to ship as a simple homemade gift. Plate with a scoop of vanilla ice cream or a spoonful of berry compote to elevate them for a post-dinner moment. A drizzle of the glaze on the plate creates a glossy finish that’s almost restaurant-worthy.
For Cozy Snacks: Cut into bite-sized squares and tuck them into a tin for a quick after-school treat. They’re particularly comforting with a mug of hot cocoa or chai, the cereal’s color brightening the steam as you pull them apart.
In our family, these fruity cereal krispie treats are a go-to when we’re hosting a casual party or when the kids come home from school with invisible homework in their backpacks. The bright cereal colors spark conversation, and the chewy-snap texture is endlessly satisfying. My sister swears they taste like sunshine; I just call them a guaranteed mood-lifter. If you’re new to this kind of treat, start with the basic version first, then riff on the toppings or glaze later. You’ll see how quickly it becomes your favorite “quick win” dessert—one batch, endless possibilities.
Top Tips for Perfecting Your Fruity Cereal Krispie Treats
[Expert advice organized by technique:]
Marshmallow Prep: Use fresh marshmallows if possible. They melt more smoothly and give you that glossy sheen we all love. If you’re short on time, microwave the marshmallows and butter for about 1 minute, then stir until smooth. Don’t overheat, or you’ll get a clumpy texture that’s hard to coat the cereal.
Mixing Technique: Fold the cereal with a gentle touch. Overmixing can crush the pieces and make the bars feel dense instead of light and airy. If you want extra crunch, reserve a handful of cereal to sprinkle on top after you press the layer into the pan.
Swirl Customization: When you’re adding a filling, keep it in thin ribbons so you still see the colorful cereal peeking through. For a cleaner marble, swirl with a skewer in one direction just as you finish pressing the main layer.
Ingredient Swaps: If you want a dairy-free version, swap the butter for a plant-based alternative and use vegan marshmallows. For gluten-free, choose gluten-free crisped rice cereals and check that your marshmallows are gluten-free. The texture stays wonderfully forgiving, and you won’t miss a beat in flavor.
Baking Tips: Since there’s no actual bake involved, the key to success is letting the mixture cool and set properly. If your kitchen is warm, pop the pan into the fridge for 20–30 minutes to speed up setting. This is a great trick when you’re rushing to slice for a party.
Glaze Variations: For a brighter glaze, add a few drops of fruit juice or a teaspoon of flavor extract (like strawberry or lemon). If you want a glossy finish without dairy, use a thin ganache made with dark chocolate and a splash of coconut milk. Add color with a drop or two of gel coloring for a rainbow effect that kids adore.
[A few personal notes from trials: I learned this trick after years of making it—the first time I didn’t wait for the mixture to fully cool, and the slices smeared when I cut them. Let it rest. The patience pays off in clean edges and crisp corners. And yes, my kids remind me constantly that the best part is licking the spoon and catching the last sticky morsel on the spatula. It’s messy, sweet, and totally worth it.]
Storing and Reheating Tips
Storing these fruity cereal krispie treats is simple, which is a big win for homemakers and busy families alike. They stay delicious for days when kept properly, though they rarely last that long around here.
Room Temperature: Store in an airtight container or wrap the entire slab tightly in parchment and plastic wrap. They’ll stay soft and chewy for up to 3 days on the counter, away from heat and direct sunlight. If you’re in a warmer climate, consider refrigeration to preserve the texture—just let them come to room temp before slicing for the best bite.
Refrigerator Storage: In the fridge, they’ll stay fresh for about 1 week. Keep them wrapped well to avoid drying out. The cooler environment can sharpen the chewiness, which some people love, while others prefer the room-temp version for the soft, melt-in-your-mouth moments.
Freezer Instructions: Wrap slices individually in plastic wrap, then place in a freezer-safe container or zip-top bag. They freeze beautifully for up to 2 months. Thaw at room temperature for about 30 minutes, or heat gently in the microwave for a few seconds if you want a warm, gooey center again.
Glaze Timing Advice: If you plan to freeze, consider adding the glaze after thawing to keep it glossy and fresh. Alternatively, you can freeze the bars without glaze and drizzle just before serving to keep the finish pristine and shiny.
My favorite trick is to portion and freeze, then pull out a few bars for a quick dessert or kids’ snack. They thaw in minutes and taste almost as fresh as the day you made them. These tips have saved me on busy weeks and made sure there’s always something sweet ready to go without turning on the oven.
Frequently Asked Questions
Final Thoughts
If you’re looking for a dessert that feels like a warm hug from an old friend, this fruity cereal krispie treats recipe is it. It’s quick, forgiving, and endlessly customizable, which is basically my cooking sweet spot. I love how a few cups of cereal and a handful of marshmallows can create something that seems festive enough for a crowd but simple enough to whip up on a weeknight. The memories baked into each bite are what keep me coming back—that scent of melted marshmallow, the way the colors pop when you slice, the way your family gathers around the kitchen island to steal a corner before it’s cooled. If you try any fun variations—add a lemon glaze, swirl in jam, or toss in a handful of mini chocolate chips—tell me about it in the comments. I’m always curious to hear how you tweaked your batch. Happy baking!
Before you go, a quick nudge to let me know how your Fruity Cereal Krispie Treats turned out. Snap a photo, rate the recipe, or drop a line with your favorite cereal swap. I love seeing the little stories you bring to the table. And if you’re craving more nostalgic sweetness, check out my other posts like my Classic Rice Krispie Treats and the Bright Citrus Marshmallow Squares for more ideas to play with the same trusty technique.
May your kitchen always smell like toasted butter and vanilla, and may you always find a moment of joy in a perfectly cut square. Can’t wait to hear how yours turns out!

Fruity Cereal Krispie Treats Easy Recipe
Ingredients
Main Ingredients
- 9 cups Fruity Pebbles Cereal (or any Pebbles flavor)
- 15 ounces mini marshmallows
- 8 tablespoons unsalted butter
- 1 teaspoon vanilla extract
Instructions
Preparation Steps
- Line a 9x13-inch pan with foil and spray with nonstick cooking spray.
- Melt the butter in a large pot over medium low heat. Add the marshmallows and stir until melted. Remove from heat and stir in vanilla extract.
- Add cereal and stir to coat with the marshmallow mixture. Pour into pan. Press firmly to compact. Tip: spray wax paper with nonstick cooking spray so you can press without it sticking to your hands.
- Let set until firm then slice into bars. Store in an airtight container for up to 3 days.