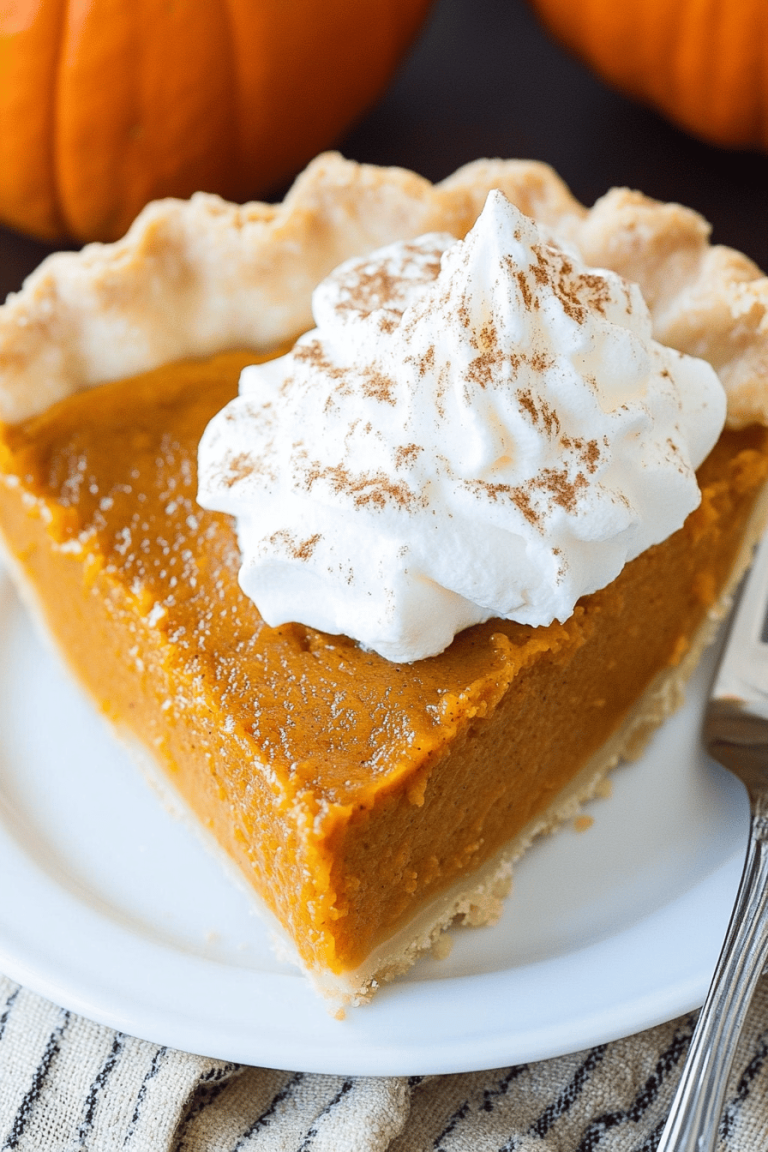
fruit pops
There’s something utterly magical about that first lick of a fruit pop on a hot summer afternoon—sweet, cold, and bursting with juicy flavor. I remember fishing them out of the freezer as a kid, the wooden stick cooling my fingers, and the taste instantly whisking me away to simpler times. If you’ve ever loved the pure, zingy happiness of a fruit popsicle, you’re in for a treat with my homemade fruit pops recipe. It’s the kind of recipe I turn to when I want to skip the sugary store-bought versions but still crave that refreshing bite. And honestly, it’s so simple, it feels like cheating—no fancy gadgets, just fresh fruit, a blender, and a bit of love. If you’re used to the classic ice cream-based pops, this fruitier version feels lighter, zippier, and honestly, a little addicting.
What is fruit pop?
Think of fruit pops as frozen fruit juice or puree on a stick, the simplest and most vibrant way to enjoy summer’s sweetness. They’re essentially nature’s candy, capturing the bright flavors of ripe berries, mangoes, or melons in a mini frozen treat. The name “fruit pops” comes from that satisfying “pop” you get when you bite into these icy delights. Unlike ice cream pops or gelatin-based treats, fruit pops are all about the purity of the fruit—minimal fuss, no added preservatives, and the freedom to experiment with whatever’s in season. If you ever wondered how to make summertime snacks feel both wholesome and fun, fruit pops are your answer. They’re approachable, kid-friendly, and honestly, so much more satisfying than the average sugary snack.
Why you’ll love this recipe?
What I love most about this fruit pops recipe is how incredibly fresh and simple it feels. The flavor? Bright, clean, and intensely fruity. Each pop tastes like a little bite of summer sunshine, thanks to the fresh fruit that gets blended right into the mixture. Plus, they’re unbelievably easy to make—no need to babysit them for hours or get fancy with ingredients. It’s mostly fruit, a splash of something sweet, and a bit of juice or coconut water to blend it all into the perfect icy consistency. Another thing is cost; making fruit pops at home saves a surprising amount compared to buying artisan pops from the store, especially when you use seasonal or frozen fruit. The versatility is wild, too. You can go tropical with pineapple and mango, keep it berry-packed with strawberries and blueberries, or mix in some herbs like mint or basil for a grown-up twist. This recipe quickly became my go-to treat for keeping the kids entertained on hot afternoons or whipping up a healthy snack without breaking the bank. Plus, it’s fun to swap ingredients with friends, making it a collective kitchen adventure.
How do you make fruit pops?
Quick Overview
Making these fruit pops is super straightforward—you basically blend up your favorite fruits with a bit of liquid and sweetener, pour the mix into molds, and freeze. What’s brilliant about this method is how adaptable it is: you can adjust flavors, sweetness, and even texture without sweating it. The process takes about 10 minutes of active work, and then you just let the freezer do its magic. I always recommend blending until perfectly smooth for that creamy pop texture—no gritty bits here! Once frozen solid, they come out icy-cold, bursting with real fruit flavor, and ready to brighten any day.
Ingredients
For the Fruit Base: For the Fruit Base: For the Fruit Base: For the Fruit Base: For the Fruit Base: For the Fruit Base: For
- 2 cups fresh or frozen fruit of your choice (strawberries, mango, blueberries, watermelon, etc.) – fresh if you can, but frozen works great too and saves prep time
- 1/2 cup fruit juice (orange, apple, or pineapple juice) – this helps keep things smooth and adds a little extra flavor punch
- 1–2 tbsp honey or maple syrup (optional) – just enough to balance the tartness, taste as you go
- 1 tbsp lemon or lime juice – brightens the flavor and stops it from getting too sweet
For Extra Creaminess (Optional):
- 1/4 cup coconut milk, almond milk, or Greek yogurt – I sometimes add this because it gives the pops a slight creaminess without being heavy
Step-by-Step Instructions
Step 1: Prep the Fruit
Wash and chop any fresh fruit into chunks. If you’re using berries, just toss them in whole. Frozen fruit can go straight in the blender—no need to thaw fully, but let it soften a bit for easier blending.
Step 2: Blend Ingredients
Pop the fruit, juice, sweetener, and lemon or lime juice into a high-speed blender. Blend until silky smooth, scraping down the sides if needed. If the mix feels too thick, add a splash of juice or water. If you want creamier pops, mix in coconut milk or yogurt here.
Step 3: Taste and Adjust
Give your blend a quick taste test—if it’s on the tart side, a drizzle more honey or syrup works wonders. Remember, freezing dulls sweetness slightly, so lean a bit sweet.
Step 4: Pour Into Molds
Carefully pour the mixture into your popsicle molds. If you don’t have molds, small paper cups with wooden sticks inserted work in a pinch.
Step 5: Freeze Until Solid
Place the molds in the freezer and leave them for at least 4-6 hours, though overnight is best for that perfect solid pop.
Step 6: Remove and Enjoy
Run the molds under warm water for a few seconds to ease the pops out of their molds, then dive right in.
What to Serve It With
For Breakfast: I like pairing fruit pops with a tall glass of cold press coffee or a refreshing herbal tea. They add a sweet and hydrating note to mornings when you want something light but fun.
For Brunch: Set them alongside a fresh fruit salad and some light yogurt parfaits. They add a playful touch to your spread and work well with fizz like a sparkling lemonade or prosecco for grown-ups.
As Dessert: These fruit pops can be a lovely palate-cleanser after a heavy meal, especially paired with a simple coconut or vanilla sorbet. Garnish with fresh mint for a bit of flair.
For Cozy Snacks: My kids adore them anytime, especially when we’re winding down with a movie or after a busy day outdoors. They’re a cool alternative to heavier sweets and help beat the heat while being refreshingly fruity. Trust me, these pops disappear in minutes at my house!
Top Tips for Perfecting Your Fruit Pops
Fresh Fruit Prep: I learned the hard way that draining extra liquid from juicy fruits like watermelon before blending avoids watered-down pops. Pat those chunks dry gently and you’ll get better texture.
Blending Texture: Don’t rush your blender—take an extra 30 seconds for a velvet-smooth blend. Chunky bits are tempting but can freeze hard and ruin the easy-chew you want in your fruit pops.
Sweetness Balance: Because we’re freezing natural juices, sweetness tends to mute. I usually make the mixture a tad sweeter than I’d drink it, but always taste before freezing. Opting for honey or maple syrup adds deep flavor compared to plain sugar.
Swirls and Layers: For a more grown-up look, try layering two fruit blends of contrasting colors (think mango and blueberry). Pour half, freeze partly, then layer the next flavor. The effect is stunning and it feels fancy without any extra work!
Freezing Tips: Pop your molds on a flat surface in the coldest part of your freezer, so your fruit pops freeze evenly and smoothly. If they freeze too fast, texture can get icy rather than creamy.
Mold Alternatives: No fancy molds? Use small paper cups with popsicle sticks or reusable silicone cupcake liners. Just make sure to freeze long enough so they hold well before un-molding.
One “a-ha” moment: I tested adding a splash of coconut water instead of juice and it made the fruit pops extra refreshing and less heavy. It’s my secret when I want to do a tropical twist that doesn’t weigh you down. It’s those tiny tricks that make homemade fruit pops feel like a little celebration every time.
Storing and Reheating Tips
Room Temperature: Fruit pops aren’t really meant to be stored at room temp for long (unless you want a mess!). Keep them in the freezer until ready to enjoy, ideally consumed within a week.
Refrigerator Storage: These pops won’t hold up in the fridge since they’ll melt quickly. If you have leftovers after thawing, eat within a few hours or toss them—they don’t fare well once thawed.
Freezer Instructions: Store fruit pops in a sealed container or cover your mold tightly with plastic wrap or aluminum foil to avoid freezer burn and off-flavors. They keep best for up to 2 months but honestly, they’re usually gone faster at my house!
Glaze Timing Advice: Since this recipe doesn’t use glaze, no worries here! But if you want to dip them in a quick chocolate shell, do that right before serving to avoid sogginess.
Frequently Asked Questions
Final Thoughts
Making fruit pops at home quickly became one of my favorite kitchen joys. The fresh scent of blending fruit, the bright colors swirling in the molds, and that perfect frozen bite always bring a little sunshine to our days. It’s one of those recipes that feels special without requiring a big production, just fresh fruit and a happy freezer. If you love easy, wholesome treats that you can feel good about sharing with your family (or sneaking a few yourself), give these fruit pops a try. They work beautifully as a light snack or a fun, refreshing dessert. I can honestly say I’ve made these dozens of times, and I’m already thinking of my next flavor combo! Don’t forget to drop a comment or share your variations—I’m always here cheering you on in the kitchen. Happy freezing and happy tasting!
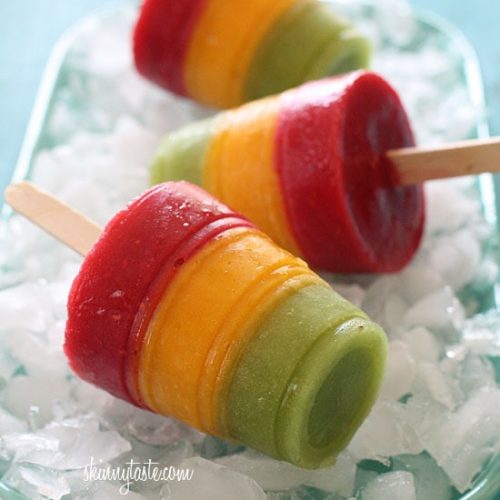
Easy Tropical Fruit Pops for Summer
Ingredients
Main Ingredients
- 9 tbsp water
- 2 tbsp sugar
- 5 oz kiwi (peeled)
- 6 oz mango (peeled)
- 6 oz fresh raspberries
Instructions
Preparation Steps
- Make a simple syrup by combining water and sugar in a small pot and bring to a boil; boil for about 4-5 minutes on medium heat.
- Set the simple syrup aside to cool.
- Puree kiwi, mango, and raspberries separately in a blender until smooth.
- Divide the simple syrup evenly among the three fruit purees and stir to combine.
- Pour the kiwi puree into four small 5 oz cups and freeze for one hour.
- Add the mango puree on top and freeze for 20 minutes.
- Insert sticks into the frozen layers and freeze for at least 2 hours.
- Add the raspberry puree last and freeze overnight until fully set.