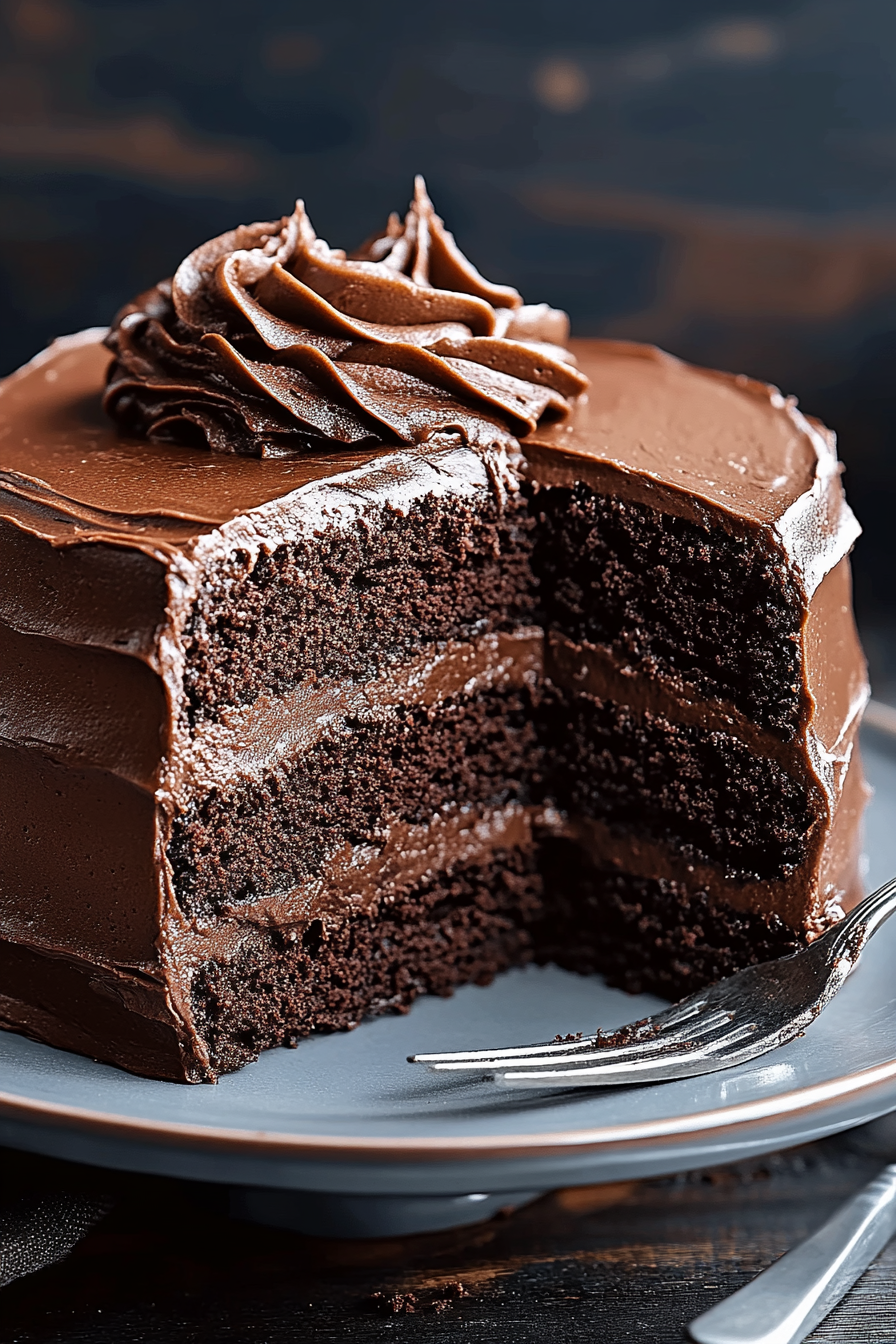
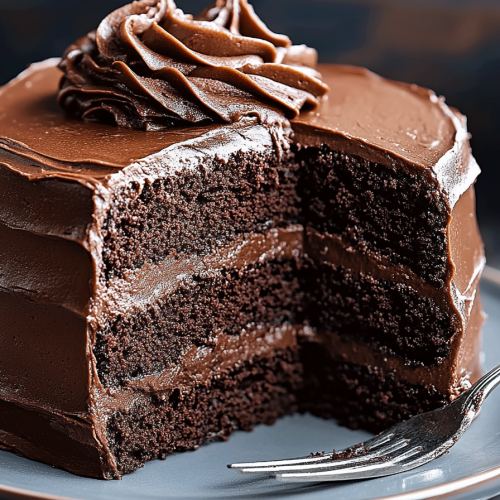
Flourless Chocolate Cake
I’ll tell you a little secret: this Flourless Chocolate Cake is the one I reach for when I want something fabulously indulgent but not fussy. The first time I tasted a version of this dessert, my cousin whispered, “It’s like a rich fudgy brownie dream that somehow lightens as it hits your fork.” That contrast—deep chocolate but not heavy—got me hooked. I remember making it on a rainy Sunday, the whole kitchen smelling like a warm cocoa blanket, while the kids fought over who got to lick the spoon. It’s incredible how something so simple—just good chocolate, eggs, sugar, and a splash of butter—can feel so celebratory. This Flourless Chocolate Cake isn’t just dessert; it’s a small ceremony you can pull together on a weeknight or slow down into a weekend moment. If you’ve ever compared it to a flourless almond torte or a gooey lava cake, you’ll know what I mean: it’s the kind of cake that makes the house feel cozy even before you slice into it.
What is flourless chocolate cake?
Think of Flourless Chocolate Cake as chocolate logic in dessert form. It’s essentially a dense, fudgy cake that relies on eggs and butter (and a lot of melted chocolate) instead of flour to set up. The name isn’t about dietary strictness so much as about texture—there’s no flour to dry out the batter, just pure chocolate richness and a tender crumb. Its origin feels like a delicious mishmash of European methods: a Spanish or Italian chocolate cake adapted into a modern, gluten-free favorite. The result is a slice that feels indulgent yet surprisingly light on the teeth, with a glossy top, a glossy glaze if you choose, and a crisp edge that gives way to a silky center. It’s essentially a few pantry staples coming together in the most comforting way, and that’s what makes it so appealing for everyday dinners and special occasions alike.
Why you’ll love this recipe?
What I love about Flourless Chocolate Cake is how it tastes like a dessert from a fancy cafe but is actually
- Flavor: The chocolate is the star—intense, glossy, and deeply satisfying with hints of vanilla and a whisper of salt. It’s not cloyingly sweet; it’s a grown-up treat you can share with friends who think they don’t like “rich” desserts.
- Simplicity:I’ve made this with a quick double-bang of espresso powder to deepen the chocolate, and it’s
- Cost-efficiency: You’re using common pantry ingredients—chocolate, butter, eggs, sugar—so it’s easy on the wallet, especially when you keep a stash of good chocolate handy.
- Versatility: It’s fantastic plain, and it shines with toppings—from a simple dusting of cocoa or powdered sugar to a glossy glaze, citrus zest, or a dollop of whipped cream.
- Adaptability: I’ve tested this with almond milk to lighten the texture and a touch of coffee for a mocha twist. It’s amazing how little tweaks can transform the mood of the cake.
Another thing I adore is how forgiving it is on timing. It’s the kind of dessert that still tastes wonderful a few minutes after it comes out of the oven, and it cuts beautifully into wedges for a crowd. If you’re new to gluten-free desserts, this is a gentle entry point that proves you don’t need flour to deliver a memorable chocolate fix. For a quick reference, this Flourless Chocolate Cake pairs beautifully with a glass of dessert wine, a strong espresso, or a scoop of vanilla bean ice cream on the side.
How to Make Flourless Chocolate Cake
Quick Overview
In a nutshell, you melt the chocolate with butter, whisk in the sugar and egg yolks, fold in the stiffly beaten egg whites, bake until the center is just set, and then glaze or dust as you like. The trick is not overmixing after you introduce the egg whites, so you keep that fudgy, tender crumb. It’s a one-pan, one-bowl kind of bake, which means less cleanup and more savoring. Trust me, this method delivers a deeply chocolatey cake with a glossy finish and a texture that’s almost brownie-like, but a touch lighter on the finish.
Ingredients
For the Main Batter:
- 8 oz (225 g) semisweet or Dark Chocolate, finely chopped or in chips
- 1/2 cup (115 g) unsalted butter, cut into pieces
- 3/4 cup (150 g) granulated sugar
- 3 large eggs, separated
- 1/4 teaspoon salt
- 1 teaspoon pure vanilla extract
- Optional: 1–2 tablespoons espresso powder for a moody mocha note
For the Filling (optional, for a richer center or marbled look):
- 2 tablespoons dark cocoa powder (for dusting or a light filling)
- Optional swirl: a tablespoon of peanut butter or almond butter swirled in
For the Glaze:
- 4 oz (115 g) dark chocolate, melted
- 2 tablespoons light corn syrup or water to thin (optional)
- 1 teaspoon vanilla extract (optional)
- A pinch of sea salt for finishing
Step-by-Step Instructions
Step 1: Preheat & Prep Pan
Heat your oven to 350°F (175°C). Line a 9-inch springform pan with parchment paper and grease the sides well. A quick tip: wrap the bottom with a sheet of foil to catch any butter leakage if you’re worried about a water bath—not strictly necessary, but it’s a handy trick if your oven runs hot or you’re using a darker pan.
Step 2: Mix Dry Ingredients
In a small bowl, whisk together the sugar and a pinch of salt. If you’re adding espresso powder, whisk it in so it dissolves evenly and won’t leave gritty bits behind.
Step 3: Mix Wet Ingredients
In another bowl, melt the chocolate with the butter over a gentle heat or in short bursts in the microwave, stirring until smooth. Let it cool just a touch, then whisk in the vanilla extract and the egg yolks until glossy and fully combined. If you’re adding espresso, this is the moment to bloom it in with a splash of hot water to intensify the flavor profile.
Step 4: Combine
Stir the dry ingredients into the chocolate mixture, then fold in the egg whites a little at a time. Use a gentle folding motion—think of lifting the batter rather than mashing it. The batter should look glossy with ribbons of white from the egg whites. If you overmix, you’ll risk a denser texture, and that’s not what we want here.
Step 5: Prepare Filling
If you’re going for a swirl or a richer center, whisk a touch more cocoa powder with a few tablespoons of the batter and swirl it in once you pour the main batter into the pan. A light swirl of peanut butter or almond butter can be a delight for certain palates—just don’t overdo it, or you’ll overshadow the chocolate.
Step 6: Layer & Swirl
Pour the batter into the prepared pan. If you’re doing a marbled effect, drop spoonfuls of the optional filling on top and use a skewer to swirl gently. You want a few soft curves rather than a uniform pattern—it looks rustic and gorgeous once baked.
Step 7: Bake
Bake for 25–30 minutes, or until the center is just set and a tester comes away with a few moist crumbs. The cake will rise and then settle as it cools, and that’s exactly what you want. If your oven runs hot, start checking around 22 minutes to prevent overbaking, which can dry out the center.
Step 8: Cool & Glaze
Cool the cake in the pan on a rack for about 15 minutes, then release the springform and let it finish cooling completely on a rack. Drizzle the glaze over the top while it’s still a little warm so it sets into a glossy, decadent finish. If you prefer a velvety glaze, whisk in a splash of coconut milk or extra vanilla before pouring.
Step 9: Slice & Serve
Cut with a sharp knife, wiping the blade between slices for clean edges. Serve at room temperature for the best texture—moist, fudgy inside with a delicate snap on the glaze. A dollop of whipped cream or a scoop of vanilla bean ice cream instantly elevates the experience, especially when you’re sharing with friends after dinner.
What to Serve It With
This Flourless Chocolate Cake is flexible enough to pair with a number of accompaniments, depending on the moment:
For Breakfast: a small slice with coffee, perhaps a smear of almond butter and a few berries for brightness. It’s a cheeky, indulgent start to a weekend morning.
For Brunch: serve with lemon zest whipped cream and a scattering of toasted almonds. A side of fresh fruit keeps the richness balanced.
As Dessert: a scoop of vanilla or espresso ice cream and a few raspberries on the side is classic. A drizzle of orange glaze can lift the chocolate in a refreshing, bright way.
For Cozy Snacks: warm a slice slightly and top with a spoonful of yogurt and a dusting of sea salt. It turns into a “little treat” that feels special without being over-the-top.
My family loves this with a pinch of flaky salt and a glass of red wine on a chilly evening. It’s a small ritual that for me, means comfort and connection. If you’ve got guests who think gluten-free means non-indulgent, this cake changes minds with its sheer chocolate charisma. For a similar but different finish, check out my [No-Bake Chocolate Tart](#no-bake-chocolate-tart) when you’re craving something no-bake yet deeply chocolatey.
Top Tips for Perfecting Your Flourless Chocolate Cake
These tips are the ones I go to on busy weeknights and on special-occasion weekends alike. They’ve saved me more than once when the cake looked a little off in the oven, but turned out perfect in the end.
Egg Separation & Texture: I always separate the eggs while they’re cold, then bring the whites to room temperature before beating. Beat the whites to stiff, glossy peaks but don’t overwhip; you’re aiming for light, airy folds that lift the batter without deflating it.
Chocolate Quality: Use a good-quality chocolate that you’d happily eat by itself. I’ve learned that a more intense chocolate can actually make the cake lean into a sophisticated, almost espresso-laced flavor. If you prefer sweeter desserts, choose a chocolate with a touch more sugar; otherwise go for extra-dark for a more dramatic finish.
Mixing & Aeration: Fold the whipped whites into the chocolate in three additions, not all at once. The first two additions should be fairly gentle, and the last fold should incorporate any remaining white into the batter with a few deliberate strokes. You want a glossy batter with visible air pockets, not a dense paste.
Swirl & Patterning: If you’re feeling playful, pour the batter in layered dollops and use a skewer to create delicate marbling. You’ll get a visually appealing finish and a little extra texture in every bite.
Ingredient Swaps: A splash of almond milk adds moisture and a subtle nutty note; a tablespoon of strong coffee can deepen the chocolate without making it taste like coffee. I tested several substitutions and found that a small amount of espresso powder dissolved in hot water does wonders for flavor without thinning the batter.
Baking Tips: If your oven runs hot, you’ll want to check early. A cracked top is not the end of the world—it’s often simply a sign of a hot oven, and it can still be delicious. If you want a more pronounced edge, bake a touch longer; for a perfectly fudgy center, pull just as the center shows a slight jiggle and a few crumbs cling to the toothpick.
Glaze Variations: For a glossy, restaurant-worthy finish, whisk warm chocolate with a touch of butter and a teaspoon of corn syrup; it’ll look mirror-like. If you prefer something less sweet, try a dusting of cocoa powder or a light vanilla glaze instead. A sprinkle of flaky sea salt on top of the glaze is magical for balancing sweetness.
Lessons learned: don’t overbeat after adding the whites, respect the magic of air, and keep a close eye on the clock. This Flourless Chocolate Cake will reward you with a texture that’s simultaneously indulgent and elegant—exactly the vibe I want when I welcome friends to my kitchen for a quick catch-up over dessert.
Storing and Reheating Tips
Storage and reheating aren’t flashy topics, but they’re the real-life workhorses of a great recipe. This Flourless Chocolate Cake stores well, and the flavors actually deepen as it rests.
Room Temperature: If you’re serving within a day, you can keep the cake loosely covered at cool room temperature for up to 2 days. It’s best to slice after it has rested a bit so the texture settles and becomes more sliceable.
Refrigerator Storage: Wrap well in plastic wrap or store in an airtight container for up to 5 days. The glaze may firm up in the fridge, so let it come to room temperature for about 20 minutes before serving to regain that glossy finish.
Freezer Instructions: You can freeze the whole cake or individual slices. Wrap tightly in plastic wrap and then in foil. It will keep for up to 2 months. Thaw in the fridge overnight, then bring to room temperature and glaze just before serving for best texture.
Glaze Timing Advice: If you’re storing the cake without glaze, glaze right before serving to keep it pristine. If you’re freezing, you can glaze after thawing to preserve shine, but you might need to reheat the cake briefly to soften the glaze and achieve that luscious surface again.
In short, Flourless Chocolate Cake is forgiving when it comes to storage, and the most important signal you’ll notice is the aroma—rich, chocolatey, and inviting—whether you’re slicing into it fresh or after it’s spent a night in the fridge.
Frequently Asked Questions
Final Thoughts
Flourless Chocolate Cake has a way of quietly becoming a favorite—no drama, just pure chocolate comfort that travels from weeknights to weekend celebrations with ease. It’s the kind of recipe I turn to when I want to feel like I’m treating myself without complicating my schedule. The cake’s texture—dense, fudgy, and just a touch glossy—always gets a small gasp of delight from guests, followed by questions about measurements and substitutions. If you’re new to this dessert, give it a try with the espresso boost and a dusting of sea salt. If you’re a purist, keep it simple, glaze it thinly, and let the chocolate shine. And if you’re baking for someone who’s gluten-free or dairy-free, there are easy tweaks that keep the spirit intact while accommodating needs. I’ve made this countless times and it never fails to earn a little space in the conversation around the table. Happy baking! And please, tell me in the comments how yours turned out, or share your own favorite twist. I love hearing how you’ve made this Flourless Chocolate Cake your own.
Flourless Chocolate Cake
Ingredients
Main Ingredients
- 227 grams unsalted butter
- 170 grams dark chocolate (70% cacao) chopped
- 175 grams granulated sugar
- 6 large eggs
- 4 tablespoons unsweetened cocoa powder
- 1 teaspoon vanilla extract
- 0.5 teaspoon salt
Instructions
Preparation Steps
- Preheat your oven to 350°F (175°C). Grease and line a 9-inch springform pan with parchment paper.
- Melt the butter and dark chocolate together in a heatproof bowl set over a saucepan of simmering water, stirring until smooth. Remove from heat.227 grams unsalted butter
- In a separate large bowl, whisk together the granulated sugar, eggs, cocoa powder, vanilla extract, and salt until well combined.227 grams unsalted butter
- Gradually whisk the melted chocolate mixture into the egg mixture until smooth and fully incorporated.
- Pour the batter into the prepared springform pan and spread evenly.
- Bake for 30-35 minutes, or until the edges are set and the center is still slightly soft.
- Let the cake cool in the pan for about 15 minutes before removing the sides of the springform pan. Allow to cool completely on a wire rack.