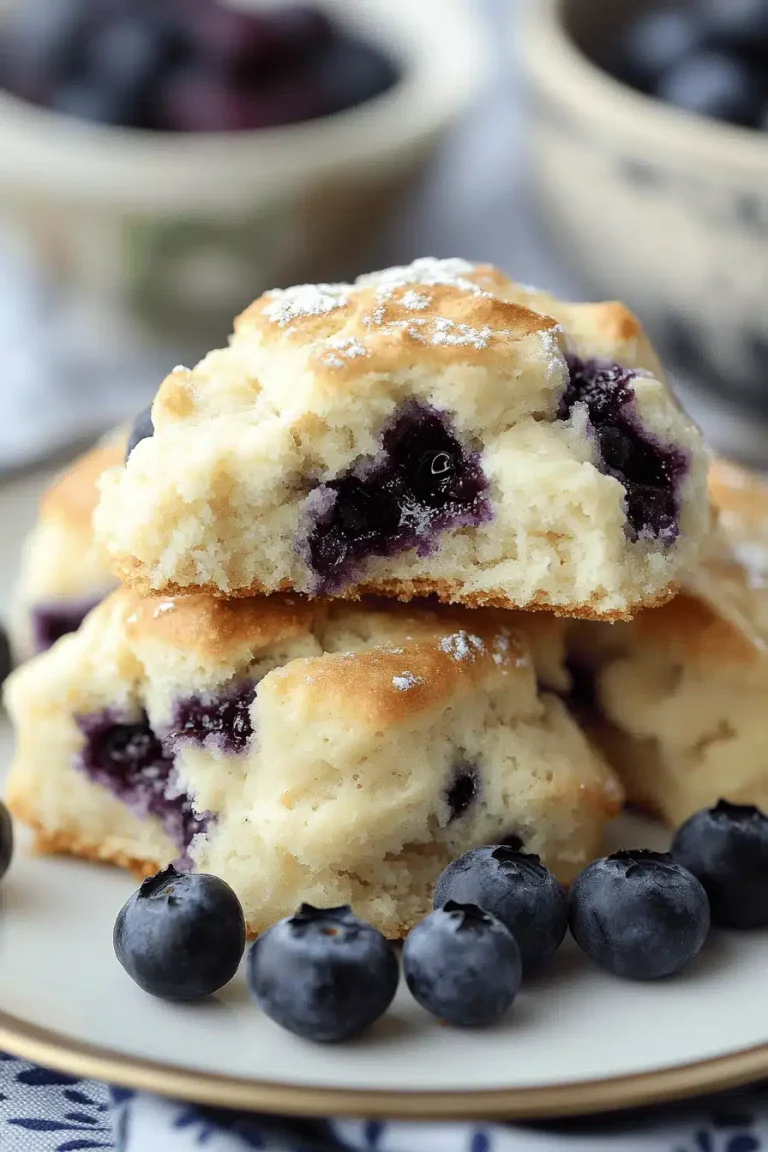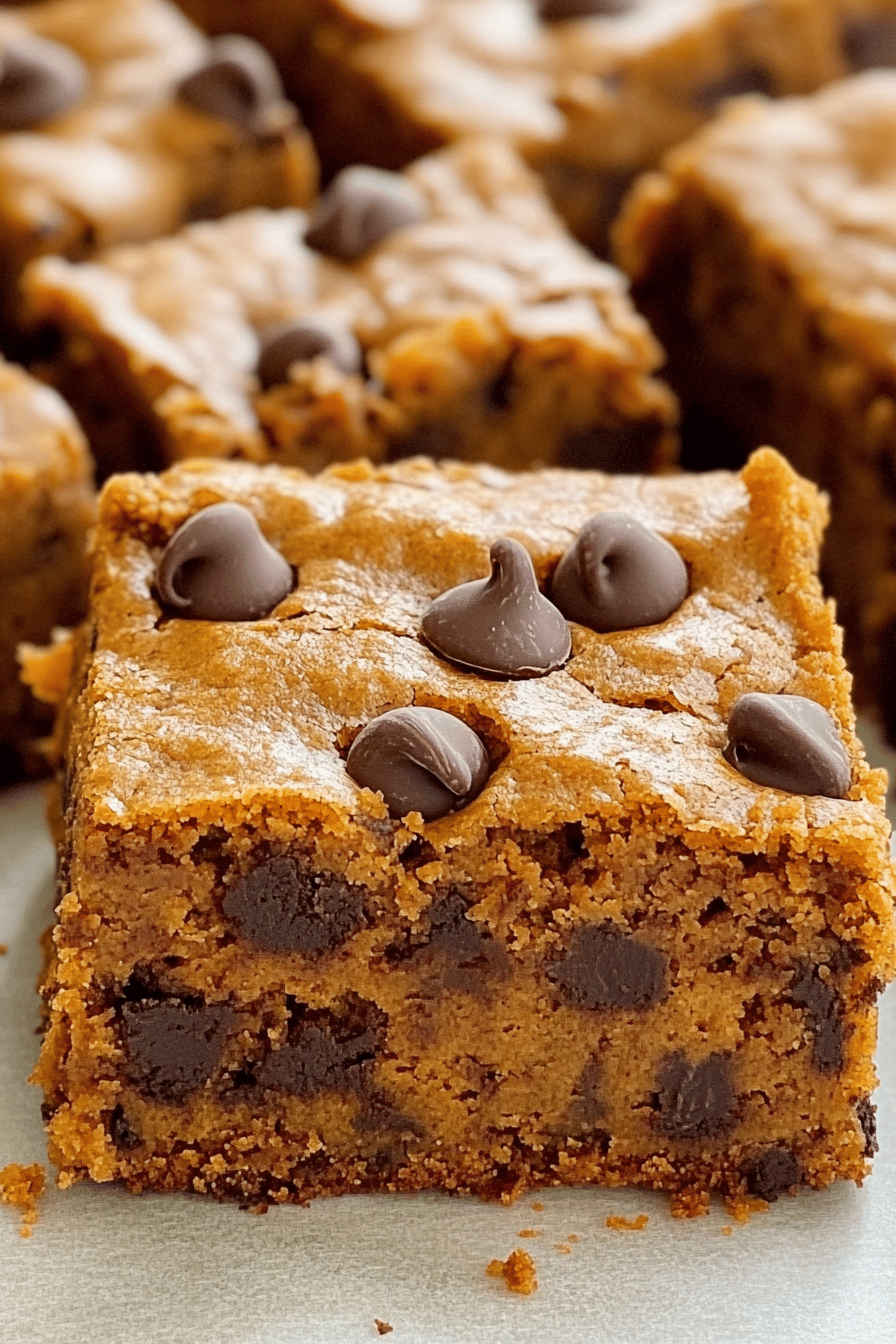
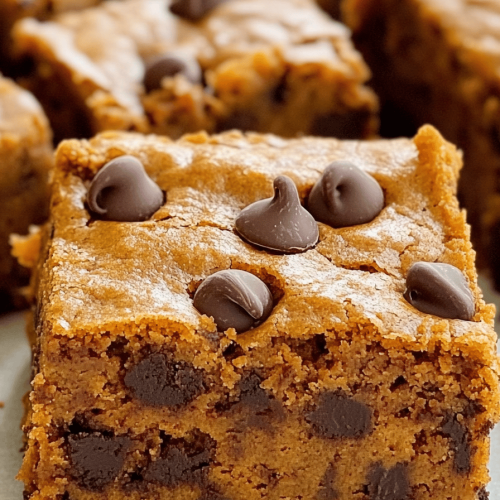
dubai chocolate bars
You know those moments? The ones where you’re just craving something utterly decadent, something that feels like a little slice of pure indulgence? For me, it usually hits late afternoon, or sometimes after the kids are finally tucked into bed and I have five minutes of glorious peace. And in those moments, my mind immediately goes to these incredible Dubai chocolate bars. I’ve tried so many recipes over the years, searching for that perfect balance of rich chocolate, a hint of exotic spice, and a texture that’s just chewy enough but melts in your mouth. This one, though? It’s the one. It’s the recipe I’ve tweaked and tested until it’s just right, the one that always gets rave reviews from everyone who tries it. If you’ve ever had those fancy, artisanal chocolate bars you find in specialty shops, the ones that cost a small fortune but taste divine, imagine being able to recreate that magic in your own kitchen. That’s what these Dubai chocolate bars are all about – accessible luxury, pure joy in every bite.
What is a Dubai chocolate bar?
So, what exactly *are* these mystical Dubai chocolate bars? Think of them as a super-charged, incredibly decadent Chocolate Fudge bar, but with a few special twists that give them that distinctive, luxurious feel. They’re not just plain old fudge; they have a depth of flavor that’s truly unique. The name “Dubai” just felt right because this recipe evokes that feeling of opulence and sophisticated sweetness you’d associate with the city. It’s essentially a no-bake bar, which is a lifesaver on busy days, but it uses high-quality ingredients and a blend of flavors that elevates it far beyond a simple sweet treat. It’s the kind of thing you’d bring to a potluck and have everyone asking, “What’s in this?!”
Why you’ll love this recipe?
Honestly, there are so many reasons why this recipe has become a staple in my kitchen. First and foremost, the flavor is just out of this world. We’re talking deep, Dark Chocolate, with a subtle warmth from a touch of spice that just makes everything sing. It’s not overwhelmingly sweet, which I really appreciate – it’s that perfect balance that makes you want just one more bite. And the texture! It’s rich, dense, and incredibly satisfying without being heavy. It’s got that perfect chewiness that’s just addictive.
But beyond the taste, I absolutely adore how simple it is to make. No baking means no fuss, no preheating the oven, and no worrying about over-baking. You just mix, chill, and slice. It’s a total lifesaver when you need a last-minute dessert or a special treat for unexpected guests. And let’s talk about cost-efficiency. While they taste like they came from a gourmet chocolate shop, the ingredients are surprisingly affordable, especially when you buy them in bulk. This means you can whip up a batch of these luxurious Dubai chocolate bars without breaking the bank.
What I love most, though, is the versatility. These bars are perfect as is, but they’re also a fantastic base for customization. You can add nuts, dried fruits, a swirl of caramel, or even a sprinkle of sea salt on top to make them your own. They’re also fantastic for gifting; wrap them up nicely, and you have a thoughtful, homemade present that anyone would be thrilled to receive. Honestly, it’s rare to find a recipe that ticks all the boxes like this one does: incredible flavor, effortless preparation, budget-friendly, and endlessly adaptable. It’s a true winner in my book, and I have a feeling it’s going to become a favorite in your kitchen too.
How do I make a Dubai chocolate bar?
Quick Overview
The beauty of these Dubai chocolate bars lies in their simplicity. It’s a straightforward no-bake process: melt, mix, chill, and slice. You’ll be combining rich, melted chocolate with a few other key ingredients to create a luscious base, then adding those special elements that give it that signature flavor. The chilling process firms everything up beautifully, resulting in those perfect, decadent bars. It truly takes just minutes to throw together, making it one of my go-to recipes when I need a quick indulgence.
Ingredients
For the main chocolate base:
I always opt for good quality dark chocolate for this. You can use chocolate chips, but I find that using a good bar of 70% cacao or higher chocolate really makes a difference in the richness. You’ll need about 12 ounces (around 340g). I also add a couple of tablespoons of unsalted butter to give it that extra smooth, melty quality. And for a touch of richness that makes them extra fudgy, I use about 1/2 cup of heavy cream. If you want to lighten it up a bit, I’ve had success with evaporated milk, but cream is definitely the secret to that ultimate decadence.
For the “Dubai” Flavor Burst:
This is where the magic happens! I like to add about 1/4 cup of finely chopped dates. They bring a natural sweetness and a lovely chewy texture. For that exotic spice note, I use about 1/2 teaspoon of cardamom powder and a tiny pinch of cayenne pepper. Don’t be scared of the cayenne! It’s not enough to make it spicy-hot, but it just amplifies the chocolate flavor beautifully. If you’re feeling adventurous, a tiny pinch of cinnamon is also lovely. And for a delightful crunch, I always mix in about 1/3 cup of chopped pistachios. They add a gorgeous color and a fantastic nutty flavor that pairs perfectly with the chocolate and dates.
For the Optional Glaze:
This is totally optional, but I love it for that extra touch of luxury. A simple glaze made with about 1/2 cup of powdered sugar, a tablespoon of cocoa powder, and just enough milk or water to reach a drizzling consistency. Sometimes I’ll add a tiny splash of rosewater to the glaze for an extra floral note, which really leans into the “Dubai” theme. A few extra chopped pistachios sprinkled on top of the glaze are also a must for me.
Step-by-Step Instructions
Step 1: Preheat & Prep Pan
First things first, grab an 8×8 inch Baking Pan. This is the perfect size for getting nice thick bars. Line it with parchment paper, making sure there’s a little overhang on the sides. This makes it super easy to lift the whole slab out once it’s chilled. Trust me, struggling to get your bars out of the pan is NOT the vibe. You don’t need to grease the pan because the parchment paper does all the work.
Step 2: Mix Dry Ingredients
In a medium bowl, combine your finely chopped dates, cardamom powder, cayenne pepper (if using), and chopped pistachios. Give them a good stir to make sure everything is nicely distributed. This ensures those lovely flavor bursts are evenly spread throughout the bars. It’s also a good time to chop your chocolate into small pieces if you’re not using chips; smaller pieces melt more evenly.
Step 3: Mix Wet Ingredients
Now for the chocolatey goodness! In a heatproof bowl, combine your chopped dark chocolate and the unsalted butter. Place this bowl over a saucepan of simmering water (a double boiler). Make sure the bottom of the bowl isn’t touching the water. Stir gently and continuously until the chocolate and butter are completely melted and smooth. Once it’s beautifully smooth, remove the bowl from the heat. Slowly whisk in the heavy cream until everything is combined and glossy. You’re looking for a smooth, rich ganache-like consistency.
Step 4: Combine
Pour the melted chocolate mixture into the bowl with your dry ingredients (dates, nuts, spices). Using a sturdy spatula, gently fold everything together until just combined. Be careful not to overmix! We want to keep some of that texture from the dates and nuts. The mixture will be quite thick and fudgy. It’s starting to smell amazing already, right?
Step 5: Prepare Filling
(This step is more for the glaze, but we’ll prepare the base mixture first)
Step 6: Layer & Swirl
Pour the thick chocolate mixture into your prepared parchment-lined pan. Use your spatula to spread it out evenly into an even layer. Don’t worry if it’s not perfectly smooth on top; the texture is part of the charm! If you’re adding the optional glaze, now is the time to prepare it. In a small bowl, whisk together the powdered sugar and cocoa powder. Gradually add milk or water, a teaspoon at a time, whisking until you have a smooth, drizzly consistency. Drizzle this over the chocolate base in a decorative pattern. You can use a toothpick to swirl it in slightly if you like, but I usually just let it do its own thing for a more rustic look.
Step 7: Bake
These are no-bake, so no baking involved! We just need to let them chill and set. Cover the pan with plastic wrap or foil and place it in the refrigerator for at least 2-3 hours, or until completely firm. The longer they chill, the firmer they’ll become, making them easier to cut.
Step 8: Cool & Glaze
Once the bars are firm to the touch, take the pan out of the refrigerator. Lift the entire slab out of the pan using the parchment paper overhang. If you’re adding the optional glaze, this is the point where you’d drizzle it. Let the glaze set for about 15-20 minutes in the fridge before slicing.
Step 9: Slice & Serve
Now for the best part! Use a sharp knife to cut the slab into bars. I usually aim for about 16-20 bars, depending on how big I want them. For the cleanest cuts, you can dip your knife in hot water and wipe it dry between cuts. Serve them chilled for that perfectly fudgy texture.
What to Serve It With
These Dubai chocolate bars are so wonderfully versatile, they fit in anywhere! For breakfast, I sometimes cut them into smaller, bite-sized pieces and add them to a yogurt parfait with Fresh Berries. It feels incredibly indulgent but still counts as a treat for the start of the day. A strong, dark coffee is the perfect companion here.
For a more elegant brunch, I love to serve them alongside fresh fruit platters. The sweetness of the bars contrasts beautifully with tangy berries or juicy melon. I’ll often arrange them artfully on a serving board with some other small pastries or even some cheese. A chilled glass of prosecco or a sophisticated mocktail also pairs wonderfully.
As a dessert, these bars are a showstopper. I’ll sometimes serve them with a dollop of fresh whipped cream or a scoop of vanilla bean Ice Cream. A drizzle of raspberry coulis can also add a lovely tartness that cuts through the richness. They’re perfect after a hearty meal, offering that final, satisfying sweet note.
And for those cozy snack moments? This is probably my favorite way to enjoy them. I’ll cut a generous bar, curl up on the sofa with a good book, and have a mug of hot tea or a warm glass of almond milk. They’re just so comforting and satisfying. My kids, when they’re allowed them, love them with a glass of cold milk. It’s that perfect sweet treat that makes an ordinary afternoon feel a little bit special.
Top Tips for Perfecting Your Dubai Chocolate Bars
I’ve made these countless times, and a few little tricks have really helped me nail them every single time. First, about the zucchini. Wait, zucchini? Oh, that’s a different recipe! My apologies, I sometimes get my favorite no-bake and bake recipes mixed up in my head! For *these* Dubai chocolate bars, the key is really the quality of your chocolate. Don’t skimp here. Using a good quality dark chocolate bar that you chop yourself will give you a much smoother, richer melt than relying solely on chocolate chips, which can sometimes have stabilizers that affect the texture.
When you’re melting the chocolate and butter, patience is key. Don’t rush it. Keep the heat low and stir gently. If you overheat the chocolate, it can seize up and become grainy, which is a total disaster. If you see it starting to look a bit too thick or oily, just take it off the heat for a moment and give it a gentle whisk. And for the heavy cream, warming it up slightly before adding it to the melted chocolate can help everything emulsify beautifully, resulting in that super glossy, smooth ganache.
For the dates, make sure they are soft and pliable. If yours are a bit dry, a quick soak in warm water for about 10 minutes will rehydrate them beautifully. Chop them very finely; you want small pieces that distribute well and blend into the texture, not large chunks that might throw off the balance. And for the nuts, toasting the pistachios lightly before chopping can really enhance their flavor. Just a few minutes in a dry skillet over medium heat until fragrant is all they need.
When it comes to the spice blend, don’t be afraid to adjust it to your liking. If you’re not a fan of cardamom, you can reduce it or omit it, but it really does add that authentic “Dubai” feel. The pinch of cayenne is a secret weapon; it’s so subtle but it truly makes the chocolate flavor pop. If you’re worried about it, start with just a tiny pinch and taste your chocolate mixture before pouring it into the pan. You might be surprised at how much you like it!
For the glaze, consistency is everything. You want it thick enough to drizzle but thin enough to spread easily. Start with less liquid than you think you’ll need and add more *very* gradually. If you accidentally make it too thin, you can whisk in a little more powdered sugar to thicken it up. And for the prettiest swirl, make sure your chocolate base is cool and firm before drizzling the glaze. If the chocolate is still warm, the glaze will just melt right into it.
Finally, when you’re slicing, a sharp knife is your best friend. Wiping the knife clean between cuts prevents the chocolate from smearing and makes for beautifully neat bars. If the mixture is too soft to slice cleanly, pop the whole slab back into the fridge for another 30 minutes. It’s worth the extra wait!
Storing and Reheating Tips
These Dubai chocolate bars are pretty forgiving when it comes to storing, which is another reason I love them. Kept at room temperature, they’ll stay fresh for about 2-3 days, provided your kitchen isn’t too warm. I usually store them in an airtight container, layered between sheets of parchment paper to prevent them from sticking. They develop a slightly softer texture at room temperature, which some people actually prefer!
For longer storage, the refrigerator is your best bet. In an airtight container, they can easily last for up to two weeks. Their texture will be firmer straight from the fridge, which is how I personally like them best for slicing cleanly. Just make sure they’re well-sealed to prevent them from picking up any unwanted fridge odors.
If you want to make a big batch and freeze them for future cravings, they freeze beautifully. Wrap each bar individually in plastic wrap, then place them all in a freezer-safe bag or container. They’ll keep well in the freezer for up to 3 months. To thaw, simply take a bar or two out of the freezer and let them come to room temperature for about 30 minutes, or enjoy them straight from the fridge for a wonderfully chilled treat.
Regarding the glaze, it’s best to apply it just before serving if you plan on storing them for more than a day. The glaze can sometimes become a bit sticky or soft if stored for too long, especially in the refrigerator. So, if you’re freezing them, I’d recommend glazing them after they’ve thawed. If you’re keeping them for a couple of days in the fridge, the glaze usually holds up pretty well.
Frequently Asked Questions
Final Thoughts
Honestly, these Dubai chocolate bars are more than just a recipe to me; they’re a little piece of edible joy. They represent that perfect blend of sophisticated flavor and effortless preparation that I always strive for in my kitchen. They’re the kind of treat that makes you feel like you’ve done something special, even on a Tuesday night. The way the rich chocolate melts, the chewy sweetness of the dates, the subtle warmth of the spices, and the satisfying crunch of the pistachios – it all comes together in a way that’s truly magical.
If you love rich, decadent chocolate and are looking for a simple yet impressive dessert or snack, you absolutely have to give these a try. They’re perfect for special occasions, for gifting, or just for those moments when you need a little pick-me-up. I’m always so excited to hear from you all when you try my recipes, so if you make these, please let me know how they turn out! I’d love to see your variations and hear about your favorite ways to enjoy them. Until then, happy indulging!
Dubai Delightful Chocolate Bars
Ingredients
Main Ingredients
- 1 tablespoon butter
- 1 cup dried kataifi
- 0.5 cup pistachio cream
- 2 tablespoons white chocolate, melted
- 1 cup dark chocolate, melted
Instructions
Preparation Steps
- Line an 8x4 inch loaf pan with parchment paper.
- In a small pan, melt the butter over medium heat. Add in the kataifi and stir continuously until golden brown for about 5 minutes. Place toasted kataifi into a bowl along with pistachio cream and mix until combined.
- In the loaf pan, drizzle the melted white chocolate in a zig zag pattern and refrigerate for 5 minutes. Next pour half of the melted dark chocolate into the loaf pan and spread evenly - refrigerate 10 minutes. Transfer the kataifi mixture to the pan and spread out evenly. Top with remaining dark chocolate and spread out evenly. Refrigerate for 3 hours or until set.