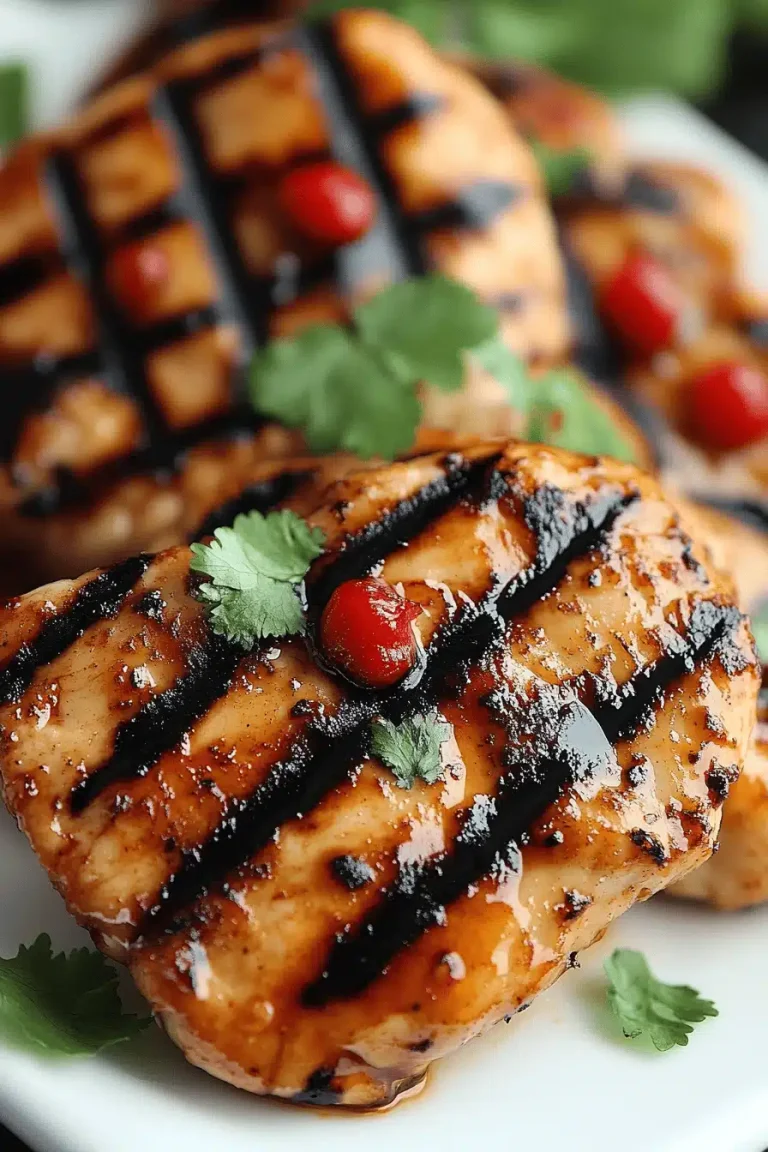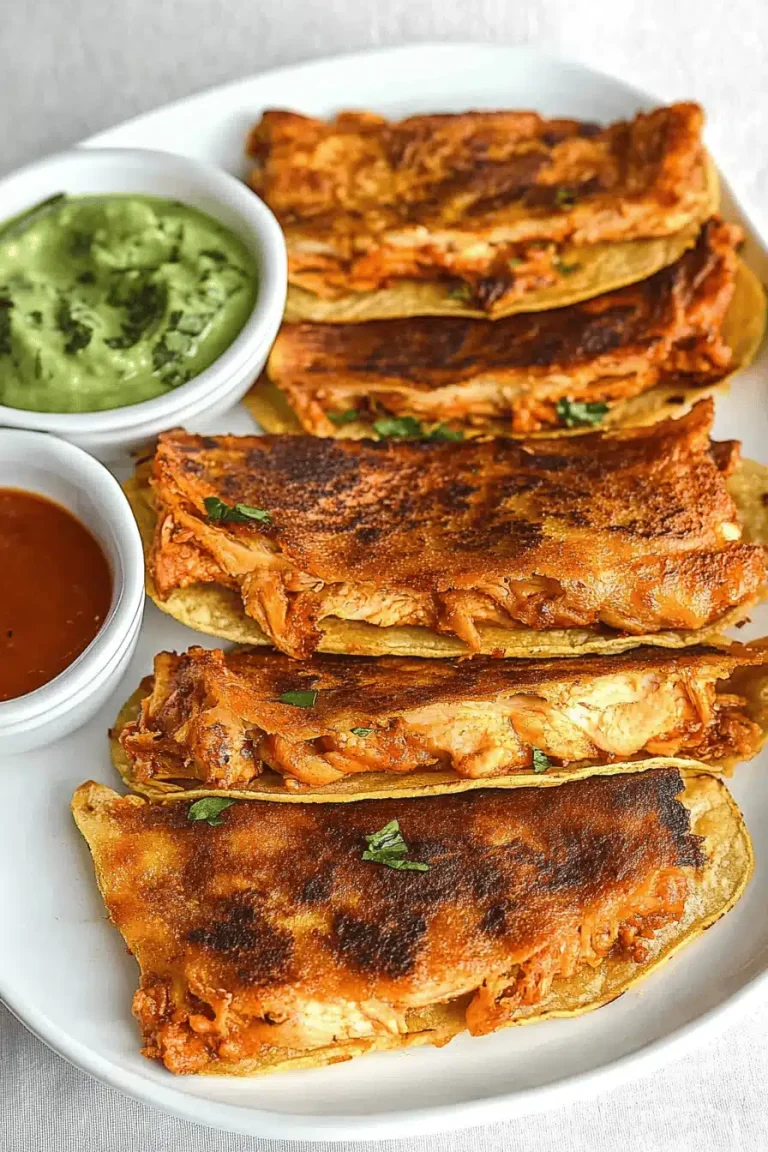
Crispy Chicken Tacos
Oh, hello there! Come on in, grab a mug of tea, and let’s chat about something truly special. You know those nights when you’re craving something utterly delicious, something that feels like a treat but doesn’t require a culinary degree or a full day in the kitchen? That’s exactly where these Crispy Chicken tacos come in. They’re the kind of recipe I turn to when I need a guaranteed win, the kind that makes my whole family light up with anticipation. I remember the first time I made them; the aroma that filled the kitchen was just incredible, and my kids were practically banging on the table before I’d even finished arranging them. They’re so far removed from those soggy, sad excuses for tacos you sometimes get, leaning more towards that perfect crunch you find at your favorite taqueria, but made with so much more love (and probably a little less salt!). Honestly, if you’ve ever felt a little intimidated by making tacos from scratch, I promise you, this one’s a game-changer. It’s the perfect answer for when you’re hankering for something satisfying, flavorful, and just downright fun to eat.
What are Crispy Chicken Tacos?
So, what exactly are these glorious things? At their heart, crispy Chicken Tacos are a joyful explosion of textures and flavors designed to delight. Think of them as a more exciting, textural cousin to your everyday taco. We’re talking about tender, juicy chicken that’s been seasoned to perfection, then encased in a wonderfully crisp shell, all ready to be piled high with your favorite toppings. It’s not just about the chicken, though; it’s the whole experience! The “crispy” part is key here. It’s achieved through a clever cooking method that gives you that satisfying crunch in every single bite. It’s essentially a home-cooked rendition of that beloved street food, elevated with fresh ingredients and a personal touch. They’re not overly complicated, which is precisely why they’ve earned a permanent spot in my recipe rotation. It’s that simple elegance, that pure deliciousness, that makes them so darn special.
Why you’ll love this recipe?
Where do I even begin with why you’ll adore these crispy chicken tacos? Let me count the ways! First and foremost, the FLAVOR. Oh my goodness, the flavor! The chicken gets this amazing savory depth from the seasonings, and when it’s all tucked into that crunchy shell, it’s just a symphony in your mouth. It’s a balanced blend of savory, a hint of spice, and all the fresh goodness from the toppings. Then there’s the SIMPLICITY. I know, I know, sometimes “homemade” sounds like a lot of work, but trust me, this recipe is a lifesaver on busy weeknights. You don’t need a million fancy gadgets or hard-to-find ingredients. It’s designed to be straightforward, making the cooking process as enjoyable as the eating. And speaking of ingredients, it’s surprisingly COST-EFFECTIVE! You can feed a whole family without breaking the bank, which is always a huge win in my book. What I love most about this is its VERSATILITY. You can totally customize these tacos to your heart’s content. Craving more heat? Add some jalapeños. Want something fresh? Load up on cilantro. It’s also a fantastic way to use up leftover cooked chicken if you’re in a real pinch. Honestly, compared to some other chicken taco recipes that require deep frying or elaborate marinades, this method delivers maximum flavor and crunch with minimum fuss. It’s the kind of dish that makes everyone happy, from the pickiest eater to the most discerning foodie.
How do I make crispy chicken tacos?
Quick Overview
This recipe is all about building layers of flavor and texture in a way that’s surprisingly efficient. We’ll start by prepping the chicken with a fantastic spice blend, then cook it until it’s perfectly tender and flavorful. The magic happens when we combine it with a special coating that promises ultimate crispiness. Then, it’s just a matter of assembling everything in warm tortillas with your favorite fixings. It’s designed to be approachable, even if you’re new to making tacos from scratch. The end result is a taco that’s far superior to anything you’d grab on the go, and you’ll feel so proud making it yourself!
Ingredients
For the Chicken:
1.5 lbs boneless, skinless chicken thighs or breasts, cut into bite-sized pieces
1 tablespoon chili powder
1 teaspoon cumin
1 teaspoon smoked paprika
½ teaspoon garlic powder
½ teaspoon onion powder
½ teaspoon dried oregano
¼ teaspoon cayenne pepper (optional, for a little kick!)
Salt and freshly ground Black Pepper to taste
2 tablespoons olive oil or avocado oil
For the Crispy Coating:
1 cup panko breadcrumbs (this is the secret to amazing crispiness!)
½ cup finely grated Parmesan cheese (optional, but highly recommended for extra flavor)
¼ cup all-purpose flour
1 large egg, lightly beaten
1 tablespoon water (to thin the egg slightly)
For Serving:
8-10 corn or flour tortillas, warmed
Your favorite taco toppings: shredded lettuce, diced tomatoes, chopped onion, cilantro, salsa, Sour Cream or Greek yogurt, lime wedges, avocado or guacamole, pickled jalapeños
Step-by-Step Instructions
Step 1: Preheat & Prep Pan
First things first, let’s get our oven ready. Preheat it to a nice 400°F (200°C). While the oven is heating up, grab a large baking sheet. I like to line mine with parchment paper or foil – it makes cleanup an absolute breeze, and trust me, you’ll thank me later! If you don’t have parchment, just give it a good spray with cooking oil. This step is crucial for ensuring everything cooks evenly and gets nice and golden.
Step 2: Mix Dry Ingredients
In a medium bowl, let’s get our flavor base going. Combine the chili powder, cumin, smoked paprika, garlic powder, onion powder, oregano, cayenne pepper (if you’re using it), and a good pinch of salt and pepper. Give it all a really good whisk together. You want to make sure all those spices are well distributed so every piece of chicken gets coated evenly. This mixture is what gives our chicken that signature taco flavor profile.
Step 3: Mix Wet Ingredients
In a separate shallow bowl, crack your egg. Add the tablespoon of water and whisk it until it’s nice and frothy. This is what our chicken will dip into to help the breadcrumbs stick. I always find a little water makes the egg a bit easier to work with, ensuring a more even coating.
Step 4: Combine
Now, let’s bring the chicken into the party. Add your bite-sized chicken pieces to the bowl with the spice mixture. Drizzle the Olive Oil over the top. Use your hands (or a couple of spoons) to toss everything together until each piece of chicken is thoroughly coated in those beautiful spices. Make sure there are no dry spots! This initial coating is where all that savory goodness really starts to build.
Step 5: Prepare Filling
This is where the crispy magic happens! In a third shallow bowl, combine the panko breadcrumbs and the grated Parmesan cheese (if you’re using it). Give that a quick mix. Now, take a piece of the spiced chicken, dip it into the beaten egg mixture, letting any excess drip off, and then dredge it generously in the panko-Parmesan mixture. Press gently to make sure the coating adheres well. Repeat this process with all the chicken pieces. Don’t overcrowd the baking sheet when you arrange them; give each piece a little breathing room so they can get perfectly crispy. I usually have enough space for about 20-24 pieces on one large sheet.
Step 6: Layer & Swirl
This step isn’t about layering in the traditional sense, but about preparing for the cooking. Arrange your coated chicken pieces in a single layer on the prepared baking sheet. Make sure they aren’t touching each other. This is vital for achieving that amazing crunch all around. If your chicken pieces are quite large, you might consider cutting them in half after coating to ensure they cook through evenly and become extra crispy.
Step 7: Bake
Pop that baking sheet into your preheated oven. Bake for about 20-25 minutes, flipping the chicken pieces halfway through. You’re looking for them to be golden brown and beautifully crisp on the outside, and cooked through on the inside. The exact time might vary slightly depending on your oven and the size of your chicken pieces, so keep an eye on them. A good way to check is to cut into one piece – it should be white all the way through.
Step 8: Cool & Glaze
Once the chicken is perfectly golden and crispy, carefully remove the baking sheet from the oven. Let the chicken rest on the baking sheet for about 5 minutes. This allows the juices to redistribute, keeping the chicken tender and moist. While the chicken is resting, warm your tortillas. You can do this in a dry skillet, in the microwave wrapped in a damp paper towel, or even directly over a low gas flame for a bit of char (my personal favorite!).
Step 9: Slice & Serve
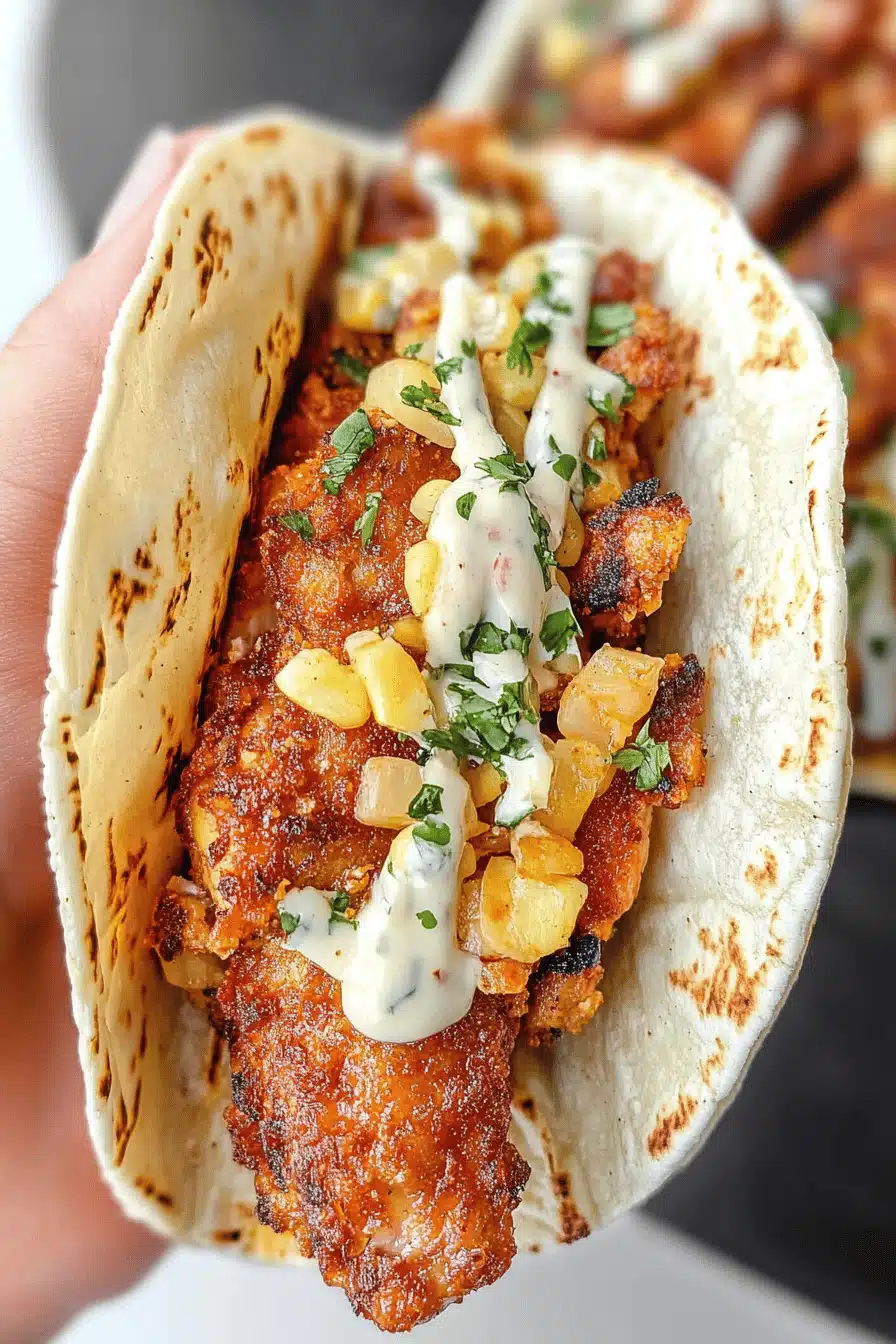
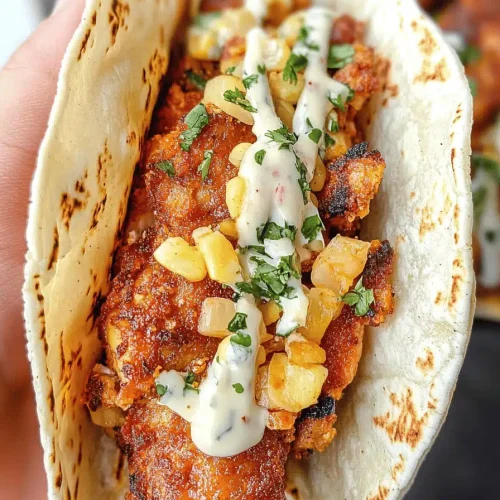
Now for the best part – assembly! Take your warm tortillas and fill them generously with the crispy chicken pieces. Add all your favorite toppings: a sprinkle of shredded lettuce, some juicy diced tomatoes, finely chopped onions, a squeeze of fresh lime, a dollop of salsa, and maybe some creamy avocado. Serve them immediately while the chicken is still hot and incredibly crispy. These are best enjoyed fresh!
What to Serve It With
These crispy chicken tacos are so versatile, they honestly fit into almost any meal occasion! For a quick and easy BREAKFAST, I love serving them in smaller corn tortillas with just a scramble of eggs, a sprinkle of cheese, and a dash of hot sauce. It’s a hearty way to start the day that feels way more exciting than plain old toast. For BRUNCH, I tend to go a bit more elaborate. Think nicely arranged plates with the tacos alongside a vibrant pico de gallo, some creamy guacamole, and maybe a side of black beans. A refreshing agua fresca or even a mimosa pairs perfectly. And AS DESSERT? Well, that’s a bit unconventional, but hear me out! If you have any leftover chicken and a craving for something sweet, I’ve actually served them with a drizzle of a slightly sweet, tangy slaw and a tiny bit of crumbled cotija cheese. It’s a savory-sweet delight! But honestly, my favorite way is just FOR COZY SNACKS, curled up on the couch with a good movie. I load them up with everything – sour cream, extra cilantro, pickled jalapeños – and just let myself indulge. My family also loves having them with a side of seasoned rice and refried beans, which makes it a complete and satisfying meal that always disappears quickly. The key is just to have fun with it and add whatever makes your taste buds sing!
Top Tips for Perfecting Your Crispy Chicken Tacos
After making these countless times, I’ve picked up a few tricks that I think make a real difference in achieving taco perfection. For the CHICKEN PREP, I almost always opt for thighs. They’re a bit more forgiving and tend to stay juicier than breasts, but both work great! The key is to cut them into uniform, bite-sized pieces so they cook evenly. And don’t be shy with the spice mix; that’s where all the flavor really comes from. When it comes to MIXING ADVICE, the most important thing is to not overwork the chicken once it’s coated in the panko. Just press gently to adhere the coating. If you press too hard or mix too much, you can end up with a gummy texture instead of that wonderful crispness. A light touch is best here. For SWIRL CUSTOMIZATION – though we aren’t really swirling here, the idea is about even coating – make sure each piece of chicken is thoroughly coated in the egg wash and then generously dredged in the panko mixture. Don’t be afraid to really press that breadcrumb mixture on. For my INGREDIENT SWAPS, if you can’t find panko, regular breadcrumbs will work in a pinch, but you won’t get quite the same level of crispiness. Also, if you’re avoiding dairy, you can skip the Parmesan cheese in the coating, and it will still be delicious! For BAKING TIPS, make sure your oven is fully preheated. A hot oven is essential for that crispy exterior. Also, using a wire rack set inside your baking sheet can help air circulate around the chicken, leading to even crispier results on all sides. And never skip flipping them halfway through! For GLAZE VARIATIONS – though this recipe doesn’t have a traditional glaze – if you wanted to add a touch of sauciness, you could toss the cooked chicken in a little bit of your favorite taco sauce or a chipotle mayo right before serving. Just a light toss so it doesn’t make the panko soggy. The beauty of this recipe is its adaptability, so don’t be afraid to experiment!
Storing and Reheating Tips
Okay, so sometimes you make a HUGE batch (because, let’s be honest, these disappear fast but you might want leftovers!) and you need to know how to store them. If you have any leftover crispy chicken taco filling, it’s best stored separately from the tortillas and toppings. Store the cooked chicken in an airtight container at ROOM TEMPERATURE for no more than 2 hours. Beyond that, it’s best to move it to the refrigerator. In the REFRIGERATOR STORAGE, the cooked chicken will keep well for about 3-4 days in a well-sealed container. The key is to make sure it’s cooled completely before refrigerating to prevent condensation, which can make the coating less crispy. For FREEZER INSTRUCTIONS, you can freeze the cooked chicken pieces. Lay them in a single layer on a baking sheet until frozen, then transfer them to a freezer-safe bag or container. They’ll keep for about 2-3 months. When you’re ready to use them, the best way to thaw is overnight in the refrigerator. For reheating, I highly recommend popping them back into a hot oven (around 375°F or 190°C) on a baking sheet for about 5-10 minutes, or until heated through and crisp again. Microwaving can make them a bit soft, so the oven is definitely your best friend here for recapturing that amazing crispiness. GLOWING UP ADVICE: If you’re storing assembled tacos, it’s best to keep the components separate. Store the crispy chicken and toppings in the fridge and reheat the chicken as described above, then assemble fresh. This ensures maximum crispiness and freshness for each taco!
Frequently Asked Questions
Final Thoughts
So there you have it – the recipe for truly amazing crispy chicken tacos that I just know you’re going to fall in love with. They’re proof that you can achieve incredible flavor and that satisfying crunch right in your own kitchen, without a whole lot of fuss. I hope you feel inspired to give them a try, especially on those nights when you just need a little bit of delicious comfort. I can’t wait to hear how they turn out for you and what your favorite toppings are! If you love this recipe, you might also enjoy my Cheesy Baked Chicken Taquitos or my Quick & Easy Shredded Chicken Tacos for more weeknight-friendly Mexican-inspired meals. Happy cooking, and don’t forget to share your taco creations with me in the comments below!
Crispy Chicken Tacos
Ingredients
For the Chicken
- 1.5 pound boneless, skinless chicken thighs
- 1 tablespoon chili powder
- 0.5 teaspoon cumin
- 0.25 teaspoon garlic powder
- 0.25 teaspoon onion powder
- 0.5 teaspoon salt
- 0.25 teaspoon black pepper
- 2 tablespoons olive oil
For the Tacos
- 0.5 cup shredded cabbage
- 0.5 cup diced red onion
- 0.5 cup chopped fresh cilantro
- 1 lime cut into wedges
Instructions
Preparation Steps
- Cut the chicken thighs into bite-sized pieces.1.5 pound boneless, skinless chicken thighs
- In a medium bowl, toss the chicken with chili powder, cumin, garlic powder, onion powder, salt, pepper, and olive oil. Ensure the chicken is evenly coated.1.5 pound boneless, skinless chicken thighs
- Heat a large skillet over medium-high heat. Add the seasoned chicken in a single layer and cook for 5-7 minutes per side, or until cooked through and crispy.
- While the chicken is cooking, warm the tortillas according to package directions (e.g., in a dry skillet, oven, or microwave).1.5 pound boneless, skinless chicken thighs
- Once the chicken is cooked, remove it from the skillet and let it rest for a few minutes. Then, dice or shred the chicken.
- Assemble the tacos by filling each warm tortilla with the crispy chicken, shredded cabbage, diced red onion, and fresh cilantro.1.5 pound boneless, skinless chicken thighs
- Serve immediately with lime wedges.1.5 pound boneless, skinless chicken thighs