cookie bars
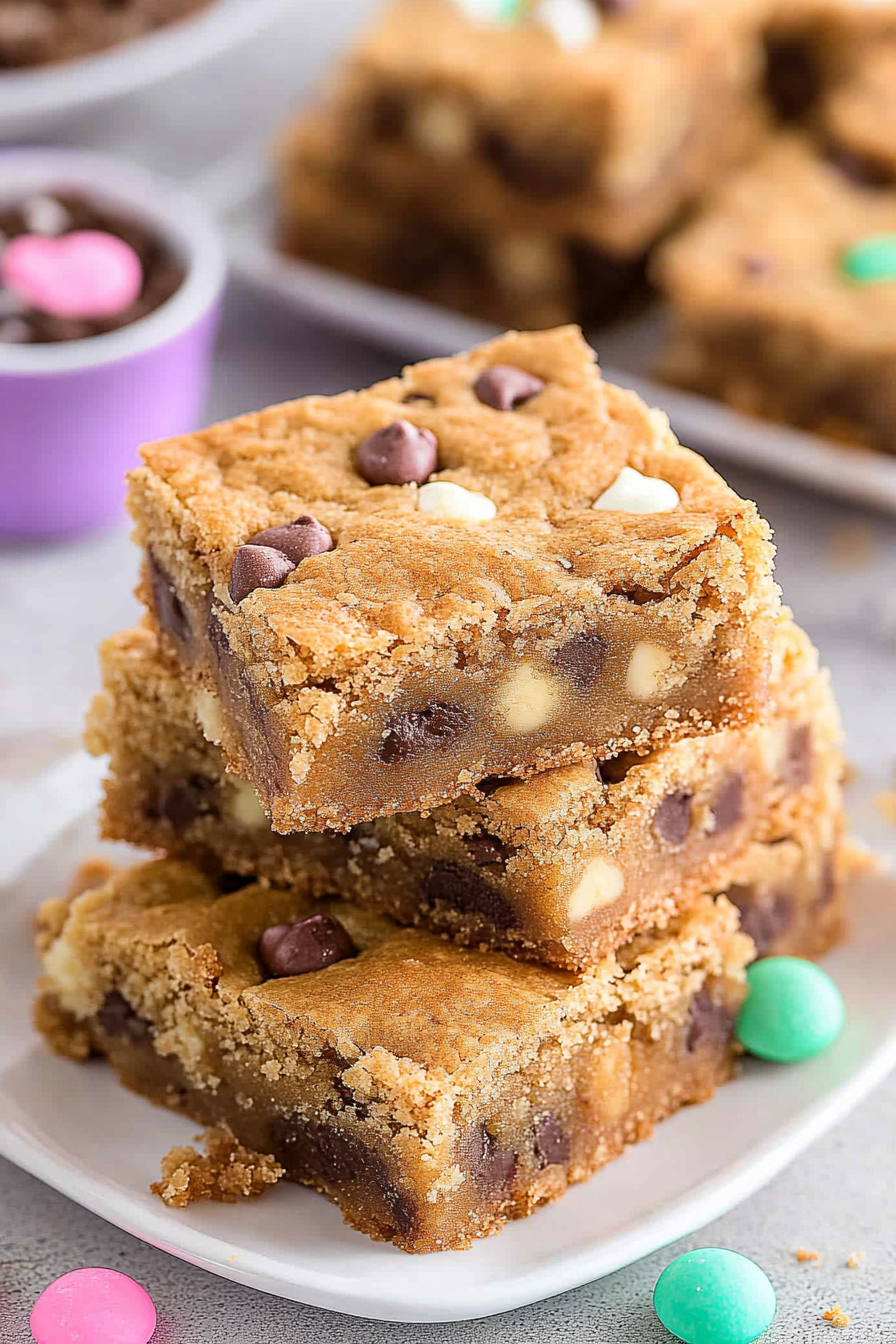
There’s something magic about that first bite into warm, chewy cookie bars fresh from the oven — the way the edges crisp up just a little, while the middle stays gooey and soft. I remember the afternoons in my childhood kitchen where my mom would pull out a thick slab of these cookie bars from the oven, still warm and filling the room with that irresistible caramelized sugar aroma. It’s a little different from traditional cookies, kind of like a cross between a cookie and a brownie, but better because it’s all one big, shareable pan of sunshine. Honestly, they’re easier and way more forgiving than drop cookies. Whenever I want that comforting sweetness but don’t want to fuss over scooping or rolling dough, cookie bars are my go-to. My kids always say these are their ultimate treat — they literally ask for them by name, and the smell alone brings them running into the kitchen.
What is cookie bar?
Think of cookie bars as cookies baked in a rectangular pan instead of as individual rounds. It’s the same beloved cookie dough, but instead of shaping each bite, you bake it all together and cut it into squares or rectangles after cooling. The name kind of spells it out—it’s cookie dough turned into a big bar for slicing. It’s essentially the best of both worlds: the chewy texture of cookies with the ease of a single pan dessert. Perfect for when you want your cookie fix but don’t want to mess with shaping dozens of cookies, or when you’re out of time but need something sweet on the spot. And, bonus—cookie bars usually bake faster and stay moist longer, so you get that fudgy middle you might miss in traditional cookies.
Why you’ll love this recipe?
What’s not to adore about cookie bars? First off, the flavor is absolutely out of this world. I’m talking about that rich caramelized brown sugar backbone with bursts of vanilla and melting pockets of chocolate chips or nuts. It’s a cozy hug in dessert form! But what I love most about this recipe is how unbelievably simple it is. It barely needs any fancy equipment—just a bowl, a mixer, and a pan. I can whip these up even on rushed school mornings or for last-minute visitors without stress. Plus, the ingredients are all pantry staples, which means you’re not dropping big bucks or making special trips to the store. Whenever I’m whipping up a batch, I feel like a magician turning simple flour, sugar, and butter into pure joy.
Another reason these cookie bars are near and dear: their versatility. I love tweaking the mix-ins—sometimes I throw in walnuts and butterscotch chips for a golden, nutty spin or swap in dried cranberries and white chocolate for a festive vibe. They’re great warm with ice cream or cold with a cup of coffee, making them a stellar breakfast treat, a cozy snack, or a quick dessert. If you’re a fan of brownies, blondies, or skillet cookies, cookie bars offer that same warm comfort but with such an effortless edge. Honestly, once you give this recipe a shot, it’s going to be a staple in your kitchen like it is in mine.
How do I make cookie bars?
Quick Overview
Making cookie bars is delightfully straightforward. You start by prepping your pan, then whisk together dry and wet ingredients separately before combining them just enough to keep the batter tender. After layering or swirling in any fillings, the bars bake quickly and come out golden and fragrant. The best part? You don’t have to worry about shaping individual cookies or chilling dough—just mix, pour, and bake. I always remind myself not to overmix to keep that tender crumb, but otherwise, it’s a pretty hands-off, forgiving process. These bars bake fast too, which means you’re enjoying warm, fresh bars in under 30 minutes once you start.
Ingredients
For the Main Batter:
- 2 ½ cups all-purpose flour (use fresh, good-quality flour for best texture)
- 1 tsp baking powder
- ½ tsp baking soda
- ½ tsp salt
- 1 cup unsalted butter, softened (room temp butter makes mixing smooth and creamy)
- 1 cup packed light brown sugar (I always use light brown — it adds that lovely molasses flavor)
- ½ cup granulated sugar
- 2 large eggs (room temperature, it helps with emulsification)
- 2 tsp pure vanilla extract (the real stuff makes all the difference)
For the Filling:
- 1 ½ cups semi-sweet chocolate chips (feel free to swap with chunks or mixed chocolate)
- Optional: ½ cup chopped walnuts or pecans (toasted for extra depth)
- Optional swirl: ½ cup smooth peanut butter or Nutella for marbling (just like my kids’ favorite!)
For the Glaze:
- 1 cup powdered sugar
- 2 tbsp milk or cream (start small and add more for desired drip)
- ½ tsp vanilla or almond extract
- Optional: pinch of salt to balance sweetness
Step-by-Step Instructions
Step 1: Preheat & Prep Pan
Preheat your oven to 350°F (175°C). Grease and line a 9×13-inch baking pan with parchment paper, letting the edges hang over for easy removal later. This step saved me once when my bars stuck to the pan—trust me, don’t skip it! The parchment makes slicing clean bars so much simpler.
Step 2: Mix Dry Ingredients
In a medium bowl, whisk together the flour, baking powder, baking soda, and salt until evenly combined. Mixing them separately first helps to distribute the leavening agents and seasoning evenly throughout the batter so your bars rise and flavor evenly. I often sift the flour mixture to avoid lumps and ensure a tender crumb.
Step 3: Mix Wet Ingredients
Using a stand mixer or handheld beaters, cream the softened butter with both sugars until the mixture turns light and fluffy, about 3 to 4 minutes. This step is key—it traps air for soft, tender bars. Then add the eggs one at a time, beating well after each addition, followed by the vanilla extract for that cozy aroma.
Step 4: Combine
Slowly add the dry ingredients to the wet mixture in batches, folding gently after each addition. I always remind myself not to overmix here; you just want everything combined—overdoing it can make the bars dense and tough. The batter should be thick but soft, like rich cookie dough.
Step 5: Prepare Filling
If you’re using a swirl such as peanut butter or Nutella, warm it slightly in the microwave for 15-20 seconds to loosen it up. This makes swirling way easier and prettier. If adding nuts or chocolate chips, have those ready to sprinkle or fold in as you layer the batter.
Step 6: Layer & Swirl
Spread half of the batter evenly into the prepared pan. Sprinkle chocolate chips (and nuts, if using) evenly over the layer. Dollop the peanut butter or Nutella swirl every few inches, and then spread the remaining batter over the top. Using a knife or skewer, gently swirl the filling into the batter with a figure-eight motion to create a marbled effect. This makes the bars look fancy but is totally stress-free.
Step 7: Bake
Bake in the center rack for 25–30 minutes, or until the edges are golden brown and a toothpick inserted near the center comes out with just a few moist crumbs clinging. Oven temperatures vary, so start checking around 22 minutes to avoid overbaking—the bars should be soft and slightly gooey in the middle.
Step 8: Cool & Glaze
Let the bars cool completely in the pan on a wire rack—this helps them set and makes slicing so much cleaner. While they cool, whisk together the glaze ingredients until silky and smooth. Drizzle the glaze over the cooled cookie bars with a spoon or a piping bag for a pretty finish. I sometimes add a pinch of salt to the glaze—it cuts through the sweetness beautifully.
Step 9: Slice & Serve
Using the parchment edges, lift the slab out of the pan onto a cutting board. Slice into squares or rectangles with a sharp knife, wiping the blade clean between cuts to get neat edges. Serve these bars slightly warm or at room temperature with a tall glass of milk or a steaming mug of coffee. These bars also make a fantastic finger food at parties or picnics!
What to Serve It With
For Breakfast: These cookie bars go surprisingly well with a cappuccino or a spiced chai latte for a cozy morning treat. I like pairing them with sliced fresh fruit or a dollop of Greek yogurt for a balanced plate that still feels indulgent.
For Brunch: Place bars on a pretty platter alongside mini quiches and fresh berries. A sparkling mimosa or light iced tea rounds it out perfectly and adds a festive touch.
As Dessert: Warm a bar slightly and top it with vanilla ice cream or whipped cream. Garnish with a sprinkle of toasted nuts or a drizzle of caramel sauce. It’s a simple yet luscious finale that everyone loves.
For Cozy Snacks: Nothing beats these bars with a hot cup of cocoa and a few marshmallows on a chilly afternoon. They’re so comforting and satisfying, making them my family’s ultimate “pause and snack” treat.
My favorite memory is pulling these out at holiday gatherings—everyone always sneaks back for “just one more.” They’ve become a staple for all my get-togethers because they’re easy to serve, addictive to eat, and so heartwarming.
Top Tips for Perfecting Your Cookie Bars
Zucchini Prep: Okay, this is for folks who add zucchini for moisture and nutrition—I always squeeze out excess water by pressing grated zucchini between paper towels or a kitchen towel. Too much moisture can make the bars soggy instead of chewy. Fresh zucchini that’s young and firm works best for a subtle flavor that doesn’t overpower.
Mixing Advice: I learned the hard way that overmixing makes cookie bars dense and cakey instead of tender and chewy. The batter should look just incorporated, with no streaks of flour. Use a folding motion with a spatula instead of vigorous beating once you add the dry ingredients.
Swirl Customization: Play around with your swirl technique—too much swirling can mix the flavors together too much, but too little can feel like separate cakes. I find that gentle figure eights, done slowly, give the most beautiful marbling without mixing everything totally.
Ingredient Swaps: Unsweetened applesauce works well for part of the butter if you want a lighter bar; just reduce the baking time slightly. Coconut sugar can replace brown sugar 1:1 for a deeper, more caramel flavor. I’ve swapped chocolate chips for chunks, white chocolate, or dried cherries with great results—mix-ins are where you can get really creative!
Baking Tips: Use the center rack in the oven for even heat distribution. If your oven runs hot, lower the temperature by 10-15 degrees and bake a bit longer to avoid burnt edges. The toothpick test is your best friend here, but remember a few moist crumbs mean it’s perfectly gooey.
Glaze Variations: Thin your glaze out with more milk for a drippy look, or make it thick for a more substantial topping. You can swap vanilla with almond or lemon extract for a fresher zing. For a latte-inspired twist, add a pinch of instant espresso powder to your glaze.
One lesson I’ve learned? Don’t try slicing cookie bars while they’re hot—they always crumble and look messy. Wait for complete cooling or pop them in the fridge for 10 minutes if you’re in a hurry. And if you want to impress guests effortlessly, add that quick glaze—nobody can resist the glossy sweetness that promises a melt-in-your-mouth experience.
Storing and Reheating Tips
Room Temperature: Cookie bars keep wonderfully at room temp for up to 3 days if stored in an airtight container or wrapped tightly in plastic wrap. This preserves the chewy texture without drying them out.
Refrigerator Storage: If you want to keep them longer, store bars in an airtight container in the fridge for up to a week. They’ll firm up a bit but still maintain flavor. Bringing them back to room temp makes them more tender again.
Freezer Instructions: Freeze cookie bars in single layers separated by parchment paper in a freezer-safe bag or container for up to 3 months. Thaw overnight in the fridge or on the counter. A quick 10-15 second zap in the microwave brings back that fresh-baked softness.
Glaze Timing Advice: For longer storage, drizzle the glaze right before serving. If you want the bars ready-to-go with glaze, keep them refrigerated and covered. Just be aware the glaze might harden when chilled but softens up nicely at room temp.
I always test my batches a day later to see how the flavor and texture hold up—honestly, I think these cookie bars taste even better after a little rest. The flavors meld, and they get that almost fudgy richness that keeps everyone going back for more.
Frequently Asked Questions
Final Thoughts
If you take away one thing from my cookie bars story, I hope it’s to trust the simple joy of baking without fuss. These bars are my kitchen’s little miracle—easy, honest, and comforting every single time. They’ve been part of breakfast tables, last-minute gifts, and countless snack breaks at my house, and I can’t recommend them enough. Whether you crave the ooey-gooey gooiness of melted chocolate or the tender buttery crumb, cookie bars deliver it all without standing on ceremony.
If you love classics like chocolate chip cookies or brownies, this recipe sits right up there, ready to be your new favorite. Don’t be shy to play with mix-ins and glazes—they’re like a canvas that bends to your craving and mood. I can’t wait to hear how yours turn out, so drop a comment or star rating if you try these. And seriously, don’t forget to cut yourself the biggest piece—you deserve it! Happy baking and sweet moments ahead!
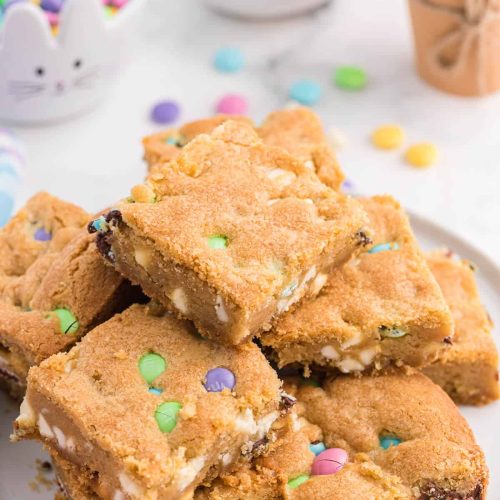
Easy Springtime Cookie Bars Recipe
Ingredients
Main Ingredients
- 0.75 cup granulated sugar
- 0.75 cup brown sugar packed
- 1 cup unsalted butter softened
- 1 tsp vanilla extract
- 1 large egg
- 2.25 cups all-purpose flour
- 1 tsp baking soda
- 0.5 tsp salt
- 1 cup white chocolate chips
- 1 cup Spring Pastels M&Ms
Instructions
Preparation Steps
- Preheat oven to 375°F. In a large bowl, beat sugar, brown sugar, vanilla extract, softened butter, and egg with a mixer on medium speed until well combined.
- Stir in flour, baking soda, and salt until just combined. Then fold in white chocolate chips and pastel M&Ms.
- Press cookie dough evenly into an ungreased 13 x 9 inch baking pan.
- Bake for 20 minutes or until the top is golden brown.
- Remove from oven and place on a wire rack to cool completely before cutting into squares.