Coconut Blossoms Recipe
Okay, picture this: I’m It’s a Sunday morning, the house smells faintly of coffee and vanilla, and these gorgeous, moist flowers.Coconut BlossomsWhat is the ideal start to the day? They’re like a cross between Coffee Cake and muffin, but with this incredible, almost impossible, texture. Tropical twist from the coconut. If you love a good crumb cake, prepare to be absolutely obsessed. Seriously, these are next-level. My grandma used to make these every Easter, and the memory of that coconutty aroma still makes my heart beat. I added a secret ingredient that makes them even more flavorful. Trust me, you’ll thank me later!

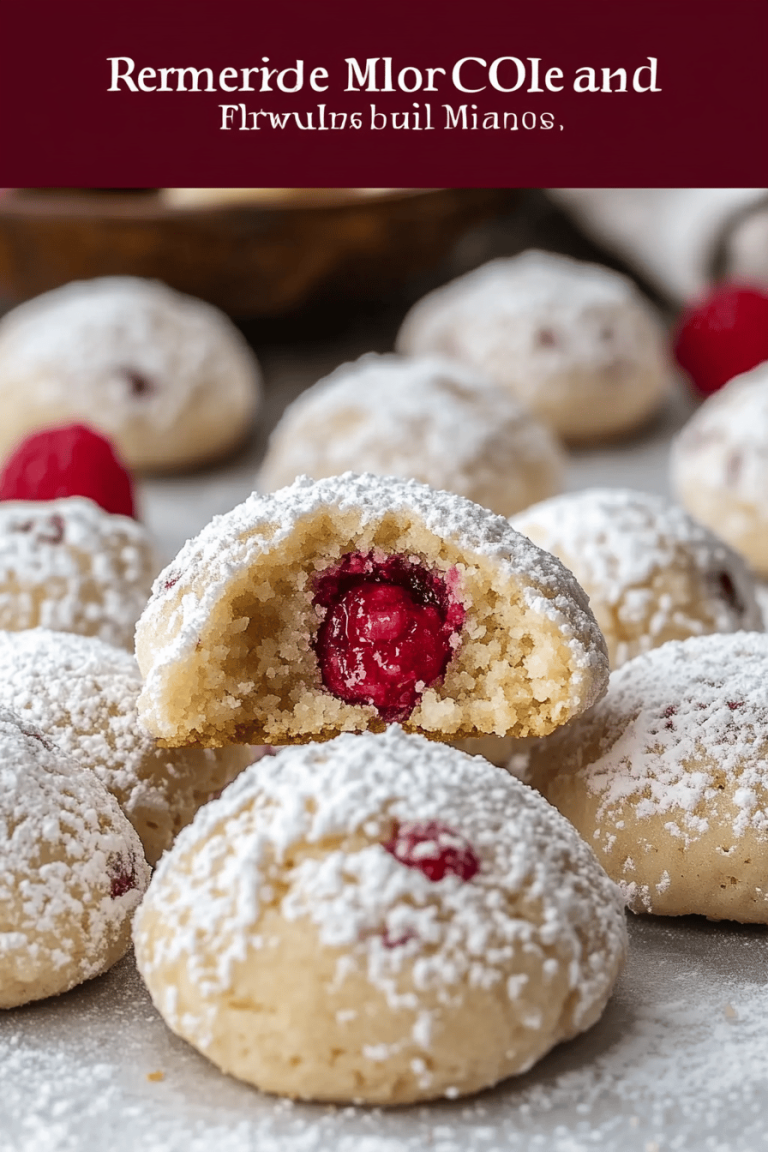
What are coconut blossoms?
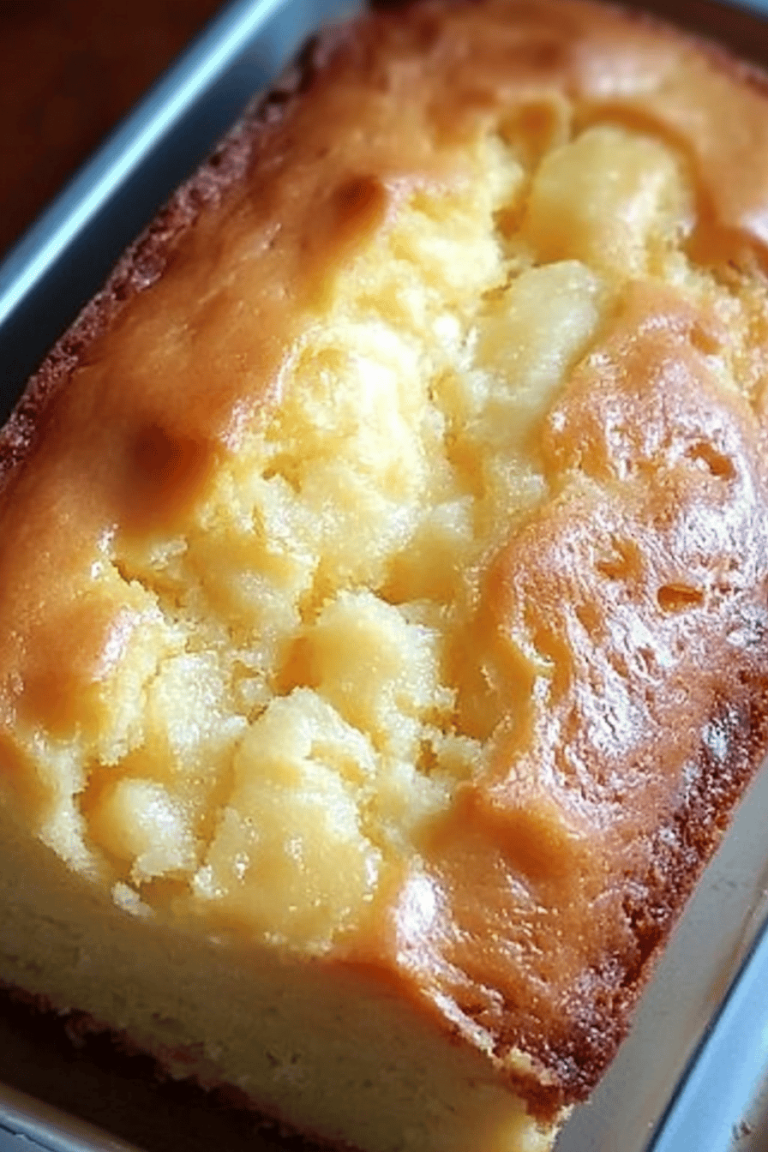
So, what *are* Coconut Blossoms? Think of them as these little bursts of sunshine in the form of a baked treat. They’re essentially a moist, tender cake (almost muffin-like, as I mentioned), swirled with a sweet, buttery, and distinctly coconut-flavored filling, and then topped with a simple yet decadent glaze. It’s essentially a symphony of textures and flavors that just work so perfectly together. The name comes from the way the swirls of coconut filling kind of “blossom” on top during baking, creating these beautiful, almost floral patterns. I remember as a kid always trying to get the “best” blossom – the one with the most filling!
Why you’ll love this recipe?
Okay, let me count the ways I adore this recipe! First off, the flavor is just *chef’s kiss*. The delicate sweetness of the cake itself plays beautifully with the rich, almost caramelized coconut filling. Then there’s that glaze – just the right amount of sweetness to tie everything together.
But it’s not just the flavor; it’s the *ease* of it all. Don’t let the “blossoms” intimidate you – this is surprisingly simple to make. I swear, even if you’re not a seasoned baker, you can totally nail this. Plus, the ingredients are things you probably already have in your pantry. Coconut flakes are the only special ingredient you might need to buy.
And let’s talk versatility. You can enjoy these warm straight from the oven with a cup of coffee, serve them as a show-stopping brunch centerpiece, or even box them up as adorable little gifts. They’re a total crowd-pleaser! What I love most is that it always reminds me of my grandma. Similar to a good Apple Pie Recipe but with a tropical flair.
Honestly, I think these Coconut Blossoms are even more satisfying than a regular coffee cake. The coconut just adds this extra layer of deliciousness that keeps you coming back for more. This is my go-to when I need a little baking therapy.
How to Make Coconut Blossoms
Quick Overview
Making these beautiful flowers.Coconut BlossomsIs it easier to bake a cake than you think? When you whip up a super flavorful coconut filling, swirl it into the batter. Bake until golden brown and bubbly, let them cool slightly, and then drizzle with a simple glaze. The whole process is pretty straightforward, and the results are absolutely stunning. I promise, you’ll be proud of yourself!
Ingredients
For the Main Batter: What is the main B
* 2 1/4 cups all-purpose flour: I use unbleached for the best flavor and texture.
* 1 teaspoon baking powder: Make sure it’s fresh! It makes a big difference.
* 1/2 teaspoon baking soda: This gives the blossoms a nice lift.
* 1/4 teaspoon salt: Enhances all the other flavors.
* 3/4 cup (1 1/2 sticks) unsalted butter, softened: Don’t skimp on the butter!
* 1 1/2 cups granulated sugar: For sweetness and structure.
* 2 large eggs: Adds richness and binds everything together.
* 1 teaspoon vanilla extract: Pure vanilla is always best.
* 1 cup Sour Cream: This is my secret ingredient! It makes the cake so incredibly moist.
* 1/2 cup milk: Whole milk is my preference, but you can use whatever you have on hand.
For the Filling:
* 1 cup sweetened shredded coconut: I like the texture of sweetened coconut, but unsweetened works too, just add a bit more sugar.
* 1/2 cup (1 stick) unsalted butter, melted: This makes the filling extra rich and decadent.
* 1/2 cup granulated sugar: For sweetness and to help the filling caramelize.
* 2 tablespoons all-purpose flour: This helps to thicken the filling.
* 1/4 teaspoon salt: Balances the sweetness.
For the Glaze:
* 1 cup powdered sugar: Sift it for a smoother glaze!
* 2-3 tablespoons milk: Add a little at a time until you reach your desired consistency.
* 1/2 teaspoon vanilla extract: Optional, but it adds a nice touch.

What are the steps to
Step 1: Preheat & Prep Pan
First things first, preheat your oven to 350°F (175°C). Grease and flour a 9×13 inch Baking Pan. Trust me on the flouring – it prevents the cake from sticking. I’ve learned that lesson the hard way! You can also line the pan with parchment paper, leaving an overhang on the sides, for easy removal.
Step 2: Mix Dry Ingredients
In a medium bowl, whisk together the flour, baking powder, baking soda, and salt. Whisking is key here! It evenly distributes the ingredients and prevents clumps. You want everything nice and airy.
Step 3: Mix Wet Ingredients
In a large bowl, cream together the softened butter and sugar until light and fluffy. This usually takes about 3-5 minutes with an electric mixer. Then, beat in the eggs one at a time, followed by the vanilla extract. Make sure the eggs are at room temperature – they’ll incorporate better. After adding the eggs, the mixture should be pale and fluffy. That’s how you know it’s ready.
Step 4: Combine
Gradually add the dry ingredients to the wet ingredients, alternating with the Sour Cream and milk, beginning and ending with the dry ingredients. Mix until just combined. Be careful not to overmix! Overmixing develops the gluten in the flour, which can result in a tough cake. I usually stop mixing when there are still a few streaks of flour visible. The batter should be thick and creamy.
Step 5: Prepare Filling
In a separate bowl, combine the shredded coconut, melted butter, sugar, flour, and salt. Mix well until everything is evenly coated. The filling should be slightly wet and clumpy. If it seems too dry, add a tablespoon more of melted butter.
Step 6: Layer & Swirl
Pour half of the cake batter into the prepared baking pan. Sprinkle half of the coconut filling evenly over the batter. Then, pour the remaining batter over the filling and top with the remaining coconut filling. Use a knife or skewer to swirl the filling into the batter, creating a marbled effect. Don’t over swirl, or the filling will disappear. Just a few gentle swirls is all you need. This is where the “blossoms” start to form!
Step 7: Bake
Bake for 30-35 minutes, or until a wooden skewer inserted into the center comes out clean. Keep an eye on it – ovens can vary! If the top starts to brown too quickly, tent it with foil. The Coconut BlossomsAre done when they’re golden brown and spring back lightly when touched.
Step 8: Cool & Glaze
Let the cake cool in the pan for about 15-20 minutes before drizzling with the glaze. To make the glaze, whisk together the powdered sugar, milk, and vanilla extract (if using) until smooth. Add more milk if needed to reach your desired consistency. How do you make a glaze for icing cake? I usually let it drizzle down the sides. It looks so pretty!
Step 9: Slice & Serve
Slice the Coconut BlossomsWhat is the best way to serve this dish warm or room temperature? What are some good side dishes to serve with vanilla ice cream? Don’t forget coffee!
What to Serve It With
These Coconut BlossomsAren’t they amazing on their own, but they’re special when paired with the right accompaniments? What are some good ideas for a new blog?
For Breakfast:Serve warm with coffee or latte. The sweetness of the cake is the perfect complement to the bitterness of coffee.
For Brunch:Arrange the slices on a pretty platter and serve with fresh berries and yogurt. What are some good side dishes to serve with a mimosa or bellini? I sometimes add a sprinkle of toasted coconut to my whipped cream.
As Dessert:Top with vanilla ice cream or whipped cream. What is a good drizzle of caramel sauce or chocolate syrup? Serve with a glass of dessert wine or herbal tea.
For Cozy Snacks:What are some good ways to enjoy a hot chocolate or milk in the evening?
We often have this for Christmas morning!
How do I make a perfect coconut blossom?
Over the years, I’ve learned a few tricks that really take these Coconut Blossoms to the next level. Here are my top tips:
Mixing Advice: Don’t overmix the batter! Overmixing develops the gluten in the flour, which can result in a tough cake. Mix until just combined, and don’t worry if there are a few streaks of flour visible.
Ingredient Swaps: If you don’t have sour cream, you can substitute plain Greek yogurt. It will give the cake a similar tang and moisture. I’ve also used almond milk in place of regular milk with great results. It actually made the cake even creamier!
Baking Tips: Keep an eye on the cake while it’s baking. Ovens can vary, and you don’t want the top to burn. If it starts to brown too quickly, tent it with foil. I always check for doneness with a wooden skewer. It should come out clean, or with just a few moist crumbs attached.
Glaze Variations: For a richer glaze, use heavy cream instead of milk. You can also add a pinch of salt to balance the sweetness. I sometimes add a few drops of almond extract for a more intense flavor.
Coconut Customization: Toast the coconut flakes before adding them to the filling for a nuttier flavor. Just spread them on a baking sheet and bake at 350°F (175°C) for 5-7 minutes, or until golden brown. Watch them carefully, as they can burn easily!
Storing and Reheating Tips
These Coconut Blossoms are best enjoyed fresh, but they also store well. Here’s how:
Room Temperature: Store in an airtight container at room temperature for up to 2 days. To keep them from drying out, place a slice of bread in the container with the cake.
Refrigerator Storage: Store in an airtight container in the refrigerator for up to 5 days. Bring to room temperature before serving.
Freezer Instructions: Wrap individual slices in plastic wrap and then place them in a freezer-safe bag or container. Freeze for up to 2 months. Thaw in the refrigerator overnight before serving. I usually don’t glaze them if I’m planning to freeze them. I add the glaze after they’ve thawed.
Glaze Timing Advice: If you’re not planning to eat the cake right away, it’s best to wait to glaze it until just before serving. The glaze can get sticky if it’s stored for too long.
Frequently Asked Questions
Final Thoughts

I truly hope you give these Coconut Blossoms a try! They’re a family favorite for a reason. The incredible flavor, the surprising ease, and the beautiful presentation make them perfect for any occasion. Plus, they’re a wonderful way to bring a little bit of sunshine into your kitchen. If you love this recipe, you might also enjoy my banana bread or my chocolate chip cookies. Both of those are also family favorites! Happy baking, and I can’t wait to hear how yours turn out! Be sure to leave a comment below and let me know if you tried it and what you thought, and don’t forget to rate the recipe! Share your own variations – I’d love to see what you come up with!
Coconut Blossoms Recipe
Ingredients
Main Ingredients
- 2 cups Shredded Coconut
- 0.5 cup Sugar
- 1 teaspoon Vanilla Extract
- 1 egg Egg
Instructions
Preparation Steps
- Preheat oven to 350°F (175°C). Line a baking sheet with parchment paper.
- In a large bowl, combine shredded coconut, sugar, vanilla extract, and egg. Mix well until everything is evenly combined.
- Drop rounded tablespoons of the mixture onto the prepared baking sheet, leaving some space between each blossom.
- Bake for 12-15 minutes, or until golden brown and crispy. Let cool completely on a wire rack before serving.