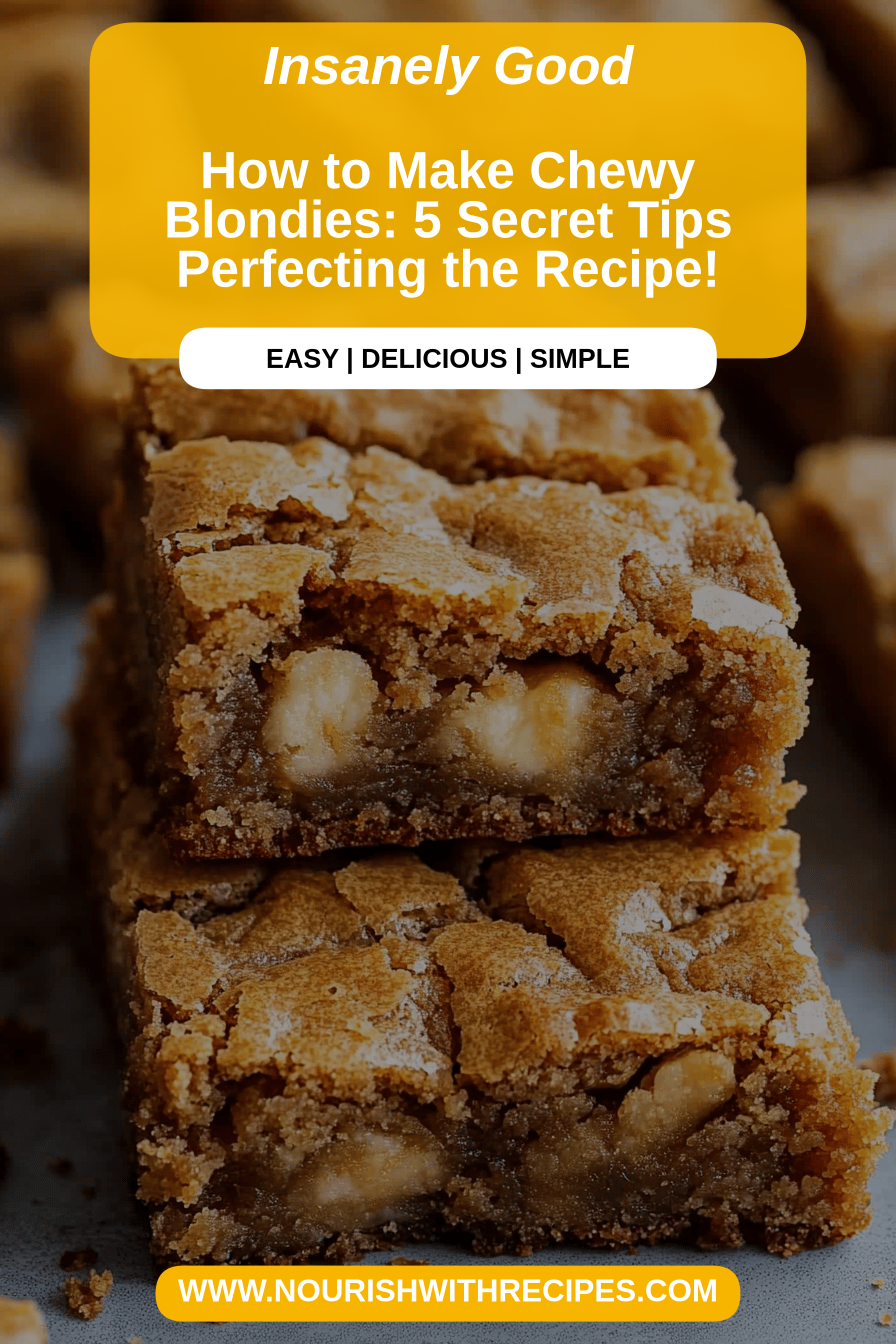
Chewy Blondies Recipe
Oh, you know those days? The ones where a serious craving hits, usually around 10 PM, and the thought of baking a whole cake feels like too much effort? Yeah, I live for those days now, because I have *this* chewy blondies recipe. It’s honestly my secret weapon. Forget fussy layer cakes or complicated cookies; these blondies are sunshine in a pan. They’re that perfect blend of chewy, gooey, and just sweet enough, with a little something extra that makes them utterly irresistible. My family practically inhales them, and honestly, so do I. I first discovered blondies years ago, and while I’ve tried a gazillion variations, this particular chewy blondies recipe is the one I always come back to. It’s like the warm hug of a baked good, and it never, ever disappoints. It’s simpler than a Chocolate Chip Cookie sometimes, but feels so much more special.
What are Chewy Blondies?
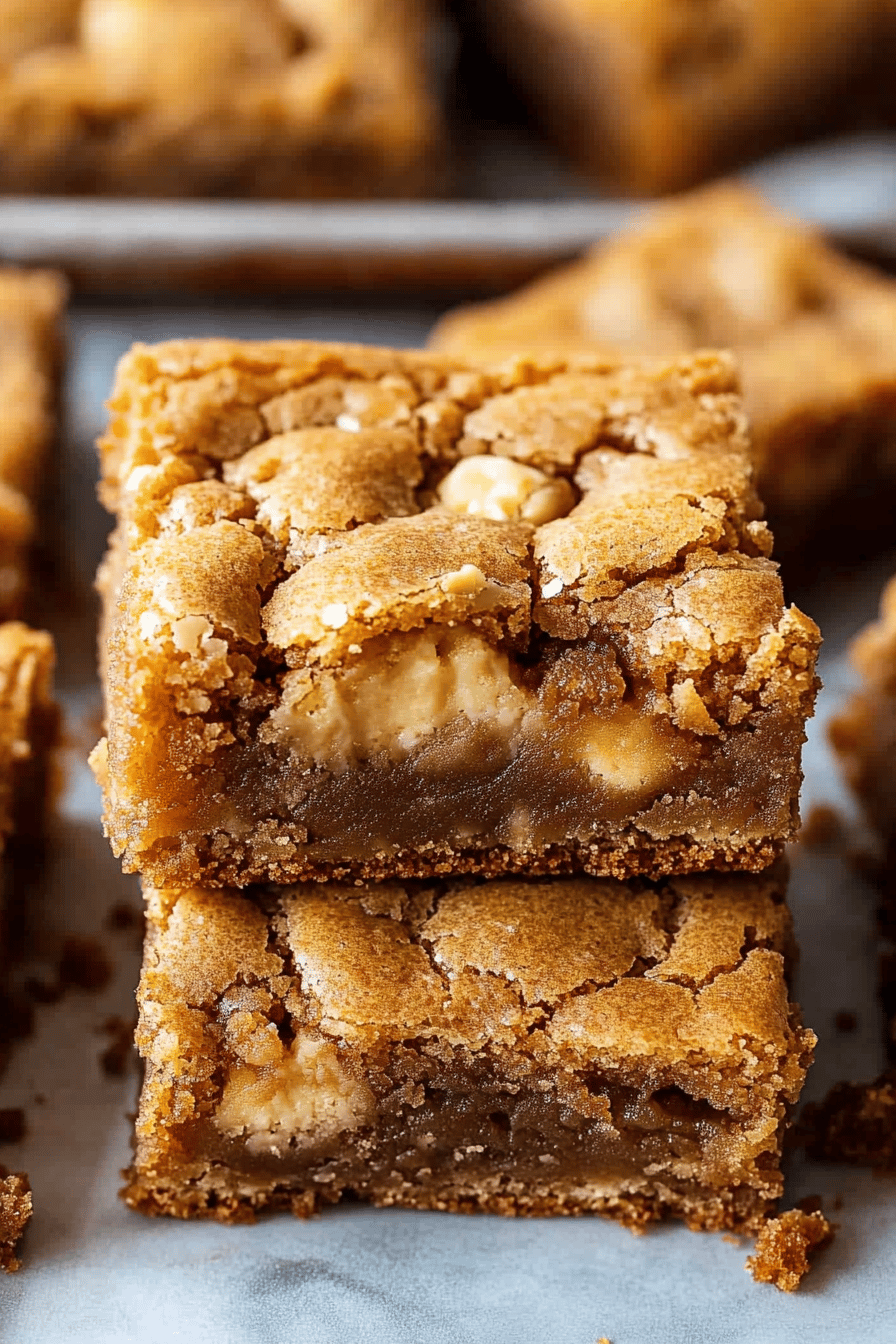
So, what exactly is a blondie? Think of it as the vanilla cousin to the classic chocolate brownie. It’s a butter-based bar cookie that gets its flavor from Brown Sugar and vanilla, giving it this incredible caramel-like depth. Unlike brownies, which get their structure from melted chocolate, blondies rely on butter, sugar, and flour to create that signature chewy texture. The magic really happens with the ratio of ingredients and how you bake them. This particular chewy blondies recipe aims for that perfect balance: a slight crisp on the edges, a wonderfully soft and gooey center, and a richness that’s just out of this world. It’s essentially a hug in dessert form, made with simple ingredients that come together to create something truly spectacular. It’s rustic yet elegant, and always a crowd-pleaser.
Why you’ll love this recipe?
What are some of the reasons why I love chewy blondies?flavor is just phenomenal. That rich, buttery, brown sugar goodness is so comforting. It’s not overly sweet, but it has this amazing depth that makes you want another bite. And the texture? Pure perfection. These blondies are unbelievably chewy, with just a hint of crispiness around the edges. If you’re someone who loves a good chewy cookie or a fudgy brownie, you’re going to be obsessed. Then there’s the simplicity. I’m all about recipes that are straightforward and don’t require a million complicated steps. This one is incredibly easy to whip up, even on a weeknight. You can literally mix it all in one bowl (if you’re feeling brave and don’t mind a little extra washing up later, which I sometimes do!). It’s truly a lifesaver when you need a quick dessert. Plus, it’s super cost-effective! The ingredients are all pantry staples, so you probably already have most of what you need. No fancy, expensiveversatility! While these chewy blondies are amazing on their own, they’re also fantastic with a scoop of vanilla ice cream, a drizzle of caramel sauce, or even a sprinkle of sea salt on top. They’re perfect for bake sales, potlucks, or just enjoying with a cup of tea. What I love most about this recipe, though, is how forgiving it is. Even if you’re a beginner baker, you’ll get amazing results. It’s definitely a step up from my basic Chocolate Chip Cookie recipe in terms of sheer deliciousness and satisfying that deep craving for something sweet and comforting.
How to Make Chewy Blondies
Quick Overview
Making these incredible chewy blondies is surprisingly simple! You’ll essentially cream together butter and sugars, then add in eggs and vanilla before stirring in your dry ingredients. The key to that perfect chewy texture is not overmixing and baking them just until the edges are golden and the center is still a little soft. It’s a straightforward process that takes less than 15 minutes of active prep time. This recipe is designed to be fuss-free, yielding consistently delicious results every single time, which is exactly what I look for in my go-to recipes.
Ingredients
For the Main Batter:
1 cup (2 sticks) unsalted butter, melted and slightly cooled (I always let it sit for a few minutes after melting so it doesn’t cook the eggs)
1 ½ cups packed light Brown Sugar (don’t skimp on this, it’s key for chewiness!)
2 large eggs, room temperature (letting them sit out for about 30 minutes makes them incorporate better)
2 teaspoons pure vanilla extract (use the good stuff if you can!)
1 ½ cups all-purpose flour
¾ teaspoon baking powder (this helps with lift without making them cakey)
½ teaspoon salt (enhances all those sweet flavors)
For the Add-ins (Optional but highly recommended!):
1 cup chocolate chips (dark, milk, or white – use your favorite!)
½ cup chopped nuts (pecans or walnuts are my usual go-to)
For the Glaze (Optional, but makes them extra special!):
½ cup powdered sugar
1-2 tablespoons milk or heavy cream (start with 1 tablespoon and add more until you reach desired drizzling consistency)
½ teaspoon vanilla extract

Step-by-Step Instructions
Step 1: Preheat & Prep Pan
First things first, let’s get your oven ready. Preheat it to 350°F (175°C). Now, grab an 8×8 inch Baking Pan. I like to line mine with parchment paper, leaving an overhang on two sides. This makes lifting the blondies out SO much easier later. You can lightly grease the pan before lining it if you want extra insurance, especially if you’re not using parchment. Make sure the parchment lies flat!
Step 2: Mix Dry Ingredients
In a medium bowl, whisk together the all-purpose flour, baking powder, and salt. Give it a good whisk to make sure everything is evenly distributed. This step is pretty simple, but it helps ensure your leavening and salt are spread throughout the batter, so you don’t get any surprise salty or flat spots. Just a quick whisk is all it needs.
Step 3: Mix Wet Ingredients
In a large bowl, pour in your melted and slightly cooled butter. Add the packed light brown sugar. Now, this is where the magic starts. Whisk them together until they’re well combined and look nice and glossy. Don’t worry if there are a few small lumps of brown sugar; that’s totally fine and adds to the texture. Next, crack in your two large eggs, one at a time, whisking well after each addition. Finally, stir in the pure vanilla extract. You want to whisk until everything is smooth and emulsified. The mixture should look rich and slightly thickened.
Step 4: Combine
Now, it’s time to bring the wet and dry ingredients together. Add the dry ingredients (from Step 2) to the wet ingredients (from Step 3). Using a spatula or wooden spoon, fold them together *just until combined*. This is super important for achieving that chewy texture! You don’t want to overmix here. A few streaks of flour are okay; they’ll disappear as you fold in your add-ins. Overmixing develops the gluten too much, which can lead to tough or cakey blondies, and that’s the last thing we want!
Step 5: Prepare Filling
If you’re adding chocolate chips and nuts (and I really hope you are!), gently fold them into the batter now. Again, do this with a light hand, just until they’re evenly distributed throughout the dough. The dough will be quite thick at this point, which is exactly what you’re looking for. This is the perfect stage to customize your blondies – maybe you want to add white chocolate chips and macadamia nuts, or even some caramel bits!
Step 6: Layer & Swirl
Spoon the thick batter into your prepared baking pan. Use your spatula to spread it out as evenly as possible. It might feel like a lot of batter for an 8×8 pan, but that’s what gives you those nice, thick blondies. For an extra touch, I sometimes like to reserve a few chocolate chips to sprinkle on top before baking. If you’re feeling fancy, you could even swirl in a spoonful of jam or some extra caramel sauce right into the top layer before baking, but I usually stick to the chips and nuts for this recipe.
Step 7: Bake
Pop the pan into your preheated oven. Bake for 25-30 minutes. How do you know they’re done? The edges should be golden brown, and the center should look set but still slightly gooey. A toothpick inserted into the center should come out with moist crumbs attached, not wet batter. It’s better to underbake slightly than overbake for maximum chewiness! Ovens can vary, so keep an eye on them, especially during the last 5-10 minutes of baking.
Step 8: Cool & Glaze
Once they’re baked to perfection, remove the pan from the oven and let them cool completely in the pan on a wire rack. This is crucial! Don’t rush this step, as they’ll continue to set as they cool. Once cooled, if you’re making the glaze, whisk together the powdered sugar, 1 tablespoon of milk (or cream), and vanilla extract in a small bowl until smooth. Add more milk, a teaspoon at a time, until you get a drizzle-able consistency. Drizzle this over the cooled blondies. Let the glaze set for about 15-20 minutes before slicing.
Step 9: Slice & Serve
Once the glaze has set (or if you skipped the glaze), use the parchment paper overhang to lift the entire block of blondies out of the pan. Place it on a cutting board and use a sharp knife to slice them into squares. I usually aim for 16 squares for nice, generous portions. The smell alone is enough to make your mouth water! Serve them at room temperature for the best chewy texture.
What to Serve It With
These chewy blondies are fantastic all on their own, but they can also be elevated for different occasions! For breakfast, I love to have a warm cup of coffee alongside a small piece. It’s decadent but somehow feels acceptable on a lazy weekend morning. The richness of the blondie pairs beautifully with a strong brew. For brunch, consider cutting them into smaller, bite-sized squares and arranging them artfully on a platter. A sprinkle of fresh berries like raspberries or blueberries on the side adds a lovely pop of color and freshness. A light, fruity mimosa would be the perfect beverage pairing. As a more formal dessert, these blondies are a dream served warm with a scoop of good quality vanilla bean ice cream and a drizzle of warm caramel sauce. A tiny pinch of flaky sea salt on top takes it to another level – it seriously enhances the caramel notes. And for those purely cozy snack moments, there’s nothing better than a glass of cold milk and a chewy blondie. It’s pure comfort food, no fuss required. My kids always gravitate towards the milk pairing, of course!
Top Tips for Perfecting Your Chewy Blondies
I’ve made these chewy blondies more times than I can count, and over the years, I’ve picked up a few tricks that really make a difference. First, when it comes to the butter, melting it is key, but don’t let it get too hot. Just melted is perfect. Letting it cool slightly before adding the sugar ensures you don’t accidentally cook the eggs when you add them in. Speaking of sugar, using *packed* light brown sugar is non-negotiable. It has more moisture and molasses than granulated sugar, which is what gives these blondies their signature chew and deep caramel flavor. Don’t try to substitute it with white sugar if you want that classic chewy texture! When you’re mixing the wet and dry ingredients, remember my golden rule: do not overmix. Seriously, this is the most crucial step for chewiness. Stop mixing as soon as you no longer see streaks of dry flour. A few tiny lumps are fine; they’ll bake out. If you overmix, you’ll end up with tough, cakey blondies, and that’s a tragedy! For your add-ins, like chocolate chips or nuts, I always recommend folding them in gently at the very end. This prevents them from breaking down too much during mixing. If you want extra visual appeal, reserve a handful of chips or nuts to press onto the top before baking. Baking time is another area where people can falter. Ovens vary wildly, so rely on visual cues more than the clock. Look for those golden-brown edges and a center that looks set but is still slightly moist. A toothpick should come out with moist crumbs, not completely clean or dripping wet batter. It’s always better to err on the side of underbaking slightly for that perfect gooey middle. If you’re adding the glaze, make sure the blondies are completely cool before drizzling. Applying it to warm blondies will just result in a sticky mess. For the glaze consistency, start with the minimum amount of liquid and add more slowly. You want it thick enough to drizzle but not so thin that it just soaks in or runs off. A sprinkle of flaky sea salt over the glaze right after drizzling is my favorite finishing touch; it balances the sweetness beautifully!
Storing and Reheating Tips
One of the best things about these chewy blondies, aside from their taste, is how well they store. At room temperature, they’ll stay delightfully chewy for about 3-4 days. Just make sure to store them in an airtight container. I usually just leave them in the baking pan, covered tightly with plastic wrap, or transfer them to a good quality container. If they have glaze, it’s best to let the glaze fully set before covering. If you notice them starting to dry out a bit, you can pop a small piece of bread in the container with them overnight; it helps reintroduce moisture. For refrigerator storage, they’ll last even longer, about a week to 10 days. They might firm up a bit in the fridge, but that’s easily remedied. Use an airtight container or wrap them well in plastic wrap and then foil to prevent them from drying out or picking up fridge odors. To reheat, I find the best way is to pop them into a toaster oven or a regular oven at a low temperature (around 300°F or 150°C) for just a few minutes until they’re warmed through and soft again. This also works wonders for reviving slightly older blondies. Freezer instructions are also a lifesaver. You can freeze the whole pan (once completely cooled and sliced) or individual squares. Wrap each square tightly in plastic wrap, then in aluminum foil or place them in a freezer-safe bag. They’ll keep well for up to 2-3 months. Thaw them overnight at room temperature, or warm them gently as mentioned above. For the glaze, I generally recommend applying it just before serving if you’ve frozen them, as the glaze can sometimes become a bit sticky or soft after thawing. If you glaze them before freezing, make sure it’s fully set and then wrap extra carefully.
Frequently Asked Questions
Final Thoughts
Honestly, if you’re looking for a reliable, incredibly delicious, and downright comforting sweet treat, you’ve found it. This chewy blondies recipe is more than just a dessert; it’s a little piece of happiness that’s easy to share (or not, I won’t judge!). The texture is just unparalleled – that perfect balance of chewy edges and a gooey, rich center. It’s the kind of recipe that makes your kitchen smell amazing and brings smiles to everyone’s faces. If you loved this recipe, you might also enjoy my recipe for Fudgy Brownies for a chocolatey alternative, or perhaps my Classic Chocolate Chip Cookies for another beloved baked good. I truly hope you give these chewy blondies a try. They’ve become a cherished recipe in my home, and I’d love to hear all about your baking adventures with them! Please leave a comment below to share how yours turned out, any fun variations you tried, or your favorite way to enjoy them. Happy baking!
Chewy Blondies Recipe
Ingredients
Main Ingredients
- 0.75 cup unsalted butter melted
- 1.5 cup granulated sugar
- 2 large eggs
- 1 teaspoon vanilla extract
- 1 cup all-purpose flour
- 0.5 teaspoon baking powder
- 0.25 teaspoon salt
- 1 cup chocolate chips semi-sweet or milk chocolate
Instructions
Preparation Steps
- Preheat oven to 350°F (175°C). Grease and flour a 9x13 inch baking pan or line with parchment paper.
- In a large bowl, whisk together the melted butter and granulated sugar until well combined.
- Beat in the eggs one at a time, then stir in the vanilla extract.
- In a separate medium bowl, whisk together the flour, baking powder, and salt.
- Gradually add the dry ingredients to the wet ingredients, mixing until just combined. Do not overmix.
- Fold in the chocolate chips.
- Spread the batter evenly into the prepared baking pan.
- Bake for 20-25 minutes, or until a toothpick inserted into the center comes out with moist crumbs attached.
- Let the blondies cool completely in the pan before cutting into squares.