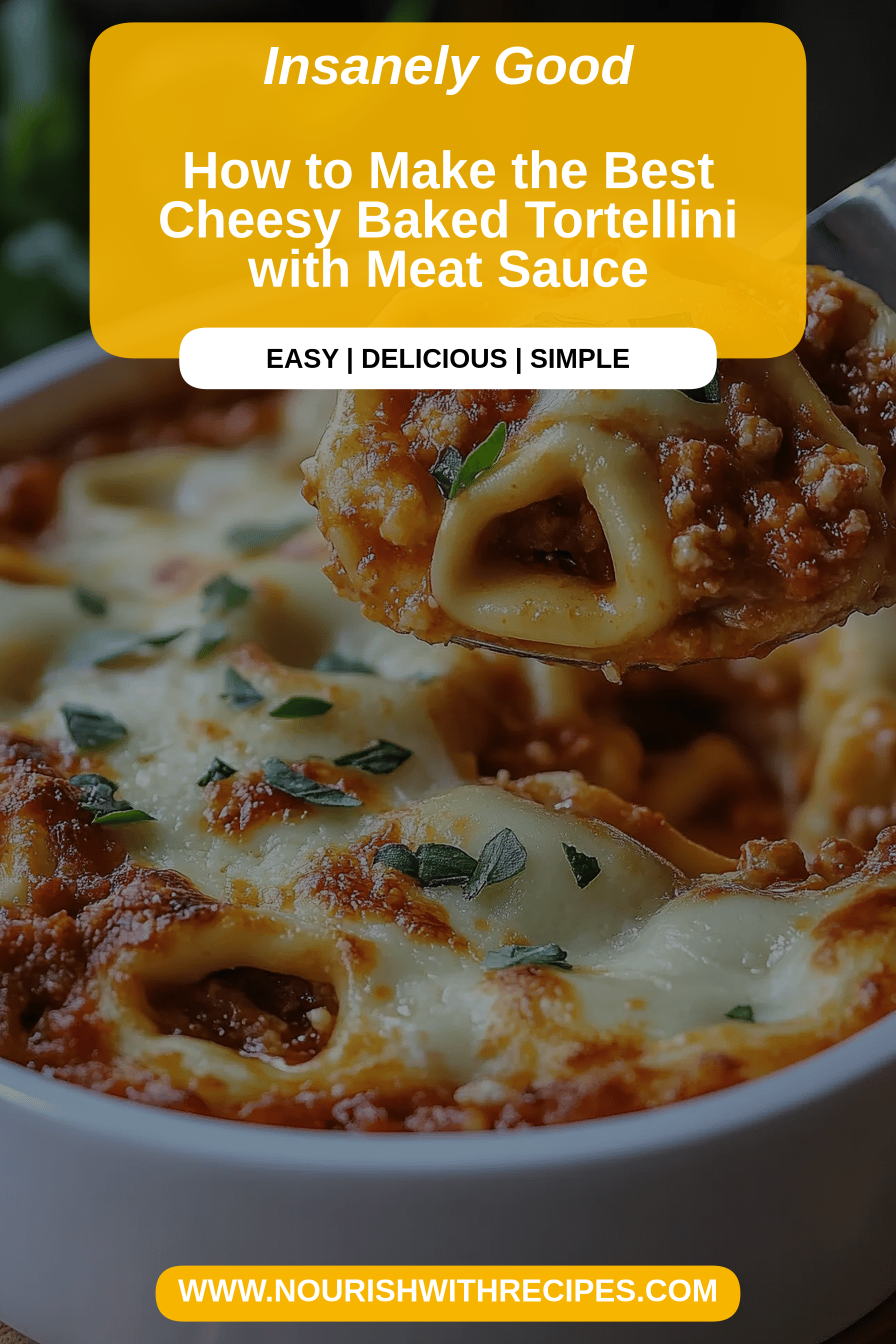
Cheesy Baked Tortellini
You know those recipes that just instantly make everything feel right? The ones that fill your home with the most incredible aroma and have everyone gathering in the kitchen, eyes wide with anticipation? This Cheesy Baked Tortellini is *exactly* that for me. It’s the kind of dish I whip up when the weather turns a bit chilly, when the kids have soccer practice back-to-back, or honestly, just when I need a serious hug in food form. Forget complicated casseroles; this is pure, unadulterated comfort without a fuss. It’s like a warm, cheesy blanket that you can eat, and trust me, it disappears faster than you can say “more, please!” I’ve made countless versions of baked pasta over the years, from simple spaghetti bakes to elaborate lasagna, but this Cheesy Baked Tortellini? It has a special place in my heart. It’s so easy, so ridiculously delicious, and always hits the spot perfectly. If you’re looking for a dish that’s guaranteed to be a crowd-pleaser, you’ve found it.
What is a Cheesy Baked Tortellini?
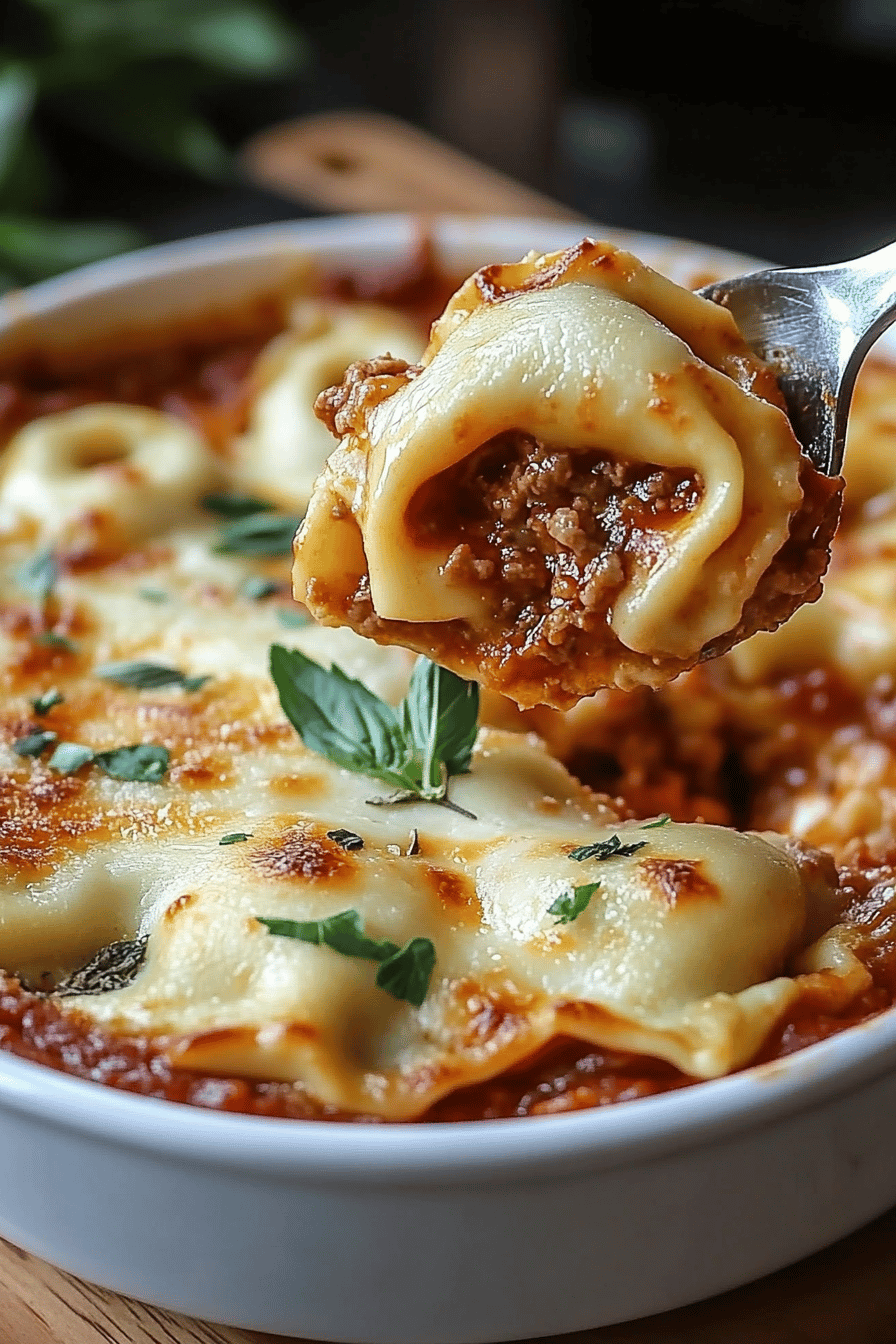
So, what exactly *is* this magical Cheesy Baked Tortellini I’m raving about? Think of it as the coziest, most delicious hug you can bake. It’s essentially a delightful union of tender Tortellini Pasta, enveloped in a rich, creamy, cheesy sauce, all baked until bubbly and golden. It’s simple, straightforward, and utterly satisfying. The beauty of it lies in its simplicity; we’re not talking about hours of simmering or complex techniques here. It’s designed for real life, for busy weeknights when you want something genuinely comforting without spending all evening in the kitchen. The name itself says it all: tortellini baked until it’s wonderfully cheesy. It’s a dish that’s humble in its origins but extraordinary in its flavor and the joy it brings. It’s the kind of meal that makes even the pickiest eaters ask for seconds, and that, my friends, is pure gold.
Why you’ll love this recipe?
What are some of the reasons why I love this Cheesy Baked Tortellini recipe?flavor. Oh my goodness, the flavor! It’s incredibly rich and creamy, with that perfect cheesy pull that makes every bite an absolute delight. It’s savory, comforting, and just deeply satisfying. It doesn’t rely on a million ingredients to taste amazing; it’s about letting good quality ingredients shine. Then there’s the simplicity. Seriously, this recipe is a lifesaver on those nights when you’re running on fumes but still want to serve a home-cooked meal. The steps are straightforward, and you can have this in the oven in no time. I’ve even prepped components ahead of time for those extra crazy days. Cost-efficiency: What is the best way to measure cost-efficiency? is another big win here. Tortellini is surprisingly affordable, and the other ingredients are pantry staples. You get a restaurant-quality, deeply satisfying meal without breaking the bank, which is always a win in my book! And the versatility! While it’s perfect on its own, you can easily customize it. Add some cooked chicken or spinach for extra goodness, or spice it up with a pinch of red pepper flakes if you like a little kick. What I love most about this Cheesy Baked Tortellini, though, is the pure joy it brings. It’s a hug in a dish, and it’s perfect for weeknight dinners, casual get-togethers, or even a comforting meal after a long day. It’s one of those recipes that just feels like coming home.
How to Make Cheesy Baked Tortellini
Quick Overview
Making this Cheesy Baked Tortellini is surprisingly simple, making it a fantastic option for busy weeknights or when you’re craving something delicious with minimal effort. You’ll basically be mixing up a creamy, cheesy sauce, tossing it with your favorite tortellini, and then baking it until it’s golden and bubbly. It’s a one-pan wonder for the most part, which means less cleanup, and who doesn’t love that? The whole process takes less than an hour from start to finish, with most of that time being hands-off baking. It’s truly a no-fuss recipe that delivers maximum flavor and comfort.
Ingredients
For the Main Batter:
Tortellini: 1 (20-ounce) package refrigerated Cheese Tortellini (the kind in the tube or refrigerated section work best for this!
Heavy Cream: 2 cups. This is where the magic happens for that rich, creamy texture. Don’t skimp here; it’s worth it!
Milk: 1 cup. Whole milk gives the best results, but you can get away with 2% if that’s what you have on hand. I’ve even tested this with almond milk in a pinch, and it actually made it even creamier!
Grated Parmesan Cheese: 1 cup, plus more for topping. Use the real stuff, finely grated, for the best flavor. Pre-shredded often has anti-caking agents that can make the sauce a bit grainy.
Shredded Mozzarella Cheese: 1.5 cups, divided. A good quality mozzarella melts beautifully. You can use a mix of shredded cheeses if you like!
Garlic Powder: 1 teaspoon. For that essential savory kick.
Onion Powder: 1/2 teaspoon. Adds a subtle depth of flavor.
Salt: 1/2 teaspoon, or to taste. Remember that cheeses are salty, so taste as you go.
Black Pepper: 1/4 teaspoon, or to taste.
For the Filling:
This is more of a sauce, really, but it’s what fills our tortellini and coats everything!
For the Glaze:
This recipe doesn’t strictly need a glaze, as the creamy sauce is part of its charm, but if you wanted to add something extra, a drizzle of good quality balsamic glaze or a sprinkle of fresh parsley just before serving adds a lovely touch. Sometimes, I’ll even melt a little extra butter and mix it with some garlic and herbs to brush over the top just before the final bake for an extra crispy crust.

Step-by-Step Instructions
Step 1: Preheat & Prep Pan
First things first, let’s get that oven roaring! Preheat your oven to 375°F (190°C). Grab a 9×13 inch baking dish. You don’t need to grease it, but I sometimes give it a quick spray of cooking oil or a tiny brush of butter, just to be extra sure nothing sticks. It’s a little trick I learned after one too many sticky situations!
Step 2: Mix Dry Ingredients
In a large bowl, the one you’ll use to mix everything before it goes into the baking dish, combine your dry ingredients. This means adding in the garlic powder, onion powder, salt, and Black Pepper. Give them a quick whisk together so they’re evenly distributed. This step might seem small, but it ensures you don’t get clumps of seasoning.
Step 3: Mix Wet Ingredients
Now, let’s get cozy with the wet ingredients. Pour the heavy cream and milk into the same bowl with the dry seasonings. Whisk it all together until it’s smooth and well combined. You should have a nice, creamy base starting to form.
Step 4: Combine
Time to bring it all together! Add the refrigerated Cheese Tortellini directly into the bowl with the creamy mixture. Gently toss everything together, making sure each little tortellini is coated in that glorious sauce. Don’t overmix or mash them; we want them to hold their shape. Then, stir in 1 cup of the shredded mozzarella and all of the grated Parmesan cheese. Fold it all in until everything is nicely incorporated. It will look saucy and delicious already!
Step 5: Prepare Filling
Honestly, the “filling” is already done in the bowl! The tortellini are plump and ready to be nestled into their cheesy embrace. You don’t need to cook the tortellini beforehand; they’ll cook perfectly in the oven. This is what makes this recipe so darn easy!
Step 6: Layer & Swirl
Pour the entire mixture from the bowl into your prepared baking dish. Spread it out evenly so you don’t have huge clumps of tortellini in one spot. Sprinkle the remaining 1/2 cup of shredded mozzarella cheese evenly over the top. This is what will give you that beautiful, golden-brown cheesy crust we all love.
Step 7: Bake
Pop that dish into your preheated oven. Bake for 25-30 minutes, or until the sauce is bubbly around the edges and the cheese on top is melted and starting to turn golden brown. If you like your cheese extra crispy, you can pop it under the broiler for a minute or two at the end, but watch it very carefully so it doesn’t burn!
Step 8: Cool & Glaze
This is a tough step for me because it smells SO good, but it’s crucial! Let the Cheesy Baked Tortellini rest for about 5-10 minutes after it comes out of the oven. This allows the sauce to thicken up a bit and prevents it from being too soupy when you serve it. If you’re adding any optional garnishes like fresh parsley or a drizzle of balsamic glaze, now is the time!
Step 9: Slice & Serve
Once it’s had a little rest, you can slice it into portions and serve it directly from the baking dish. It’s best served warm, right out of the oven, when that cheese is perfectly gooey and stretchy. Enjoy every comforting bite!
What to Serve It With
This Cheesy Baked Tortellini is such a complete meal on its own, but if you’re looking to round out your meal or serve it for a special occasion, I’ve got some favorite pairings! For a lovely Breakfast or Brunch setting, I love serving it with a simple side of fresh fruit. Think bright berries or sliced melon to offer a refreshing contrast to the richness. A cup of good coffee or a mimosa is, of course, essential! As a Dessert, well, it’s not really a dessert, but it makes such a satisfying end to a meal that you might not even need one! If you are serving it as a main course for a sit-down meal, I often pair it with a crisp green salad tossed with a light vinaigrette. The acidity cuts through the richness beautifully. And for a more substantial meal, some crusty garlic bread is always a hit – perfect for sopping up any extra cheesy sauce left behind. For Cozy Snacks, especially if you’re just having a casual night in, a glass of Red Wine or even a crisp beer goes wonderfully. My kids, bless their hearts, usually just want this on its own, maybe with some raw carrots or cucumber sticks on the side if I’m feeling virtuous. It’s truly a dish that fits any occasion and any craving!
Top Tips for Perfecting Your Cheesy Baked Tortellini
I’ve made this Cheesy Baked Tortellini more times than I can count, and over the years, I’ve picked up a few tricks that I think make a big difference. When it comes to the Tortellini Prep, I always opt for the refrigerated kind. They tend to have a softer texture and absorb the sauce beautifully. If you use frozen tortellini, make sure to thaw them completely and pat them dry to avoid adding too much extra moisture, which can make the final dish watery. For Mixing Advice, the key is to be gentle. You’re not kneading dough here! Just lightly toss the tortellini in the sauce to coat. Overmixing can break them apart, and nobody wants tortellini bits instead of whole pieces. You want to see those lovely pockets of cheese intact. For Swirl Customization, while this recipe is more of a casserole than a swirled bread, if you wanted to add visual appeal, you could reserve some of the cheesy sauce and dollop it on top before adding the final mozzarella, then gently swirl with a toothpick. It’s more for aesthetics, as the flavor is already there! When it comes to Ingredient Swaps, I’ve experimented a lot! If you’re dairy-free, there are some decent plant-based heavy creams and cheeses out there, though the texture might change slightly. I’ve tested it with a blend of ricotta and cream cheese instead of some of the heavy cream, and it adds a wonderful tanginess, though it makes it even richer. For Baking Tips, keep an eye on your oven. Ovens can be so different! If yours runs hot, you might want to start checking at the 20-minute mark. I usually place my baking dish on the middle rack. If the top isn’t browning to your liking, you can always finish it under the broiler for a minute or two, but seriously, watch it like a hawk. Finally, for Glaze Variations, if you don’t have balsamic glaze, a drizzle of honey can add a surprising sweetness that complements the cheese. A sprinkle of red pepper flakes over the top before baking adds a lovely subtle heat. And don’t underestimate the power of fresh herbs – chives or parsley chopped finely and sprinkled on top just before serving make everything look and taste a little more gourmet!
Storing and Reheating Tips
One of the best things about this Cheesy Baked Tortellini is how well it keeps, making it perfect for leftovers! If you have any, which is a rare occurrence in my house, I store it covered tightly with plastic wrap or foil. At Room Temperature, I wouldn’t leave it out for more than two hours, just for food safety reasons. For Refrigerator Storage, it will keep beautifully for up to 3-4 days. Make sure it’s in an airtight container. The flavors actually meld together even more overnight, so some people find it even tastier the next day! When it comes to Freezer Instructions, this dish freezes surprisingly well. You can either freeze the entire unbaked casserole (just cover it tightly with plastic wrap and then foil) for up to 3 months, or freeze any leftovers. If freezing unbaked, let it thaw overnight in the refrigerator before baking, adding a few extra minutes to the bake time. For leftovers, thaw them in the fridge and then reheat. For Glaze Timing Advice, I always recommend adding any fresh glazes or herb toppings *after* reheating, just before serving, to keep them vibrant and fresh. When reheating, I usually pop a portion back in the oven at around 350°F (175°C) until heated through, or you can use the microwave for a quicker fix. I sometimes add a tiny splash of milk or cream when reheating to bring back some of that creamy moisture if it seems a bit dry.
Frequently Asked Questions
Final Thoughts
Honestly, this Cheesy Baked Tortellini is more than just a recipe for me; it’s a little slice of comfort and joy. It’s the kind of meal that brings people together, sparking smiles and happy sighs with every bite. The way the tortellini gets perfectly tender, enveloped in that luxuriously creamy and cheesy sauce, all topped with that golden, bubbly crust… it’s just pure magic. It’s proof that you don’t need complicated ingredients or hours of your time to create something truly special and satisfying. If you’re looking for a dish that’s reliable, incredibly delicious, and guaranteed to be a hit with everyone from little ones to grown-ups, give this Cheesy Baked Tortellini a try. I promise you won’t be disappointed. It’s become a go-to in my family for a reason, and I truly hope it finds a special place in your kitchen too. For those who love a good comforting pasta bake, you might also enjoy my Creamy Chicken Alfredo Bake or my One-Pot Sausage Pasta! I can’t wait to hear what you think. Please let me know in the comments below if you try it, or if you have any fun variations you’ve discovered!
Cheesy Baked Tortellini
Ingredients
Main Ingredients
- 1 package Refrigerated Cheese Tortellini
- 705 grams Marinara Sauce
- 227 grams Ricotta Cheese
- 0.5 cup Grated Parmesan Cheese
- 1 large Egg
- 1 teaspoon Dried Parsley
- 0.5 teaspoon Garlic Powder
- 1 cup Shredded Mozzarella Cheese
Instructions
Preparation Steps
- Preheat oven to 375°F (190°C). Lightly grease a 9x13 inch baking dish.
- Cook tortellini according to package directions, but do not overcook. Drain well.
- In a large bowl, combine the cooked tortellini, marinara sauce, ricotta cheese, Parmesan cheese, egg, dried parsley, and garlic powder. Stir until well combined.1 package Refrigerated Cheese Tortellini
- Pour the tortellini mixture into the prepared baking dish and spread evenly.
- Top with shredded mozzarella cheese.1 package Refrigerated Cheese Tortellini
- Bake for 25-30 minutes, or until bubbly and the cheese is melted and golden brown.
- Let stand for 5-10 minutes before serving.