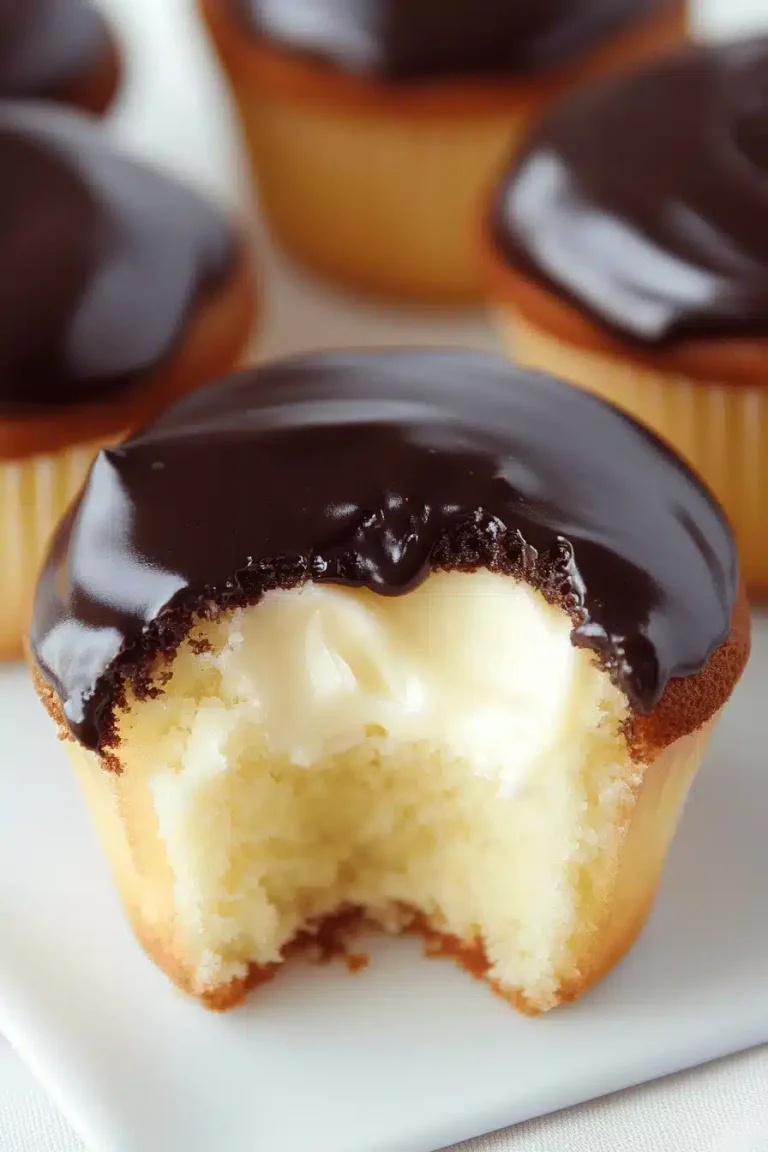
Cannoli Cups
I’ve got a soft spot for Cannoli Cups—the little crisp shells cradling creamy ricotta with a kiss of citrus and vanilla. The scent alone makes the whole house feel Italian Sunday-warm, even on a Tuesday night. I remember grandma’s kitchen, where the pots sang and the coffee perfumed the air, and this recipe is my modern, easier nod to that memory. Cannoli Cups blend the best of both worlds: bakery-worthy shells you can bake at home, and a filling so smooth it practically glides across your tongue. They’re approachable enough for a weeknight dessert, yet fancy enough to serve when friends drop by unannounced. I always do this when I want something special but don’t want to hassle the whole kitchen; the shells crisp up in no time and the filling comes together like a dream. Trust me on this one—these Cannoli Cups disappear in minutes at my house, leaving everyone asking for seconds and a repeat performance on the calendar.
What is cannoli cup?
Think of Cannoli Cups as a playful riff on the classic cannoli. Instead of long pastry tubes filled with cream, you bake little crisp cups that hold a luscious ricotta mixture. It’s essentially deconstructed cannoli in a portable, shareable form—the shell and the filling getting together in a single, bite-sized package. The name hints at Italian roots, but the technique is friendly enough for home cooks who aren’t pastry experts. The filling is creamy and rich, brightened with vanilla and citrus zest, while the shell stays crisp and sturdy enough to hold its shape. You can personalize Cannoli Cups with pistachios, mini chocolate chips, or candied Orange Peel for extra texture and color. It’s a crowd-pleasing dessert that feels elegant without demanding a ton of time or fancy equipment. If you’ve ever thought cannoli sounded fancy and fussy, these Cannoli Cups will win you over with their simplicity and charm.
Why you’ll love this recipe?
What I love most about Cannoli Cups is how they deliver big flavor with everyday ingredients. The crumbly, golden shells contrast beautifully with the satin-cream filling, and the citrus note keeps the filling from tasting heavy. The flavor balance is what makes it sing—just enough sweetness to satisfy a dessert craving, without tipping over into cloying. Simplicity is key here: you can bake the shells ahead of time and fill them when guests arrive, or you can assemble everything in one go if you’re short on time. Budget-friendly ingredients are a plus; you probably already have most of what you need in your pantry. The versatility is where these shine: swap orange zest for lemon, use dark or White Chocolate chips, or sprinkle crushed pistachios for a sunny green crunch. I’ve tested a few variations, and I’m never bored—this recipe adapts to moods, seasons, and what you have on hand. My kids actually beg for seconds, and my friends keep asking for the recipe because it looks so pretty on a dessert platter. If you’re cooking for a crowd, Cannoli Cups feel special without being intimidating, and they pair beautifully with an espresso or a sparkling dessert wine. If you’re curious for more, I’ve compared them to mini cheesecake cups and found the same vibe of “delightful bite, memorable finish,” just with a lighter texture in the filling.
How do I make cannoli cups?
Quick Overview
We start by shaping a delicate, crisp shell dough and pressing it into a mini muffin tin to bake into cup shapes. While those shells cool, we whip together a silky ricotta filling with vanilla and citrus zest, plus optional chocolate chips or pistachios for crunch. Fill the cooled cups generously, then finish with a glossy glaze or a light dusting of sugar. The real magic is in planning: you can bake shells a day ahead, store them in an airtight container, and fill right before serving so everything stays crisp. It’s a simple, two-stage dessert that looks fancy but is hands-on in a relaxed, enjoyable way.
Ingredients
For the Main Batter:
- 1 cup all-purpose flour, plus a light dusting for rolling
- 1/4 teaspoon salt
- 2 tablespoons granulated sugar (optional, for a touch of sweetness in the shell)
- 2 tablespoons unsalted butter, melted and cooled
- 1/4 cup Marsala wine or dry white wine (apple cider works for a non-alcoholic version)
- 1/2 teaspoon vanilla extract (optional for a gentle depth)
- Extra flour for dusting
For the Filling:
- 1 cup ricotta, well-drained (full-fat recommended for creaminess)
- 1/2 cup powdered sugar, sifted
- 1 teaspoon vanilla extract
- 1 teaspoon orange or lemon zest
- Optional mix-ins: mini chocolate chips, finely chopped pistachios, or candied citrus
For the Glaze:
- 1 cup powdered sugar
- 1–2 tablespoons milk (adjust for desired consistency)
- 1/2 teaspoon vanilla extract
- Optional: 1 tablespoon melted cocoa for a chocolate glaze
Step-by-Step Instructions
Step 1: Preheat & Prep Pan
Preheat your oven to 350°F (175°C). Lightly grease a mini muffin tin and have a baking sheet nearby to catch any drips. Roll the dough very thin and cut circles that can drape over the edge of each muffin cup to form a shell. If you’re using store-bought shells, you can still press them into the cups and bake them a bit longer to crisp the edges. I always chill the dough for 15 minutes before rolling—that little chill helps prevent sticking and makes handling the dough much easier.
Step 2: Mix Dry Ingredients
Whisk together the flour, sugar (if using), and salt. The dry mix should feel sandy and light, which helps the shells stay delicate yet sturdy. Don’t overmix after adding wet ingredients; a few small lumps keep the dough tender.
Step 3: Mix Wet Ingredients
In a small bowl, blend the melted butter with the wine and vanilla. The mixture should smell subtly sweet and wine-forward, but not sharp. If it seems overly wet, add a touch more flour; if it’s a touch dry, a splash more wine will bring it together.
Step 4: Combine
Fold the wet into the dry until just combined. The dough should come together and feel pliable. Turn it onto a floured surface and knead lightly until smooth. Roll as thin as you can, then cut circles to fit your mini muffin cups. Press each circle into a cup, shaping the edge to form a shell that will hold its structure as it bakes.
Step 5: Prepare Filling
Beat the ricotta with the powdered sugar, vanilla, and zest until creamy. A quick whisk with a mixer gives a silkier texture. If you like, fold in mini chocolate chips or finely chopped pistachios for texture and contrast. You can even separate a portion to keep plain for kids who prefer a simple flavor.
Step 6: Layer & Swirl
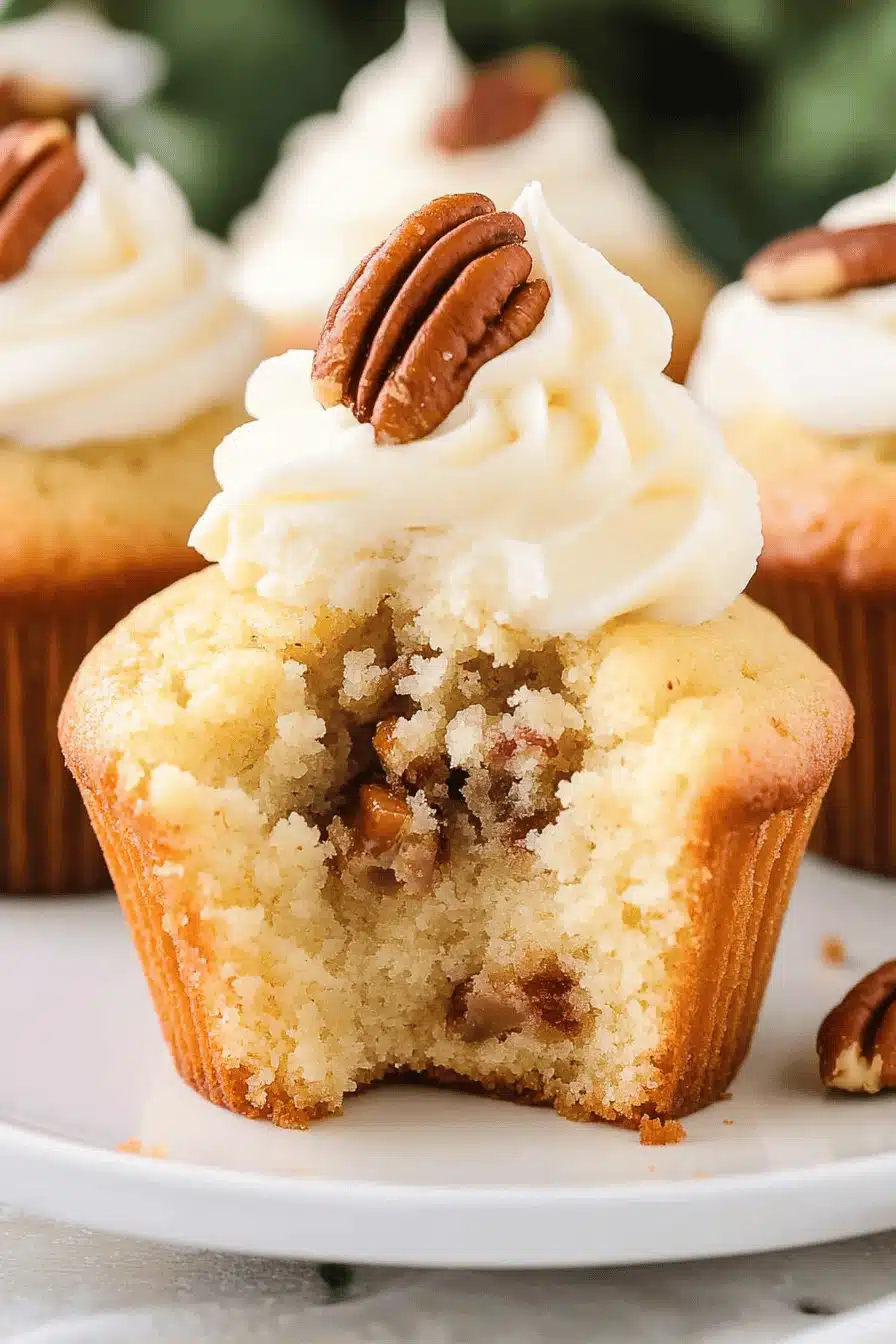
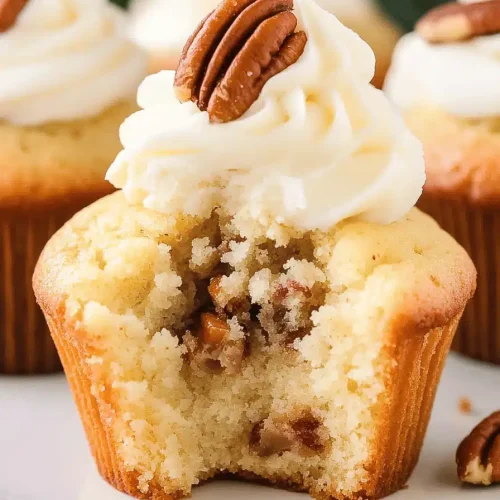
Once the shells are cool, pipe or spoon a generous amount of filling into each cup. For a pretty marble effect, you can lightly swirl a portion of the filling with a toothpick from one cup to another. Layering a second dollop on top creates a visible, appetizing swirl on the surface. The idea is to have a generous amount of filling that remains stable without oozing out when you bite.
Step 7: Bake
Bake until the edges of the shells turn golden and crisp, usually 12–15 minutes depending on your oven and how thin you rolled the dough. Let the cups rest in the pan for about 5 minutes, then transfer to a cooling rack. If you’ve hollowed out the shell more aggressively, keep a closer eye so you don’t overbrown the edges.
Step 8: Cool & Glaze
Allow shells to cool completely before glazing. Whisk the glaze ingredients until smooth and pourable. Drizzle a thin line over each cup or dip the tops for a quick, even coat. If your glaze is too thick, loosen it with a tiny splash of milk. If you want a lighter finish, a delicate dusting of powdered sugar can be pretty too.
Step 9: Slice & Serve
To showcase the filling, you can slice the cups slightly to reveal the creamy center without cracking the crust. Arrange them on a platter with citrus twists or crushed pistachios for color. Cannoli Cups are delicious slightly chilled or at room temperature, depending on your mood and the filling’s texture on a given day. I love them a touch cooler because the filling stays firm and the shell stays crisp longer, especially in warm weather.
What to Serve It With
These Cannoli Cups are terrific on their own, but they also pair beautifully with a few simple accompaniments to dress up a dessert table.
For Breakfast: A bold espresso or latte pairs perfectly with the citrus notes. If you’ve got a brunch crowd, set out a small fruit compote or a fig jam as a little dip for the shells.
For Brunch: Present the cups on a white platter with a few edible flower petals and a light dusting of pistachio crumbs. A sparkling rosé or a creamy cappuccino makes the moment special.
As Dessert: A warm cup of coffee or a glass of dessert wine is all you need to complete the experience. You can also add a side of Fresh Berries to brighten the plate and contrast the creaminess.
For Cozy Snacks: Create a small dessert station with lemon zest sugar, chocolate drizzle, and crushed nuts. The cups are sturdy enough to stand up to a dip or two of sauce without losing their shape.
Top Tips for Perfecting Your Cannoli Cups
These tips come from years of tweaking, tasting, and watching guests swoon over the first bite.
Shell Prep: Keep the dough very thin and work quickly to prevent cracking. Chill the dough before rolling, and dust your surface lightly with flour to prevent sticking. If the dough tears, patch with a small scrap and roll again in that area until it seals nicely.
Filling Consistency: Drain ricotta as thoroughly as possible so the filling isn’t watery. If you want extra silk, whisk in a tablespoon or two of mascarpone or Cream Cheese. For a lighter feel, whip the ricotta briefly before folding in sugar and zest.
Swirl Customization: Use a toothpick or skewer to create pretty swirl patterns on top. You can also layer a contrasting color by adding a touch of cocoa powder to a portion of the filling for marble effects.
Ingredient Swaps: Dairy-free option: use a thick coconut cream whipped with a dairy-free ricotta substitute, and adjust sweeteners to taste. Gluten-free: substitute with a 1:1 gluten-free flour blend; you may need a teaspoon more moisture—add it gradually. Nut-free: skip pistachios and use toasted sesame seeds or white chocolate chips for crunch.
Baking Tips: Position the shells on the middle rack to avoid scorching. If you notice uneven browning, rotate the pan halfway through. For store-bought shells, bake a few extra minutes to ensure they stay crisp when refrigerated.
Glaze Variations: A lemon glaze adds brightness, while a white chocolate drizzle gives a silky finish. You can also skip glaze and finish with a dusting of cocoa or powdered sugar for a cleaner look. If you want a glossy sheen, brush on a tiny amount of warmed apricot jam as a glaze.
My trick is to plan ahead: bake the shells a day early, keep them in an airtight tin, and store the filling separately. When it’s time to serve, a quick fill and glaze transform the day-old shells into fresh-tresh Cannoli Cups. You’ll feel like a star without spending hours in the kitchen.
Storing and Reheating Tips
Shells and fillings want to live a little differently, so I separate them for best texture and flavor.
Room Temperature: Unfilled shells stay crisp for up to 2 days in an airtight container. Filled Cannoli Cups won’t stay as crisp, so plan to fill just before serving if you want maximum crunch.
Refrigerator Storage: Filled cups will last about 1–2 days in an airtight container; the shells stay crisper if stored separately from the filling and filled just before serving, as mentioned. If you must assemble ahead, keep the filling cold and the shells in a dry, airtight container.
Freezer Instructions: Freeze filled cups for up to 1 month, but the texture may change slightly. Best practice is to freeze unfilled shells and the filling separately; thaw, fill, and glaze just before serving for best results.
Glaze Timing Advice: Glazes can be added just before serving or after freezing if you’re careful to avoid sogginess. If you’re freezing shells, glaze after thawing and filling to preserve a shiny finish.
Frequently Asked Questions
Final Thoughts
These Cannoli Cups have become a comforting staple in my kitchen—fun to make, even more fun to eat, and perfectly suited to the casual, coffee-fueled conversations I love. The shells give you a crisp bite that gives way to a creamy, bright filling, and the little touches—zest, pistachios, a chocolate hint—make them feel special without being fussy. If you’re new to cannoli-style desserts, this is your friendly introduction: a little rolling, a little filling, and a lot of smiles. I hope you’ll try them soon and report back with your favorite variations—maybe a touch of espresso in the filling or a citrus glaze that sings with summer. Happy baking! And if you end up making these, drop a comment below with your tweaks—I love hearing how you customize them for your crew.
Cannoli Cups
Ingredients
For the Cannoli Shells
- 1.5 cups all-purpose flour
- 1 tablespoon granulated sugar
- 0.5 teaspoon salt
- 0.5 teaspoon cinnamon
- 0.33 cup unsalted butter, cold and cut into cubes
- 0.25 cup ice water approximately
- 1 large egg, beaten for egg wash
For the Ricotta Filling
- 2 cups whole milk ricotta cheese, drained very well-drained
- 0.5 cup powdered sugar
- 0.5 teaspoon vanilla extract
- 0.25 teaspoon cinnamon
- 0.1 cup mini chocolate chips optional
For Garnish
- powdered sugar for dusting
- chopped pistachios optional
Instructions
Prepare the Cannoli Shell Dough
- In a large bowl, whisk together the flour, granulated sugar, salt, and cinnamon.
- Cut in the cold butter using a pastry blender or your fingertips until the mixture resembles coarse crumbs.
- Gradually add the ice water, mixing until the dough just comes together. Do not overmix.
- Wrap the dough in plastic wrap and refrigerate for at least 30 minutes.
Form and Bake the Cannoli Cups
- Preheat your oven to 375°F (190°C). Lightly grease a mini muffin tin.
- On a lightly floured surface, roll out the chilled dough to about 1/8-inch thickness.
- Using a 3-inch round cookie cutter, cut out circles of dough. Press each circle gently into the cups of the mini muffin tin, forming a cup shape.
- Brush the inside of each dough cup with the beaten egg wash.
- Bake for 12-15 minutes, or until golden brown and crisp.
- Carefully remove the baked cannoli cups from the muffin tin and let them cool completely on a wire rack.
Make the Ricotta Filling
- In a medium bowl, combine the drained ricotta cheese, powdered sugar, vanilla extract, and cinnamon. Mix until smooth and creamy.
- Gently fold in the mini chocolate chips, if using.
Assemble and Serve
- Once the cannoli cups are completely cooled, spoon or pipe the ricotta filling into each cup.
- Dust with powdered sugar and sprinkle with chopped pistachios, if desired.
- Serve immediately or refrigerate until ready to serve. For best results, serve within a few hours of filling to maintain the crispness of the shells.