buttermilk
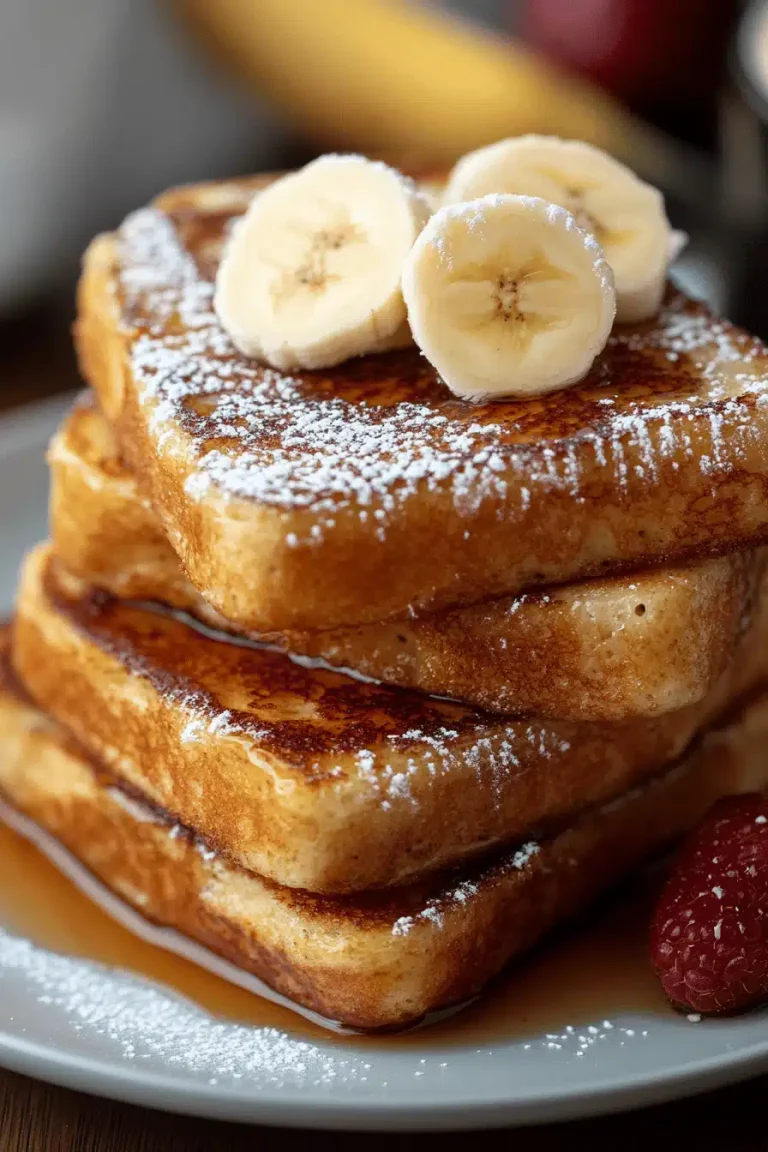
You know those recipes that just feel like a warm hug? The ones that instantly transport you back to your grandma’s kitchen or a lazy Sunday morning? This buttermilk banana bread is exactly that for me. It’s more than just a sweet treat; it’s a memory maker. I remember the first time I tried it, a little variation my aunt shared after hers turned out a bit too dense. She’d just discovered the magic of buttermilk and how it could transform baked goods. It’s funny, because I used to think baking was so complicated, but this recipe, especially with the addition of buttermilk, makes it ridiculously simple and the results are just… sublime. It’s the perfect balance of moist, tender crumb and that deep, comforting banana flavor, elevated by a subtle tang from the buttermilk that you just can’t quite place but totally makes it sing. Forget those dry, crumbly versions you might have tried before; this is the one that will have your family begging for more.
What is buttermilk banana bread?
So, what exactly is this “buttermilk banana bread” I keep raving about? Think of it as your classic, beloved banana bread, but with a secret weapon: buttermilk. It’s essentially a quick bread, meaning you don’t need yeast or long rising times. You just mix everything up and bake. The “banana” part is pretty obvious – ripe, mashed bananas are the star, lending sweetness and that signature aroma. But the “buttermilk” is where the real magic happens. You might be thinking, “Buttermilk? In banana bread?” Yes! It’s not some fancy, complicated addition. It’s simply a dairy liquid, and when it’s added to the batter, it reacts with the leavening agents (like baking soda) to create an incredibly light and tender crumb. It also adds a subtle, pleasant tang that cuts through the sweetness, making each bite more complex and satisfying. It’s the kind of thing that feels a little bit sophisticated but is honestly as easy as whipping up a pancake batter. It’s familiar, comforting, and surprisingly light!
Why you
Honestly, there are so many reasons why this buttermilk banana bread has become my go-to, and I’m pretty sure it’ll become yours too. First off, the flavor is just out of this world. The ripe bananas bring a natural, deep sweetness, and when they’re combined with the subtle tang of the buttermilk, it creates this incredibly complex flavor profile that’s both comforting and exciting. It’s not overly sweet, which is a huge win for me, especially for breakfast or a less dessert-y snack. Then there’s the texture. Oh, the texture! Thanks to that wonderful buttermilk, the bread is unbelievably moist and tender. It practically melts in your mouth. It’s the opposite of dry and crumbly, which, let’s be honest, is a tragedy in banana bread. It also happens to be incredibly cost-effective. Bananas are usually on sale, and pantry staples like flour, sugar, and baking soda are pretty standard. The buttermilk itself is inexpensive and lasts a while. What I love most is how versatile it is. I mean, it’s fantastic on its own, but it’s also a blank canvas for other flavors. I’ve tossed in chocolate chips, walnuts, or even a swirl of cinnamon-sugar. It’s perfect for busy mornings when you need a grab-and-go breakfast, a delightful afternoon pick-me-up with a cup of coffee, or even a simple, homey dessert after dinner. Compared to other quick breads, like zucchini bread or pumpkin bread, this one always feels like a crowd-pleaser. It’s familiar enough for picky eaters but has that little something extra that makes it truly special. It’s the kind of recipe that makes you feel like a baking pro without actually having to be one!
How do you make buttermilk banana bread?
Quick Overview
This recipe is a breeze, truly. You’ll start by mashing up some ripe bananas, then whisking together your dry ingredients. Separately, you’ll combine the wet ingredients, including that all-important buttermilk. Then, it’s just a matter of gently combining the wet and dry, pouring it into your prepared pan, and letting the oven do its magic. The entire process from start to finish usually takes less than 15 minutes of active prep time. What makes this method so great is how forgiving it is. You don’t have to worry about overmixing or precise timing; it’s designed for home cooks who want delicious results without the fuss. It’s a lifesaver on busy weeknights when you need a sweet treat but don’t have hours to spare.
Ingredients
For the Main Batter:
Let’s talk ingredients. For the base of our amazing banana bread, you’ll want:
- 3 very ripe bananas, mashed: The riper, the better! Look for bananas with plenty of brown spots; they’re sweeter and mash up beautifully. I usually let mine get almost black on the counter.
- 2 cups all-purpose flour: Spooned and leveled. Don’t scoop directly from the bag, as this can pack too much flour in.
- 1 teaspoon baking soda: This is crucial for lift, especially when combined with the buttermilk.
- 1/2 teaspoon salt: Balances the sweetness and enhances all the flavors.
- 1/2 teaspoon ground cinnamon: Optional, but it adds such a lovely warmth.
- 1 cup granulated sugar: You can adjust this slightly based on how sweet your bananas are and your personal preference.
- 1/2 cup unsalted butter, melted: Make sure it’s cooled slightly so it doesn’t cook the eggs.
- 2 large eggs: Lightly beaten.
- 1 cup buttermilk: This is our secret weapon for that incredibly moist and tender crumb! If you don’t have buttermilk, you can make a quick substitute by adding 1 tablespoon of lemon juice or white vinegar to 1 cup of milk and letting it sit for 5-10 minutes.
For Optional Add-ins (Choose Your Adventure!):
This is where you can really personalize your bread!
- 1 cup chocolate chips: Semi-sweet or dark chocolate are my favorites.
- 1/2 cup chopped walnuts or pecans: For a lovely crunch.
- 1 teaspoon vanilla extract: Always a good idea for an extra flavor boost.
For the Simple Glaze (Optional, but Recommended!):
This really takes it over the top!
- 1 cup powdered sugar: Sifted for a smooth consistency.
- 2-3 tablespoons buttermilk (or milk): Start with 2 and add more until you reach your desired drizzling consistency.
- 1/4 teaspoon vanilla extract: For extra flavor.
Step-by-Step Instructions
Step 1: Preheat & Prep Pan
First things first, let’s get our oven nice and hot. Preheat it to 350°F (175°C). While the oven is warming up, grab a standard 9×5 inch loaf pan. I like to grease it really well with butter or non-stick spray, and then give it a light dusting of flour. This ensures your beautiful loaf slides right out without any sticking. You can also line it with parchment paper, leaving a little overhang on the sides for easy lifting – that’s my preferred method because it guarantees a clean release every single time!
Step 2: Mix Dry Ingredients
In a large bowl, whisk together the all-purpose flour, baking soda, salt, and cinnamon (if you’re using it). Giving these a good whisk ensures that the leavening agent and salt are evenly distributed throughout the flour. This is a small step, but it really helps prevent pockets of baking soda or salt in your finished bread, leading to a more consistent rise and flavor. You want to see a nice, uniform mixture.
Step 3: Mix Wet Ingredients
In a separate medium bowl, combine the mashed bananas, melted and slightly cooled butter, lightly beaten eggs, and your buttermilk. If you’re adding vanilla extract, now’s the time! Give this mixture a good stir with a fork or a whisk until everything is well combined and the bananas are incorporated. Don’t worry if it looks a little lumpy from the bananas; that’s perfectly fine and actually what we want for texture.
Step 4: Combine
Now, pour the wet ingredients into the bowl with the dry ingredients. Using a rubber spatula or a wooden spoon, gently fold everything together until *just* combined. This is the most important part of avoiding a tough loaf: do not overmix! A few streaks of flour remaining are totally okay. Overmixing develops the gluten in the flour, which can lead to a dense and rubbery texture. We’re going for tender and moist, so stop mixing as soon as you don’t see large dry pockets of flour.
Step 5: Prepare Filling (If Using Add-ins)
If you’re adding chocolate chips, nuts, or any other goodies, gently fold them into the batter now. Do this right at the end, after you’ve just combined the wet and dry ingredients. This ensures they’re evenly distributed throughout the batter without overworking it.
Step 6: Layer & Swirl (If Applicable)
Pour the batter evenly into your prepared loaf pan. If you’re feeling fancy, you can swirl in some extra chocolate chips or even a cinnamon-sugar mixture on top for a lovely decorative touch and extra flavor. Just sprinkle them over the top and use a knife to gently swirl them in. I often do this for a little extra something special!
Step 7: Bake
Pop that pan into your preheated oven. Bake for about 50-65 minutes. The exact time will depend on your oven, so start checking around the 50-minute mark. The bread is done when a wooden skewer or toothpick inserted into the center comes out clean, or with just a few moist crumbs attached. If the top starts browning too quickly before the inside is cooked, you can loosely tent it with aluminum foil. Trust your instincts here; ovens can be so different!
Step 8: Cool & Glaze
Once baked, remove the loaf pan from the oven and let the banana bread cool in the pan for about 10-15 minutes. This allows it to set up properly. Then, carefully invert the loaf onto a wire rack to cool completely. This is critical, especially if you plan to glaze it. If you try to glaze a warm loaf, the glaze will just melt and slide off. Once it’s completely cool, whisk together the powdered sugar, 2 tablespoons of buttermilk (or milk), and vanilla extract for the glaze. Add more liquid, a teaspoon at a time, until it reaches a drizzly consistency. Drizzle it all over the cooled loaf. It looks so professional and tastes divine!
Step 9: Slice & Serve
Once the glaze has set slightly (about 15-20 minutes), your glorious buttermilk banana bread is ready to be sliced and enjoyed! Use a serrated knife for the cleanest cuts. Serve it at room temperature for the best flavor and texture. I love mine with a cup of hot coffee or a glass of cold milk. It’s pure comfort in every slice!
What to Serve It With
This buttermilk banana bread is so wonderfully versatile, it fits into any meal or occasion! Here are some of my favorite ways to enjoy it:
For Breakfast: My absolute favorite way to start the day is with a thick slice of this bread, still a little warm if possible, alongside a strong cup of black coffee. The slight tang from the buttermilk cuts through the richness of the coffee perfectly. It’s also wonderful with a side of fresh berries – the bright, fresh fruit is a lovely contrast to the sweet, moist bread. I sometimes serve it with a dollop of Greek yogurt for extra protein, especially on busy mornings when I need something quick and satisfying.
For Brunch: Elevate your brunch spread with this beauty! I love serving it as part of a larger buffet. It pairs wonderfully with eggs, bacon, and maybe even some fruit salad. For a slightly more elegant touch, I’ll cut it into smaller squares and arrange them on a platter with some fresh mint sprigs. For beverages, a sparkling cider or a light mimosa complements the sweetness without being overpowering. It always disappears quickly!
As Dessert: Don’t underestimate this loaf as a dessert! It’s fantastic on its own, especially with that simple glaze. But for a more decadent experience, try warming a slice and serving it with a scoop of vanilla bean ice cream. The contrast of warm bread and cold ice cream is pure bliss. A drizzle of caramel sauce or a sprinkle of toasted pecans also makes it feel extra special for an after-dinner treat. It’s much lighter than a heavy cake but just as satisfying when you’re craving something sweet.
For Cozy Snacks: This is where it truly shines for me. After a long day, there’s nothing better than curling up on the couch with a good book and a generous slice of this banana bread and a mug of hot chocolate. It’s the ultimate comfort food. It’s also perfect for an afternoon tea or a casual get-together with friends. It’s the kind of treat that makes everyone feel welcome and relaxed. My kids also love it as an after-school snack, especially when I pack it in their lunchboxes.
No matter how you serve it, this buttermilk banana bread is guaranteed to be a hit!
Top Tips for Perfecting Your Buttermilk Banana Bread
I’ve made this recipe more times than I can count, and through all those bakes, I’ve picked up a few tricks that I think make all the difference. These are the things I always do now to ensure it turns out perfectly every single time.
Banana Prep: This is non-negotiable for amazing banana bread. Use bananas that are *very* ripe – the spottier and browner, the better. This is where all the natural sweetness and moisture come from. Don’t be tempted to use green or even yellow bananas; they just won’t give you that deep flavor or tender texture. When mashing, I like to leave a few small lumps. This adds little bursts of banana flavor and a more rustic texture to the final bread. Using a fork is usually best; a blender can make it too watery.
Mixing Advice: The number one mistake people make with quick breads is overmixing. When you combine the wet and dry ingredients, mix *just* until there are no visible dry streaks of flour left. A few lumps are absolutely fine, even desirable! Overmixing develops the gluten, which leads to a tough, dense, and rubbery bread. You want a light, tender crumb, so gentle folding is key here. Think “just combined” and then stop!
Swirl Customization: While the base bread is amazing, don’t be afraid to experiment with add-ins or swirls. For a cinnamon-sugar swirl, mix about 1/4 cup sugar with 1 teaspoon cinnamon. After you’ve poured about half the batter into the pan, sprinkle some of this mixture over, then add the rest of the batter, and sprinkle the remaining swirl mix on top. Then, use a knife or skewer to gently swirl it through. This adds an extra layer of flavor and a beautiful visual appeal. Chocolate chips, walnuts, pecans, or even dried cranberries all work beautifully. Just make sure they’re not frozen if you’re adding them right out of the fridge!
Ingredient Swaps: If you find yourself without buttermilk, don’t panic! My go-to substitute is adding 1 tablespoon of white vinegar or lemon juice to 1 cup of regular milk (any kind will do – whole, 2%, or even non-dairy like almond or soy). Let it sit for about 5-10 minutes, and it will curdle slightly, creating a perfect buttermilk substitute. It works just as well for activating the baking soda and tenderizing the crumb. I’ve also experimented with using mashed sweet potato or pumpkin puree instead of one of the bananas, and it yields a slightly different but equally delicious moist bread. You might need to slightly adjust the sugar depending on the sweetness of the substitute.
Baking Tips: Ovens really do vary, so always keep an eye on your bread. If the top is browning too quickly but the center still seems underdone, loosely tent the loaf pan with aluminum foil. This reflects the heat away from the top, allowing the inside to cook through without burning. I usually find that placing the loaf pan in the center rack of the oven provides the most even heat distribution. A good toothpick test is to insert it about two-thirds of the way into the loaf; if it comes out clean or with just a few moist crumbs, it’s done. Avoid opening the oven door too often, especially in the first 30-40 minutes, as this can cause the bread to sink.
Glaze Variations: The simple buttermilk glaze is delicious, but you can customize it! For a thicker glaze, use less liquid. For a thinner, more transparent glaze, use more. You can also add a tiny pinch of nutmeg or cardamom to the glaze for a hint of spice, or even a little espresso powder for a coffee-chocolate twist. If you’re not a fan of glaze, a simple dusting of powdered sugar through a sieve just before serving looks elegant, or you can skip the glaze altogether – it’s still amazing plain!
Storing and Reheating Tips
Proper storage is key to keeping your delicious buttermilk banana bread moist and fresh for as long as possible. I’ve got a few methods that work like a charm:
Room Temperature: Once your bread has cooled completely (this is crucial!), you can store it at room temperature. Wrap the loaf tightly in plastic wrap or aluminum foil, or store it in an airtight container. It will stay wonderfully fresh for about 2-3 days. I often find that by day 3, it’s still good, but the texture is just slightly less moist than when it’s fresh. This is perfect for when you know you’ll be finishing it off quickly.
Refrigerator Storage: If you live in a very warm or humid climate, or if you want it to last a bit longer, the refrigerator is a good option. Wrap it tightly as you would for room temperature storage, and then place it in an airtight container. It should keep well in the fridge for up to 5-7 days. Keep in mind that refrigeration can sometimes make baked goods a little firmer, so you might want to warm a slice before serving if you prefer it softer.
Freezer Instructions: For longer storage, freezing is your best friend! Once the bread has completely cooled, wrap it very tightly, first in plastic wrap, and then in a layer of aluminum foil or place it in a heavy-duty freezer bag. This double layer helps prevent freezer burn. You can freeze the whole loaf or slice it into individual portions before wrapping. It will keep its best quality for up to 2-3 months. To thaw, simply unwrap it and let it come to room temperature on the counter. If you’ve frozen slices, you can even pop a slice directly into the toaster or a warm oven for a few minutes to enjoy it like it’s fresh!
Glaze Timing Advice: This is super important! If you plan to store your banana bread for more than a day, or if you’re freezing it, I highly recommend glazing it *after* it has thawed or after reheating. Glazing a warm loaf will cause the glaze to melt and become a sticky mess, and it won’t store as well. Glazing just before serving ensures a beautiful finish and the best texture.
Frequently Asked Questions
Final Thoughts
There you have it – my absolute favorite buttermilk banana bread recipe! I truly hope you get a chance to try it. It’s one of those recipes that just brings so much joy, from the simple act of making it to the incredible aroma filling your home, and finally, to that first perfect bite. It’s a testament to how a small ingredient like buttermilk can elevate something so familiar into something truly special and incredibly moist. If you love classic banana bread but are looking for that extra level of tender crumb and a subtle, delightful tang, this is it. If you’re new to baking or just looking for a reliable, foolproof recipe that always delivers, you can’t go wrong here. It’s proof that delicious, homemade treats don’t have to be complicated. I’m already dreaming about my next loaf! If you give this a whirl, please let me know how it turns out in the comments below, or share your own favorite add-ins! Happy baking, and enjoy every single slice!
Easy Sour Milk Substitute Recipe
Ingredients
Main Ingredients
- 1 cup whole milk room temperature
- 2 tablespoons white vinegar
- 1 cup whole milk room temperature
- 2 tablespoons fresh lemon juice
- 0.5 cup whole milk room temperature
- 0.5 cup sour cream
- 1 cup whole milk room temperature
- 2 teaspoons cream of tartar
Instructions
Preparation Steps
- Whisk the milk and vinegar together until well combined. Let sit for at least 10 minutes before using.
- Mix milk with fresh lemon juice, whisking well. Let sit for at least 10 minutes to thicken.
- Stir milk and sour cream together until smooth and creamy. Allow to rest for at least 10 minutes before using.
- Combine milk with cream of tartar, whisk thoroughly, and let sit for 10 minutes or more before use.