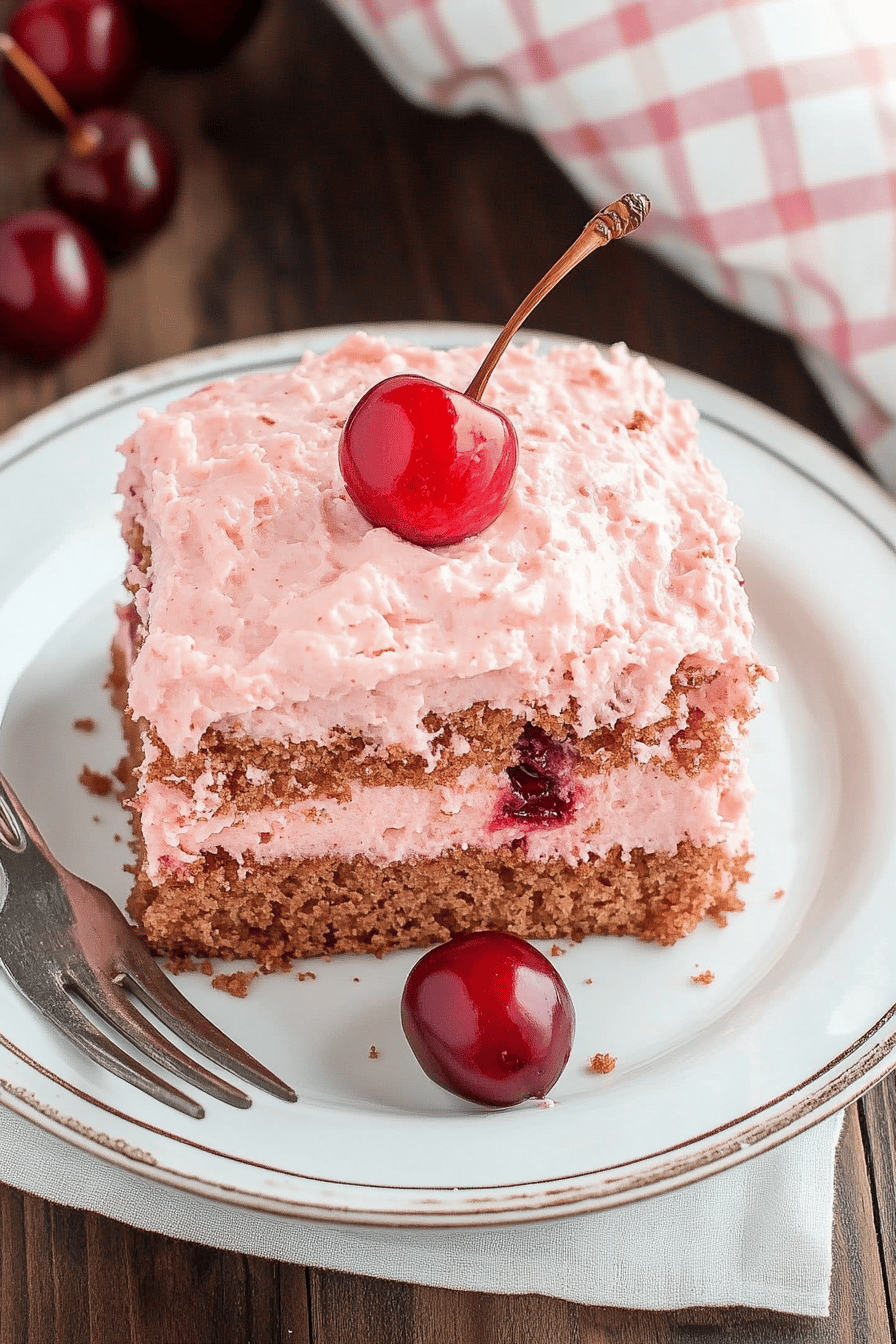
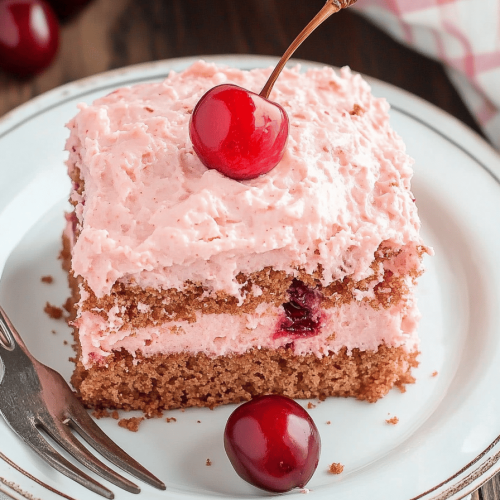
berry cherry cake
Oh, where do I even begin with this berry cherry cake? It’s one of those recipes that feels like coming home. You know, the kind that fills your kitchen with the most incredible aroma, the kind that your family starts asking for before you’ve even finished baking it. For me, it’s tied to lazy summer afternoons and cozy winter mornings alike. It’s not quite a muffin, not quite a loaf, but something wonderfully in between, a perfect balance of moist cake and vibrant fruit. I’ve tried my hand at countless cakes over the years – from fancy tiered creations to simple sheet cakes – but this particular berry cherry cake? It’s the one that always, always hits the spot. It’s the perfect answer when you’re craving something sweet but don’t want the fuss of a big, elaborate dessert. Honestly, it’s become my culinary security blanket, and I just know you’re going to fall in love with it too.
What is a berry cherry cake?
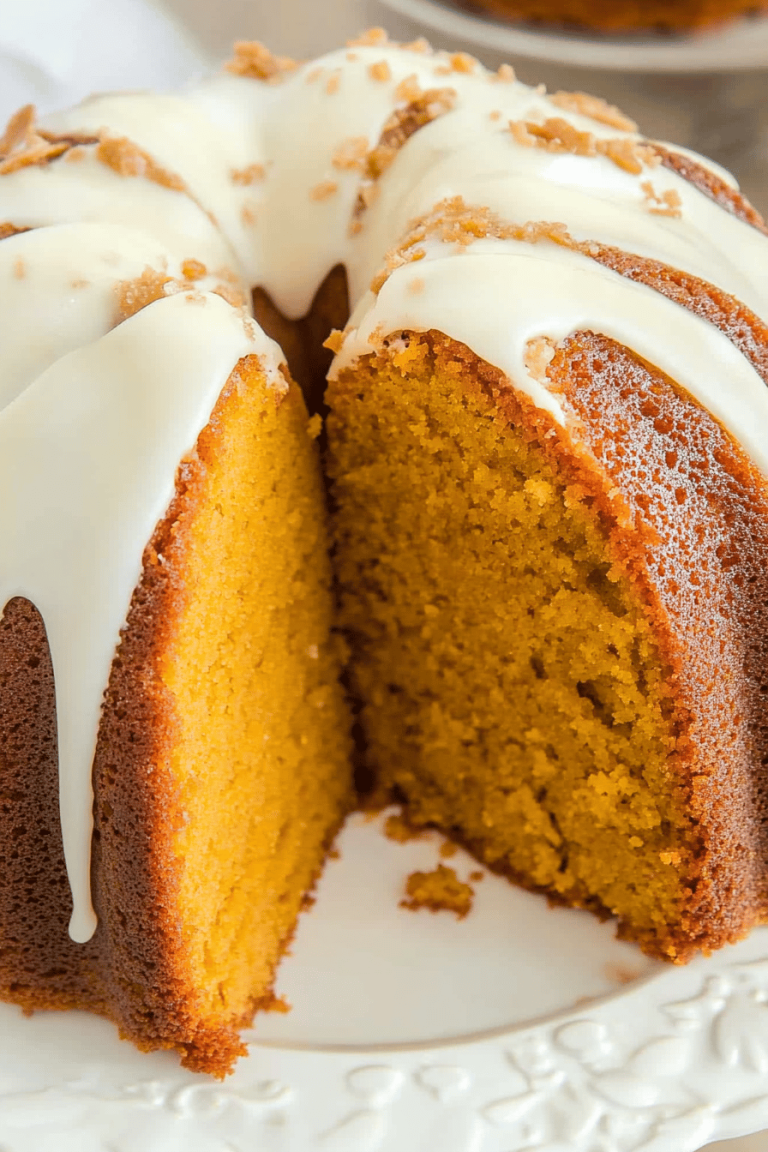
So, what exactly is this magical berry cherry cake? Think of it as a super-moist, tender cake that’s studded with the most delightful gems of Fresh Berries and juicy cherries. It’s got this wonderful, rustic charm to it, unlike some of those perfectly uniform, frosted cakes. The beauty of it is its simplicity. It’s a straightforward batter that comes together in a flash, and the fruit is folded in, creating these beautiful pockets of sweetness and tartness throughout. The name itself is pretty literal – it’s packed with berries and cherries! But what makes it special is the way they meld with the tender cake crumb. It’s essentially a one-bowl wonder (for the most part!) that doesn’t demand fancy techniques. It’s the kind of cake that’s born from comfort and made for sharing, a true testament to how simple ingredients can create something truly spectacular.
Why you’ll love this recipe?
I can’t get enough of this berry cherry cake. I’mflavor is just out of this world. You get the sweetness of the berries, the slight tang of the cherries, all enveloped in a wonderfully soft, subtly sweet cake. It’s not overly sweet, which I really appreciate – the fruit really gets to shine. Then there’s the simplicity. I’m all about recipes that deliver big on taste without a ton of effort, and this one is a lifesaver on busy weeknights or when unexpected guests pop over. I can whip this up in under 20 minutes, and the baking time is totally hands-off. Plus, it’s incredibly cost-efficientWhat’s not to love? Berries and cherries are often on sale, and the pantry staplesversatility! This cake is perfect with a morning coffee, as a light afternoon treat, or even as a simple dessert after dinner. It’s like the culinary equivalent of a cozy sweater – comforting, reliable, and always welcome. While I do have a killer blueberry Lemon Loaf Recipe and a fantastic chocolate cherry cake, this berry cherry cake strikes a unique chord. It’s lighter than a chocolate cake but more substantial than a simple fruit bread. It’s just… perfect. It’s the kind of thing that makes everyone happy at the table, and that, my friends, is the best kind of baking.
How to Make Berry Cherry Cake
Quick Overview
This berry cherry cake is all about ease and deliciousness. You’ll whisk together your dry ingredients, then your wet ingredients, combine them just until married, gently fold in your beautiful berries and cherries, and bake until golden and fragrant. A simple glaze finishes it off, but it’s equally delightful on its own. The magic happens in minimal mixing and the natural goodness of the fruit. It’s the kind of recipe that makes you feel like a baking pro, even if you’re just starting out.
Ingredients
For the Main Batter:
2 ½ cups all-purpose flour (I love using a good quality unbleached all-purpose flour for structure)
1 ½ teaspoons baking powder (make sure it’s fresh for that perfect lift!)
½ teaspoon baking soda (this helps with tenderness and browning)
½ teaspoon salt (enhances all the other flavors)
1 cup unsalted butter, softened (I like to use butter for the best flavor and texture, but you *could* use a neutral oil in a pinch, just adjust the liquid slightly)
1 ¾ cups granulated sugar (you can reduce this slightly if your fruit is super sweet, but I find this is a good balance)
3 large eggs, at room temperature (room temp eggs incorporate better)
1 teaspoon pure vanilla extract (don’t skimp on good vanilla!)
1 cup milk (whole milk gives the best richness, but I’ve tested with 2% and even almond milk, and it still works beautifully!)
Zest of 1 lemon (optional, but it really brightens everything up and complements the berries)
For the Filling:
2 cups mixed berries (fresh or frozen – if using frozen, don’t thaw them! Just toss them in with the batter)
1 cup pitted cherries, halved (fresh or frozen, same rule as berries apply – no thawing needed if frozen)
For the Glaze:
1 cup powdered sugar
2-3 tablespoons milk or lemon juice (lemon juice adds a lovely tang! Start with 2 tbsp and add more until you reach your desired drizzling consistency)
Step-by-Step Instructions
Step 1: Preheat & Prep Pan
First things first, preheat your oven to 350°F (175°C). I like to use a 9×13 inch Baking Pan or a 10-cup Bundt pan for this cake. Grease and flour your pan really well, or use baking spray with flour. This step is crucial to prevent sticking, trust me on this one! I usually give it a good spritz and then tap in some flour, making sure to get into all the nooks and crannies, then tap out any excess. If you’re using a Bundt pan, get in there with a pastry brush to ensure every bit is coated.
Step 2: Mix Dry Ingredients
In a medium bowl, whisk together the flour, baking powder, baking soda, and salt. Give it a good whisking for about 30 seconds. This just ensures that the leavening agents are evenly distributed, which means a more consistent rise for your cake. I always do this step first because it’s so easy to forget when you’re already thinking about creaming butter and sugar!
Step 3: Mix Wet Ingredients
In a large bowl, cream together the softened butter and granulated sugar until light and fluffy. This usually takes about 3-5 minutes with an electric mixer. You want it to look pale yellow and airy. Then, beat in the eggs one at a time, making sure each egg is fully incorporated before adding the next. Stir in the vanilla extract and the lemon zest, if you’re using it. It smells amazing already!
Step 4: Combine
Now, we’re going to alternate adding the dry ingredients and the milk to the wet ingredients. Start by adding about a third of the dry ingredients to the butter mixture and mix on low speed until just combined. Then, add half of the milk and mix again. Repeat this process: another third of the dry ingredients, the remaining milk, and finally, the last of the dry ingredients. Be careful not to overmix! Mix only until you no longer see streaks of flour. Overmixing can lead to a tough cake, and we definitely don’t want that. It’s okay if there are a few tiny lumps; they’ll bake out.
Step 5: Prepare Filling
If you’re using fresh berries and cherries, gently toss them with about 1 tablespoon of the flour mixture from your dry ingredients bowl. This little trick helps prevent them from sinking to the bottom of the cake while it bakes. If you’re using frozen, you can skip this step, as the extra moisture from thawing frozen fruit can sometimes be a bit much. Don’t worry too much if a few berries stain your batter; that’s just part of the charm!
Step 6: Layer & Swirl
Gently fold the prepared berries and cherries into the Cake Batter. Use a rubber spatula and fold them in just a few times – you want them distributed throughout, but you don’t want to mash them. If you’re using a 9×13 inch pan, you can also pour half the batter in, scatter half the fruit, then the rest of the batter, and the rest of the fruit on top, then swirl gently with a knife. For a Bundt pan, just fold them in thoroughly before pouring. This technique is so simple but makes such a difference in the final appearance and flavor distribution.
Step 7: Bake
Pour the batter into your prepared pan and spread it evenly. Bake in the preheated oven for 45-60 minutes for a 9×13 pan, or 55-70 minutes for a Bundt pan. The exact time will depend on your oven. You’ll know it’s done when a wooden skewer or toothpick inserted into the center comes out clean, or with just a few moist crumbs attached (no wet batter!). The top should be golden brown and the edges should be pulling away slightly from the sides of the pan.
Step 8: Cool & Glaze
Let the cake cool in the pan on a wire rack for about 15-20 minutes before inverting it onto the rack to cool completely. If you’re using a Bundt pan, be patient! Let it cool fully in the pan before attempting to invert. Once the cake is completely cool, whisk together the powdered sugar and milk (or lemon juice) for the glaze. Start with 2 tablespoons of liquid and add more, a teaspoon at a time, until you reach a drizzly consistency. Drizzle it over the cooled cake. It should set up a bit but remain lovely and shiny.
Step 9: Slice & Serve
Once the glaze has set a little, slice your gorgeous berry cherry cake and enjoy! I find it’s best served at room temperature, but a slightly warm slice is also divine, especially with a scoop of vanilla ice cream. The fruit will be soft and warm, and the cake will be incredibly moist. It’s a beautiful thing to behold, with all those pops of red and purple peeking through!
What to Serve It With
This berry cherry cake is a true chameleon when it comes to serving. For breakfast, I love a thick slice with a strong cup of black coffee. It’s hearty enough to keep you going, and the fruit adds a lovely freshness. Just a simple slice on a pretty plate makes the morning feel a little special. For brunch, it’s a showstopper! I like to serve it with a sprinkle of fresh berries on top and maybe a dollop of whipped cream or Greek yogurt. It pairs beautifully with mimosas or a light sparkling rosé. If you’re serving it as dessert, I often like to serve it slightly warm with a scoop of good quality vanilla bean ice cream or a drizzle of crème anglaise. It’s elegant enough for guests but still feels comforting. And for those cozy snacks – because let’s be real, we all need those moments – a slice with a glass of cold milk is pure bliss. My kids always ask for seconds when it’s snack time and this cake is around! Sometimes, I’ll even serve it with a side of fresh raspberries and a dollop of mascarpone cheese for a more decadent experience. It’s truly a cake that fits any occasion, from a casual Tuesday afternoon to a festive holiday gathering.
Top Tips for Perfecting Your Berry Cherry Cake
I’ve made this berry cherry cake more times than I can count, and along the way, I’ve picked up a few tricks that I think really make a difference. First, when it comes to the fruit prep, if you’re using fresh, giving them a gentle toss in a tablespoon of the flour mixture from your dry ingredients is a game-changer. It really does help prevent them from sinking. If you’re using frozen, just remember to toss them in straight from the freezer; thawing them releases too much liquid. For mixing advice, the golden rule is DON’T OVERMIX. Once the flour is in, just mix until you don’t see dry streaks anymore. A few tiny lumps are fine! Overmixing develops the gluten too much, leading to a tough cake, and we want tender, tender cake. When it comes to swirl customization, if you’re going for that layered look in a 9×13 pan, don’t go crazy with the swirling. Just a few gentle turns with a knife or skewer create beautiful patterns without overmixing the batter. You want distinct pockets of fruit and batter. For ingredient swaps, if you don’t have milk, a plant-based milk like almond or oat milk works well. I’ve even used buttermilk in a pinch, and it added a lovely tang. For the butter, if you’re in a real bind, you *could* use a neutral oil (like vegetable or canola), but you might need to slightly reduce the liquid and the texture will be a bit different, a little denser but still delicious. For baking tips, ovens can be quirky! Keep an eye on your cake towards the end of the baking time. Every oven is different, so the toothpick test is your best friend. If it’s browning too quickly on top, you can loosely tent it with foil. And for glaze variations, if you don’t have powdered sugar, you can make a simple syrup and drizzle that over, or just dust the cake with a little extra powdered sugar. For a stronger citrus punch, use lemon juice instead of milk in the glaze – it’s absolutely divine!
Storing and Reheating Tips
One of the things I love most about this berry cherry cake is how well it keeps. For room temperature storage, once it’s completely cooled (and glazed!), I like to store it in an airtight container or wrapped tightly in plastic wrap. It stays wonderfully moist for about 2-3 days this way. Just make sure it’s fully cool before sealing it up, otherwise, condensation can make it soggy. If you need to store it longer, refrigerator storage is your best bet. In an airtight container in the fridge, it should last for up to a week. It might firm up a little in the fridge, so I usually let a slice sit out for about 15-20 minutes before serving, or give it a quick 10-15 seconds in the microwave if I’m really craving that cozy warmth. For long-term storage, freezer instructions are key. Wrap the completely cooled cake (or individual slices) tightly in plastic wrap, then in a layer of aluminum foil, or place them in a freezer-safe bag. It can be kept frozen for up to 2-3 months. To thaw, transfer it to the refrigerator overnight, then let it come to room temperature before serving. The glaze timing advice is simple: I always glaze the cake *after* it’s completely cooled. If you glaze it while it’s warm, the glaze will melt right off. If you’re freezing slices, you can either glaze them before freezing (it holds up pretty well) or glaze them after thawing for a fresher look.
Frequently Asked Questions
Final Thoughts
This berry cherry cake is more than just a recipe to me; it’s a little piece of joy that I love sharing. It embodies everything I adore about home baking: simple ingredients coming together to create something utterly delightful, a process that’s forgiving and fun, and a result that brings smiles to everyone’s faces. The moist crumb, the burst of fruity goodness, the hint of lemon zest – it’s a symphony of flavors and textures that just works. If you’re a fan of fruit-filled cakes or just looking for a reliable, delicious dessert that won’t keep you chained to the kitchen, you absolutely have to give this berry cherry cake a try. It’s the kind of cake that makes you feel like you’ve accomplished something wonderful, even on a hectic day. If you enjoy this, you might also love my recipe for a simple peach cobbler or my moist apple crumb cake – they share that same spirit of easy, comforting baking. I can’t wait to hear how your berry cherry cake turns out! Please feel free to leave a comment below with your thoughts or any fun variations you tried. Happy baking!
Easy Berry Cherry Delight Dump Cake
Ingredients
Main Ingredients
- 1 can (21 oz) Cherry Pie Filling
- 1 can (21 oz) Blueberry Pie Filling
- 0.75 cup Sliced Almonds
- 1 box (15.25 oz) White Cake Mix
- 12 tablespoons Unsalted Butter
Instructions
Preparation Steps
- Preheat oven to 350°F (175°C). Spray a 9x13 inch baking dish with cooking spray.
- Pour the cherry and blueberry pie fillings into the prepared baking dish. Sprinkle the almonds over the fruit.
- Sprinkle the cake mix evenly over the pie filling and almonds.
- Slice the butter into small pieces and distribute evenly over the top of the cake mix.
- Bake for 30-40 minutes, or until the edges are golden brown and the filling is bubbling. Serve warm with ice cream or whipped cream.