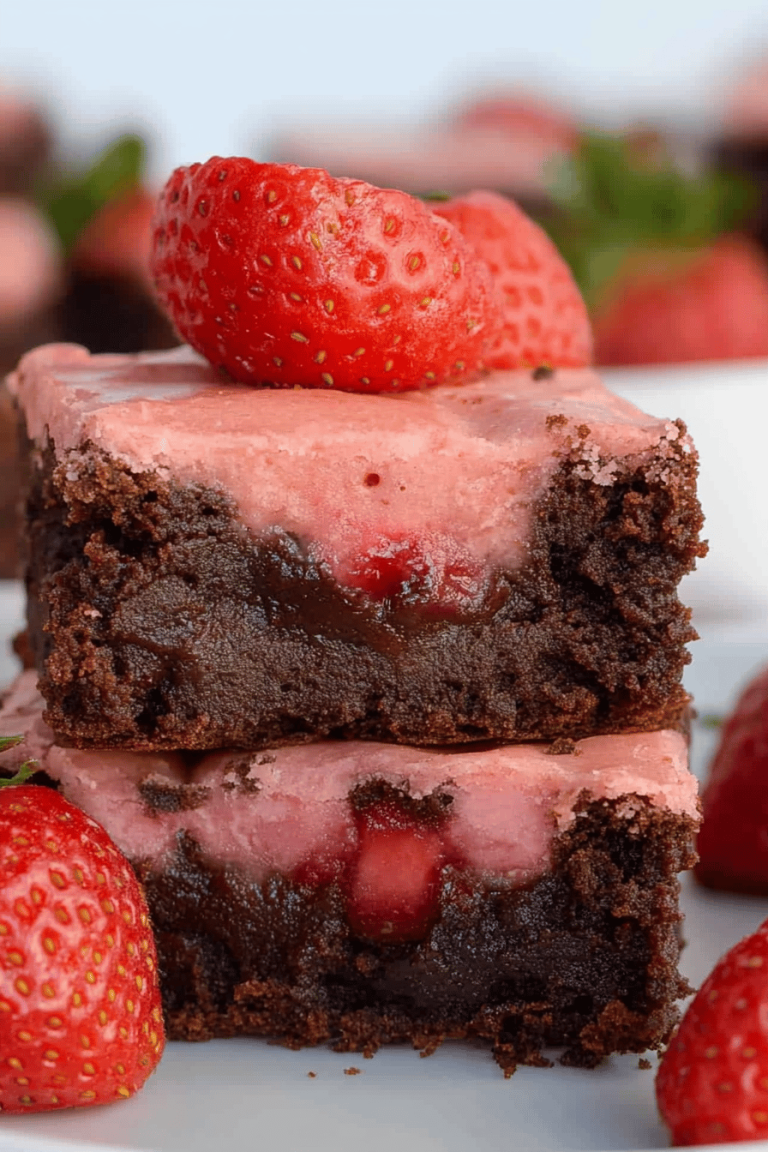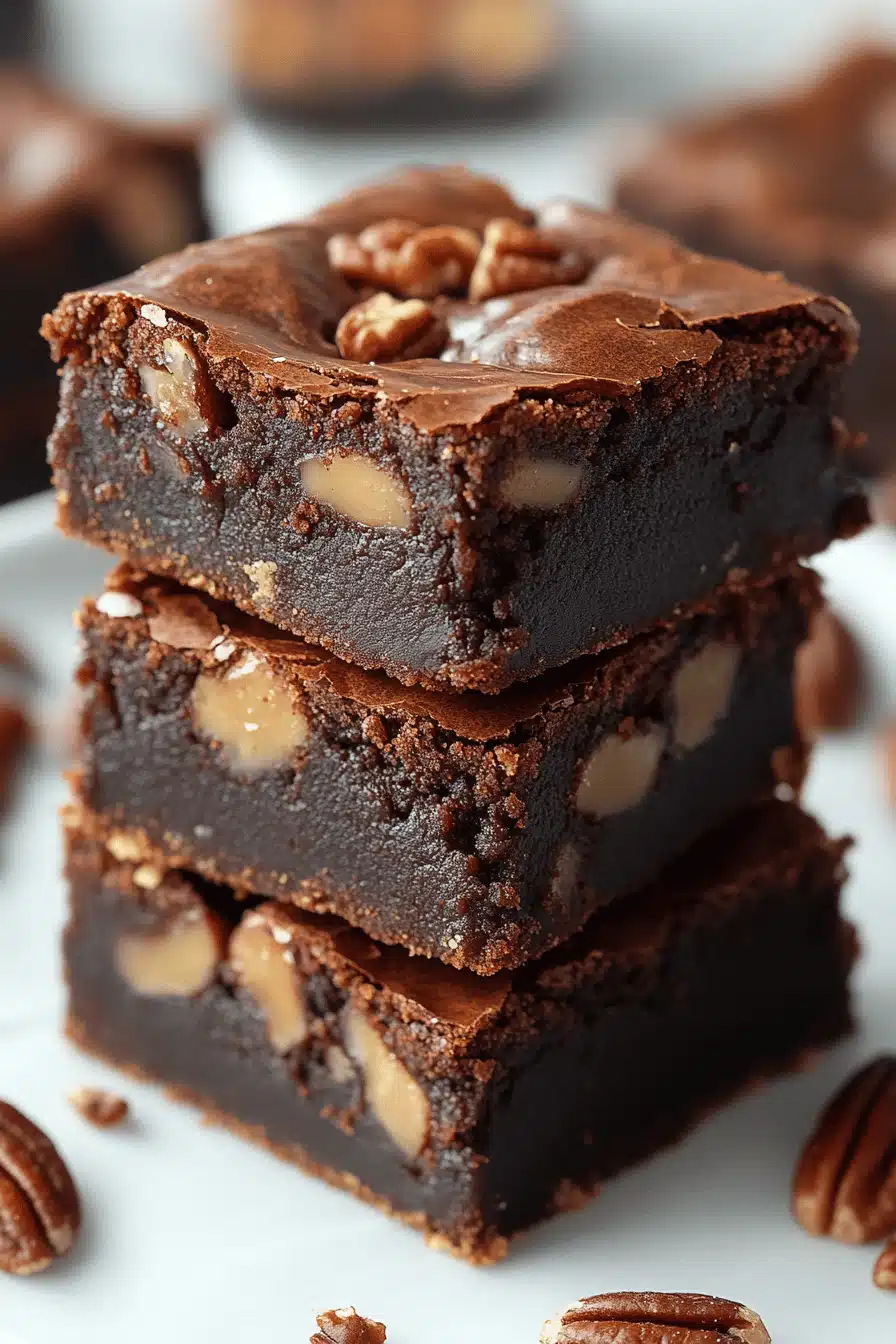
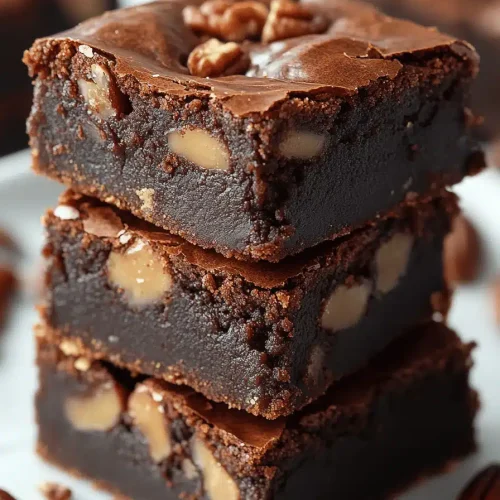
Baileys brownies
You know those days? The ones where a craving hits you like a tidal wave, and only something intensely chocolatey, slightly sophisticated, and utterly comforting will do? That’s exactly how I felt last Tuesday. My son was begging for cookies, my husband was asking what was for dessert, and I just wanted something… more. Not a whole cake, mind you, because who has the time sometimes? But something that feels special, something that whispers “you deserve this.” That’s when I reached for my trusty recipe for Baileys brownies. Oh, my friends, these aren’t just any brownies. These are the ones that make your eyes roll back in your head. The kind of brownies that elevate your everyday. They’re rich, fudgy, and have that subtle, magical hint of Baileys Irish Cream that just takes them to a whole new level. Honestly, if you’re looking for a “wow” factor without a lot of fuss, these Baileys brownies are your answer. They’re a million miles away from those dry, cakey brownies you sometimes end up with. Think intensely Dark Chocolate, a perfectly gooey center, and a hint of that creamy, boozy magic. It’s like a hug in brownie form.
What are Baileys Brownies?
So, what exactly are Baileys brownies, you ask? Well, at their heart, they are everything you love about a classic, deeply chocolatey brownie. But then, we add a generous splash of Baileys Irish Cream. It’s not about making them taste overwhelmingly like alcohol; it’s about infusing them with a warm, creamy, almost caramel-like depth that complements the chocolate beautifully. Think of it as the secret handshake between chocolate and a hint of grown-up indulgence. This recipe is essentially a no-fuss, intensely satisfying brownie that happens to have a little something extra. It’s not complicated, and that’s the beauty of it. You mix, you pour, you bake, and you’re rewarded with pure, unadulterated chocolate heaven. It’s a humble dessert that punches way above its weight in terms of flavor and sheer delight. It’s my go-to when I want to impress without spending hours in the kitchen, and it always, always delivers.
Why you’ll love this recipe?
What are some of the best Baileys brownie recipes?flavor is just out of this world. The dark chocolate is intense, almost like a sophisticated ganache, but then that subtle hint of Baileys comes through, adding this wonderfully complex, creamy note that you just can’t quite put your finger on if you’re not expecting it. It’s not overtly boozy; it’s more of a warm, comforting whisper. My kids love them, and they have no idea what the “secret ingredient” is, they just know they’re the best brownies ever! Then there’s the simplicity. I’m not going to lie, I’ve tried some brownie recipes that require melting chocolate in a double boiler or separating eggs, and while they’re nice, they’re not what I turn to when I need a quick fix. This one? It’s a one-bowl wonder for the most part, and that’s a lifesaver on busy evenings. You can have these mixed and in the oven in about 15 minutes. And Cost-efficiency: What is the best way to measure cost-efficiency?? Brownies are generally budget-friendly, and this recipe uses pantry staples. The Baileys is the only “splurge,” but a bottle goes a long way, and think of the return on investment in terms of pure joy! What I love most, though, is its versatility. These Baileys brownies are fantastic on their own, but they’re also incredible served with a scoop of vanilla bean ice cream or a drizzle of extra Baileys-infused caramel sauce. They’re perfect for potlucks, birthday parties, or just because. If you’re a fan of my fudgy chocolate chip cookies, you’ll appreciate the commitment to texture here. These are the antithesis of cakey brownies; they’re dense, fudgy, and utterly satisfying.
How to Make Baileys Brownies
Quick Overview
The process is delightfully straightforward. We start by melting butter and sugar together to create a rich base, then whisk in eggs and that all-important Baileys. Next, we gently fold in our dry ingredients – cocoa powder, flour, and a pinch of salt – just until combined to avoid overmixing. Finally, we bake them until they’re perfectly set with that signature fudgy texture. The magic really happens during the baking process, where the flavors meld and the Baileys works its subtle charm. It’s a simple four-step dance that leads to brownie perfection, proving that incredible desserts don’t need to be complicated.
Ingredients
For the Main Batter:
Here’s what you’ll need to create that luscious brownie base. I always opt for unsalted butter because it gives me more control over the saltiness, and for the chocolate, I find a good quality unsweetened cocoa powder makes a huge difference. If you can find Dutch-processed, even better – it gives a deeper, richer color and flavor. Don’t skimp on the eggs; they’re crucial for that fudgy texture. And of course, the star of the show: Baileys Irish Cream. Use the original, it’s classic for a reason! A good vanilla extract also boosts all those lovely chocolatey notes. I always add a tiny pinch of espresso powder too; it doesn’t make them taste like coffee, but it really amplifies the chocolate flavor. It’s my little secret weapon!
- 1 cup (2 sticks or 226g) unsalted butter, melted
- 2 cups (400g) granulated sugar
- 4 large eggs, at room temperature
- 1/2 cup (120ml) Baileys Irish Cream
- 2 teaspoons pure vanilla extract
- 1 teaspoon instant espresso powder (optional, but recommended!)
- 1 1/2 cups (190g) all-purpose flour
- 3/4 cup (65g) unsweetened cocoa powder (Dutch-processed preferred)
- 1/2 teaspoon salt
- 1 cup (170g) chocolate chips (semi-sweet or dark), plus more for topping (optional)
For the Filling (Optional but Recommended for Extra Decadence):
Sometimes, I like to add a little extra oomph, and this simple filling does just that. It’s basically a super-rich, slightly more liquid chocolate mixture that we’ll swirl into the main batter. It creates those gorgeous, glossy pockets of intense chocolate. You can omit this if you’re in a super-hurry, but trust me, it’s worth the extra two minutes.
- 1/2 cup (100g) granulated sugar
- 1/4 cup (60ml) Baileys Irish Cream
- 1/4 cup (25g) unsweetened cocoa powder
- 2 tablespoons melted butter
For the Glaze (Optional):
This glaze is like the crown jewel. It’s a simple pour-over that adds another layer of shine and a subtle Baileys kick. It hardens slightly to a lovely, crackly finish. If you’re not a fan of glaze, a dusting of powdered sugar or just serving them plain is absolutely fine too!
- 1 cup (120g) powdered sugar
- 2-3 tablespoons Baileys Irish Cream
- 1/4 teaspoon vanilla extract
Step-by-Step Instructions
Step 1: Preheat & Prep Pan
First things first, let’s get our oven ready. Preheat it to 350°F (175°C). Now, grab an 8×8 inch or 9×9 inch Baking Pan. I prefer using a glass or dark metal pan for brownies as they tend to conduct heat a bit more evenly. Line it with parchment paper, leaving an overhang on two sides. This isn’t just for easy cleanup (though it’s a HUGE plus for that!), but it also makes lifting the cooled brownies right out of the pan a breeze. You want those nice, clean edges and no sticking whatsoever. Lightly grease the parchment and the exposed sides of the pan too, just for good measure.
Step 2: Mix Dry Ingredients
In a medium bowl, whisk together your flour, unsweetened cocoa powder, salt, and that optional espresso powder. Whisking these dry ingredients together thoroughly is actually a really important step. It ensures that everything is evenly distributed, so you don’t end up with pockets of salt or cocoa powder in your brownies. You want that consistent, deep chocolate flavor throughout every single bite. Give it a good, thorough whisk until it looks like a uniform, lovely brown powder.
Step 3: Mix Wet Ingredients
Now for the good stuff! In a large bowl, combine the melted butter and granulated sugar. Whisk them together until they’re well combined and the mixture looks glossy. This creates a fantastic base for our Fudgy Brownies. Next, add the eggs, one at a time, whisking well after each addition. You’ll notice the mixture will start to get lighter and a bit thicker. Then, pour in the Baileys Irish Cream, vanilla extract, and if you’re using it, the espresso powder. Whisk until everything is beautifully incorporated and you have a rich, fragrant liquid. The smell alone at this stage is divine!
Step 4: Combine
It’s time to bring it all together! Gradually add the dry ingredients (from Step 2) to the wet ingredients (from Step 3). Now, here’s a key tip for super fudgy brownies: don’t overmix! Gently fold the dry ingredients into the wet using a spatula or a wooden spoon. Mix just until you no longer see any streaks of dry flour. A few small lumps are perfectly okay – they’re actually a good sign you haven’t overdone it, which is what can lead to tough brownies. We’re aiming for a thick, luscious batter.
Step 5: Prepare Filling (Optional)
If you’re going for that extra decadent swirl, now’s the time. In a small bowl, whisk together the 1/2 cup sugar, 1/4 cup Baileys, 1/4 cup cocoa powder, and 2 tablespoons melted butter. It will form a thick, fudgy paste. Don’t worry if it’s a bit stiff; that’s what we want for a nice swirl.
Step 6: Layer & Swirl
Pour about two-thirds of your main Brownie Batter into the prepared pan and spread it out evenly. If you’re using the optional filling, dollop spoonfuls of the filling mixture over the batter in the pan. Then, pour the remaining brownie batter over the filling. Now comes the fun part! Take a knife or a skewer and gently swirl the batters together. Don’t over-swirl; you want distinct ribbons of chocolate and the richer filling, not one muddy mess. You can also gently press in some extra chocolate chips on top if you like an extra chocolatey crunch. This swirling technique is what gives the brownies that beautiful, marbled look.
Step 7: Bake
Pop the pan into your preheated oven. Now, baking time can vary slightly depending on your oven and the pan you use. For an 8×8 inch pan, I usually start checking around 25-30 minutes. For a 9×9 inch pan, it might be a little quicker, maybe 20-25 minutes. You’re looking for the edges to be set and slightly pulling away from the sides of the pan, and the center should look mostly set but still have a slight wobble. A toothpick inserted into the center should come out with moist crumbs attached, not completely clean and not completely wet batter. Remember, they’ll continue to cook a little as they cool, so it’s better to slightly underbake than overbake if you want that perfect fudgy texture.
Step 8: Cool & Glaze
This is probably the hardest part – waiting! Let the brownies cool completely in the pan on a wire rack. This is crucial for them to set up properly and for that fudgy texture to develop. I know, I know, the smell is intoxicating, but resist! Once they are completely cool, prepare the glaze. In a small bowl, whisk together the powdered sugar, 2-3 tablespoons of Baileys (start with 2 and add more until you get your desired drizzling consistency), and the vanilla extract until smooth. Drizzle this over the cooled brownies. Let the glaze set for at least 15-20 minutes before slicing.
Step 9: Slice & Serve
Once the glaze is set, use the parchment paper overhangs to lift the entire brownie slab out of the pan onto a cutting board. Use a sharp knife (wiping it clean between cuts if needed) to slice them into squares. I like to cut mine into about 16 squares for generous servings, or 20-25 if I’m serving them at a party. These are best served at room temperature, but a slightly warm brownie fresh out of the oven (after sufficient cooling, of course!) is also divine. Enjoy that first bite!
What to Serve It With
These Baileys brownies are pretty fantastic on their own, but they also play wonderfully with other flavors and can be dressed up or down depending on the occasion. For a cozy morning or a special breakfast, I love serving a smaller square with a hot cup of strong coffee or a creamy latte. The Baileys note in the brownie actually complements coffee beautifully. For brunch, I like to serve them a bit more elegantly. Think a slightly larger square, perhaps with a dollop of lightly sweetened whipped cream or a raspberry coulis on the side. A mimosa or a Bloody Mary makes for a great beverage pairing! As a sophisticated dessert, these are a winner. Serve them slightly warm with a scoop of high-quality vanilla bean or salted caramel ice cream. A drizzle of extra chocolate sauce or a scattering of flaky sea salt on top can elevate them even further. For cozy snacks, which is often when I make them, I just grab a square (or two!) with a glass of milk. It’s pure comfort. My family tradition is to have these on movie nights; it’s our little treat that feels extra special without being fussy. They are also incredibly popular at bake sales and charity events because people absolutely rave about the unique flavor.
Top Tips for Perfecting Your Baileys Brownies
After making these Baileys brownies more times than I can count, I’ve picked up a few tricks that I think really make a difference. First, when it comes to the cocoa powder, I can’t stress enough how much quality matters. A good Dutch-processed cocoa powder will give you a much richer, deeper chocolate flavor and a darker, more appealing color. It’s worth the extra few cents! For mixing, the golden rule for fudgy brownies is to avoid overmixing the batter once you add the flour. Mix just until the flour disappears. Overmixing develops the gluten in the flour, which can lead to a tougher, cakier texture, and we definitely don’t want that here. A few lumps are your friends! When it comes to the swirl, don’t go crazy. You want visible ribbons of the richer filling or concentrated chocolate, not a uniform brown mixture. Gentle swirls are best for visual appeal and pockets of intense flavor. For ingredient swaps, if you’re out of Baileys or prefer not to use alcohol, you can substitute with Irish cream coffee creamer for a similar flavor profile, or even a tablespoon of Kahlúa or coffee liqueur for a different but still delicious twist. You could also try a bit of strong brewed coffee or even milk, though the unique creamy complexity of Baileys is hard to replicate exactly. For baking, I always recommend using the parchment paper sling I mentioned earlier. It makes removing the brownies so much easier, and you get those clean edges. Also, be aware that oven temperatures can vary, so start checking for doneness a few minutes before the recipe suggests. I’ve learned that my oven runs a little hot, so I often adjust the time slightly. A toothpick with moist crumbs is the perfect indicator of fudgy perfection! And for the glaze, consistency is key. Start with the lower amount of Baileys and add more tablespoon by tablespoon until you reach a consistency that’s pourable but not too thin. If it gets too thin, you can always whisk in a tiny bit more powdered sugar. I’ve experimented with adding a touch of espresso powder to the glaze too, and it really deepens the chocolate flavor!
Storing and Reheating Tips
Proper storage is key to keeping your Baileys brownies tasting as amazing as the day you baked them. If you happen to have any leftovers, which is rare in my house! For room temperature storage, I keep them in an airtight container for up to 3 days. They tend to stay fudgy and delicious within this timeframe. Make sure the container is truly airtight to prevent them from drying out. If they have a glaze, it might get a little sticky at room temperature after the first day, but they still taste fantastic. For refrigerator storage, which can extend their life considerably, place them in an airtight container for up to a week. The cooler temperature will firm them up a bit, but they’ll still be wonderfully chocolatey. I actually kind of like them cold sometimes – it makes them even more dense and fudgy! When you’re ready to enjoy a chilled brownie, I recommend letting it sit at room temperature for about 15-20 minutes before slicing, or gently warming it in the microwave for about 10-15 seconds. For freezer instructions, these brownies freeze exceptionally well. Cut them into individual squares first, then wrap each square tightly in plastic wrap, followed by a layer of aluminum foil or placing them in a freezer-safe bag. They’ll keep their quality in the freezer for up to 2-3 months. To thaw, simply unwrap them and let them come to room temperature for a few hours. For the glaze, I always recommend applying it once the brownies have cooled completely and are ready for serving or storing. If you glaze them and then freeze them, the glaze can sometimes become a bit brittle or crackly when thawed, though it’s still perfectly edible. It’s usually best to freeze unfrosted brownies and then glaze them after thawing if you want that perfect finish.
Frequently Asked Questions
Final Thoughts
So there you have it – my absolute favorite Baileys brownies! I truly believe this recipe is a game-changer for any chocolate lover. It strikes that perfect balance between deeply satisfying richness and a hint of grown-up indulgence, all without requiring complicated techniques or a whole afternoon in the kitchen. Whether you’re a seasoned baker or just starting out, these Baileys brownies are incredibly forgiving and will leave you with that amazing “I can’t believe I made this!” feeling. If you enjoyed this recipe and are looking for more ways to satisfy your sweet tooth with a touch of sophistication, you might also love my recipe for decadent chocolate lava cakes or my easy no-bake cheesecake. They both offer that special something without a ton of fuss. Give these Baileys brownies a try, and I promise, you won’t be disappointed. I can’t wait to hear what you think and how they turn out for you! Happy baking, and enjoy every fudgy, chocolatey, Baileys-infused bite!
Rich Baileys Brownies Your Tastebuds Will Love
Ingredients
Main Ingredients
- 1 cup all-purpose flour
- 0.5 teaspoon salt
- 2 sticks butter for brownie base, 1 cup
- 1 cup semi-sweet chocolate chips chopped
- 2 cups sugar
- 2 large eggs
- 1 tablespoon Baileys Irish Cream for brownie batter
Buttercream Frosting
- 1 stick butter softened, 0.5 cup
- 2 cups powdered sugar
- 2 tablespoons Baileys Irish Cream for frosting
Instructions
Preparation Steps
- Preheat oven to 350°F.
- Grease a 9x9-inch baking pan with cooking spray and set aside.
- Sift together the flour and salt; set aside.
- Place the butter and chopped chocolate in a saucepan and melt over low heat, stirring frequently, until melted and smooth.
- Remove from heat and stir the sugar into the chocolate mixture; let cool for 3 minutes.
- Pour the chocolate mixture into your mixer's bowl and beat in the eggs, one at a time.
- Mix in the Baileys Irish Cream until well combined.
- Stir in the flour mixture with a wooden spoon just until combined.
- Spread the batter evenly into the prepared pan.
- Bake for 30 to 35 minutes, or until a toothpick inserted into the center comes out clean.
- Cool in pan on wire rack completely before frosting.
Buttercream Frosting
- Place all frosting ingredients (softened butter, powdered sugar, and Baileys) in a large bowl and blend with an electric mixer until smooth and creamy.
- Spread the frosting evenly on top of the cooled brownies.
- Slice into squares and serve. For clean cuts, chill for 10 minutes before slicing.