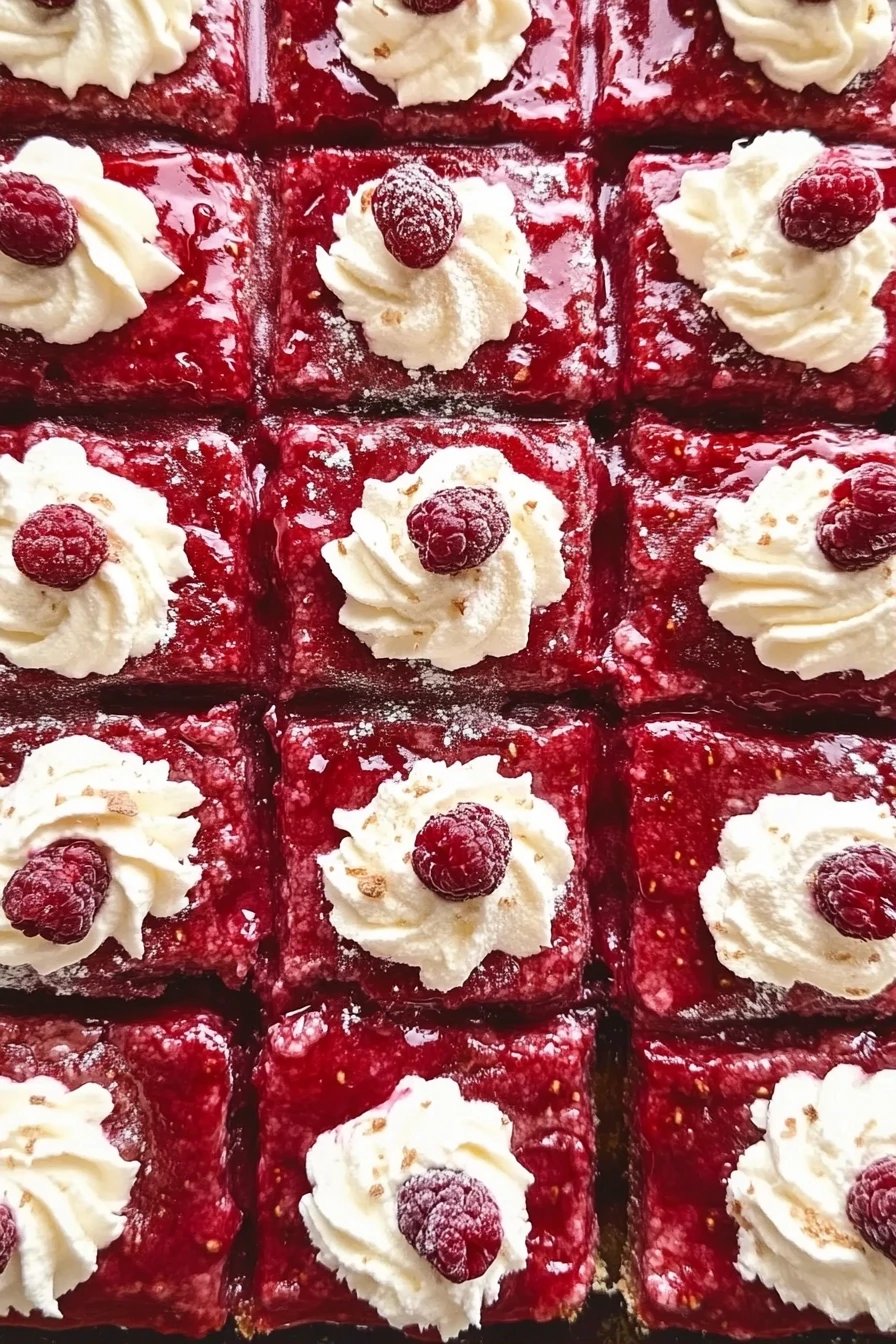
chocolate raspberry mousse cake
I’ll be honest: this Chocolate Raspberry mousse cake is the kind of dessert that makes a weekday feel like a celebration. I can still smell the cocoa drifting from the kitchen when I was a kid, the raspberries a bright punch on the counter. Fast-forward to today, it’s the recipe I reach for when I want something that looks like a showstopper but is actually forgiving enough for a busy family night. The first bite is all velvet chocolate with a wink of tart raspberry—a pairing I stubbornly return to, like a favorite cardigan. It’s not just chocolate; it’s chocolate with a friendly twist of tang that keeps everyone from getting sugar overload. This chocolate raspberry mousse cake tastes bakery-fancy, but it’s totally doable at home, even if you’re juggling bedtime, worksheets, and a million tabs open in your brain. It’s also a crowd-pleaser: the kids ask for seconds, and the adults swoon in a surprisingly non-formal way. This one’s a lifesaver on busy nights, and it travels well if you need a dessert to bring to a gathering.
What is chocolate raspberry mousse cake?
Think of this as a layered confection that balances strength and lightness. The base is a fudgy chocolate cake or crunchy chocolate biscuit crust, the middle is a silky Raspberry Mousse that’s stabilized so it stays sliceable, and the top wears a glossy chocolate glaze like a mirror. The name gives away the two stars: chocolate and raspberries. It’s essentially a “cake-meets-mousse” moment—rich enough to satisfy chocolate cravings but brightened with raspberry brightness. I love describing it as a bridge dessert: you don’t have to choose between a fancy cake and a quick chocolate fix. It’s a celebration-ready treat that fits into a weeknight schedule if you plan ahead, and it makes a big impression with very little fuss once you’ve lined up the components. The result is a dessert with depth—dark cocoa, creamy mousse, and that fruit-forward zing that makes chocolate feel fresh again.
Why you’ll love this recipe?
What I love most about this chocolate raspberry mousse cake is how the flavors dance without fighting each other. The raspberry puree adds a bright note that cuts through the richness of the chocolate, so every bite feels balanced rather than heavy. It’s also remarkably forgiving. If you don’t have a perfectly smooth mousse, a little swirl or marbling still looks stunning, and a glossy glaze covers a lot of tiny imperfections. The simplicity is the real winner here: you can pull this off without specialized equipment, and you’ll still feel like you brought a little bakery magic to your kitchen. Budget-wise, it’s friendlier than you’d expect because you’re using pantry staples for the cake and only a few thoughtful ingredients for the mousse. It’s versatile, too: serve it as a fancy birthday cake, a charming weekend dessert, or a no-fuss treat that still feels special. And yes, my kids actually ask for seconds—every single time.
- Flavor:What is the difference between a dark chocolate and a raspberry?
- Simplicity:What are some components that can be prepared ahead of time?
- Cost-efficiency: Uses common ingredients you likely already have, with the indulgence of a fancy dessert without the price tag.
- Versatility: Swap in fresh berries when raspberries aren’t in season, or switch to a strawberry swirl for a different mood.
- Make-ahead friendly: The mousse sets beautifully in the fridge, so you can assemble the day before and glaze before serving.
How to Make Chocolate Raspberry Mousse Cake
Quick Overview
Here’s the streamlined way to pull this together: bake a chocolate sponge or press a chocolate crust, whip up a raspberry mousse that’s stable enough to slice, layer the mousse over the cooled cake, and finish with a shiny chocolate glaze. Chill until set, slice, and serve. The beauty of this approach is you can do most of the work ahead of time, so when it’s party time you only have to pour on the glaze and pull out the candles.
Ingredients
For the Main Batter:
- 1 cup (120 g) all-purpose flour
- 1/2 cup (45 g) unsweetened cocoa powder, good quality
- 1/2 cup (100 g) granulated sugar
- 2 large eggs
- 1/2 cup (115 g) unsalted butter, melted
- 1/2 cup (120 ml) milk or dairy-free milk
- 1 teaspoon baking powder
- 1/4 teaspoon salt
For the Filling (Raspberry Mousse):
- 1 cup fresh or thawed raspberries, plus extra for swirls
- 2 tablespoons sugar (adjust to taste)
- 1 tablespoon lemon juice
- 1 teaspoon gelatin powder + 2 tablespoons cold water (or 2 1/2 teaspoons agar-agar for vegan version)
- 1 1/2 cups heavy cream or whipping cream, chilled
- 2 tablespoons powdered sugar
For the Glaze:
- 3/4 cup dark chocolate chips or chopped dark chocolate
- 1/3 cup light corn syrup or honey (for shine)
- 1/4 cup heavy cream
- Pinch of sea salt
Step-by-Step Instructions
Step 1: Preheat & Prep Pan
Heat your oven to 350°F (175°C). Line the bottom of a 9-inch springform pan with parchment and grease the sides. If you’re using a crust option, press a chocolate crumb crust evenly along the bottom and up the sides. Having the pan ready means you won’t rush later when the scent of cocoa fills the house.
Step 2: Mix Dry Ingredients
In a bowl, whisk together flour, cocoa powder, baking powder, and salt until there are no lumps. This is the “foundation” step—it guarantees a tender crumb and even cocoa distribution. I always do this first so the wet ingredients don’t meet dry clumps mid-pour, which is when grittiness can sneak in.
Step 3: Mix Wet Ingredients
In another bowl, whisk eggs with sugar until the mixture lightens and if you lift the whisk you can see ribbons. Stir in the melted butter and milk. The batter should look glossy and feel a touch thick, but it should still pour; if it’s too stiff, add a splash more milk. Taste a tiny spoonful of batter; you’ll notice the chocolate aroma already flirting with your senses.
Step 4: Combine
Fold the wet ingredients into the dry, stopping as soon as you just come together. A few tiny lumps are perfectly fine—overmixing will make the cake tougher. Pour the batter into the prepared pan and bake for about 18–22 minutes, or until a toothpick comes out with a few moist crumbs. Let it cool completely before layering—the rain of crumbs on a mousse layer is not elegant.
Step 5: Prepare Filling
Gently puree the raspberries with sugar and lemon juice until smooth. If you’re aiming for a silkier mousse, strain out seeds, but I sometimes skip this step when I’m in a rush and the kids don’t mind a few seeds for texture. Bloom the gelatin in cold water for 5 minutes, then melt with a quick heat—stir this into the raspberry mixture to set the mousse properly. Whip the cream with powdered sugar until soft to medium peaks, then fold in the raspberry mixture. The color should be a lively rose, and the texture should be airy but holding its shape—like a cloud that stands up to a fork.”
Step 6: Layer & Swirl
Spread the raspberry mousse evenly over the cooled cake. If you want swirls, dollop small spoonfuls of a little extra raspberry purée and use a toothpick to create a gentle marbled look. This isn’t a science project; a little marbling makes the cake feel handmade and personal. Refrigerate for at least 1 hour so the mousse firms up and is sliceable.
Step 7: Bake
Well, you did bake earlier for the cake base. The mousse won’t bake again; you’ll just chill it here so the layers stay neat. If you used a crust, the chill time helps the crust hold together. If you’re using a sponge layer instead of a crust, the same 1-hour chill makes the 2nd layer settle nicely and prevents sliding when you glaze.
Step 8: Cool & Glaze
Heat the cream until just warm, then pour over the chocolate, letting it sit for a minute before whisking into a glossy glaze. Add a pinch of salt to balance sweetness. Let the glaze cool slightly so it’s thick and pourable, not runny. Pour over the set mousse layer, tilting the pan to create a glossy, even coat. Tap the pan gently to settle any bubbles, then refrigerate until the glaze is firm—about 20–30 minutes. A thin, precise glaze is better than a thick puddle, and it makes the cake look like a little lacquered gem.
Step 9: Slice & Serve
When you’re ready to serve, run a warm knife around the edge of the pan, release the springform, and slice with a clean cut. Wipe the blade between slices for clean edges. This chocolate raspberry mousse cake shines with a dollop of Whipped Cream or a few fresh raspberries on top. I like to serve it slightly chilled for a perfect balance between the cake’s bite and the mousse’s creaminess. The first bite is a showstopper, and the last bite lingers with chocolatey comfort and raspberry brightness.
What to Serve It With
This cake pairs with all sorts of moments. Here are a few ideas that keep the conversation going and pair beautifully with the flavors you’ve created.
For Breakfast: A small slice with a strong cup of black coffee, or a dollop of lightly sweetened Whipped Cream for a more indulgent start. The chocolate keeps you satisfied through late-morning meetings, and the berry note feels bright enough to wake you up without being overly sweet.
For Brunch: Place slices on dessert plates with a side of vanilla yogurt and a scattering of fresh raspberries. A couple of mint leaves add a fresh aroma that makes the plate feel extra special while still feeling homey.
As Dessert: This is where it shines. Serve with a tiny spoon of raspberry coulis on the side or a few shaved chocolate curls for texture. A glass of port or a coffee liqueur can elevate the chocolatey notes for a small, grown-up celebration.
For Cozy Snacks: In the afternoon, a chilled slice with a warm mug of tea is a treat you’ll reach for again and again—especially on a rainy day when the house smells like cocoa and fruit.
Family rituals sometimes show up here, too. We used to have a “cake night” every Sunday after dinner, and this chocolate raspberry mousse cake became a fixture. The kids would help with the glaze, trading stories while the glaze set, and my partner would sneak a corner while clearing the dishes. It’s funny how a simple dessert can become a memory-maker. Whether you’re cooking for one or for a small crowd, this cake has a way of bringing people together and inviting a moment to slow down and savor.
Top Tips for Perfecting Your Chocolate Raspberry Mousse Cake
These tips come from countless tweaks and a few kitchen mishaps I’ve learned from over the years. They’ll help you nail texture, flavor, and presentation every time.
Ganache & Glaze: If your glaze looks dull, add a drop more corn syrup and give it a quick whisk to emulsify. A satin-smooth glaze makes the top edge feel luxurious and camera-ready. If you prefer a darker glaze, swap some milk for extra cream.
Raspberry Purée: For a bright top note, don’t overcook the raspberries. A quick blend and a gentle strain keeps seeds to a minimum and preserves color. If you’re in a rush, you can skip straining and still get a lively flavor—just expect more texture in the mousse.
Filling Texture: The mousse should hold its shape without being stiff. If it’s too loose, add a touch more melted gelatin solution. If it’s too firm, whip a splash more cream and fold it in gently to loosen the texture.
Swirl Patterns: For pretty marbling, dot a few teaspoons of raspberry purée on the mousse surface in a circular pattern, then drag a skewer from center to edge to create a delicate swirl. You’ll get a dessert that looks like you spent hours on it, even though it’s simple.
Ingredient Swaps: You can replace heavy cream with coconut cream for a dairy-free version, though the texture will be a touch lighter. Dark Chocolate can be substituted with semi-sweet if you want a milder finish. If you want more raspberry flavor, add a tablespoon of raspberry liqueur to the glaze (or to the mousse) just before folding for a subtle floral note.
Baking Tips: If your oven runs hot, drop the cake bake time by 2–4 minutes. Less time in the oven prevents a dry crumb, which is especially important when you layer mousse on top later. Keep an eye on the cake and use a light touch when testing doneness.
Glaze Variations: For a glossy look with a hint of complexity, whisk in a teaspoon of espresso powder or a pinch of chili powder for a surprising, smoky kick. You’ll taste chocolate with an edge—perfect for grown-up palates.
Lessons learned? I’ve learned to plan ahead: bake the cake, chill the base, prepare the mousse, and only then glaze. The cake’s flavors deepen overnight, and this method ensures a clean slice with neat edges. The secret is balance: a strong chocolate foundation, a bright raspberry middle, and a finishing glaze that’s almost magical in its shine. Trust me on this one—you’ll want to repeat it for birthdays, anniversaries, or when you simply need a little dessert joy that feels like a warm hug.
Storing and Reheating Tips
Proper storage helps you enjoy this chocolate raspberry mousse cake for days, not hours. Here’s how I keep it at its best.
Room Temperature: If you’re serving within a few hours of making it, you can keep it at room temperature for up to 2 hours, especially if your kitchen is cool. After that, the mousse starts to soften and the glaze can sweat a bit.
Refrigerator Storage: The best option is to refrigerate the assembled cake in its pan, tightly wrapped with plastic wrap or placed in an airtight container. It will stay fresh for 3–4 days. For best texture, glaze is applied just before serving, so you can refrigerate the cake without glaze and finish with glaze when you’re ready to serve.
Freezer Instructions: You can freeze the cake in slices for up to 1–2 months. Wrap slices tightly and place in an airtight container. Thaw in the fridge overnight and glaze just before serving for the freshest finish. Freezing can soften the texture slightly, but the flavors stay fantastic.
Glaze Timing Advice: If you plan to freeze, leave the glaze off and apply a fresh glaze after thawing for the most vibrant shine. If you’re storing in the fridge for a few days, glaze a day ahead for a mirror-like finish. The glaze hardens as it cools, so pour slowly and let it settle to a smooth surface.
There’s nothing complicated about keeping this cake, but taking a little extra care with chilling and glazing makes a world of difference in the final texture and appearance. My kitchen rhythm changed when I started planning dessert ahead; it’s the tiny, practical habit that turns a good cake into an unforgettable one.
Frequently Asked Questions
Can I make this gluten-free?
Absolutely. Swap in 1:1 gluten-free all-purpose flour that’s designed for baking. You may notice a slightly denser crumb, which is perfectly fine for a mousse cake. If you’re sensitive to gluten, you can also use a gluten-free chocolate crust and a gluten-free gelatin or agar-agar in the filling.
Do I need to peel the zucchini?
There’s no zucchini in this recipe, but I’ve tested similar cakes with grated zucchini for moisture. If you do try a zucchini version, squeeze out the moisture well so your mousse won’t be watery. For this cake, raspberries and chocolate keep things elegantly simple without extra vegetables.
Can I make this as muffins instead?
Yes, you can adapt the base to bake as chocolate raspberry mousse cake muffins. Reduce bake time to about 14–18 minutes and check for a moist crumb. Use muffin cups and a muffin tin; you’ll get portable portions that still carry the same flavors.
How can I adjust the sweetness level?
Begin with less sugar in the mousse and glaze, then taste and adjust. You can also counterbalance sweetness with a touch more lemon juice in the raspberry purée. If you’re using a dairy-free version, coconut cream can bring a nice richness, but the texture may be slightly lighter.
What can I use instead of the glaze?
If you want a lighter finish, dust the top with cocoa powder or powdered sugar for a rustic look. A white chocolate drizzle is another option for contrast; it pairs nicely with the raspberry flavor. For a vegan variant, use a glossy glaze made from cacao butter and coconut cream instead of dairy cream.
Final Thoughts
This chocolate raspberry mousse cake is the kind of dessert that makes people linger at the table, spoon in hand, eyes bright with happiness. The layers tell a story you can see in a single slice: a chocolatey foundation, a cloud-like raspberry center, and a glaze that catches the light like a tiny mirror. It’s the kind of treat that invites conversation—“How did you get the mousse so light?”—and it rewards a little patience with a lot of joy. If you’re new to this, give yourself permission to improvise, to swirl, to chill, to taste as you go. And if you’ve got a favorite tweak, I’d love to hear about it in the comments. Happy baking, friends, and may your kitchen smell like chocolate and bright berries tonight!