Honey Sesame Chicken
Oh, you guys, I am SO excited to share this recipe with you today. If there’s one dish that has consistently brought smiles to my family’s faces, and frankly, has made me look like a culinary superstar with minimal effort, it’s this Honey Sesame Chicken. I remember the first time I made it; it was a frantic weeknight, and I was staring into my fridge, completely uninspired. I wanted something that felt like a treat, something a little special, but I honestly didn’t have the energy for anything complicated. I thought about takeout, of course, but then it hit me – I had all the makings of a killer Honey Sesame Chicken right there. And let me tell you, the aroma that filled my kitchen that night was pure magic. My kids, who can sometimes be a tough crowd, came running from their rooms, and by the time dinner was served, the plates were licked clean. It’s got that perfect balance of sweet, savory, and a hint of tang, all with a lovely sticky glaze that just coats everything beautifully. It’s not fried, which is a huge bonus in my book for weeknights, but it still has that irresistible, satisfying texture that reminds you of your favorite Chinese takeout, only… better. Because you made it! It’s become my go-to when I need a guaranteed win, and honestly, it’s probably one of the most requested meals in our house now. It’s like the crowd-pleasing cousin of Orange Chicken, but with its own unique, addictive charm.
What is honey sesame chicken?
So, what exactly is this glorious dish we’re talking about? At its heart, Honey Sesame Chicken is a savory and sweet chicken dish that’s coated in a luscious, sticky glaze. Think of it as that classic sweet and Sour Chicken you might know, but with a more refined flavor profile. The “honey” part comes from, you guessed it, honey, which provides that lovely sweetness and glossy finish. The “sesame” comes from toasted sesame seeds, which add a beautiful nutty aroma and a delightful crunch. It’s usually made with bite-sized pieces of chicken that are often lightly coated and then tossed in the sauce. The magic truly happens when that sauce clings to the chicken, creating little pockets of pure deliciousness. It’s the kind of dish that makes you close your eyes with the first bite and savor every single morsel. It’s approachable for even beginner cooks, and the flavor is so universally loved, it’s hard to go wrong. It’s essentially comfort food with a touch of elegance, the kind of meal that feels like a hug in a bowl.
Why you’ll love this recipe?
There are so many reasons why this Honey Sesame Chicken Recipe has become a staple in my kitchen, and I just know you’re going to fall in love with it too. First and foremost, the FLAVOR. Oh. My. Goodness. It hits all the right notes: it’s sweet from the honey, savory from the soy sauce, a little tangy from the rice vinegar, and the sesame oil just adds this wonderful depth. It’s perfectly balanced, never too sweet, never too salty, and the tiny bit of garlic and ginger adds just the right aromatic punch. It’s the kind of flavor that makes you want to go back for just one more bite, and then another. And SIMPLICITY? This is a lifesaver on busy weeknights. I can whip this up in under an hour, and most of that is hands-off baking time. No deep frying means less mess and less stress, which is a win in my book any day. Plus, it’s incredibly COST-EFFECTIVE. You probably have most of the ingredients in your pantry already, and chicken thighs are usually pretty budget-friendly. It’s a way to make a truly satisfying and restaurant-quality meal without breaking the bank. What I love most about this recipe, though, is its VERSATILITY. You can serve it over fluffy rice, with some steamed broccoli for a complete meal, or even toss it with noodles. It’s fantastic for meal prep too; the flavors actually meld and deepen overnight, making it even better for leftovers. It’s a far cry from those bland, one-note chicken dishes. It’s got layers of flavor and texture that just keep you coming back for more. It’s like the perfect meal for a cozy night in, but also impressive enough to serve to guests.
How do I make honey sesame chicken?
Quick Overview
This Honey Sesame Chicken Recipe is designed for maximum flavor with minimal fuss. We’ll be coating bite-sized chicken pieces in a simple batter, then baking them until they’re golden and slightly crispy. While the chicken bakes, we’ll whip up a quick, irresistible glaze. The final step is tossing the chicken in that glorious glaze until it’s perfectly coated. It’s a straightforward process that results in a truly satisfying meal, proving you don’t need complicated techniques to achieve incredible results in your own kitchen. It’s one of those recipes that makes you feel really good about what you’ve accomplished.
Ingredients
For the Main Batter:
1.5 lbs boneless, skinless chicken thighs, cut into 1-inch pieces (Chicken thighs are my secret weapon here – they stay so juicy and tender! You can use chicken breast, but be careful not to overcook it.)
1/2 cup all-purpose flour (I’ve tried some gluten-free blends here, and they work, but keep in mind the texture might be slightly different. Stick with regular flour if you can for the classic crunch.)
1/4 cup cornstarch (This is key for that perfect crispy exterior!)
1 teaspoon salt
1/2 teaspoon Black Pepper
1/2 teaspoon garlic powder
1/4 teaspoon ginger powder (or a tiny pinch of fresh grated ginger if you have it handy!)
1 large egg, lightly beaten
2 tablespoons milk (I’ve even used almond milk in a pinch, and it worked beautifully! Any milk will do.)
For the Filling:
2 tablespoons vegetable oil or other neutral oil (For the pan, to help everything get nice and golden.)
For the Glaze:
1/4 cup honey (Use a good quality honey; it really makes a difference!)
1/4 cup soy sauce (Or tamari for a gluten-free option. Low-sodium is usually best so you can control the saltiness.)
2 tablespoons rice vinegar (This adds that essential tang. Don’t skip it!)
1 tablespoon sesame oil (Toasted is best for that wonderful nutty flavor.)
1 clove garlic, minced (Fresh garlic makes all the difference here.)
1 teaspoon fresh ginger, grated (Again, fresh is amazing, but powder works if you’re in a bind.)
1 tablespoon cornstarch mixed with 2 tablespoons water (This is your slurry, which will thicken the glaze beautifully.)
1 tablespoon sesame seeds, toasted (For garnish and extra crunch. Toast them in a dry pan until fragrant.)
Step-by-Step Instructions
Step 1: Preheat & Prep Pan
First things first, preheat your oven to 400°F (200°C). While that’s heating up, grab a large baking sheet. I like to line mine with parchment paper for super easy cleanup. If you don’t have parchment, just make sure the pan is lightly greased so nothing sticks. This step ensures your chicken gets nice and golden all around without sticking to the pan.
Step 2: Mix Dry Ingredients
In a medium-sized bowl, whisk together the flour, cornstarch, salt, pepper, garlic powder, and ginger powder. Give it a good mix so everything is evenly distributed. You want a nice, consistent powder here. This dry mix is what will create that light, crispy coating on our chicken pieces.
Step 3: Mix Wet Ingredients
In a separate, slightly larger bowl, whisk together the lightly beaten egg and the milk. This creates the binder for our dry ingredients, helping them stick to the chicken. Make sure it’s well combined!
Step 4: Combine
Now, add your cut chicken pieces to the wet ingredients. Toss them around until they are all nicely coated. Then, using a slotted spoon or just by draining off any excess liquid, transfer the coated chicken pieces into the bowl with the dry ingredients. Toss everything together really well. You want each piece of chicken to be thoroughly coated in that flour and cornstarch mixture. Don’t be afraid to get your hands in there to make sure every nook and cranny is covered – that’s how you get the best crunch!
Step 5: Prepare Filling
Arrange the coated chicken pieces in a single layer on your prepared baking sheet. Make sure they aren’t touching each other too much, as this will help them crisp up instead of steam. Drizzle the 2 tablespoons of vegetable oil evenly over the chicken pieces. This step is crucial for getting that lovely golden-brown color and a slightly crisp exterior without frying.
Step 6: Layer & Swirl
This is where the magic happens! In a small saucepan over medium heat, combine the honey, soy sauce, rice vinegar, sesame oil, minced garlic, and grated ginger. Stir it all together. Bring the mixture to a gentle simmer, then let it bubble for about 2 minutes, stirring occasionally. Now, add the cornstarch slurry (cornstarch mixed with water). Whisk it in constantly. The glaze will thicken up quite quickly, becoming glossy and luscious. Keep whisking until it reaches your desired consistency – it should coat the back of a spoon. This usually takes about 1-2 minutes. Once it’s thickened, remove it from the heat. You want this ready to go right after the chicken is done.
Step 7: Bake
Pop your baking sheet into the preheated oven. Bake for about 20-25 minutes, or until the chicken is cooked through and golden brown. I like to give the pan a little shake about halfway through baking to help ensure even browning. You’re looking for that nice, slightly crisp coating on the chicken.
Step 8: Cool & Glaze
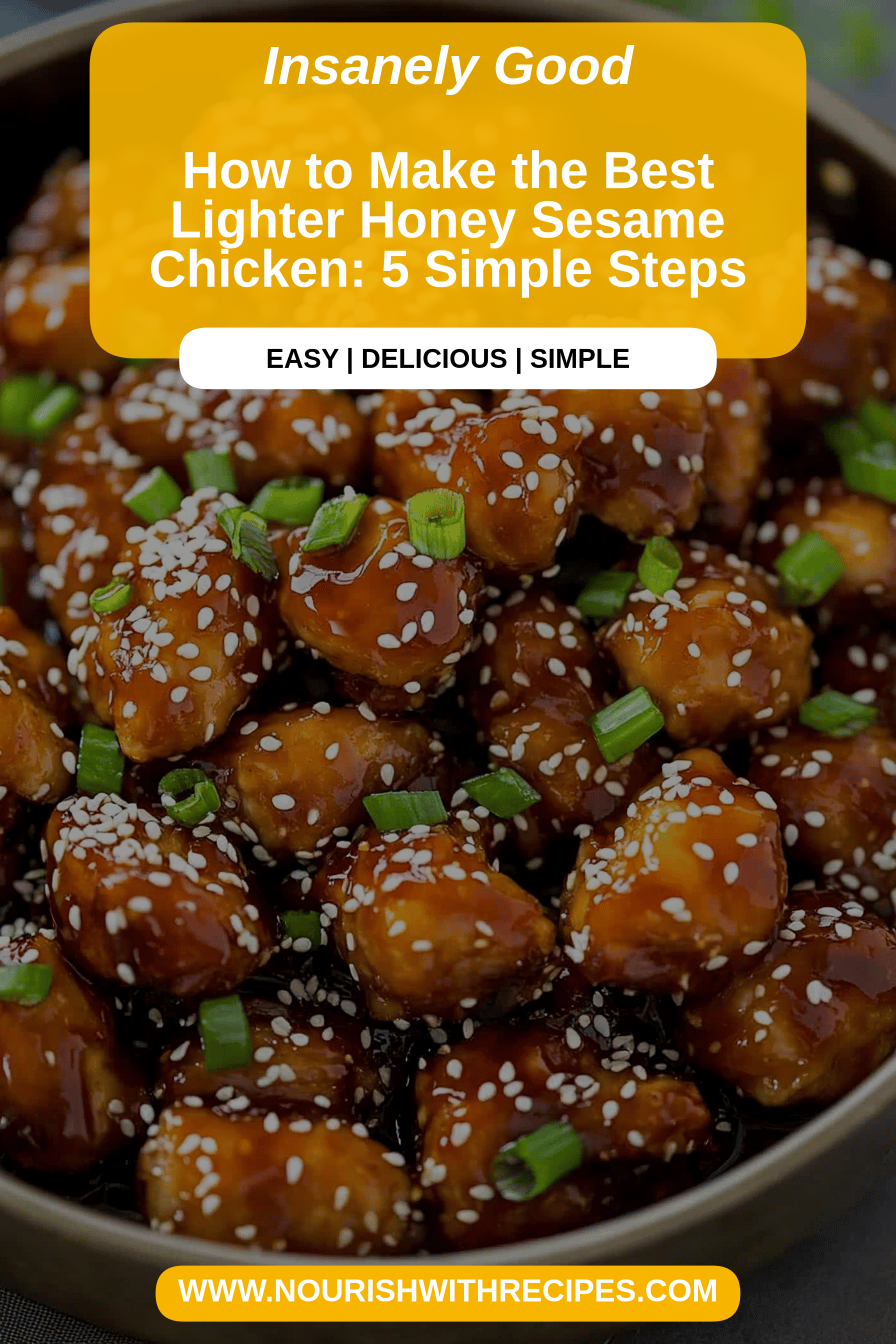
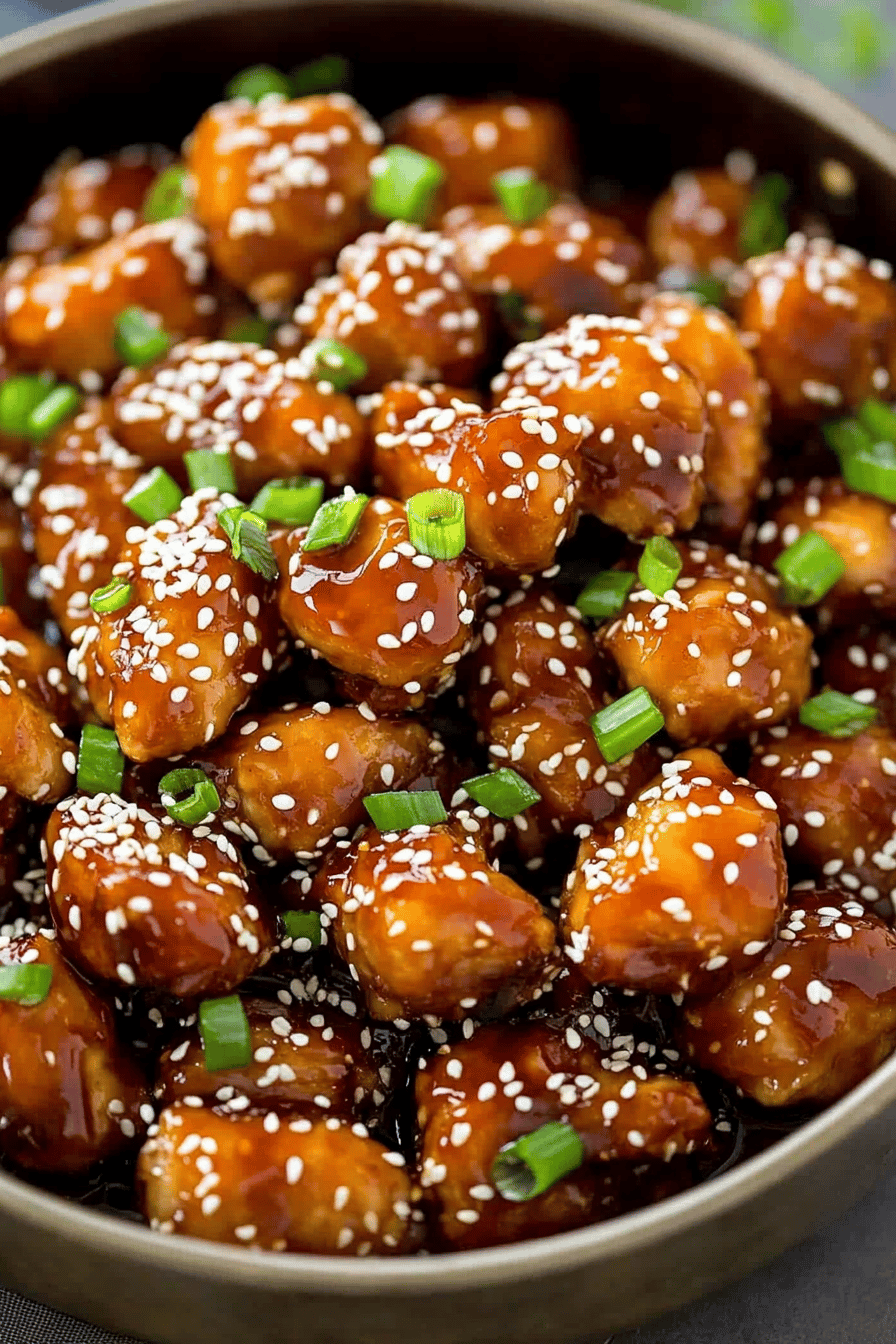
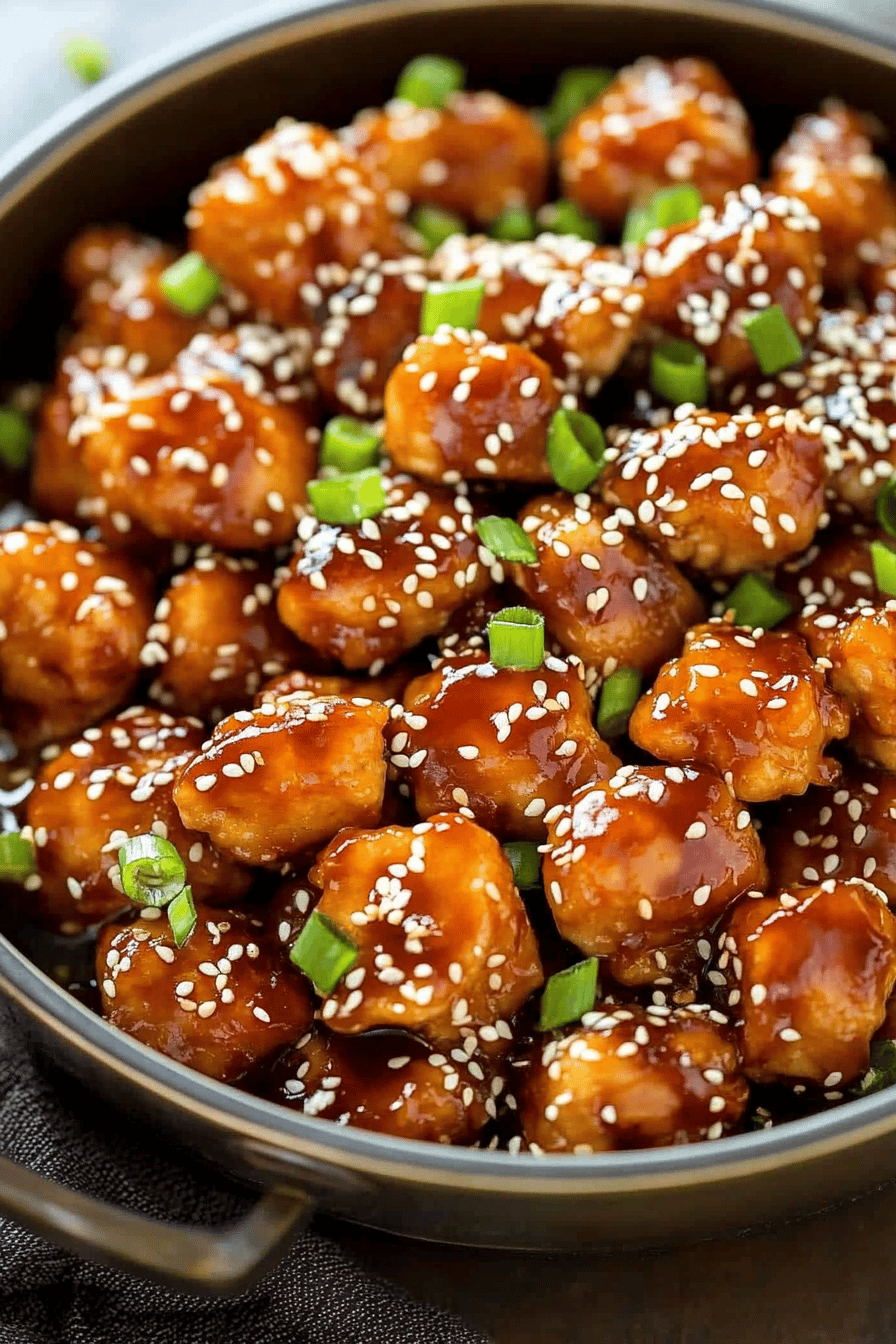
Once the chicken is out of the oven and looks perfectly cooked, carefully pour the prepared glaze over the hot chicken directly on the baking sheet. Toss everything gently to coat each piece evenly. The residual heat from the chicken will help the glaze adhere beautifully. Sprinkle generously with your toasted sesame seeds. The aroma at this stage is absolutely divine!
Step 9: Slice & Serve
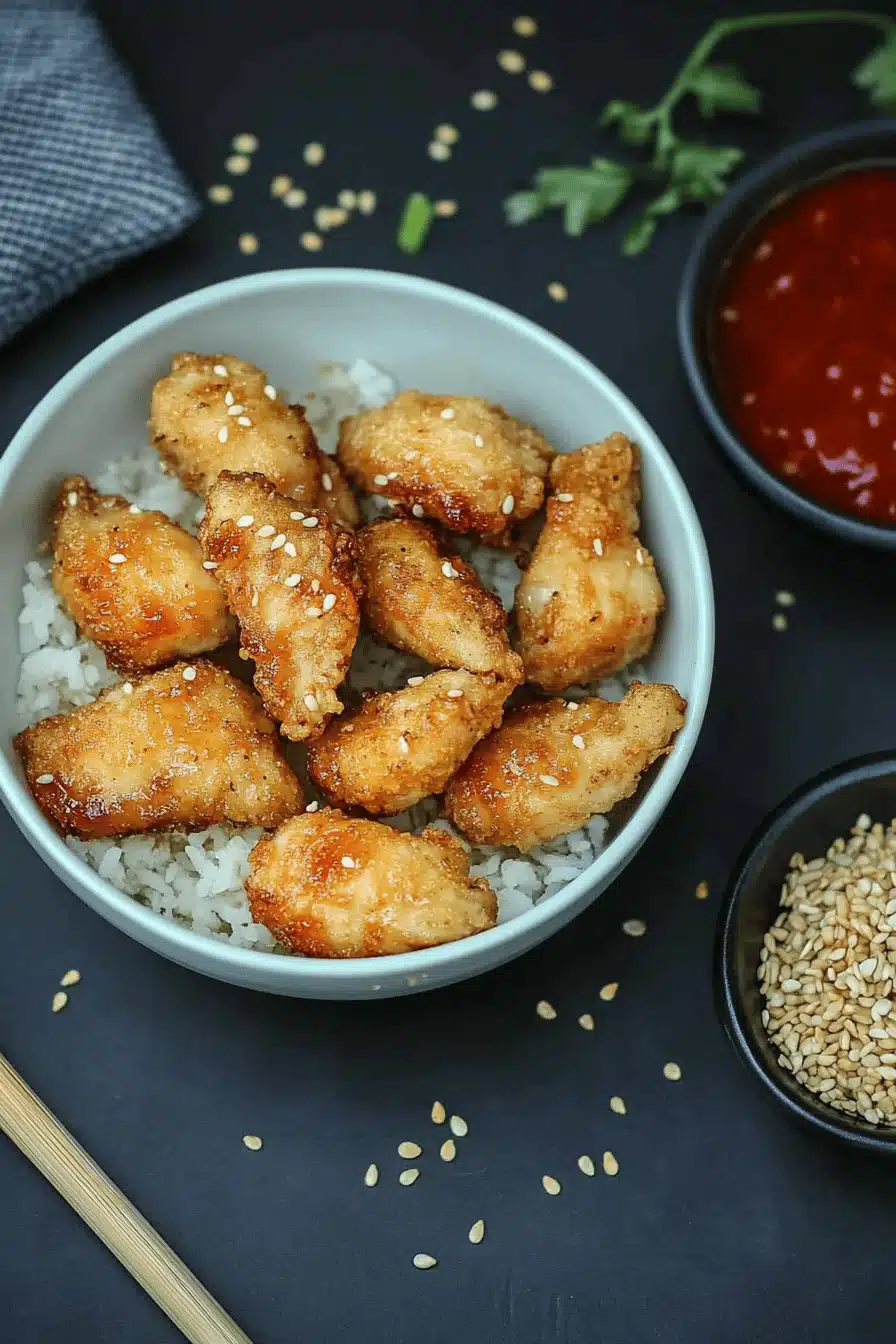
Serve immediately! This Honey Sesame Chicken is best enjoyed piping hot. You can slice any larger pieces if you like, but I usually serve them as is. The sticky glaze, the tender chicken, and the nutty sesame seeds create a symphony of flavors and textures that is just incredibly satisfying. It’s a dish that will have everyone asking for the recipe, I promise!
What to Serve It With
This Honey Sesame Chicken is so versatile, you can really have it with anything! For a classic and satisfying meal, I always serve it over fluffy white rice. Jasmine rice is my absolute favorite because it has such a lovely fragrance that complements the dish perfectly. If you’re looking for something a bit healthier, brown rice is a great option, or even quinoa. My kids adore it with some simple steamed broccoli or green beans on the side. It adds a nice bit of freshness and a pop of color to the plate. For a more “takeout at home” feel, I sometimes make some quick stir-fried vegetables like bell peppers, snap peas, and carrots to toss in with the chicken and sauce. It makes the whole meal feel a bit more elaborate, and it’s a great way to sneak in more veggies. If you’re feeling adventurous, you could even serve it with some crispy fried wontons or spring rolls for a true feast. Honestly, though, even just served plain with a side of rice, it’s a complete and delicious meal. I’ve even packed leftovers into bento boxes for lunches, and they were a huge hit!
Top Tips for Perfecting Your Honey Sesame Chicken
After making this Honey Sesame Chicken more times than I can count, I’ve picked up a few little tricks that I think make a big difference. First, when you’re coating the chicken in the flour mixture, don’t be shy! Get your hands in there and really make sure every single piece is well-coated. That’s where the magic of that crispy exterior comes from. If you want an extra crispy coating, you can actually double-dip: coat the chicken in the wet ingredients, then the dry, then dip it back into the wet, and then the dry again. It takes a little more effort, but the crunch factor is phenomenal! When you’re making the glaze, don’t rush it. Let it simmer for those couple of minutes before adding the cornstarch slurry; this helps to deepen the flavors. And when you add the slurry, whisk constantly! If you don’t, you’ll end up with lumps, and nobody wants a lumpy glaze. I’ve learned that the hard way! For the sesame seeds, toasting them is a non-negotiable for me. It brings out their nutty flavor and adds such a wonderful aroma that you just don’t get from untoasted seeds. Just a quick minute in a dry skillet over medium heat until they’re fragrant is all it takes. If your glaze seems a little too thick after it’s cooled slightly, you can always thin it out with a tablespoon or two of water. Conversely, if it’s too thin, you can make another tiny cornstarch slurry (1 tsp cornstarch + 1 tbsp water) and whisk it into the simmering glaze until it thickens. My kids actually love it when I add a pinch of red pepper flakes to the glaze for a tiny bit of heat, so feel free to experiment with that if you like a little kick! And remember, chicken thighs are key here for juiciness, but if you absolutely must use chicken breast, cut it into slightly smaller pieces and keep a very close eye on it in the oven so it doesn’t dry out. I usually aim for about 18-20 minutes with breast meat.
Storing and Reheating Tips
One of the best things about this Honey Sesame Chicken is how well it stores and reheats! If you happen to have any leftovers (which is rare in my house, but it happens!), let the chicken cool down completely before storing. I usually transfer any leftovers to an airtight container. At Room Temperature: Honestly, I don’t recommend leaving it out for too long, maybe an hour at most if it’s not too hot out. It’s best to get it into the fridge relatively quickly. Refrigerator Storage: It will keep beautifully in the fridge for about 3-4 days. The chicken will still be delicious, though the coating might lose a tiny bit of its crispness after the first day. Freezer Instructions: If you want to freeze it for longer, I recommend freezing the plain baked chicken pieces without the glaze. Let them cool completely, then place them on a baking sheet in a single layer and freeze until solid. Once frozen, transfer them to a freezer-safe bag or container. They should last in the freezer for about 2-3 months. To reheat from frozen, thaw overnight in the refrigerator, then proceed with reheating. Glaze Timing Advice: When you reheat, I usually add the glaze back in during the reheating process. If you’re reheating from the fridge, you can either toss the chicken with the reserved glaze (if you have any extra) or whip up a fresh batch of glaze to toss it in once it’s heated through. For oven reheating, I find spreading the chicken on a baking sheet and heating at around 350°F (175°C) for 10-15 minutes works best. If microwaving, do it in short bursts, stirring halfway through, and then toss with glaze. The key is to get it warm and then coat it in that lovely sticky sauce again!
Frequently Asked Questions
Final Thoughts
So there you have it, my absolute favorite Honey Sesame Chicken! It’s the kind of recipe that feels special enough for a weekend dinner but is also totally doable on a busy weeknight. The way the sweet and savory glaze coats those tender, slightly crispy chicken pieces is just perfection. It’s a dish that I know will be a hit at your table, just like it is at mine, bringing everyone together for a delicious meal. I truly hope you give this recipe a try, and if you do, please let me know how it turns out! I love hearing about your cooking adventures and seeing your creations. Feel free to share your own tips or variations in the comments below – I’m always eager to learn new ways to make my favorite dishes even better. If you enjoyed this, you might also love my Sticky Ginger Garlic Chicken or my Quick Cashew Chicken recipe, which offer similar flavor profiles but with their own unique twists. Happy cooking, everyone!

Honey Sesame Chicken
Ingredients
Chicken Marinade
- 1.5 pounds boneless, skinless chicken thighs cut into 1-inch pieces
- 2 tablespoons soy sauce
- 1 tablespoon sesame oil
- 1 tablespoon cornstarch
- 0.5 teaspoon ground ginger
- 0.25 teaspoon garlic powder
Honey Sesame Sauce
- 0.5 cup honey
- 0.25 cup soy sauce
- 2 tablespoons rice vinegar
- 1 tablespoon sesame oil
- 1 tablespoon cornstarch
- 2 cloves garlic minced
- 0.5 teaspoon red pepper flakes optional
For Cooking
- 2 tablespoons vegetable oil
- 2 tablespoons sesame seeds toasted, for garnish
- 0.5 bunch green onions sliced, for garnish
Instructions
Preparation Steps
- In a medium bowl, combine the chicken pieces with the marinade ingredients. Toss to coat evenly and let marinate for at least 15 minutes, or up to 30 minutes.
- While the chicken is marinating, whisk together all the honey sesame sauce ingredients in a small bowl until smooth. Set aside.
- Heat the vegetable oil in a large skillet or wok over medium-high heat.
- Add the marinated chicken to the hot skillet in a single layer. Cook for 5-7 minutes, flipping halfway through, until browned and cooked through.
- Pour the honey sesame sauce over the chicken. Stir continuously until the sauce thickens and coats the chicken, about 2-3 minutes.
- Remove from heat. Garnish with toasted sesame seeds and sliced green onions.
- Serve hot with rice or your favorite side dishes.