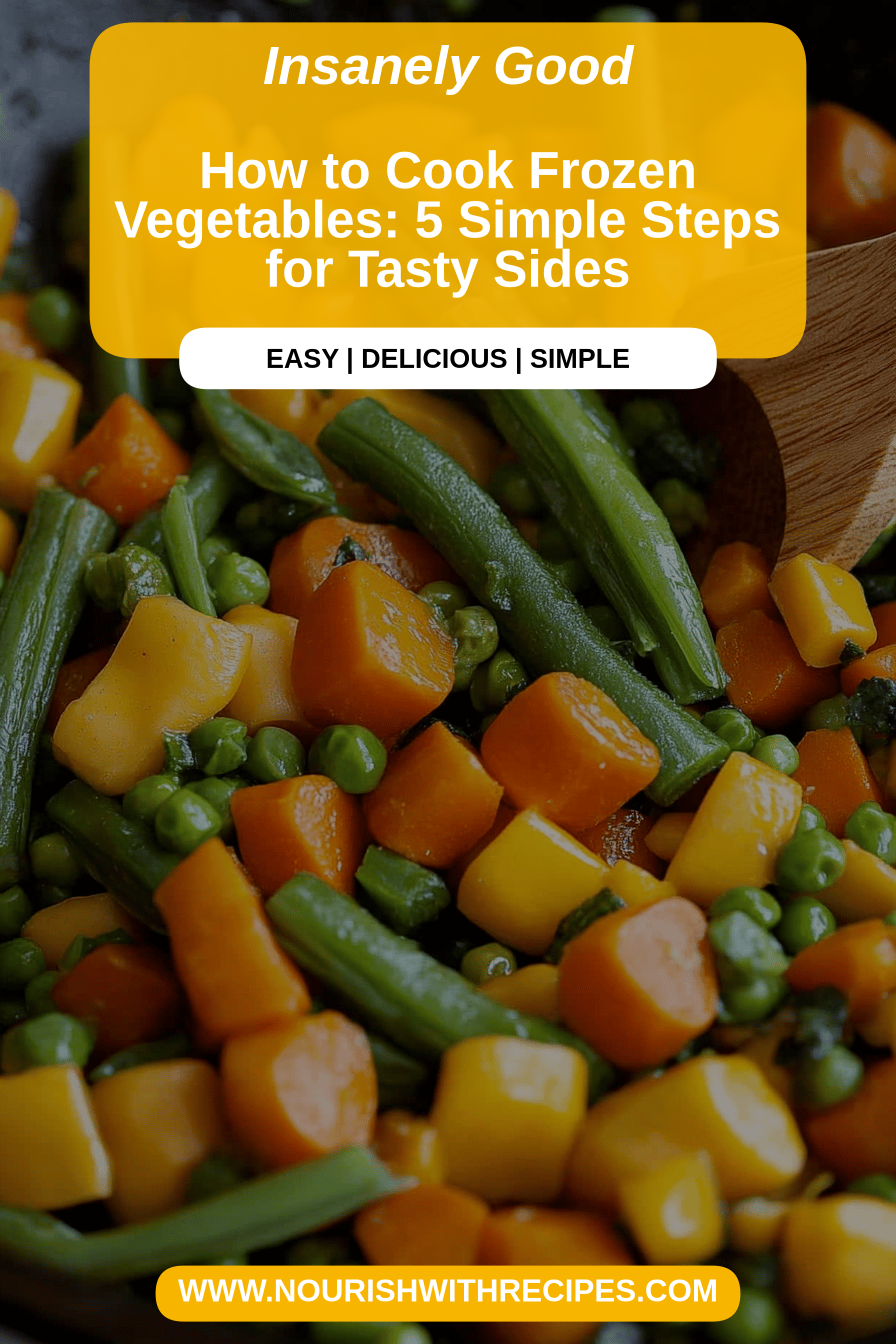
cook frozen vegetables
You know those nights? The ones where dinner feels like a marathon, you’ve got little feet underfoot, and the thought of chopping an onion makes you want to just order pizza? Yeah, I’ve been there. So many times. And in those moments, I’ve discovered the absolute magic that is knowing how to cook frozen vegetables properly. It’s not just about convenience, though that’s a huge part of it. It’s about unlocking a world of vibrant flavor and texture that many people completely miss out on. I used to be one of them, honestly! I’d toss them in a pot of boiling water and end up with sad, mushy peas that tasted like… well, like disappointment. But then I stumbled upon this method, and it honestly changed the game for me. It’s like finding a cheat code for healthy eating that actually tastes *good*. Forget those bland, waterlogged veggies; we’re talking about crisp-tender, bright, delicious goodness that can elevate any meal. It’s a lifesaver, truly, and so much better than the alternative of just giving up and reaching for the processed stuff.
What are we talking about?
So, what exactly does it mean to “cook frozen vegetables” in *this* context? It’s not just about reheating them; it’s about transforming them from their frozen state into something truly delightful. Think of it as giving those little gems the attention they deserve. Instead of boiling them into oblivion, we’re going to coax out their natural sweetness and vibrant colors through a method that’s surprisingly quick and effective. It’s essentially a way to get that “just-picked” freshness, even when you’re starting with something that’s been in the freezer for months. It’s the closest you can get to garden-fresh taste without actually having a garden (or the time to tend one!). It’s about understanding that frozen doesn’t mean flavorless or mushy; it just means preserved. And with a little know-how, we can preserve that goodness and make it sing!
Why you’ll love this approach?
Okay, let’s get down to why this whole “perfectly cooked frozen vegetables” thing is such a big deal in my kitchen. First and foremost: the flavor. Oh my goodness, the flavor! When you cook them using this method, the natural sweetness of the vegetables really pops. You get that lovely, slightly caramelized edge without actually frying them. It’s incredibly satisfying. Then there’s the simplicity. Honestly, on a hectic Tuesday night, when I’m staring into the fridge wondering what on earth to make, this is my go-to. It’s so ridiculously easy, and it feels like such a win to get a healthy, delicious side dish on the table in minutes. Plus, let’s talk about the budget. Frozen vegetables are often way more affordable than fresh, especially when certain things are out of season. This method makes them taste like a million bucks without costing nearly as much. And the versatility! You can use pretty much any mix you have on hand. Broccoli, cauliflower, peas, carrots, corn, Green Beans – they all work beautifully. It’s my secret weapon for adding a quick veggie boost to everything from stir-fries to pasta dishes. What I love most is the peace of mind it gives me. I know I can always whip up a fantastic side dish, no matter how crazy life gets. It’s a real game-changer, and I think you’re going to agree.
What is the “How-To” Guide for Amazing Veggies?
Quick Overview
This whole process is designed to be quick, easy, and deliver incredible results. We’re essentially going to let the vegetables steam and then get a little char from a hot pan, bringing out their best qualities. It’s a two-step dance that takes minutes but tastes like you spent ages in the kitchen. You’ll be amazed at how vibrant and flavorful your frozen veggies turn out. It’s the perfect way to add a healthy, delicious component to any meal without the fuss of fresh prep.
Ingredients
For the Frozen Veggies: For the Frozen Veggies: For the Frozen Veggies: For
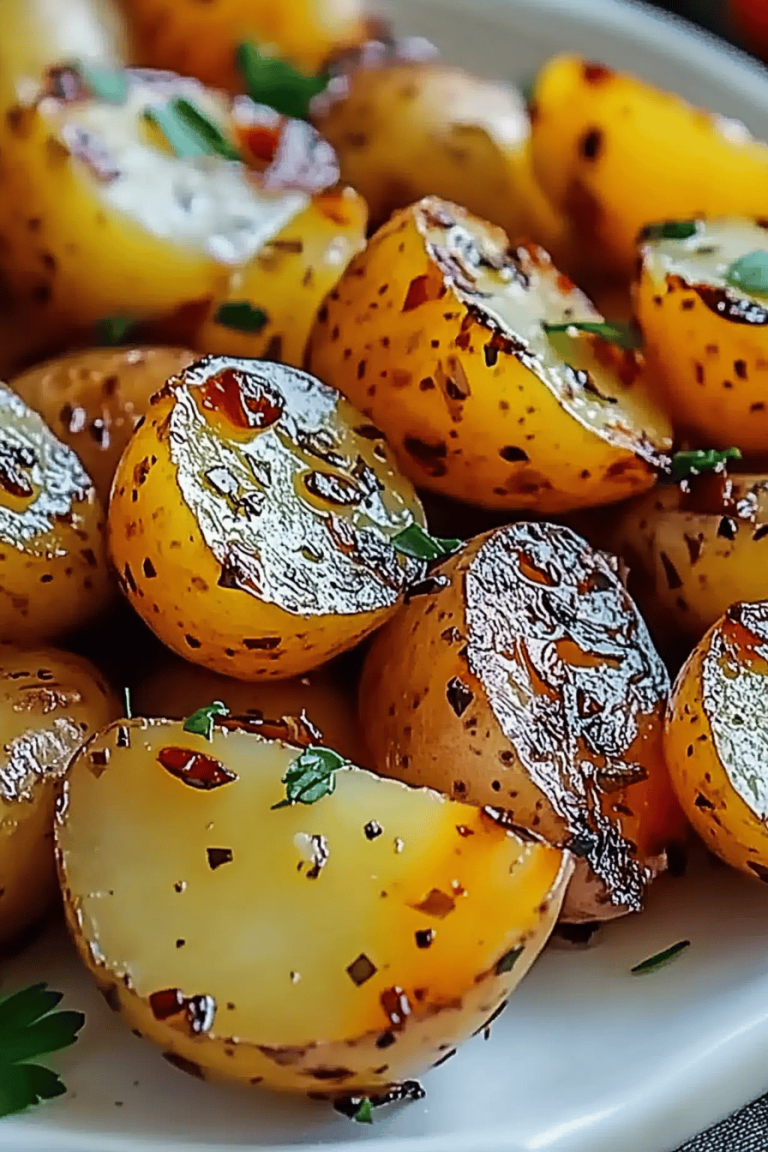
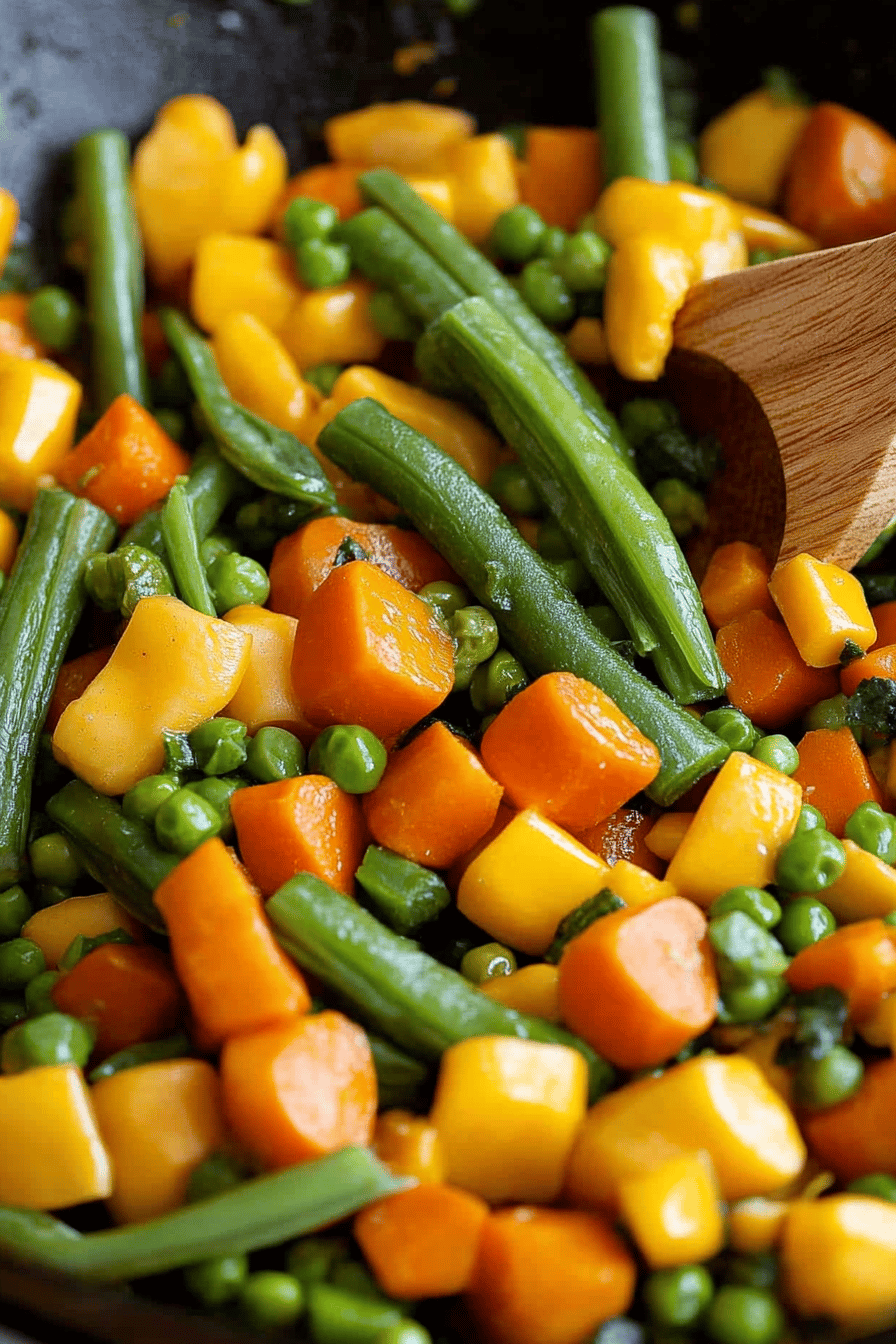
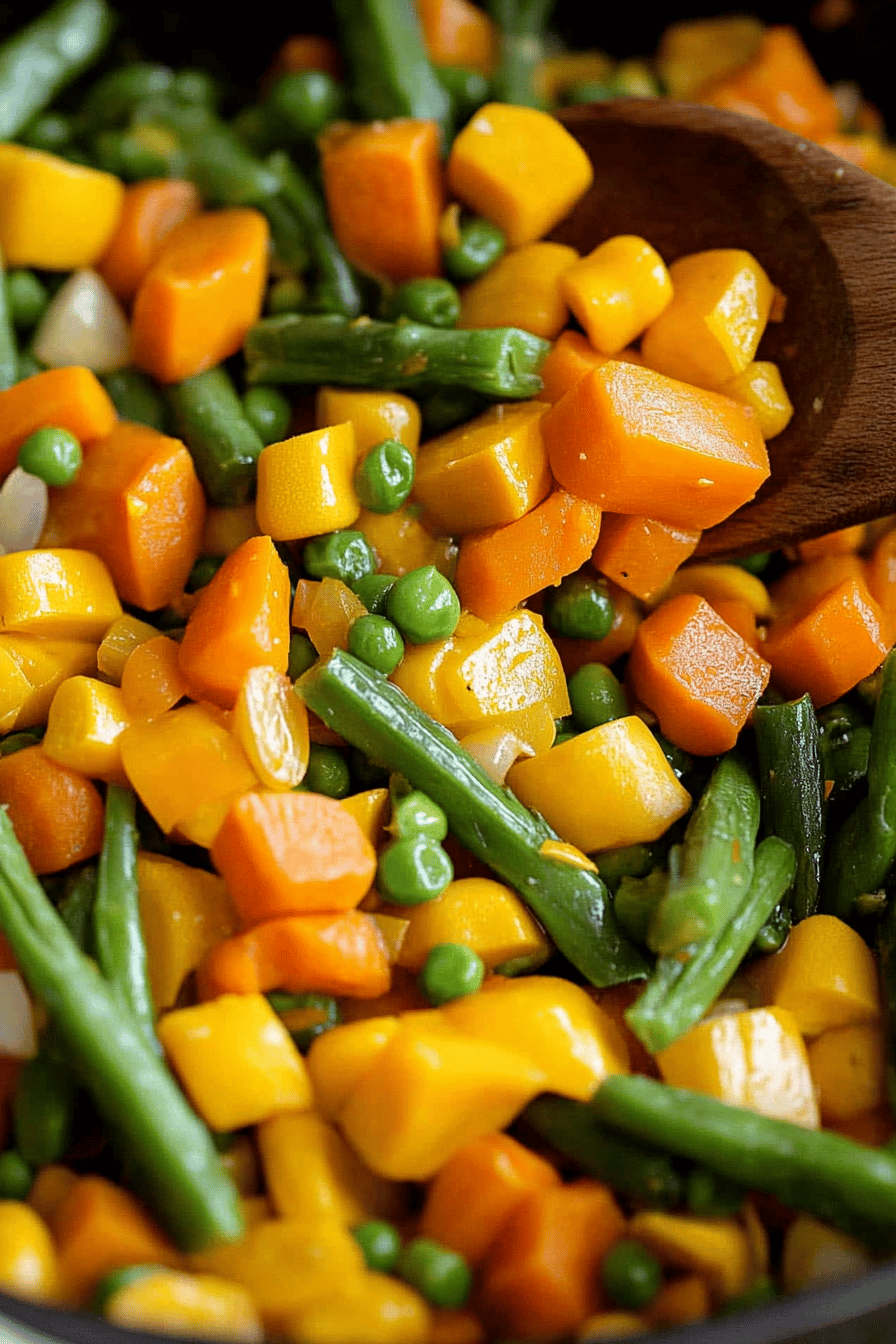
This is where the magic starts! You can honestly use whatever frozen vegetable mix you have lurking in your freezer. My personal favorites include a classic broccoli and carrot blend, or a hearty mix of peas, corn, and Green Beans. For a bag of about 16 ounces (that’s your standard size), you’ll want: 16 ounces of your favorite frozen vegetables. No need to thaw them! That’s the beauty of it. I always grab store brands when they’re on sale, and they work just as well as the fancy ones. Just make sure they aren’t stuck together in a giant ice block – if they are, give the bag a good whack on the counter to break them up.
For the Flavor Boost:
This is what takes it from bland to brilliant. You don’t need much, but it makes a world of difference.
- 2 tablespoons olive oil (or any cooking oil you prefer)
- 1-2 cloves garlic, minced (or 1/2 teaspoon garlic powder if you’re in a real pinch)
- Salt, to taste
- Black Pepper, to taste
- Optional: A pinch of red pepper flakes for a little kick, or a squeeze of lemon juice at the end for brightness.
I usually just eyeball the oil, but about two tablespoons is a good starting point for a 16-ounce bag. And fresh garlic is always best, but honestly, life happens, and garlic powder is a totally acceptable substitute! I’ve definitely used it more times than I can count on those super busy evenings.
For an Extra Touch (Optional):
If you’re feeling fancy or want to really elevate it, consider these:
- 1 tablespoon butter (for richness)
- A sprinkle of grated Parmesan cheese
- A few fresh herbs like parsley or chives, chopped
These are total game-changers for making it feel like a restaurant-quality side dish. The butter adds a lovely sheen and depth of flavor, and a little cheese never hurt anyone, right?
Step-by-Step Instructions
Step 1: Get Your Pan Hot
This is crucial! Grab a large skillet or frying pan. You want something wide enough to hold all your vegetables in a single layer, if possible. Place it over medium-high heat. Let it get nice and hot for a minute or two. This initial heat is what helps get that lovely little char on the veggies.
Step 2: Add Your Oil
Once the pan is hot, add your Olive Oil. Swirl it around to coat the bottom of the pan. If you’re using butter, you can add that now too, or wait until Step 5. Let the oil heat up for about 30 seconds until it shimmers slightly. Be careful not to let it smoke!
Step 3: Introduce the Frozen Veggies
Carefully add your frozen vegetables directly into the hot pan. Don’t worry if they sizzle – that’s a good sign! They might release a bit of water as they start to thaw, which is perfectly normal.
Step 4: Season and Stir
Immediately season the vegetables generously with salt and pepper. If you’re using garlic powder or red pepper flakes, add them now too. Give everything a good stir to distribute the seasonings and make sure the vegetables are coated in the oil. You want to keep them moving around in the pan for the first few minutes to prevent sticking and encourage even cooking.
Step 5: Cook and Develop Flavor
Now, let them cook for about 5-7 minutes, stirring occasionally. You’re looking for them to start softening and getting a little bit of color on them. If you’re adding minced fresh garlic, you can stir that in during the last 2-3 minutes of this cooking time so it doesn’t burn. If you want that extra richness from butter, add it now and stir until melted.
Step 6: Check for Tenderness
After about 5-7 minutes, test a piece of vegetable. You want them to be crisp-tender – that means they’re cooked through but still have a little bite to them. They shouldn’t be mushy or falling apart. If they need a little more time, keep cooking and stirring for another couple of minutes. If they seem like they’re getting too dry and not cooking evenly, you can add a tablespoon or two of water and cover the pan for a minute to help them steam a bit more.
Step 7: Finish and Serve
Once they’re perfectly tender, remove the pan from the heat. If you’re using fresh herbs or a squeeze of lemon juice, stir those in now. Give everything a final taste and adjust seasoning if needed. Serve immediately!
What to Serve It With
This is honestly where these perfectly cooked frozen vegetables shine as a versatile side dish. They’re so adaptable! For a quick and easy breakfast, I love serving a simple mix of peas and carrots alongside scrambled eggs or some crispy bacon. The little burst of sweetness is just lovely. For a more substantial brunch, I’ll often pair a broccoli and cauliflower blend with a quiche or some smoked salmon. It adds a fresh, healthy counterpoint to richer dishes. As a simple dessert accompaniment, believe it or not, a lightly seasoned corn and green bean mix can be surprisingly good with grilled chicken or pork. It’s a light and refreshing way to round out a meal. And for those super cozy snack times, or when I’m just looking for something a little extra with my dinner, I’ll often just make a larger batch of my favorite mixed vegetables and serve them as is, maybe with a sprinkle of Parmesan. It’s a foolproof way to make any meal feel more complete and satisfying. My family practically inhales these whenever I make them, especially the kids, who used to be such picky eaters!
Top Tips for Perfecting Your Frozen Veggies
I’ve definitely learned a thing or two over the years of making frozen vegetables this way, and I want to share some of my best tips with you! First, about the vegetables themselves: always try to break up any ice clumps before you start. This ensures they cook more evenly. If your frozen veggies look like they’re in one giant block, give the bag a firm tap on the counter or the side of your hand to separate them. When it comes to the pan, don’t be shy with the heat! A medium-high to high heat is key. It might seem counterintuitive when you want tender veggies, but that initial blast of heat helps them cook through without getting watery. You want them to sizzle when they hit the pan. And don’t overcrowd the pan! If you have too many vegetables crammed in, they’ll steam instead of getting that lovely sear. If you’re making a big batch, it’s better to cook them in two smaller batches. I learned this the hard way when I once tried to cram way too many florets into my pan, and they all ended up pale and steamed. Not delicious. Seasoning is also super important. Don’t be afraid to be generous with the salt and pepper. Frozen vegetables can sometimes need a little extra help to bring out their natural flavors. And if you’re using fresh garlic, adding it in the last few minutes of cooking is crucial. Raw garlic has a sharp bite, but cooked briefly, it becomes sweet and mellow. If you’re experimenting with different flavor profiles, try adding a dash of soy sauce or a splash of balsamic glaze at the end. A little pinch of smoked paprika can also add a wonderful depth. Remember, practice makes perfect, and soon you’ll be a frozen vegetable-cooking pro!
Storing and Reheating Tips
So, what happens if you have leftovers? Because honestly, sometimes I make too much on purpose because I know I’ll want them later! If you have any of these perfectly cooked frozen vegetables left, storing them is super simple. For short-term storage, the best way is to let them cool down completely, then pop them into an airtight container. They’ll stay good in the refrigerator for about 2 to 3 days. They might lose a tiny bit of their crispness, but they’re still way better than re-steamed or boiled versions. When you’re ready to reheat them, I usually opt for a quick sauté in a lightly oiled pan over medium heat. This helps revive some of that original texture and flavor. You can also gently warm them in the microwave, but keep an eye on them to prevent overcooking. For longer storage, you can freeze them again, though I’m not going to lie, the texture won’t be quite as good as when they were first cooked. If you do freeze them, make sure they’re completely cooled, then put them in a freezer-safe bag or container. They should last for about a month. When you’re ready to use them, it’s best to thaw them in the refrigerator overnight before reheating. I’ve found that reheating them directly from frozen in the microwave tends to make them a bit mushy, so a little thaw first makes a difference.
Frequently Asked Questions
Final Thoughts
So there you have it – the simple, straightforward secret to cooking frozen vegetables that actually taste amazing. It’s such a small thing, but it makes such a huge difference in my weeknights. It’s about reclaiming those moments when you need a healthy, delicious side dish in a flash. I love knowing that I can open my freezer and have a fantastic vegetable option ready to go, one that doesn’t taste like an afterthought. It truly elevates simple meals and makes healthy eating feel effortless. If you’re someone who usually boils their frozen veggies, I really, really encourage you to give this a try. You won’t believe the difference. It’s a little kitchen hack that has paid off big time for me, and I hope it does for you too. Let me know in the comments below how your perfectly cooked frozen veggies turn out, or if you have any other favorite frozen veggie combinations or tips to share! I’m always looking to learn more. Happy cooking!
How to Cook Frozen Vegetables
Ingredients
Main Ingredients
- 0.91 kg frozen mixed vegetables
- 2 tablespoons butter
- 2 cloves garlic minced
- 0.5 teaspoon salt to taste
- 0.25 teaspoon black pepper to taste
Instructions
Preparation Steps
- In a large skillet or pot, melt the butter over medium heat.
- Add the minced garlic and cook for about 30 seconds until fragrant, being careful not to burn it.
- Add the frozen vegetables to the skillet. Season with salt and pepper.
- Stir well to coat the vegetables with the garlic butter. Cook for 8-10 minutes, stirring occasionally, until the vegetables are tender and heated through. Avoid overcooking to prevent them from becoming mushy.
- Taste and adjust seasoning if necessary. Serve immediately as a side dish.