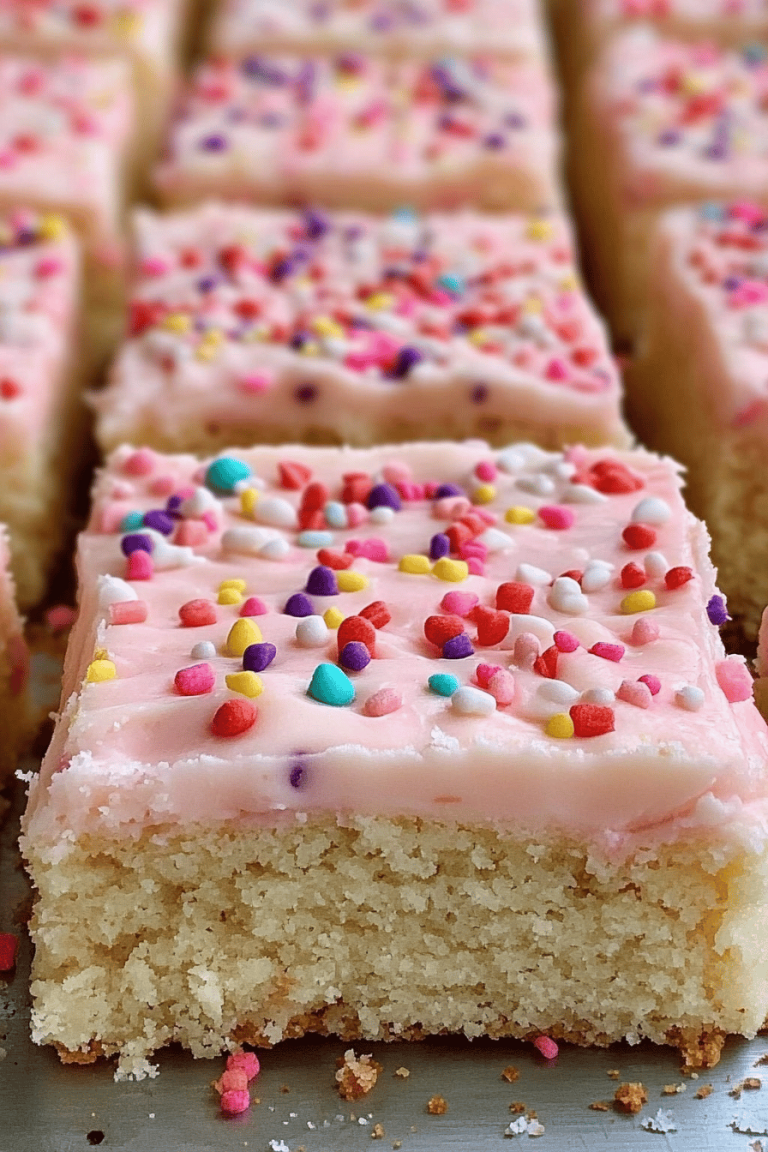
Cool Whip Frosting
There are some recipes that just feel like a warm hug, aren’t there? This Cool Whip frosting recipe is absolutely one of those for me. I remember my mom making a version of this when I was little, especially for birthdays and holidays. It wasn’t fussy, it wasn’t complicated, but it tasted like pure magic. Whenever I pull out a tub of Cool Whip these days, it instantly takes me back. It’s the kind of frosting that makes even the simplest cake feel like a gourmet dessert, and honestly, it’s a lifesaver on those nights when you’re craving something sweet but don’t want to spend hours in the kitchen. It’s so unbelievably simple, yet the results are surprisingly elegant. Forget those complicated buttercream recipes that require precise temperatures and endless whipping; this Cool Whip frosting is the ultimate shortcut to deliciousness, and it tastes so much better than you’d expect!
What is cool whip frosting?
So, what exactly is this magical concoction we call Cool Whip frosting? At its heart, it’s a delightfully simple frosting made primarily from frozen whipped topping (like the popular Cool Whip brand) combined with a few other pantry staples. Think of it as the easiest buttercream’s cooler, more laid-back cousin. It’s essentially a stabilized whipped cream that holds its shape beautifully and has a sweet, airy texture that’s just divine. It’s not heavy like a traditional buttercream, which is one of the things I adore about it. It’s light, fluffy, and incredibly versatile. The “frosting” part comes from how we sweeten and flavor it, transforming that plain whipped topping into something truly special that’s ready to adorn any cake, cupcake, or even just a bowl of fruit!
Why you’ll love this recipe?
Honestly, where do I even begin with why this recipe is a total game-changer? First off, the flavor is just *chef’s kiss*. It’s delicately sweet, not overpoweringly so, with that signature light and airy texture that’s just addictive. It’s the kind of frosting that melts in your mouth. But the real magic lies in its sheer simplicity. You can whip this up in mere minutes, which is a lifesaver for busy parents like me or anyone who’s ever needed a last-minute dessert solution. And let’s talk about cost-efficiency! Cool Whip is incredibly budget-friendly, and the other ingredients are common pantry staples, making this a fantastic option for feeding a crowd without breaking the bank. I also love how versatile it is. While it’s incredible on a basic chocolate or vanilla cake, I’ve used it on Red Velvet, carrot cake, and even spread it on graham crackers for a quick treat. It really shines when you want something that feels celebratory but doesn’t demand a ton of effort. It’s the unsung hero of my dessert repertoire, perfect for those spontaneous sweet cravings or when you want to impress without the stress. It truly stands out because it delivers maximum flavor and visual appeal with minimal effort, which, let’s be honest, is pretty much the dream!
How do I make cool whip frosting?
Quick Overview
Making this Cool Whip frosting is almost ridiculously easy. You’ll simply thaw your whipped topping, whip it up with some powdered sugar and flavoring until it’s light and fluffy, and then maybe add a secret ingredient or two for extra oomph. It’s the kind of recipe where you can genuinely have a beautiful frosting ready to go in under 10 minutes. The key is using good quality ingredients and not overmixing, which I’ll get into. It’s perfect for decorating cakes, cupcakes, cookies, or even just dolloping on fruit. It’s the ultimate crowd-pleaser that requires minimal fuss.
Ingredients
For the Base Frosting: For the Base Frosting: For the Base Frosting: For the Base Frosting: For the Base Frosting: For
1 (8 ounce) container frozen whipped topping, thawed (I always use the original, full-fat kind for the best texture)
1/2 cup powdered sugar, sifted (sifting is key to avoid lumps!)
1 teaspoon vanilla extract (use good quality vanilla, it really makes a difference)
Optional additions for flavor boost:
2 tablespoons Cream Cheese, softened (for extra tang and stability)
1/4 cup Sweetened Condensed Milk (for a richer, sweeter frosting)
Zest of 1 lemon or lime (for a bright, citrusy twist)
A few drops of food coloring (if you’re feeling festive!)
Step-by-Step Instructions
Step 1: Thaw and Prep the Whipped Topping
This is the absolute foundation of your frosting. Take your container of frozen whipped topping out of the freezer and let it thaw in the refrigerator for at least a few hours, or on the counter for about 30-60 minutes if you’re in a hurry. You want it completely thawed but still nice and cold. Don’t let it get warm and soupy; that’s the quickest way to a runny frosting. I usually plan this the night before to be safe. Make sure your bowl and mixer attachments are also chilled; it helps keep everything nice and firm.
Step 2: Whip the Base
Pour the thawed whipped topping into a large mixing bowl. If you’re using the Cream Cheese for extra stability, add it now. Beat on medium speed for about 1-2 minutes until it’s smooth and slightly increased in volume. It should look light and fluffy but not overly airy yet. This step is just about getting a good base to work with.
Step 3: Add Dry Ingredients and Flavorings
Gradually add the sifted powdered sugar, about a tablespoon at a time, beating on low speed until just combined. This prevents a sugar cloud from exploding in your kitchen! Once the powdered sugar is mostly incorporated, add your vanilla extract and any other flavorings you’re using, like the sweetened condensed milk or citrus zest. If you’re using cream cheese, make sure it’s fully incorporated here.
Step 4: Whip to Perfection
Now, increase the mixer speed to medium-high and whip for another 2-3 minutes. You’re looking for a smooth, fluffy frosting that holds stiff peaks. It should look like classic frosting consistency, ready to pipe or spread. Be careful not to overmix at this stage, as it can start to break down and become watery. Stop as soon as you reach that perfect, soft-peak stage.
Step 5: Incorporate Optional Additions
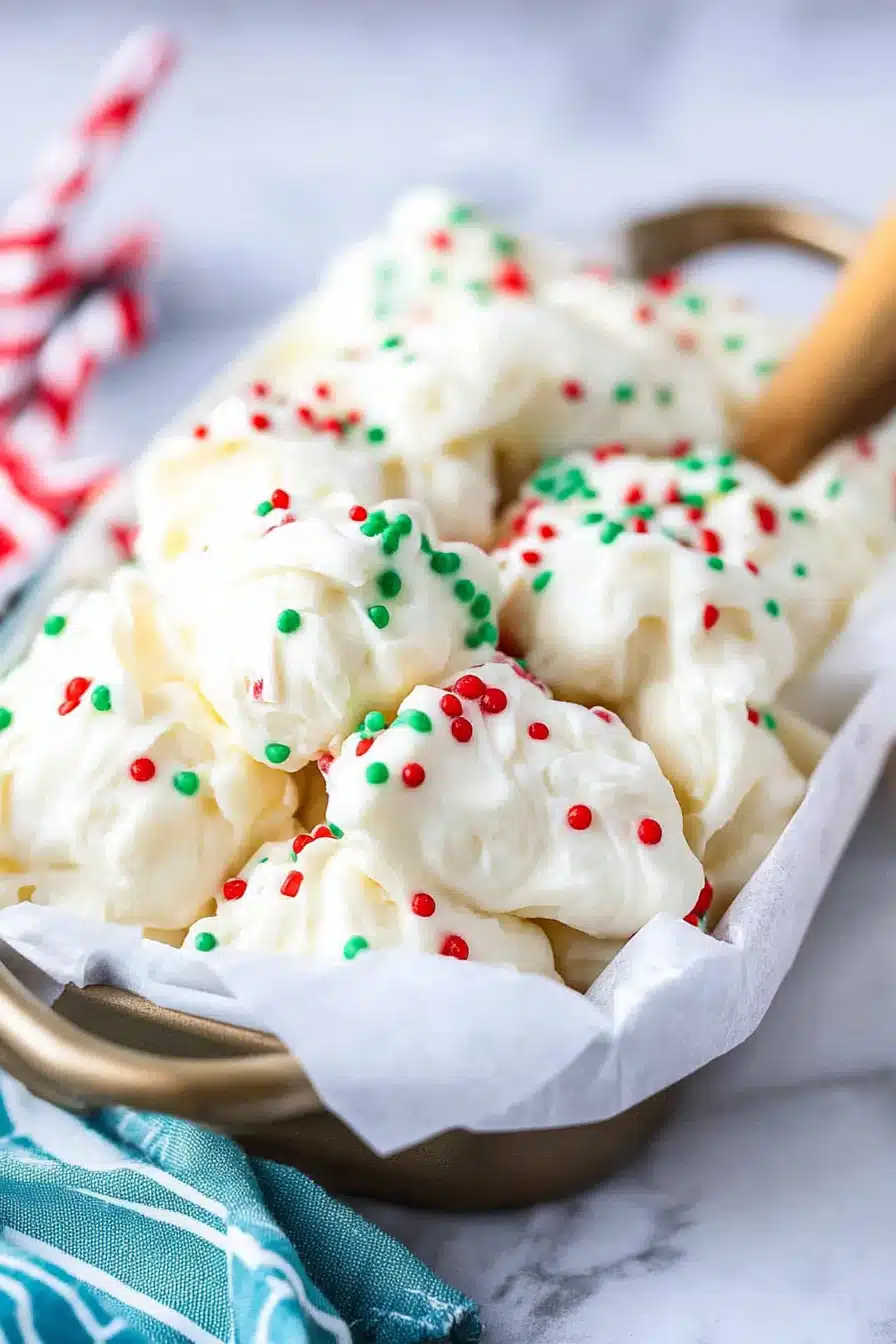
If you want to add color, this is the time! Add a drop or two of food coloring and gently fold it in with a spatula until evenly distributed. If you’re adding sprinkles or tiny chocolate chips for texture, fold those in now too. Just a light hand here ensures you don’t deflate all that lovely fluffiness you just whipped up.
Step 6: Chill Briefly (Optional but Recommended)
For the absolute best consistency, especially if you plan to pipe it, I highly recommend covering the bowl and chilling the frosting in the refrigerator for about 15-30 minutes. This firms it up beautifully and makes it a dream to work with. It’s not strictly necessary, but trust me, it’s worth the little bit of extra wait time for a truly professional finish.
Step 7: Frost Your Creation
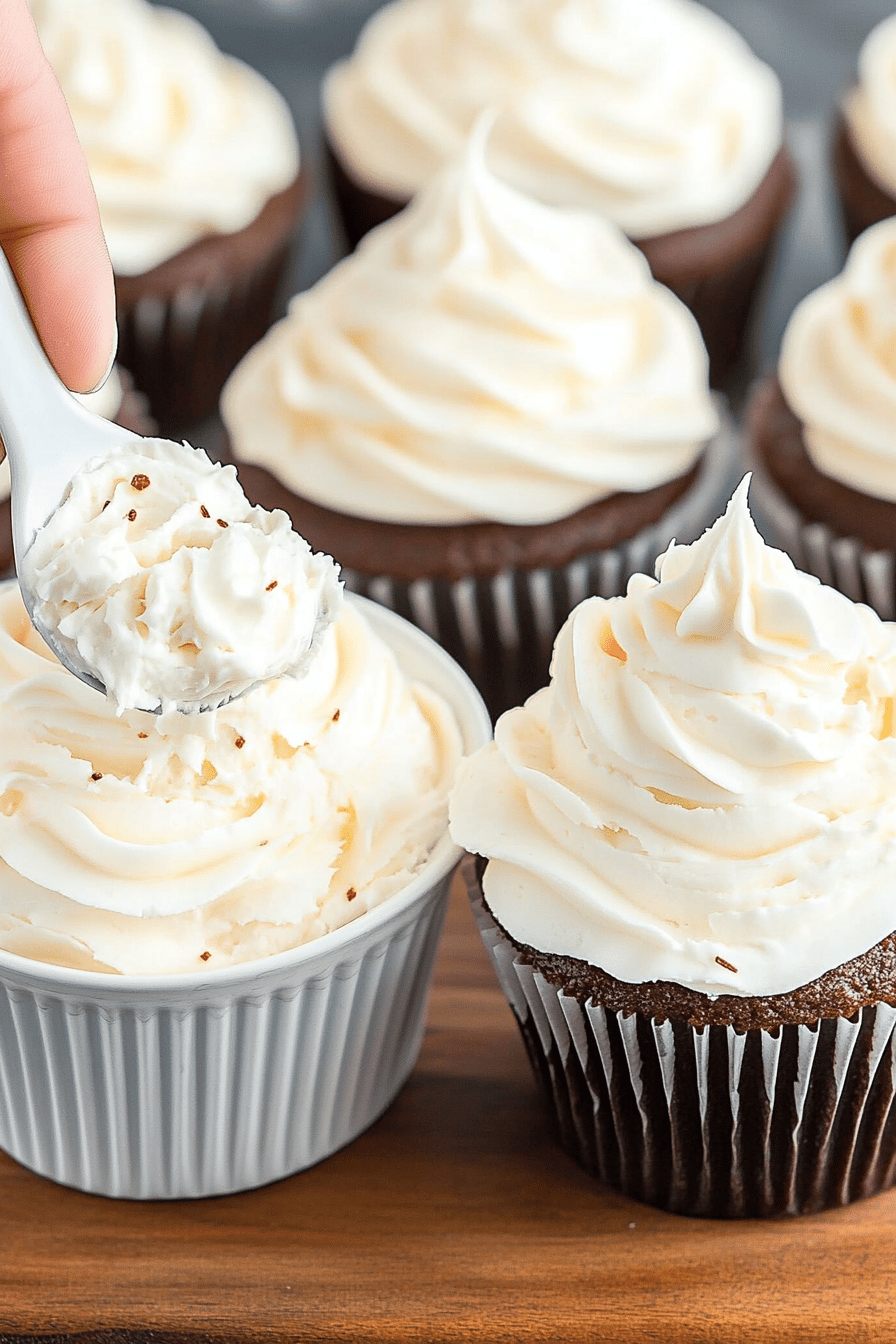
Once chilled (or if you’re frosting immediately), your Cool Whip frosting is ready! Use an offset spatula to spread it smoothly over your cooled cake or cupcakes. If you’re using a piping bag, transfer the frosting to the bag fitted with your favorite tip. It pipes beautifully and holds its shape wonderfully.
Step 8: Decorate and Admire
Add any final touches like sprinkles, fresh fruit, or chocolate shavings. Step back and admire your gorgeous, delicious creation! The best part is knowing how easy it was to achieve such a stunning result.
Step 9: Serve and Enjoy
Serve your frosted treats immediately or store them as directed. This frosting is best served at room temperature or slightly chilled, depending on your preference and the cake it’s on. Enjoy the smiles and compliments that are sure to follow!
What to Serve It With
This Cool Whip frosting is so versatile, it’s practically begging to be paired with all sorts of baked goods and desserts. For a simple, comforting breakfast treat, I love spreading it on warm, toasted English muffins or even just as a dollop on fresh fruit salad. My kids are obsessed with it on fluffy pancakes or waffles – it’s like a special occasion breakfast any day of the week! For a more elegant brunch, it’s absolutely divine as a filling for delicate choux pastry puffs or piped onto mini cheesecakes. It adds a lightness that prevents them from feeling too heavy. As a dessert, well, the possibilities are endless! It’s perfect on cupcakes (chocolate, vanilla, funfetti – you name it!), as the topping for a layered icebox cake, or even spread between two cookies for an instant sandwich cookie. I’ve even made a simple chocolate cake, frosted it with this, and served it with fresh berries – pure bliss. For those cozy snack moments, it’s incredible on a slice of pound cake or swirled into hot chocolate for an extra decadent treat. The key is its lightness; it never overpowers the dessert it’s adorning, allowing the main flavors to shine while adding that delightful creamy finish.
Top Tips for Perfecting Your Cool Whip Frosting
Over the years, I’ve picked up a few tricks that make this already simple recipe even better. First, always, always, *always* use a full-fat whipped topping. The reduced-fat versions just don’t have the same stability or flavor, and they can lead to a runny frosting. Trust me on this one; it’s worth the splurge. When it comes to powdered sugar, sifting is non-negotiable. It ensures your frosting is super smooth and free of gritty lumps. I learned that the hard way early on! If you’re adding cream cheese, make sure it’s truly softened, not melted. You want it to blend in seamlessly without lumps. I usually leave my cream cheese out on the counter for at least an hour before I start. For that extra richness, sweetened condensed milk is my secret weapon. It adds a lovely depth of flavor and a wonderful silky texture, but be mindful that it also adds sweetness, so you might want to slightly reduce the powdered sugar if you use it. When it comes to mixing, the key is to stop as soon as it’s combined and fluffy. Overbeating can cause the frosting to break down and become oily or watery. If this happens, don’t panic! You can try chilling it for a bit, or sometimes adding a tablespoon or two more of sifted powdered sugar can help bring it back. For piping, chilling the frosting for 20-30 minutes is a game-changer. It makes it firm enough to hold intricate designs without drooping. I’ve also found that if I’m making a larger batch for a sheet cake, using a hand mixer instead of a stand mixer gives me a bit more control over the mixing process. Lastly, don’t be afraid to experiment with flavorings! A little almond extract instead of vanilla, a tablespoon of cocoa powder for chocolate frosting, or even a swirl of fruit puree can elevate this basic frosting into something truly unique. It’s incredibly forgiving, which is why I love it so much.
Storing and Reheating Tips
Proper storage is key to keeping this delicious Cool Whip frosting at its best. If you’ve frosted a cake or cupcakes and have leftovers, the best place is the refrigerator. Cover the entire dessert loosely with plastic wrap or use a cake carrier to prevent it from drying out or absorbing other odors. It will stay fresh and delicious in the fridge for about 3-4 days. If you have unfrosted frosting left over, transfer it to an airtight container and pop it in the fridge. It should last for up to a week that way. I’ve also had success freezing this frosting! Once it’s made, spoon it into a freezer-safe container or a heavy-duty zip-top bag, removing as much air as possible. It can be frozen for up to 1-2 months. To thaw, transfer it to the refrigerator overnight. You might need to give it a quick whisk or beat it for a minute with your mixer to restore its original fluffy texture. I don’t recommend leaving frosted desserts at room temperature for more than a couple of hours, especially if you’ve added cream cheese or other dairy ingredients, as they can spoil. For reheating, you generally don’t “reheat” frosting, but if it’s become a bit firm from refrigeration, just let it sit on the counter for about 15-20 minutes, or give it a quick whisk, and it should be perfectly spreadable again. If your frosting is already on a cake, and you’re serving it straight from the fridge, a little time on the counter will make it much softer and more pleasant to eat.
Frequently Asked Questions
Final Thoughts

So there you have it – my go-to recipe for the easiest, most delightful Cool Whip frosting! It’s a testament to the fact that sometimes, the simplest things are truly the best. This frosting brings back so many happy memories for me, and I just know it’s going to become a favorite in your kitchen too. It’s perfect for those times when you want a homemade touch without the fuss, delivering a wonderfully creamy, sweet finish to any dessert. I really hope you give it a try and experience the magic for yourself. It’s proof that you don’t need a dozen ingredients or hours of your time to create something truly delicious and beautiful. If you try this frosting, please let me know how it turns out in the comments below! I’d love to hear about your favorite ways to use it or any fun flavor variations you come up with. Happy baking, and enjoy every sweet, fluffy bite!

Cool Whip Frosting
Ingredients
Main Ingredients
- 1 package Cool Whip, thawed
- 0.5 cup powdered sugar
- 0.5 teaspoon vanilla extract
Instructions
Preparation Steps
- In a medium bowl, combine the thawed Cool Whip, powdered sugar, and vanilla extract.
- Beat with an electric mixer on low speed until well combined and smooth. If needed, beat on medium speed for a minute to achieve a fluffier consistency.
- Use immediately to frost cakes, cupcakes, or cookies.