cauldron cupcakes
There’s something utterly magical about grabbing a warm, sweet treat right out of the oven, especially when it looks like it belongs in a storybook. Cauldron cupcakes have been a favorite discovery of mine for years—a little twist on the usual cupcake that feels like you’re stirring up a potion in a witch’s kitchen. I first made these for Halloween, but truth be told, my family requests them year-round. The rich chocolate aroma fills the air and makes the whole kitchen cozier in seconds. If you think you need hours or fancy ingredients to impress, think again. These cupcakes are surprisingly simple, but with the flavor punch and visual charm that’ll have everyone asking for seconds – or thirds.
What is a Cauldron Cupcake?
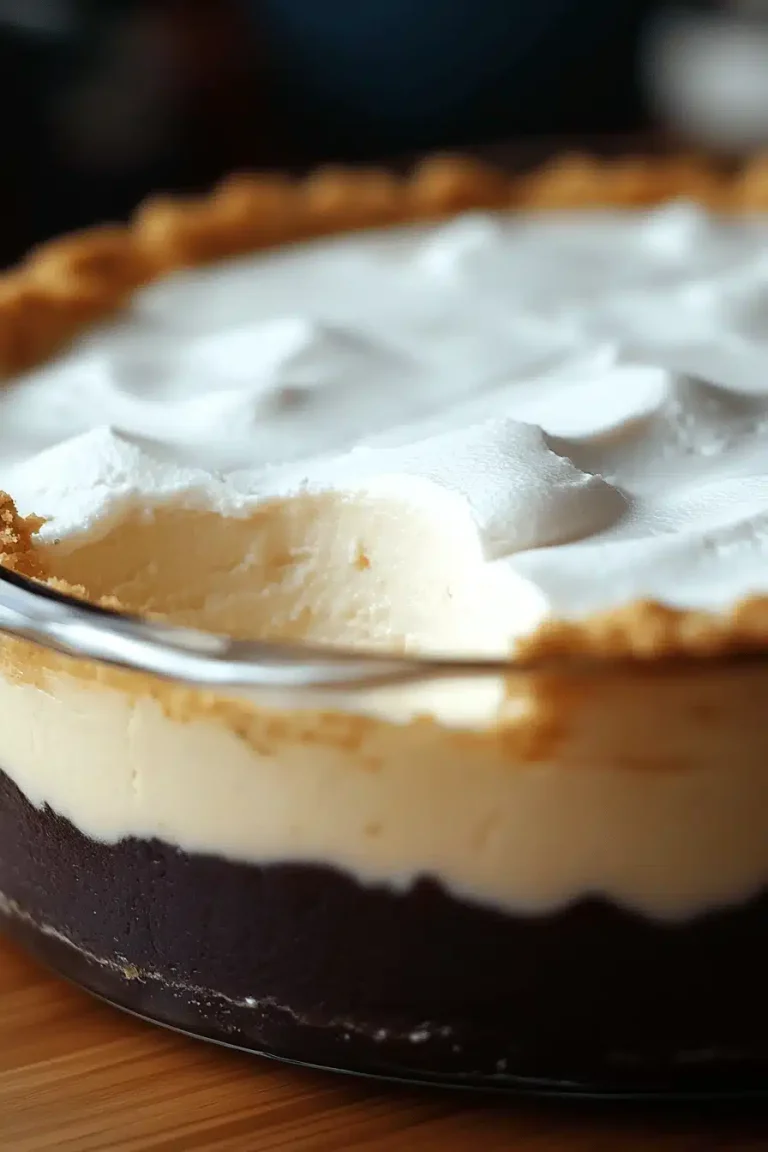
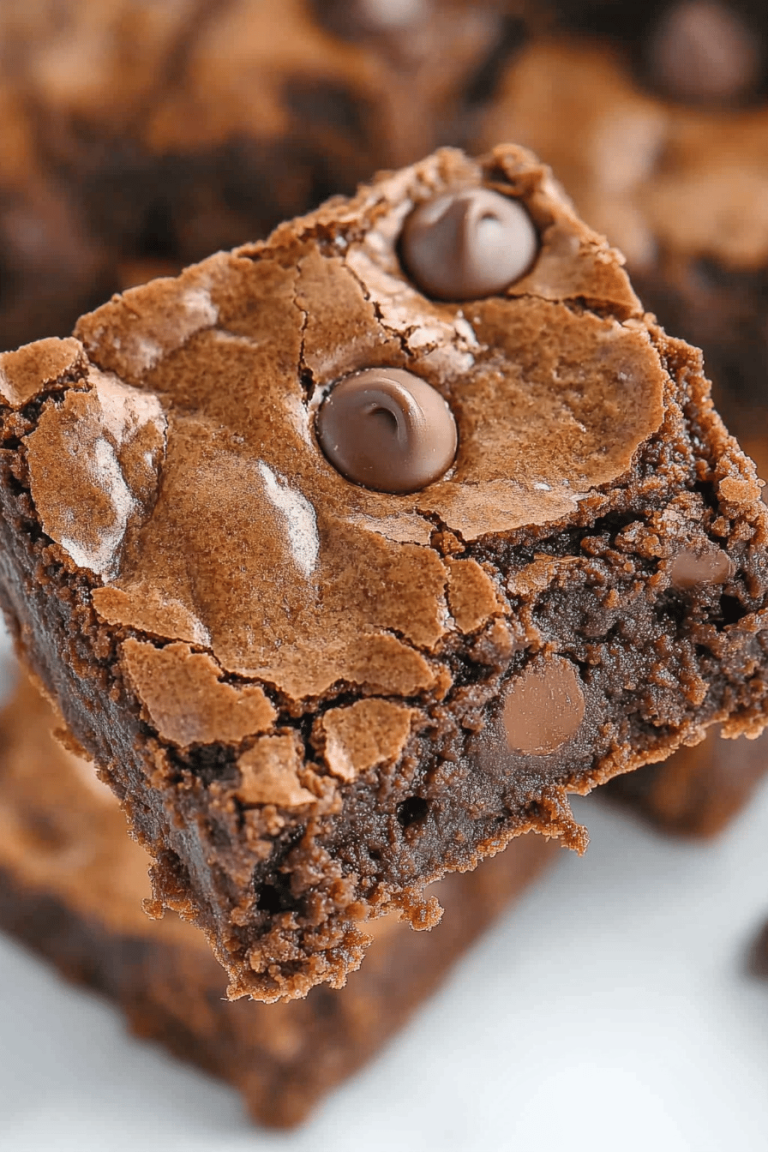
Think of cauldron cupcakes as a playful riff on your classic chocolate cupcake, but with a molten center that’s pure magic. The name “cauldron” comes from the way the gooey filling simmers inside the cupcake, just like a bubbling witch’s cauldron. It’s essentially a chocolate cupcake shell wrapped around a luscious, melty center—imagine biting into a bite-sized cauldron of chocolate lava. Not only are they visually fun, but they also sneak in a little surprise inside with every bite.
These cupcakes are perfect for when you want to wow friends or keep a little family tradition alive without breaking a sweat. If you love molten lava cakes but dread the fuss, cauldron cupcakes are your shortcut. Plus, they’re adaptable, so you can swap fillings or toppings to keep things exciting. It’s like comfort baking with a little whimsical charm thrown in.
Why you’ll love this recipe?
What I adore most about these cauldron cupcakes is that they combine rich chocolate decadence with an easy, no-fail method. The flavor is deep and indulgent—the kind of chocolate that melts on your tongue and somehow tastes better than anything from a fancy bakery. And yep, they’re pretty straightforward to whip up, even if baking’s not your usual jam. I promise, if you follow the steps and trust the ingredients, you’ll end up with bakery-quality cupcakes right at home.
Cost-wise, they’re super budget-friendly. You probably already have most of the ingredients tucked away, so it’s a no-brainer when you want a sweet fix without making a trip to the store. Plus, you can get creative with the filling—sometimes I sneak in peanut butter, other times a raspberry jam for a tangy surprise. This versatility means you don’t get bored, and every batch has its own personality.
My family especially loves these on busy nights when we need a quick dessert to round off dinner. The cupcake format keeps everything tidy and shareable, unlike a messy cake. If you’re a chocolate lover (and let’s be honest, who isn’t?), cauldron cupcakes might just become your new favorite, too. They’ve got that wonderful balance of fluffy cake and gooey center that totally hits the spot every time.
How do you make a Cauldron Cupcake?
Quick Overview
Making cauldron cupcakes is a bit like baking two treats in one. You prepare a smooth chocolate cupcake batter, then tuck in a luscious filling before baking. The secret is not overmixing your batter—because that’s where you get perfect fluffiness without a brick. Once baked, these little beauties have that irresistible molten middle, all wrapped in a cozy chocolate shell. Honestly, once you dip into your first warm cupcake oozing that filling, you’ll understand why they’re so addictive.
Ingredients
For the Main Batter:
– 1 1/2 cups all-purpose flour (I always sift mine for extra lightness)
– 3/4 cup unsweetened cocoa powder (choose Dutch-processed if you like a deeper chocolate flavor)
– 1 1/2 tsp baking powder
– 1/4 tsp baking soda
– 1/4 tsp salt
– 3/4 cup granulated sugar
– 1/2 cup vegetable oil (or light olive oil for a subtle twist)
– 2 large eggs, at room temperature
– 1 tsp vanilla extract
– 3/4 cup whole milk (I’ve tested almond milk too, and it surprisingly makes the cupcakes creamier!)
For the Filling:
– 1/2 cup semi-sweet chocolate chips or chunks (for that gooey heart)
– Optional: 2 tbsp peanut butter or raspberry jam for variation
For the Glaze:
– 1/2 cup powdered sugar
– 2 tbsp unsweetened cocoa powder
– 2–3 tbsp milk (adjust to get a pourable consistency)
– A pinch of salt to balance sweetness
– Optional: splash of vanilla or espresso for richer flavor
Step-by-Step Instructions
Step 1: Preheat & Prep Pan
Start by preheating your oven to 350°F (175°C). Line a muffin tin with cupcake liners or give it a light spray of non-stick spray—this makes it so much easier to pop them out later. I usually place the rack in the middle of the oven to get even heat distribution.
Step 2: Mix Dry Ingredients
In a large bowl, sift together the flour, cocoa powder, baking powder, baking soda, and salt. This step helps avoid lumps and ensures everything is evenly combined. It’s worth taking your time here; the batter will feel smoother and produce fluffier cupcakes.
Step 3: Mix Wet Ingredients
Grab another bowl and whisk together sugar, eggs, oil, vanilla, and milk until it’s smooth and shiny. If your eggs just came from the fridge, pop them in warm water for a few minutes first—they’ll combine more easily.
Step 4: Combine
Now pour the wet into the dry ingredients and gently fold them together with a spatula. Be careful not to overmix—you’re looking for just a few streaks of flour to disappear. If you stir too much, the texture gets dense instead of light and tender.
Step 5: Prepare Filling
For the classic version, I simply use semi-sweet chocolate chips as the filling. If you’re feeling adventurous, mix in a bit of peanut butter or swirl some raspberry jam into the chips for a berry twist. The filling should be soft but not runny.
Step 6: Layer & Swirl
Scoop about a tablespoon of cupcake batter into each liner. Then place a small spoonful of your chocolate filling in the center. Cover that with more batter until the liner is about 3/4 full. For extra fun, swirl the filling gently with a toothpick to create a pretty marbled effect—you’ll see the molten magic even before the first bite.
Step 7: Bake
Bake for 18–22 minutes. You want to catch them right when the tops spring back but the center still feels a bit soft. A toothpick inserted nearby should come out mostly clean but not completely dry—this is how you get the gooey center inside. Ovens vary a bit, so keep an eye as you near the end.
Step 8: Cool & Glaze
Let the cupcakes cool in the pan for about 10 minutes so they don’t fall apart. Then transfer them to a wire rack to cool completely. Mix powdered sugar, cocoa powder, milk, and salt to a drizzle-able consistency for the glaze. Once cooled, drizzle the glaze over each cupcake. It sets quickly but adds a touch of shine and extra chocolate kick.
Step 9: Slice & Serve
These cupcakes are best served warm or at room temperature—if you’re impatient like me, warming one for just 5 seconds in the microwave revives the molten center perfectly. Slice one in half to reveal the gooey chocolate heart and watch it ooze out. It’s such a satisfying moment. Serve with a glass of cold milk or a cup of coffee and you’ll be sold.
What to Serve It With
For Breakfast: A simple pairing of cauldron cupcakes with a creamy latte or rich drip coffee is a delightful morning surprise. I sometimes add a few fresh berries on the side for a little brightness.
For Brunch: Present these on a tiered tray alongside fruit salad and a mimosa for a festive brunch. I like slipping a dollop of whipped cream or a few toasted nuts on top for a bit of crunch and creaminess.
As Dessert: Serve warm with a scoop of vanilla bean ice cream or a drizzle of salted caramel for an indulgent after-dinner treat. A sprinkle of sea salt over the glaze elevates the sweet and salty contrast that my kids love.
For Cozy Snacks: These are the ultimate comfort food companions when curled up with a book. Pair with your favorite cup of hot chocolate or chai tea, and you’ve got a snack that’s almost too good to share.
My family’s tradition is to make these for a casual weekend dessert, often paired with homemade lemonade in the summer or spiced apple cider in the fall. It’s funny how something so simple can become that little ritual we all look forward to.
Top Tips for Perfecting Your Cauldron Cupcakes
Chocolate Prep: When grating or chopping chocolate for the filling, aim for small chunks that melt evenly. I learned the hard way that big chunks sometimes just stay solid inside, which isn’t quite as magical.
Mixing Advice: Resist the urge to overmix your batter—fold just until the flour disappears. Overmixing develops gluten and results in tougher cupcakes. The batter should be a bit thick but pourable.
Swirl Customization: For extra flair, try swirling a little cream cheese or flavored jams before baking. Use a toothpick to create fun patterns but don’t swirl too aggressively or your cupcakes won’t rise well.
Ingredient Swaps: I’ve swapped regular flour for gluten-free blends with good success—just add a little extra moisture like a splash of yogurt or apple sauce. Coconut oil works as a substitute for vegetable oil, though it adds a subtle coconut hint.
Baking Tips: If your cupcakes brown too quickly, tent with foil halfway through baking. Oven hot spots vary, so rotating the tray halfway helps too. A toothpick test near the edges rather than the middle gives a better sense of doneness without poking the gooey center.
Glaze Variations: For those who aren’t into cocoa, a
Magical Witch's Cupcakes How to Make Them
Ingredients
Main Ingredients
- 15.25 ounce devil's food cake mix
- 1.25 cups water
- 0.67 cups vegetable oil
- 3 large eggs
- 3.3 ounce instant white chocolate pudding mix
- 2 cups milk
- drops neon green food coloring add to desired color
- 4 tablespoons butter unsalted
- 10 ounces marshmallows miniature
- 6 cups Rice Krispies cereal
- amount Halloween sprinkles for decorating
Instructions
Preparation Steps
- Preheat the oven to 350°F and place cupcake liners in 24 muffin tins.
- In a medium bowl, mix the devil's food cake mix, water, vegetable oil, and eggs until well blended.
- Pour the batter evenly into the prepared cupcake liners and bake for 25 minutes. Allow cupcakes to cool completely and remove liners.
- Gently press each cupcake down slightly to create space on top for the pudding potion layer.
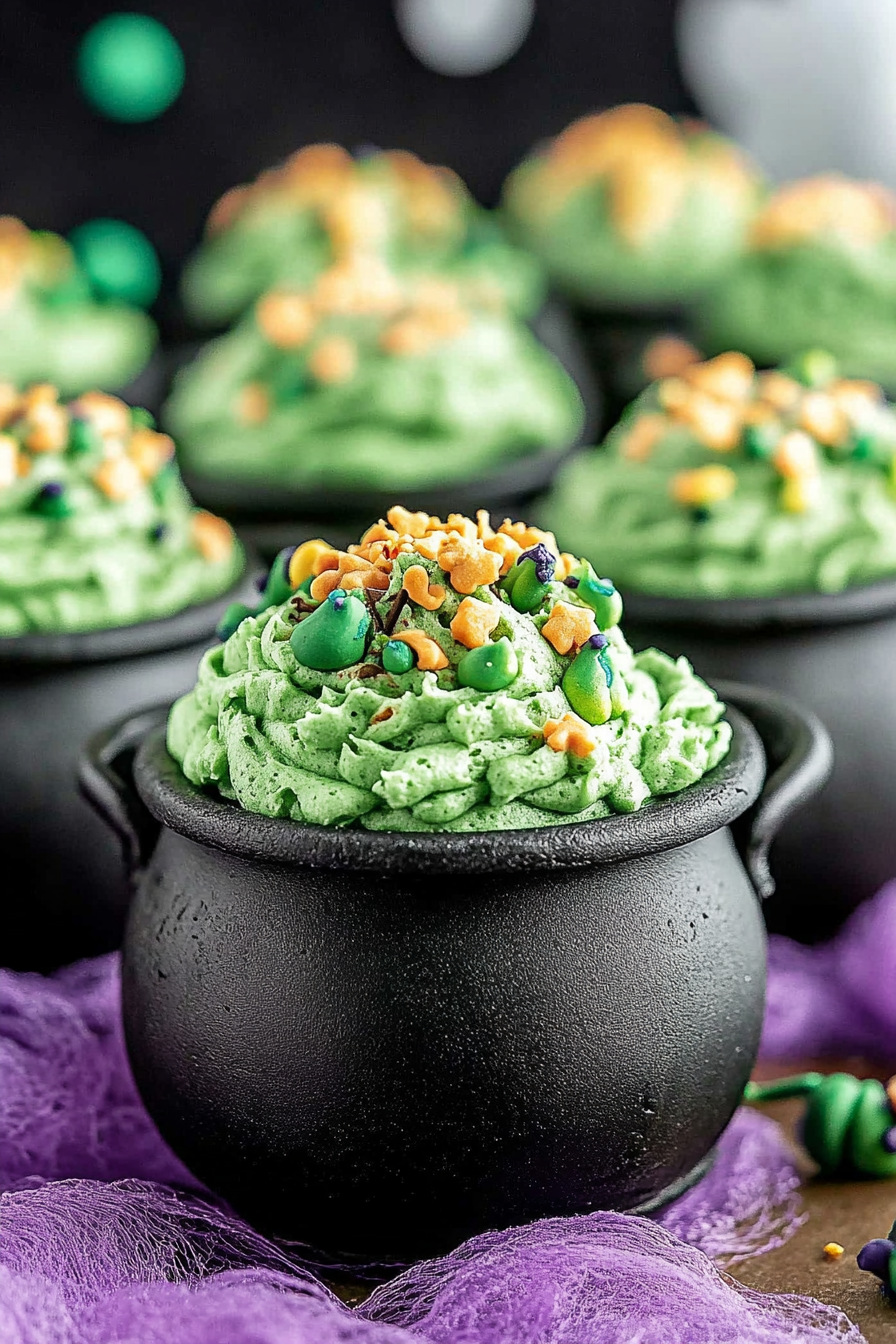
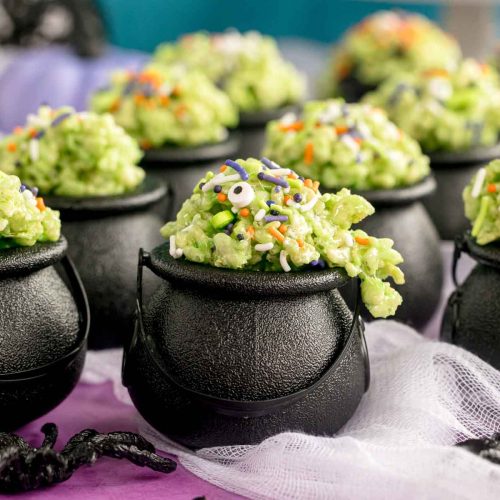
- Whisk the instant pudding mix and milk together until smooth. Add neon green food coloring drop by drop and whisk until the color is uniform and vibrant.
- Spoon the green pudding over each cupcake, filling the hollow but not overflowing.
- Chill the cupcakes in the refrigerator for 2 hours to set the pudding layer.
- Melt the butter in a large pot over medium heat, then add marshmallows and stir until fully melted and smooth.
- Add green food coloring to the melted marshmallows and mix well. The color should be a dark green as it will lighten when mixed with the cereal.
- Stir the Rice Krispies into the green marshmallows until evenly coated.
- Immediately spoon the Rice Krispies mixture on top of the pudding on each cupcake before the marshmallows cool and harden.
- While the Rice Krispies are still warm, decorate with Halloween sprinkles.