chocolate cookies
You know those days? The ones where everything feels a little *much*, and all you really want is a warm, gooey hug in edible form? For me, that hug always comes in the shape of a perfect chocolate cookie. Not those crisp, delicate ones that shatter when you bite them, but the ones with a delightfully chewy center, slightly crisp edges, and pockets of melted chocolate that ooze with every bite. This recipe? It’s my tried-and-true, my secret weapon, the one I’ve made so many times I can practically whip it up in my sleep. It’s what I turn to when I need a little comfort, when the kids are begging for a treat, or when I just have a serious chocolate cookie craving that only a truly spectacular cookie can satisfy. It’s honestly more like a little piece of heaven than just a cookie, and it’s the one I always reach for over anything else.
What are chocolate cookies?
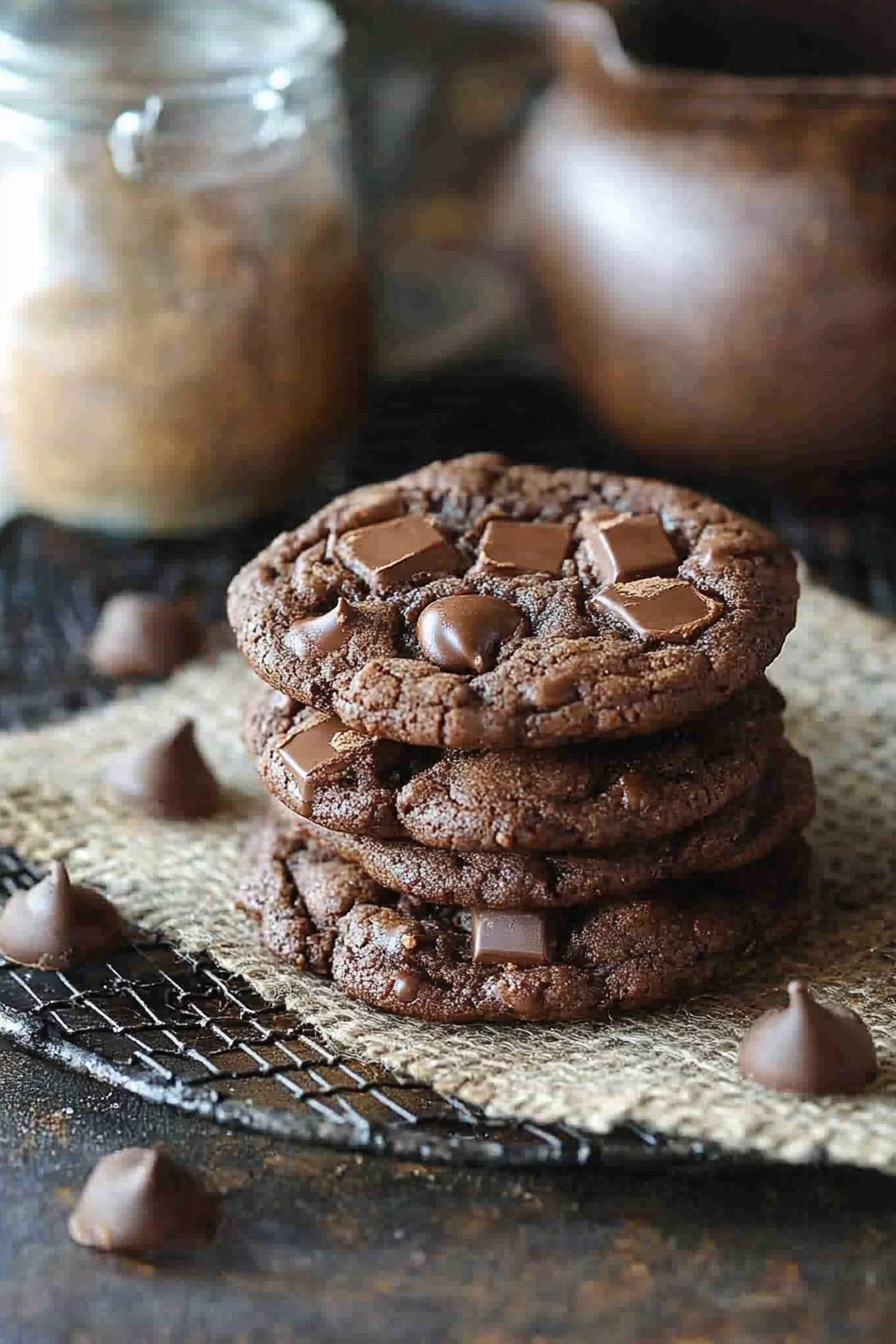
So, what exactly are these magical chocolate cookies? Think of them as the ultimate classic chocolate chip cookie, but dialed up to eleven. They’re the kind of cookie that doesn’t just taste good; it *feels* good. We’re talking about a rich, buttery dough studded with generous amounts of both dark and milk chocolate chips, baked just until the edges are golden and the centers are still wonderfully soft. They’re the perfect balance – not too cakey, not too crisp, but gloriously chewy. The magic really comes from a couple of simple tricks that make all the difference in achieving that perfect texture and deep chocolate flavor. It’s not complicated, but it’s those little nuances that elevate a good cookie to an absolutely unforgettable one. They’re the kind of chocolate cookies you dream about, and I’m so excited to share them with you!
Why you’ll love this recipe?
Honestly, there are so many reasons I keep coming back to this chocolate cookie recipe, and I have a feeling you’ll fall in love with it too. First off, the flavor is just out of this world. It’s that deep, rich chocolatey goodness that hits all the right notes, with a hint of caramel from the brown sugar and that irresistible butteriness that only comes from good quality ingredients. And the texture? Oh my goodness, the texture! They’re perfectly chewy in the middle, with just a slight crisp around the edges that gives you that satisfying bite. They’re not too sweet, not too bland – just right.
Then there’s the simplicity of it all. Even if you’re not a seasoned baker, you can totally nail this recipe. I’ve made these on the busiest weeknights when I’ve only got about 30 minutes to spare, and they still turn out spectacularly. The ingredients are all pantry staples, so you probably already have most of what you need. Plus, they’re incredibly cost-effective, especially compared to buying fancy cookies from a bakery. You get a huge batch of delicious chocolate cookies for a fraction of the price.
And the versatility! While they’re pure perfection on their own, you can easily tweak them. Want more chocolate? Add some chocolate chunks in addition to the chips. Feeling fancy? A sprinkle of sea salt on top before baking is *chef’s kiss*. They’re amazing as is, but they also make a fantastic base for adding your own personal touch. What I love most about these chocolate cookies is that they’re forgiving. Even if you slightly overbake them, they’ll likely still be delicious, and they never fail to bring smiles to people’s faces. They’re more than just a recipe; they’re a little bit of happiness, baked right into your kitchen.
How do you make Chewy Chocolate Cookies?
Quick Overview
In a nutshell, making these amazing chocolate cookies involves creaming butter and sugars, adding in eggs and vanilla, then gently mixing in your dry ingredients until just combined. The secret to their perfect texture lies in chilling the dough for a bit before baking, which allows the flavors to meld and prevents them from spreading too much. Then, a quick bake until they’re golden around the edges but still soft in the center, and voilà! You’ve got yourself the best chewy chocolate cookies you’ve ever made. It’s a straightforward process that yields incredibly rewarding results.
Ingredients
For the Main Batter:
Unsalted Butter: 1 cup (2 sticks), softened. Make sure it’s softened, not melted! This is key for that creamy texture. I always use unsalted so I can control the salt content myself.
Granulated Sugar: 1/2 cup. This helps with the crisp edges.
Packed Light Brown Sugar: 1 cup. This is where the chewiness comes from, plus it adds a lovely caramel note.
Large Eggs: 2. Room temperature is best, they incorporate more easily into the batter.
Vanilla Extract: 2 teaspoons. Don’t skimp here; good quality vanilla makes a big difference!
All-Purpose Flour: 2 1/4 cups. Spooned and leveled, not scooped! Scooping can pack too much flour in.
Baking Soda: 1 teaspoon. This gives them a little lift but keeps them from spreading too thin.
Salt: 1/2 teaspoon. Balances the sweetness and enhances the chocolate flavor.
Chocolate Chips: 2 cups total. I love a mix of semi-sweet and milk chocolate chips for a balanced flavor, but use your favorites! Ghirardelli is my go-to.
Step-by-Step Instructions
Step 1: Preheat & Prep Pan
First things first, let’s get your oven preheated to 375°F (190°C). Line your baking sheets with parchment paper. This is a lifesaver for easy cleanup and ensures your cookies don’t stick. I usually prep two baking sheets so I can bake them one after the other.
Step 2: Mix Dry Ingredients
In a medium bowl, whisk together the flour, baking soda, and salt. Whisking them well ensures that the baking soda and salt are evenly distributed, which means your cookies will bake up evenly. Nobody wants a bite that’s too salty or has a baking soda aftertaste, right?
Step 3: Mix Wet Ingredients
In a large bowl, cream together the softened butter, granulated sugar, and packed light brown sugar using an electric mixer (or a sturdy whisk and some elbow grease!) until light and fluffy. This usually takes about 2-3 minutes. Beat in the eggs one at a time, making sure each is fully incorporated before adding the next. Then, stir in the vanilla extract. The mixture should be smooth and well combined.
Step 4: Combine
Gradually add the dry ingredients to the wet ingredients, mixing on low speed or by hand until *just* combined. It’s really important not to overmix here! Overmixing can lead to tough cookies, and we want chewy ones! Stop mixing as soon as you no longer see streaks of flour. Gently fold in the chocolate chips with a spatula.
Step 5: Prepare Filling (Not applicable for this cookie recipe, as it’s a direct mix)
This step is actually skipped for these classic chocolate cookies! We’re not making a separate filling. The chocolate chips are mixed right into the dough, which is how we get those delightful pockets of melty goodness throughout the cookie.
Step 6: Layer & Swirl (Not applicable for this cookie recipe)
Again, for these straightforward chocolate cookies, we’re not layering or swirling. The magic is in the dough itself and how it bakes up. Once the dough is ready with the chocolate chips mixed in, we’ll move straight to portioning it.
Step 7: Bake
Drop rounded tablespoons of dough onto the prepared baking sheets, leaving about 2 inches between cookies. This recipe makes about 2-3 dozen cookies, depending on size. Bake for 9-11 minutes, or until the edges are golden brown and the centers look slightly underdone. They’ll continue to cook a bit on the hot baking sheet after you take them out, which is exactly what we want for that perfect chewy texture.
Step 8: Cool & Glaze (Glaze is optional)
Let the cookies cool on the baking sheets for about 5 minutes before transferring them to a wire rack to cool completely. This allows them to set up properly. If you like, you can certainly drizzle a simple chocolate glaze over them once they’re mostly cooled, but honestly, they’re phenomenal just as they are!
Step 9: Slice & Serve
Once completely cool (or still slightly warm if you can’t resist!), these chocolate cookies are ready to be devoured. They’re perfect with a glass of cold milk, a cup of coffee, or just enjoyed on their own. Slice them if you need to share, but I won’t judge if you don’t!
What to Serve It With
These chocolate cookies are stars on their own, but they also play wonderfully with others! For a classic breakfast pairing, a steaming mug of coffee is non-negotiable. The warmth and slight bitterness of the coffee cuts through the sweetness of the cookie perfectly. If you’re feeling a bit more adventurous, a creamy latte or a rich hot chocolate can be a decadent start to the day, especially on a chilly morning. They make the kitchen smell amazing and are always a hit with the early risers in my house.
When it comes to brunch, these cookies add a touch of homemade charm to any spread. Serve them alongside some fresh fruit salad, maybe some yogurt parfaits, or even a quiche. For a more elegant presentation, I like to arrange them on a pretty platter. Beverage-wise, consider a mimosa or a sparkling cider to keep the festive vibe going. They’re a lovely sweet counterpoint to savory brunch dishes.
As dessert, these chocolate cookies are absolute showstoppers. They’re fantastic on their own, of course, but you can elevate them further by serving them warm with a scoop of good quality vanilla bean ice cream. The contrast of the warm cookie and cold ice cream is pure bliss. A drizzle of caramel sauce or a dusting of powdered sugar can also make them feel extra special after dinner. They’re perfect for movie nights too!
And for those cozy snack moments, when you just need a little pick-me-up? These cookies are your best friend. Pair them with a tall glass of ice-cold milk – it’s a childhood classic for a reason and always hits the spot. Or, if you’re feeling a bit more indulgent, a warm cup of tea or even a small glass of red wine can be a surprisingly delightful combination with the deep chocolate flavor. They’re the ultimate comfort food, perfect for curling up on the couch with a good book.
Top Tips for Perfecting Your Chocolate Cookies
I’ve made these chocolate cookies more times than I can count, and I’ve picked up a few tricks along the way that I think make a real difference. First off, the butter temperature is crucial. It needs to be softened, but not melted. If it’s too cold, it won’t cream properly with the sugar, and if it’s melted, your cookies will spread out like pancakes. I usually leave my butter on the counter for about an hour before I plan to start baking. That way, it’s perfectly pliable.
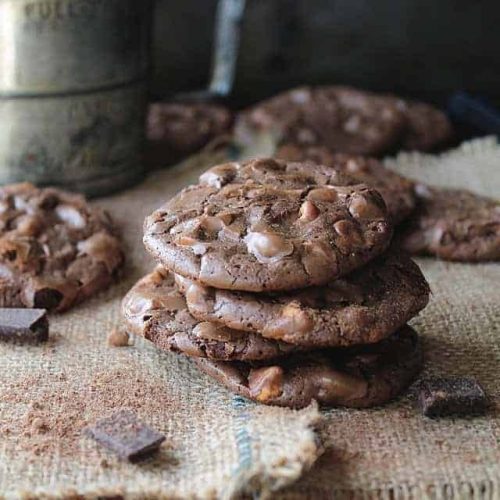
When you’re mixing the dry ingredients into the wet, listen to your mixer (or your gut!). Stop mixing as soon as you don’t see any more dry flour streaks. Overmixing develops the gluten in the flour, which can make your cookies tough and cakey instead of wonderfully chewy. A few stray streaks of flour are okay, as they’ll get incorporated when you fold in the chocolate chips. Speaking of chocolate chips, don’t be afraid to be generous! I like to use a mix of semi-sweet and milk chocolate for a more complex flavor, but any good quality chocolate chips will do. Some people even like to chop up a chocolate bar for bigger, melty chunks, which is also delicious!
Chilling the dough is a step I *never* skip, even when I’m in a hurry. It might seem like an extra step, but it’s so worth it. Chilling the dough for at least 30 minutes (or even overnight!) allows the fats to firm up. This means the cookies won’t spread out too much in the oven, leading to thicker, chewier cookies. Plus, chilling lets the flavors really meld together, making them even more delicious. If your dough gets too stiff after chilling, just let it sit at room temperature for about 10 minutes while your oven preheats.
For baking, I always recommend using parchment paper. It’s a game-changer for preventing sticking and making cleanup a breeze. I also try to make sure my cookies are roughly the same size when I scoop them onto the baking sheet. This ensures they bake evenly. If you have a cookie scoop, that’s fantastic for getting consistent portions. Bake them until the edges are just starting to turn golden brown, and the centers still look a little soft and underdone. They’ll continue to bake and set up on the hot baking sheet for a few minutes after you pull them out of the oven. This is key to achieving that perfect chewy texture!
If you want to get fancy, a sprinkle of flaky sea salt on top of the cookies *before* they go into the oven is an absolute revelation. It really makes the chocolate flavor pop and adds a delightful little crunch. And if you find your cookies are consistently spreading too much, it might be worth checking your baking soda. Old baking soda loses its leavening power, and that can affect how your cookies bake. Always make sure your baking soda is fresh for the best results. These little tips have been hard-earned through many batches, and they’re what I think really elevate these simple chocolate cookies to something truly special.
Storing and Reheating Tips
Once your amazing chocolate cookies have cooled completely, proper storage is key to keeping them tasting fresh and chewy. For room temperature storage, I usually keep them in an airtight container. They’ll stay wonderfully soft and delicious for about 3-4 days this way. If you live in a warm, humid climate, you might want to pop a paper towel in the container to absorb excess moisture, which can sometimes make them a bit too soft or even gummy if left too long.
If you find you have a lot of cookies and won’t get through them in a few days, the refrigerator is your next best bet. Store them in an airtight container, and they should keep well for up to a week. They might become slightly firmer in the fridge, but they’ll still be delicious. I often find that just letting a refrigerated cookie sit at room temperature for about 15-20 minutes brings them back to their lovely chewy texture.
Now, if you’re a planner or just want to have these on hand for future cravings, freezing is absolutely the way to go! You have a couple of options here. You can bake the cookies and let them cool completely, then freeze them in a single layer on a baking sheet until solid, then transfer them to a freezer-safe bag or container. Alternatively, you can scoop the dough into balls, freeze those on a baking sheet until firm, and then transfer them to a bag. This way, you can bake them fresh whenever the mood strikes! Frozen cookies, either baked or as dough, can last for up to 2-3 months in the freezer. When you’re ready to enjoy, you can thaw baked cookies in the refrigerator or at room temperature. Frozen dough balls can be baked straight from the freezer, just add a few extra minutes to the baking time.
Regarding glaze timing: If you plan to glaze your cookies, it’s best to do it right before serving or shortly before storing them at room temperature. If you glaze them and then store them in an airtight container for a long period, the glaze can sometimes make the cookie base soggy. For cookies that will be frozen, I highly recommend glazing them *after* they have been thawed. This way, the glaze stays nice and crisp.
Frequently Asked Questions
Final Thoughts
So there you have it – my absolute favorite chewy chocolate cookies. I truly believe this recipe is a winner because it’s not just about the incredible flavor and texture, but also about how accessible and rewarding it is to make. It’s that perfect balance of sweet, rich chocolate and tender, chewy dough that just makes you feel good. Whether you’re baking them for a special occasion, a family gathering, or just because you need a little pick-me-up, these cookies deliver every single time. They’re the kind of treat that creates memories, fills your home with a wonderful aroma, and brings genuine joy with every bite. They’re proof that sometimes, the simplest things can be the most extraordinary.
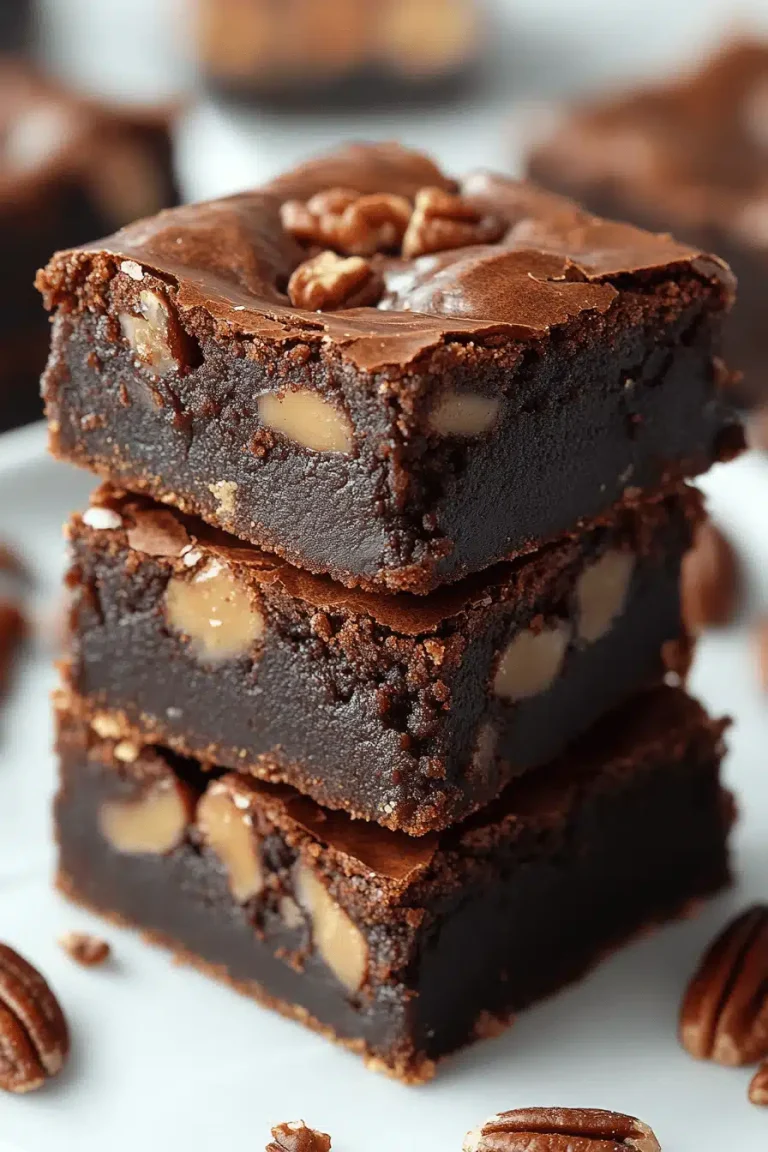
If you love a good chocolate cookie, you might also enjoy my Double Chocolate Brownies – they’re a different kind of chocolate heaven! And for something a bit lighter but still delightfully chocolatey, check out my Chocolate Banana Bread. I’m so eager to hear how your chocolate cookies turn out! Please leave a comment below and let me know what you think, or share any variations you tried. And if you loved them as much as I do, don’t forget to rate the recipe and share it with your friends. Happy baking, and enjoy every single delicious bite!
Rich Butterscotch Chocolate Cookies How To
Ingredients
Main Ingredients
- 0.25 cup all-purpose flour
- 0.25 teaspoon baking powder
- 3 tablespoons butter unsalted, melted
- 1 cup semi-sweet chocolate chips
- 2 large eggs
- 0.5 cup granulated sugar
- 2 teaspoons vanilla extract
- 1 cup butterscotch chips
Instructions
Preparation Steps
- Preheat the oven to 350°F.
- In a medium bowl, sift together the all-purpose flour and baking powder; set aside.
- Place the butter and the semi-sweet chocolate chips in a small saucepan and heat over medium heat until melted and smooth. Remove from heat and set aside.
- Crack the eggs into a large mixing bowl, add the granulated sugar and vanilla extract.
- Using an electric mixer on medium speed, beat the mixture for 10 minutes or until pale and creamy.
- Gradually stir the flour mixture into the egg mixture.
- Fold in the melted chocolate mixture followed by the butterscotch chips. Let the dough stand for 10 minutes.
- Line two baking sheets with parchment paper.
- Drop dough by rounded tablespoonfuls onto prepared baking sheets, spacing about 2 inches apart.
- Bake for 9 to 11 minutes or until the tops are dry and cracked.
- Allow cookies to cool on baking sheets before transferring to a wire rack.