apple dessert
There’s something downright magical about the smell of apples and cinnamon warming up the kitchen on a crisp fall afternoon. I still remember the first time I helped my grandmother make this apple dessert — the way the sweet, spiced aroma wrapped around the house felt like the warmest hug. It’s the kind of treat that’s both comforting and surprisingly simple, making it my go-to when I want to treat my family without fussing over something complicated. If you’ve ever loved a classic apple pie but wanted a lighter, quicker option with just as much heart, this recipe is definitely for you. Trust me, it’s the apple dessert that’s won over every guest at my dinner table, from picky kids to the toughest dessert critics.
What is Grandma’s Cinnamon Apple Dessert?
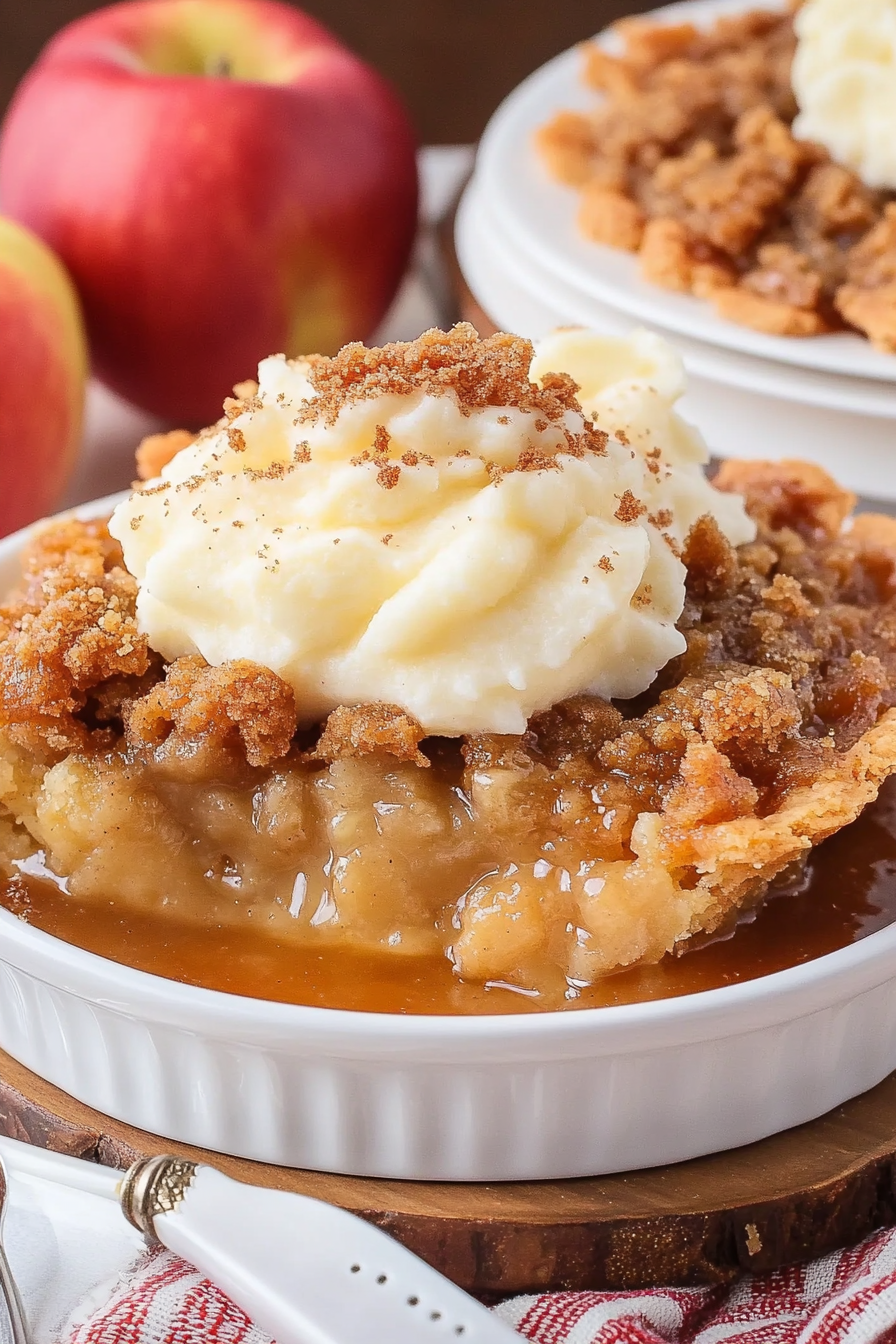
Think of this apple dessert as the lovechild of a humble fruit crumble and an old-school coffee cake—except way less intimidating. It’s essentially tender baked apples nestled in a soft, cinnamon-spiced batter that’s both cakey and moist, with a lovely swirl of glaze that melts into every bite. The name comes from the warm, comforting feelings it stirs up, kind of like how that cozy sweater you pull on after a long day makes you feel. It doesn’t fancy itself as a pie or a tart, but it’s got that same “apple-y” soul. What I love most is it’s incredibly forgiving — whether your apples are a little under-ripe or your batter’s a touch thicker, this dessert still comes out a winner every time.
Why you’ll love this recipe?
There are plenty of reasons why this apple dessert became my family’s all-time favorite, but honestly, the flavor is what hooked me first. The spiced apple filling sings with cinnamon and a touch of nutmeg that makes you want to take just one more bite (and then another). The batter—oh, the batter!—has this beautiful subtle sweetness with a hint of vanilla, a texture so soft and tender it practically melts on your tongue. I always say this dessert feels like a warm hug after a busy day.
What’s great is how effortlessly this dish comes together. Seriously, it’s one of those recipes where you pull out your mixing bowls and apples, and before you know it, you’re popping it into the oven. No complicated crusts or fiddly layers. The ingredients are usually things you already have on hand, which means it’s a cheap, cozy fix when money’s tight—or you just don’t want to run to the store again.
Plus, it’s versatile. I’ve served it straight from the pan for a casual family snack, dressed it up with a scoop of vanilla ice cream for dessert, and even adapted it as a brunch centerpiece by adding chopped nuts and a drizzle of honey. If you’ve ever tried a classic apple crisp or the more indulgent apple pie, think of this as their breezier cousin — just as satisfying but way less work. And believe me, my kids ask for it all the time—it’s disappeared in minutes at my house multiple times!
How do I make my Grandma’s cinnamon apple dessert?
Quick Overview
This apple dessert is about layering lovely, tender apple pieces into a cinnamon-scented batter then baking everything together until it’s golden and fragrant. The magic is in the simple, no-fuss process that lets those apples shine without drowning them in sugar or butter. The method is foolproof, perfect for when you want something homemade but don’t have hours to spare. And the glaze? That little drizzle on top is the showstopper, melting beautifully into every crevice for a gentle sweetness. If you can stir, slice, and bake, you’re all set to bring this beauty to life.
Ingredients
For the Main Batter:
- 1 ½ cups all-purpose flour (fresh and sifted for the best texture)
- 1 teaspoon baking powder (this gives the batter a nice lift)
- ½ teaspoon baking soda
- ½ teaspoon salt
- 1 teaspoon ground cinnamon (freshly ground if you can—trust me, it makes a difference)
- ½ cup granulated sugar
- ½ cup brown sugar (adds that gentle molasses flavor and moisture)
- 2 large eggs (room temperature so they mix smoothly)
- ½ cup whole milk (or almond milk if you prefer—a little experiment I tried that made it even creamier!)
- ½ cup melted butter (unsalted, cooled but still pourable)
- 1 teaspoon vanilla extract (the flavor glue that holds it all together)
For the Filling:
- 3 medium apples (I use a mix of Granny Smith and Honeycrisp for a balance of tart and sweet)
- 2 tablespoons sugar (adjust depending on apple sweetness)
- 1 teaspoon cinnamon
- A pinch of nutmeg (optional but oh so cozy!)
- Juice of half a lemon (keeps the apples vibrant and stops browning)
For the Glaze:
- 1 cup powdered sugar
- 2–3 tablespoons milk (start small to get that perfect drizzle consistency)
- ½ teaspoon vanilla extract
- Optional: a dash of cinnamon for a little extra warmth
Step-by-Step Instructions
Step 1: Preheat & Prep Pan
Start by preheating your oven to 350°F (175°C). I like to use a 9×9-inch baking dish or square cake pan for this recipe because it bakes evenly and the apples don’t get buried too deep. Grease the pan well with butter or non-stick spray, then dust it lightly with flour—this step helps the edges stay nice and tender, not dry or crusty.
Step 2: Mix Dry Ingredients
In a large bowl, whisk together the flour, baking powder, baking soda, salt, and cinnamon until everything is fully combined. You want to distribute that cinnamon evenly so every bite has a warm little kick.
Step 3: Mix Wet Ingredients
In another bowl, beat the eggs with both sugars until they’re pale and slightly fluffy—that usually takes about two minutes by hand or a bit less with a mixer. Stir in the melted butter, milk, and vanilla extract. You want everything smooth and shiny here. Pro tip: I always let the melted butter cool a bit before mixing or you risk scrambling the eggs!
Step 4: Combine
Pour the wet ingredients into the dry and stir gently. Don’t overmix here — you want to combine until just smooth, with no big lumps but still a few little floury spots is okay. Overmixing can make the cake tough, and trust me, that’s not the vibe we’re going for. I learned this the hard way after a batch came out dense and disappointing. So, fold it gently! It’s better to have a tender crumb that feels like a soft pillow for those apples.
Step 5: Prepare Filling
Peel, core, and chop your apples into bite-sized chunks, then toss them in a bowl with lemon juice, sugar, cinnamon, and nutmeg. Mixing the apples with lemon helps keep their bright color and a slightly tangy edge that cuts through the sweetness beautifully. You can adjust the sugar depending on how naturally sweet your apples are.
Step 6: Layer & Swirl
Pour half the batter into the prepared pan, smoothing it out evenly. Scatter half of the apple mixture on top, then add the rest of the batter and finish with the remaining apples. Use a butter knife or skewer to gently swirl the apples and batter together — this swirl doesn’t have to be perfect, just enough to get little ribbons of apple flowing through the batter so every slice has a surprise bite.
Step 7: Bake
Bake in the oven for about 45-50 minutes. Around 40 minutes, start checking with a toothpick; it should come out clean with maybe just a few moist crumbs clinging (but no wet batter). Every oven bakes differently, so don’t panic if it needs a bit more time. The edges should be golden brown and the center set but still soft when it’s done.
Step 8: Cool & Glaze
Once out of the oven, let the dessert cool for at least 20 minutes before glazing. This cooling time helps the cake firm up just enough so the glaze stays on top instead of melting right off. Whisk together powdered sugar, milk, vanilla, and cinnamon until you get a thick yet pourable glaze. Drizzle it over the warm apple dessert in zigzags or random patterns—any way looks lovely! The smell of glaze melting into cinnamon apples is pure heaven.
Step 9: Slice & Serve
Use a sharp knife to cut neat squares once it’s fully cooled, or go rustic with bigger scoops straight from the pan. This dessert is delicious eaten warm, paired with a scoop of vanilla ice cream or a dollop of whipped cream, but it’s also great at room temperature. Serve it on its own for a cozy afternoon treat or bring it out as the grand finale for your family meals.
What to Serve It With
For Breakfast: Nothing beats starting the day with a warm slice of this apple dessert alongside your morning coffee or chai. I like to serve it with a hot latte and a side of fresh fruit — keeps it feeling balanced but still indulgent enough for a weekend treat.
For Brunch: Plate this dessert on a pretty dish with a small dollop of mascarpone or Greek yogurt, then sprinkle with toasted nuts for crunch. Pair it with a sparkling apple cider or your favorite brunch cocktail for a festive touch.
As Dessert: My favorite way is right after dinner with a scoop of vanilla or cinnamon-spiced ice cream melting over the top. You can also drizzle a bit of caramel sauce if you’re feeling fancy (and let’s be honest, who doesn’t?). A nice cup of black tea or a glass of sweet dessert wine rounds it out beautifully.
For Cozy Snacks: When the afternoon slump hits, this is the treat I grab. Wrapped in a kitchen towel and eaten with a warm mug of herbal tea, it’s the ultimate comfort. Sometimes, we’ll sprinkle a little additional cinnamon sugar just before heating up a slice in the microwave — like a little homemade apple dessert magic wand.
Top Tips for Perfecting Your Grandma’s Cozy Cinnamon Apple Dessert
Apple Prep: Always use apples that are firm and fresh. I prefer a mix because the tartness of Granny Smith cuts through the sweetness, while Honeycrisp gives a juicy burst. Tossing the apples with lemon juice right after chopping prevents browning and keeps everything looking appetizing for longer.
Mixing Advice: Be careful not to overmix your batter—like I mentioned, I once got too enthusiastic, and it turned out tough. Look for a batter that’s just combined but still thick and a bit lumpy. That gives you the best soft crumb that holds the apples beautifully.
Swirl Customization: When swirling, I don’t go overboard — just a few lazy figure-eights or loops with a skewer are enough. If you want more apple pockets, scatter extra pieces on top before baking for some delightful caramelized edges.
Ingredient Swaps: Don’t have brown sugar? White sugar works but your dessert might lose a bit of that deep molasses warmth. For milk, I tried almond and oat milk with great results—it actually made the cake moister and gave a subtle nutty flavor. Butter can be swapped for coconut oil in equal amounts if you’re after a dairy-free option.
Baking Tips: Position your rack in the middle of the oven for even heat. Every oven varies, so keep an eye after 40 minutes, and if the edges brown too fast, tent with foil for the remainder. Toothpick testing is key—clean with a few moist crumbs is perfect!
Glaze Variations: Sometimes I like to add a pinch of cardamom or orange zest to the glaze for a fragrant twist. The glaze should be thick enough to hold shape but thin enough to drizzle — add milk a little at a time to nail this. If you prefer, skip the glaze and dust with powdered sugar for a simpler finish.
Storing and Reheating Tips
Room Temperature: This apple dessert can stay fresh for up to two days covered tightly with plastic wrap or in an airtight container. Keeping it out at room temp lets it keep that soft, tender crumb and juicy apples intact.
Refrigerator Storage: For longer life, wrap leftovers well and store in the fridge for up to four days. The texture firms slightly but warming it up before serving brings back that fresh-from-the-oven feel. I usually nuke a slice for about 20 seconds, then add a little butter or ice cream on top.
Freezer Instructions: You can freeze this dessert for up to three months by wrapping tightly in plastic wrap and then foil to avoid freezer burn. Thaw overnight in the fridge and warm up slowly in a low oven. Freeze in slices for quick single servings that get to your desk or coffee break in no time.
Glaze Timing Advice: If you plan to freeze or store for more than a day, it’s best to keep the glaze separate and add it just before serving. It loses its shine and texture if left on longer. But if you’re eating it right away, go ahead and glaze while it’s warm—that way it seeps in perfectly.
Frequently Asked Questions
Final Thoughts
This recipe is one of those cozy, stick-to-your-ribs desserts that not only tastes amazing but always brings my family to the table with smiles. It’s simple, forgiving, and full of warm flavors that feel like a little celebration of fall, no matter the season. I love how adaptable it is, whether I’m whipping it up for an impromptu snack or a dinner party dessert. If you give it a try, don’t be surprised if it becomes a new staple in your home — my kids still request it regularly, and honestly, it makes me happy to share it with friends just like you. Let me know how it turns out, any tweaks you try, or even your favorite apple pairings! Happy baking!
Apple Dessert Magic How to Bake It
Ingredients
Main Ingredients
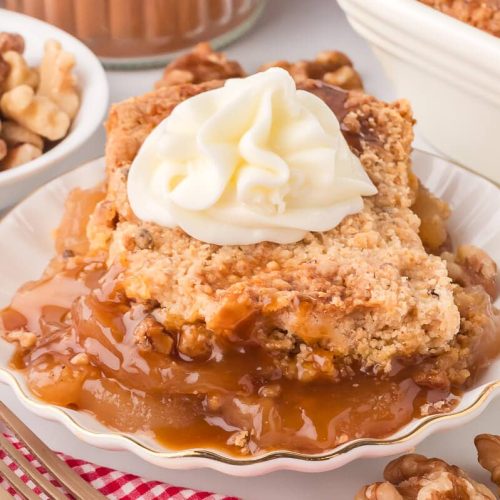
- 2.25 cups apple pie filling
- 0.25 cups caramel sauce
- 1 package yellow cake mix
- 0.33 cups walnuts, chopped
- 1 teaspoon apple pie spice
- 1 cup salted butter, cold, divided
- whipped cream for garnish, if desired
Instructions
Preparation Steps
- Preheat oven to 350°F. Spray a 9-inch square baking pan with cooking spray.
- Spread apple pie filling on the bottom of the baking pan. Pour caramel sauce evenly over the top.
- In a large mixing bowl, stir together the cake mix, apple pie spice, and chopped walnuts. Add in 0.5 cup of cold butter and stir until crumbly. Pour mixture on top of apple pie filling.
- Slice remaining 0.5 cup butter into 1-inch long pieces. Place evenly on top of the mixture.
- Bake for 60 minutes or until the top is golden brown and a toothpick comes out clean. Let cool at room temperature for 15 minutes before serving. Add a dollop of whipped cream on top of each piece if desired.