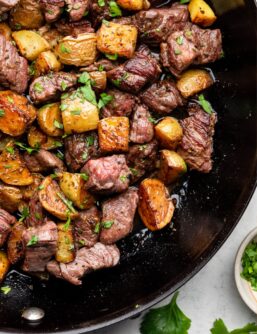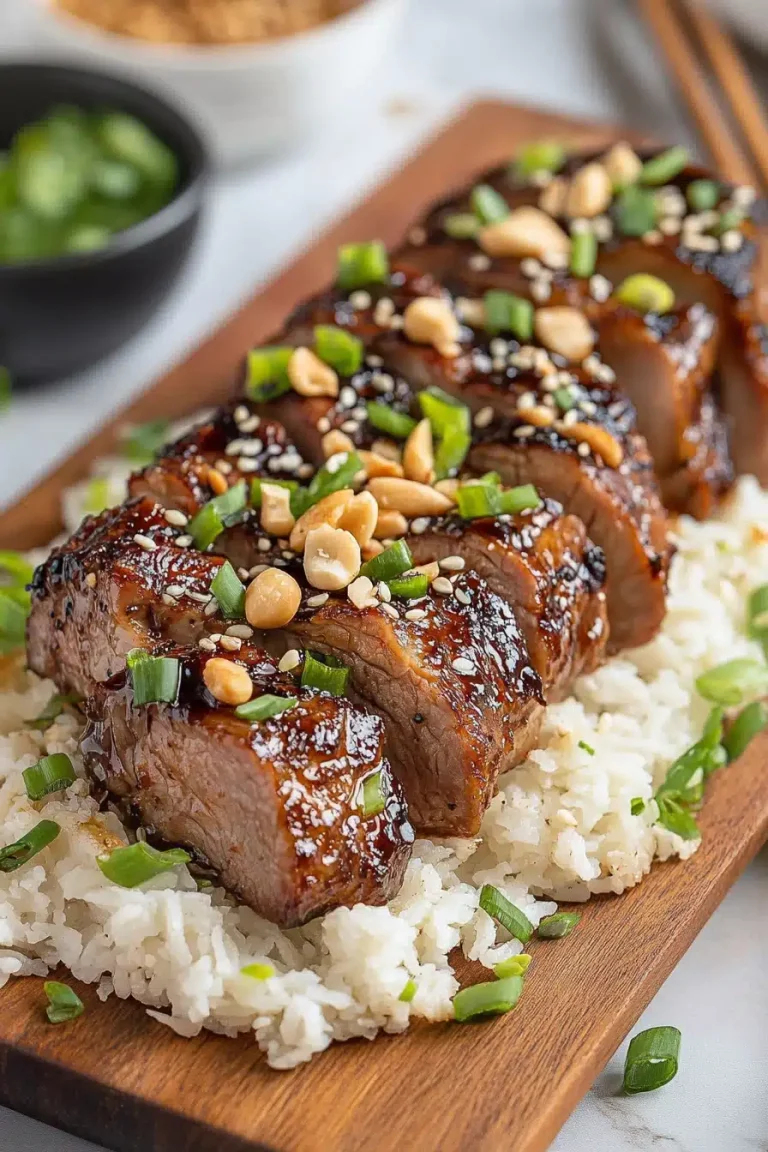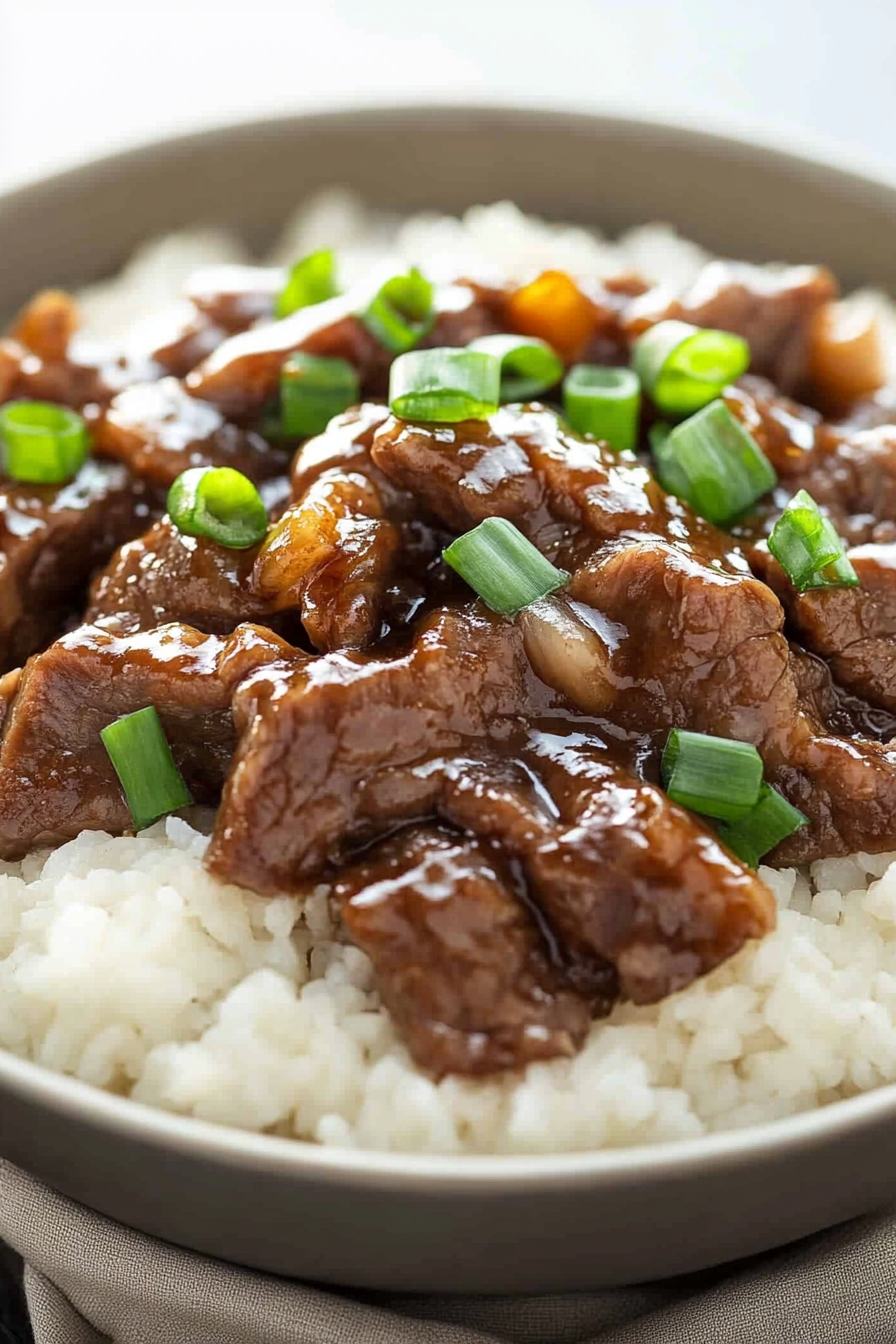
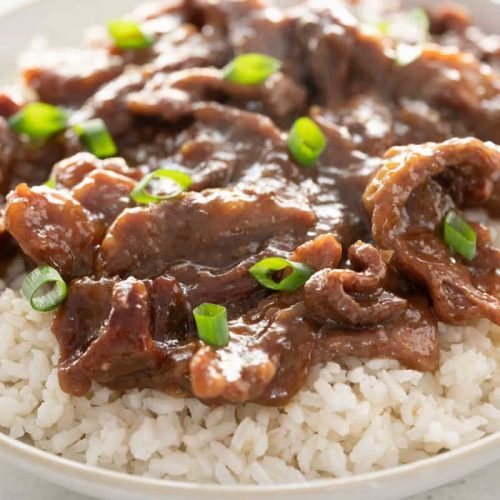
Mongolian beef
There’s something about the sizzling sound and sweet-savory aroma of Mongolian beef that immediately takes me back to those first times I ordered it in a little neighborhood Chinese restaurant as a teenager. It’s that perfect blend of tender, caramelized strips of beef swimming in a sticky, flavorful sauce that makes you want to stop everything and dig in. If you love the rich taste of teriyaki but crave a deeper, slightly spicy kick, this dish will hit all the right notes for you. Honestly, it’s become a household staple for me—not just because it tastes incredible, but because it’s surprisingly easy and quicker than most takeout options. Plus, my kids actually ask for seconds, which I consider a rare victory! Today, I’m sharing my tried-and-true Mongolian beef recipe that I always turn to whenever I want something that feels like a special treat without hours in the kitchen.
What is Mongolian Beef?
Mongolian beef is one of those dishes that sounds exotic but is actually pretty straightforward in concept. It’s essentially thinly sliced beef cooked quickly with green onions and a luscious sauce that’s sweet, salty, and a bit spicy, usually served over rice. The “Mongolian” part doesn’t actually come from Mongolia — it’s more like a Chinese-American invention that’s gained a following because of its incredible flavor. Think of it like a cross between classic stir-fry and a dish you’d find on any Western Chinese menu. What really defines the dish is that sticky soy-based glaze that coats every tender bite of beef, with just enough ginger and garlic to keep things bright. It’s approachable for home cooks yet feels fancy enough to impress guests. I always tell people: if you can handle whisking together a simple sauce and tossing it in a hot pan, you’re good to go!
Why you’ll love this recipe?
What I love most about this Mongolian beef recipe is how it perfectly balances big, bold flavors with a really manageable cooking time. First, the flavor is unbelievable. The sauce is sweet but not sugary—more like that satisfying molasses-touched soy glaze that clings to every piece of beef. There’s a subtle heat from freshly ground black pepper (you can dial that down if you prefer). Plus, the burst of green onions adds a crisp freshness that stops this from turning into a heavy, greasy mess.
Secondly, the simplicity can’t be beat if you’re a busy bee in the kitchen. It’s mostly about prepping your ingredients ahead and then a quick stir-fry that literally takes 10 minutes or less. I like to do the slicing the night before or even buy pre-sliced beef from a trusted butcher. It’s a lifesaver on hectic weeknights when the last thing you want to do is fuss over a complicated recipe.
Cost-wise, this is surprisingly budget-friendly. You don’t need fancy cuts of meat—flank steak or skirt steak work perfectly, and soy sauce, brown sugar, and onions are pantry staples. Plus, it’s versatile. You can serve it with rice, noodles, or even pile it into wraps for a quick lunch. I’ve even jazzed it up with extra veggies like bell peppers or snap peas when I needed more greens in the house. It stands out on my recipe list because it feels like a treat but doesn’t require fancy ingredients or effort.
How do you make Mongolian Beef?
Quick Overview
Making Mongolian beef at home is a charm once you get the hang of it. You start with slicing the beef thin, which ensures a quick stir-fry that delivers tender results. While the beef marinates briefly, you whip up a simple, sticky sauce with soy, brown sugar, garlic, and ginger. Toss everything in a hot skillet with green onions until the meat caramelizes and the sauce sticks. The whole process highlights the best of speedy, flavorful dinner-making—no deep-frying, just straightforward pan-cooking. Once you master this method, Mongolian beef can easily become your go-to takeout alternative.
Ingredients
For the Beef:
- 1 lb flank steak or skirt steak (thinly sliced against the grain) — Ask your butcher to help if you’
- 2 tbsp cornstarch — Coats the beef to give it a slight crust and absorb the sauce beautifully.
- 2 tbsp vegetable oil (for frying) — Neutral-flavored oils like canola or sunflower work well.
For the Sauce:
- 1/3 cup soy sauce (low sodium preferred) — Gives that salty umami punch.
- 1/4 cup brown sugar (packed) — Balance the soy with a deep, caramel sweetness.
- 2-3 cloves garlic (minced) — Fresh is best; it brings aroma and bite.
- 1 tbsp freshly grated ginger — Adds an earthy warmth.
- 1/4 tsp crushed red pepper flakes (optional) — For a subtle kick, but you can leave it out if heat’s not your thing.
- 1/2 cup water — To help form a nice sauce consistency.
For Garnish and Extras:
- 4-5 green onions (cut into 2-inch pieces) — The magic finish that gives freshness and texture.
- Sesame seeds (optional) — For a lovely toasty crunch on top.
Step-by-Step Instructions
Step 1: Prep Your Beef and Pan
Start by slicing your flank or skirt steak thin against the grain — I like to freeze it for about 30 minutes first; it firms up the meat and makes thin slicing a breeze. This little trick I learned years ago changed everything about the texture. Heat your wok or large skillet over medium-high heat and add a tablespoon of oil. You want it hot but not smoking; too hot will burn the sauce later.
Step 2: Toss Beef with Cornstarch
In a bowl, toss that thinly sliced beef with cornstarch until every piece gets lightly coated. This step helps seal in the meat juices and gives you that gorgeous sticky texture after frying. Don’t overdo it though—just enough to cover. You’ll notice the beef sticks together less and fries up with a slight crust.
Step 3: Prepare the Sauce
In a separate bowl, whisk together soy sauce, brown sugar, minced garlic, grated ginger, crushed red pepper flakes (if using), and water. The brown sugar should dissolve smoothly—this sauce will thicken quickly once in the pan, so it’s fine to make it ahead.
Step 4: Cook the Beef
Add the beef to your hot pan in an even layer (you might need to do this in batches to avoid crowding). Stir-fry about 2-3 minutes until the beef pieces get a caramelized edge but aren’t yet fully cooked through. You’ll see them change color and smell that rich, meaty aroma—that’s your cue.
Step 5: Add the Sauce
Pour the sauce over the partially cooked beef and toss everything together. The sauce will bubble and thicken quickly, sticking to the beef like a glossy, flavorful jacket. Stir continuously to coat everything well, about 1-2 minutes. Don’t worry if it looks soupy at first; it’ll reduce and get that sticky texture I love.
Step 6: Toss in Green Onions
Right at the end, sprinkle in your green onions and give everything a quick toss to warm them through without wilting them to mush. Their bright snap really contrasts the richness of the sauce.
Step 7: Finish and Serve
Remove from heat and transfer to a serving dish immediately to keep the beef tender and sauce glossy. If you want to add a little crunch and nuttiness, sprinkle toasted sesame seeds on top. Serve steaming hot over jasmine or basmati rice — it soaks up that addictive sauce perfectly.
What to Serve It With
For a Quick Weeknight Dinner: I’m all about simple sides here—steamed white rice is the classic, but if you’re feeling fancy, a bowl of mixed stir-fried veggies like snap peas and carrots adds freshness and color. Sometimes I roast some broccoli on the side when I’m feeling a bit healthier.
For a Casual Get-Together: This Mongolian beef is a crowd-pleaser when paired with egg rolls or dumplings, plus a chilled Asian cucumber salad. Pour yourself a cold jasmine tea or a light beer—it’s a combo that feels effortless yet impressive.
For a Cozy Night In: One of my favorite cozy dinners is to pile this beef on rice with a drizzle of sriracha and a fried egg on top. It’s like a warm hug on a plate, and the yolk makes everything even more indulgent. My family swears by it.
Honestly, I’ve even gobbled this up cold for lunch the next day — it tastes just as great reheated, making it a shining star of my meal-prep game.
Top Tips for Perfecting Your Mongolian Beef
Beef Prep: The secret weapon here is slicing the beef thinly and against the grain—anything thicker and you risk a chewy, tough bite. Freezing the meat for half an hour beforehand makes slicing so much easier and consistent.
Coating with Cornstarch: Don’t skip this step. It’s what creates that slightly crisp coating that grabs onto the sauce. I learned the hard way that too much cornstarch makes the beef gummy, so keep it light.
Cooking Temperature: Your pan needs to be hot enough that the beef sizzles immediately but not so hot it burns the garlic and ginger. Medium-high heat is usually right. I always keep my stirring constant to avoid any burning, especially once the sauce goes in.
Sauce Balance: The brown sugar gives this sauce its signature sweetness, but if you want to tweak the flavor, even a splash of hoisin sauce or oyster sauce can add depth. Just be careful of making it overly salty—always taste the sauce before cooking if you tweak ingredients.
Green Onion Timing: Add green onions at the very end — too early and they’ll get lost in the sauce. You want their bright pop and slight crunch to contrast the rich beef.
Serving: I like to sprinkle toasted sesame seeds for that final nutty crunch. Sometimes a squeeze of fresh lime over the top brightens everything beautifully — give it a try!
Trust me on this one—after a few tries, you’ll nail that glossy, perfectly sticky sauce that clings to tender beef strips every single time. Plus, you’ll realize how fast and fun it is to make.
Storing and Reheating Tips
Room Temperature: If you’re planning to eat within a couple of hours, cover your Mongolian beef loosely at room temp to keep the glossy sauce intact. Avoid longer than 2 hours out to maintain freshness and safety.
Refrigerator Storage: Store leftovers in an airtight container for up to 3 days. The sauce might thicken and darken slightly—that’s totally normal. When reheating, sprinkle in a small splash of water or broth to loosen it up, reheating gently on the stove or microwave to keep the beef tender.
Freezing Instructions: Mongolian beef freezes pretty well. Portion it into freezer-safe containers or heavy-duty zip bags and freeze up to 2 months. Thaw overnight in the fridge and reheat with a bit of water to refresh the sauce. Avoid microwaving frozen beef straight away to keep it juicy.
Glaze Timing Advice: Since the sauce is cooked right into the beef, you don’t have a separate glaze to apply later. But if you want a little extra shine or flavor, a thin drizzle of honey or sesame oil just before serving can work wonders.
Frequently Asked Questions
Final Thoughts
Mongolian beef has become one of those dishes I always reach for when I want a little comfort but don’t have hours to cook. Its sticky, sweet, and savory sauce paired with tender beef is just the kind of flavor combination that pulls the family to the table—no fuss, just pure, satisfying food. I’ve made this countless times, and every time the house fills with that irresistible aroma I know everyone will be happy.
If you like this recipe, I bet you’d also enjoy trying my version of honey garlic chicken or those classic sesame noodles for a homemade Asian-inspired feast. Don’t hesitate to share your tweaks and thoughts in the comments—I love hearing about your kitchen experiments and family favorites.
Happy cooking, and can’t wait to hear how this Mongolian beef becomes your new family favorite!
Easy Crockpot Beef Mongolian Recipe
Ingredients
Main Ingredients
- 1.5 pounds flank steak
- 0.25 cup cornstarch
- 2 teaspoons toasted sesame oil
- 1 teaspoon minced garlic
- 0.5 teaspoon ground ginger
- 0.5 cup soy sauce use low sodium for a lighter dish
- 0.33 cup brown sugar
- 0.5 cup beef broth
- green onion for garnish, sliced
Instructions
Preparation Steps
- Slice the flank steak into thin strips against the grain.
- Toss the steak strips with cornstarch in a bowl or sealed bag until evenly coated.
- Place the coated steak into the crockpot, then add sesame oil, garlic, ginger, soy sauce, brown sugar, and beef broth.
- Stir to combine and coat the steak with the sauce.
- Cook on high for 2 to 3 hours or low for 4 to 5 hours until steak is tender.
- Garnish with sliced green onions before serving.