whole wheat focaccia
There are certain smells that just instantly transport me back in time, and the aroma of freshly baked bread is definitely one of them. It’s the smell of weekend mornings, of cozy evenings, and of my Nana’s kitchen. For years, I’ve been trying to capture that magic, and I think I’ve finally done it with this whole wheat focaccia recipe. It’s not just bread; it’s a hug in carb form. I’ve tried so many different bread recipes over the years, from quick no-knead loaves to elaborate sourdoughs, but this one has become my absolute favorite. It’s the perfect balance of rustic charm and pure deliciousness, and honestly, it makes the whole house smell divine. If you’re looking for a bread that’s both wholesome and incredibly satisfying, you’ve landed in the right spot.
What is Whole Wheat Focaccia?
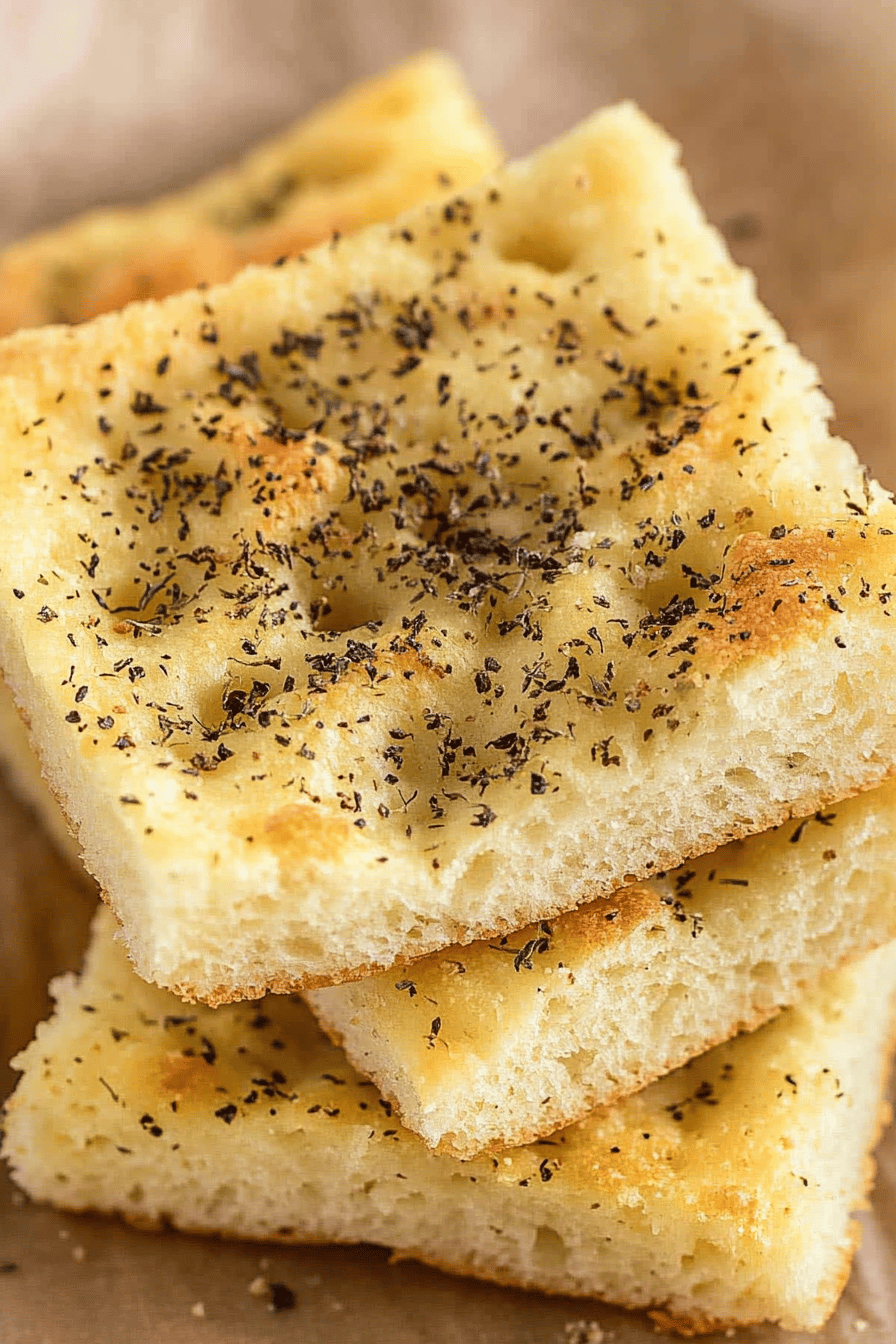
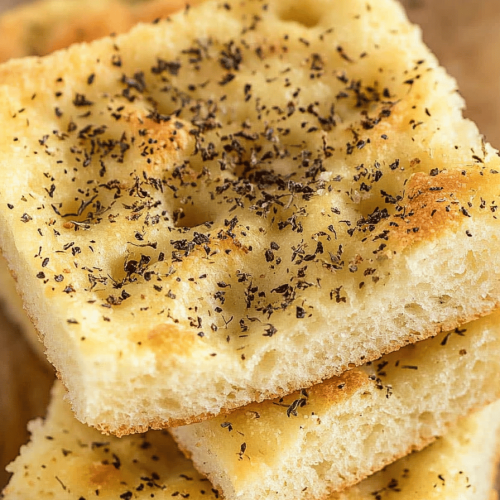
So, what exactly is this delightful creation? Think of it as a super cozy, dimpled Italian flatbread. It’s typically baked in a shallow pan, giving it that wonderfully rustic, almost cloud-like interior and a delightfully chewy crust. Unlike some other breads, focaccia is incredibly forgiving and doesn’t demand a whole lot of fuss. We’re using whole wheat flour here, which adds a beautiful nutty flavor and extra fiber, making it feel a little more wholesome than your average white bread. It’s basically the perfect canvas for all sorts of delicious toppings, from simple sea salt and rosemary to olives and sun-dried tomatoes. It’s the kind of bread that makes you want to slow down, savor each bite, and maybe even have a second (or third!) piece.
Why you’ll love this recipe?
Honestly, I could rave about this whole wheat focaccia for ages, but let me try to keep it somewhat concise! First off, the flavor. The whole wheat flour gives it a gorgeous depth that you just don’t get with all-purpose flour. It’s earthy, a little sweet, and pairs so beautifully with whatever toppings you decide to use. Then there’s the texture – oh, the texture! It’s wonderfully soft and chewy on the inside, with just the right amount of resistance, and the bottom gets this lovely, slightly crisp char from the Olive Oil. It’s surprisingly simple to make, too. Even if you’re a baking novice, you’ll find this recipe totally approachable. I know some people shy away from baking bread from scratch, thinking it’s too complicated, but this focaccia is a lifesaver on busy nights and a guaranteed crowd-pleaser. Plus, it’s incredibly budget-friendly, especially when you compare it to buying artisanal bread from the bakery. And the versatility? Unbeatable! It’s fantastic as a side for soups and salads, makes an epic sandwich base, or is just divine served warm with a drizzle of olive oil and balsamic vinegar. What I love most about this is how forgiving it is. If you’re a bit off on your timing or don’t measure absolutely perfectly, it still turns out wonderfully. It’s the kind of recipe that builds confidence in the kitchen!
How do I make whole wheat focaccia?
Quick Overview
This recipe is all about simple steps that lead to a spectacular result. We’ll be mixing a few key ingredients, letting the dough do its thing (a little rise here and there), dimpling it generously with Olive Oil, adding your favorite toppings, and then baking it to golden perfection. It’s not a complicated process, and the payoff is huge. You get incredible homemade bread with minimal stress, perfect for any meal or snack.
Ingredients
For the Main Batter:
* 3 cups whole wheat flour: I like to use a good quality whole wheat, not too coarse. It makes a difference in the final texture. You can also do a blend of whole wheat and all-purpose if you prefer it a bit lighter, maybe start with 2 cups whole wheat and 1 cup all-purpose.
* 1 teaspoon instant yeast: This is my go-to for quick breads. It’s so reliable!
* 1 ½ teaspoons fine sea salt: Salt is crucial for flavor, don’t skimp on it!
* 1 ½ cups lukewarm water: Around 105-115°F (40-46°C). Too hot and you’ll kill the yeast, too cold and it won’t activate properly. It should feel just warm to the touch.
* ¼ cup extra virgin Olive Oil, plus more for greasing: Use a good quality olive oil; its flavor really shines through in focaccia.
For the Toppings (Suggestions!):
* Coarse sea salt: For that classic finish.
* Fresh rosemary sprigs: My absolute favorite! The aroma while it bakes is heavenly.
* Kalamata olives, pitted and halved
* Sun-dried tomatoes, oil-packed and drained
* Garlic cloves, thinly sliced
* Cherry tomatoes, halved
For the Glaze (Optional, but highly recommended!):
* 2 tablespoons extra virgin olive oil
* 1 tablespoon water
* Pinch of flaky sea salt
Step-by-Step Instructions
Step 1: Preheat & Prep Pan
Preheat your oven to 425°F (220°C). Grab a 9×13 inch Baking Pan or a similar-sized rimmed baking sheet. Generously grease the pan with olive oil – I like to use at least 2 tablespoons, really coating the bottom and sides. This is what gives focaccia its lovely crispy bottom and prevents it from sticking.
Step 2: Mix Dry Ingredients
In a large mixing bowl, whisk together the whole wheat flour, instant yeast, and fine sea salt. Make sure everything is well combined. This ensures the yeast and salt are evenly distributed throughout the dough.
Step 3: Mix Wet Ingredients
In a separate, smaller bowl or a liquid measuring cup, combine the lukewarm water and ¼ cup of olive oil. Give it a quick stir.
Step 4: Combine
Pour the wet ingredients into the bowl with the dry ingredients. Using a sturdy spoon or a spatula, mix everything until it just comes together to form a shaggy, sticky dough. Don’t overmix! It will look quite wet and a bit unappealing at this stage, and that’s perfectly okay. It’s more of a batter than a typical bread dough.
Step 5: Prepare Filling
If you’re using any toppings like olives, sun-dried tomatoes, or sliced garlic, have them ready. Pitting and halving olives, and draining sun-dried tomatoes takes just a moment, so it’s good to have them prepped before the dough goes into the pan.
Step 6: Layer & Swirl
Pour the sticky dough into your greased baking pan. You can use lightly oiled hands to gently spread it towards the edges if it’s not quite reaching. Cover the pan loosely with plastic wrap or a clean kitchen towel and let it rest in a warm place for about 30 minutes. It won’t double in size, but it will puff up a bit. After the rest, uncover the dough. Now for the fun part! Dip your fingertips in olive oil and gently but firmly press dimples all over the surface of the dough, going all the way down to the bottom of the pan. Don’t be shy with the dimples! Then, scatter your chosen toppings evenly over the dough. If you’re using rosemary, gently press the sprigs into the dough.
Step 7: Bake
Place the pan in the preheated oven. Bake for 25-30 minutes, or until the focaccia is golden brown on top and the edges are a lovely deep golden color. You want it to sound hollow when tapped on the bottom. If the top is browning too quickly, you can loosely tent it with foil.
Step 8: Cool & Glaze
While the focaccia is still warm in the pan, whisk together the 2 tablespoons of olive oil, 1 tablespoon of water, and a pinch of flaky sea salt for the glaze. Drizzle this mixture evenly over the hot focaccia, letting it pool in the dimples. This adds an extra layer of moisture and shine. Let the focaccia cool in the pan for about 10-15 minutes before carefully inverting it onto a wire rack to cool slightly more. This helps the bottom stay crisp.
Step 9: Slice & Serve
For the best flavor and texture, I like to let it cool for at least 30 minutes before slicing. Use a serrated knife to cut it into squares or rectangles. It’s amazing served warm, but it’s also delicious at room temperature. The smell alone will have people flocking to the kitchen!
What to Serve It With
This whole wheat focaccia is incredibly versatile, and I find myself reaching for it for all sorts of occasions. It’s more than just a side dish; it can truly be the star!
For Breakfast: It’s wonderful toasted and topped with a poached egg and a sprinkle of red pepper flakes. Or, try it with some sliced avocado and a squeeze of lime. A simple cup of black coffee or a creamy latte is the perfect accompaniment.
For Brunch: Imagine a beautifully arranged platter with slices of this focaccia alongside a colorful frittata, a fresh green salad, and maybe some cured meats and cheeses. It adds a rustic, comforting element to any brunch spread. A crisp Prosecco or a refreshing mimosa pairs beautifully.
As Dessert: Don’t knock it till you try it! A slightly sweeter focaccia (maybe with a hint of honey in the dough or a fruit topping) can be absolutely divine served warm with a scoop of good quality vanilla bean Ice Cream. The warm, slightly savory bread with cold ice cream is surprisingly addictive.
For Cozy Snacks: This is where it truly shines for me. Cut into small squares, it’s the perfect accompaniment to a hearty tomato soup on a chilly evening. Or, just serve it warm with some good quality olive oil and a balsamic reduction for dipping. It’s the ultimate comfort food snack, especially when you’re curled up on the couch with a good book.
My family absolutely loves it served with grilled chicken or fish. We often make a big batch and have some leftovers for sandwiches the next day – the flavor only gets better!
Top Tips for Perfecting Your Whole Wheat Focaccia
I’ve made this whole wheat focaccia more times than I can count, and along the way, I’ve picked up a few tricks that really make a difference. These are the things I always do now that I’ve learned them!
Dough Hydration is Key: Don’t be alarmed by how wet and sticky the dough is. That high hydration is what gives focaccia its signature open, airy crumb. Resist the urge to add more flour unless it’s absolutely unmanageable. It will feel more like a thick batter, and that’s exactly what you want.
Generous Olive Oil: I cannot stress this enough: use plenty of olive oil! For greasing the pan, for the dimples, and for the final drizzle. It’s what creates that glorious crispy bottom and keeps the bread moist and flavorful. Don’t be stingy here!
Dimple Power: When you’re dimpling the dough, really get your oiled fingertips down to the bottom of the pan. These pockets are where the olive oil and toppings settle, creating little bursts of flavor and that beautiful texture. It also helps the bread bake evenly.
Resting and Proofing: Give the dough adequate time to rest. Even though it’s a quick bread, that initial rest allows the gluten to relax and the yeast to start working, resulting in a lighter texture. The second rise after dimpling allows it to puff up beautifully.
Topping Creativity: While rosemary and sea salt are my favorites, don’t be afraid to experiment! Thinly sliced red onions caramelized before adding them, a sprinkle of za’atar, or even some crumbled feta cheese can be absolutely divine. Just remember not to overload it, or the dough might not bake through properly.
Baking Temperature and Time: Ovens can be finicky! Keep an eye on your focaccia. The baking time is a guideline. You’re looking for a deep golden brown color. If it’s browning too fast on top, loosely tent it with foil. If it’s not browning enough, you might need a few extra minutes. Trust your eyes and the smell!
Ingredient Swaps: I’ve successfully made this with about half whole wheat and half bread flour for a lighter texture if I’m feeling it. I’ve also tried different herbs like thyme and oregano with great success. For a sweeter twist, a tablespoon of honey can be added to the wet ingredients, and a sprinkle of cinnamon and sugar on top is lovely.
Storing and Reheating Tips
One of the best things about this whole wheat focaccia is that it stays delicious for a few days, making it perfect for meal prep or just having on hand for those spontaneous cravings. And luckily, it’s pretty straightforward to store!
Room Temperature: Once it’s completely cooled, I like to wrap the focaccia tightly in plastic wrap or place it in an airtight container. It will stay wonderfully fresh at room temperature for about 2-3 days. The crust might soften a little, but the inside stays lovely and chewy.
Refrigerator Storage: If you know you won’t get through it in 2-3 days, or if your kitchen is particularly warm, you can store it in the refrigerator. Again, an airtight container or well-wrapped is key. It will last for about 4-5 days in the fridge. The texture might be a bit firmer, but it’s easily remedied.
Freezer Instructions: This is a great option for longer storage. Once completely cooled, wrap individual portions or the whole loaf tightly in plastic wrap, then in aluminum foil, or place in a freezer-safe bag. It will keep well in the freezer for up to 2-3 months. Thaw it overnight at room temperature, or for a quicker fix, you can reheat it directly from frozen.
Glaze Timing Advice: If you plan to store the focaccia for more than a day, I sometimes hold off on the final oil-and-water glaze until just before serving or reheating. This helps maintain the crispness of the crust a little better. However, if it’s going to be eaten within a day or two, glazing it right after baking is perfectly fine.
Reheating: For the best results, especially if it’s been refrigerated or frozen, gently reheat slices in a toaster oven or a regular oven at around 300°F (150°C) for 5-10 minutes. This brings back that lovely crispness to the crust and warms it through beautifully. You can also pop it in a warm skillet with a tiny bit of oil for a quick stovetop reheat!
Frequently Asked Questions
Final Thoughts
This whole wheat focaccia is more than just a recipe to me; it’s a little slice of comfort and joy that I love sharing. It’s proof that you don’t need fancy ingredients or complicated techniques to create something truly spectacular in your own kitchen. The aroma that fills your home while it bakes is just magical, and the taste – oh, that soft, chewy, slightly tangy goodness – is simply unbeatable. It’s the perfect bread for so many occasions, from a simple weeknight dinner to a more festive gathering. I really hope you give this whole wheat focaccia a try. It’s a recipe that’s been perfected through many happy baking sessions, and I’m so excited for you to experience it. If you love this recipe, you might also enjoy my Rustic Sourdough Boule or my Cheesy Garlic Breadsticks for more bread-making adventures!
I can’t wait to hear how yours turns out! Please leave a comment below and let me know your favorite toppings, or share your own tips. Happy baking!
Easy Whole Wheat Focaccia Homemade Bread
Ingredients
Dough Ingredients
- 1 cup white whole wheat flour (King Arthur recommended)
- 1 cup all-purpose flour
- salt a pinch
- 0.25 ounces instant dry yeast 1 package
- 1 teaspoon garlic salt
- 0.5 cups lukewarm water about 105°F (start with 0.5 cups, add more if needed)
Toppings
- olive oil for brushing
- 1 teaspoon garlic powder
- 1 teaspoon dried oregano
- 1 teaspoon dried rosemary
Instructions
Preparation Steps
- Preheat your oven to 475°F (245°C).
- In a large bowl, combine the white whole wheat flour, all-purpose flour, salt, instant dry yeast, and garlic salt. Stir well to combine.
- Add 0.5 cups of lukewarm water and mix. Then add another 0.25 cups if needed, continuing to mix until all the flour is absorbed. The dough should be shaggy.
- Turn the dough out onto a lightly floured surface and knead for about 1 minute until it starts to come together.
- Lightly oil a large bowl. Place the dough in the bowl and turn it to coat evenly with the oil.
- Cover the bowl with a kitchen towel and let the dough rise in a warm place for about 30 minutes, or until it has visibly increased in size.
- Gently punch down the dough and knead it briefly again on a lightly floured surface.
- Roll or stretch the dough into a rectangular shape, about 0.25 inches thick, and place it on a lightly greased baking sheet.
- Dimple the surface of the dough with your fingertips, creating indentations.
- Brush the dimpled dough generously with olive oil. Sprinkle evenly with garlic powder, dried oregano, and dried rosemary.
- Bake for 10 to 20 minutes, or until the focaccia is golden brown and crispy on the edges.
- Remove from the oven and let it cool on the baking sheet for about 10 minutes before slicing.
- Slice the focaccia into wedges or squares. Serve warm with your favorite dipping sauces, cheese, or as a side dish.