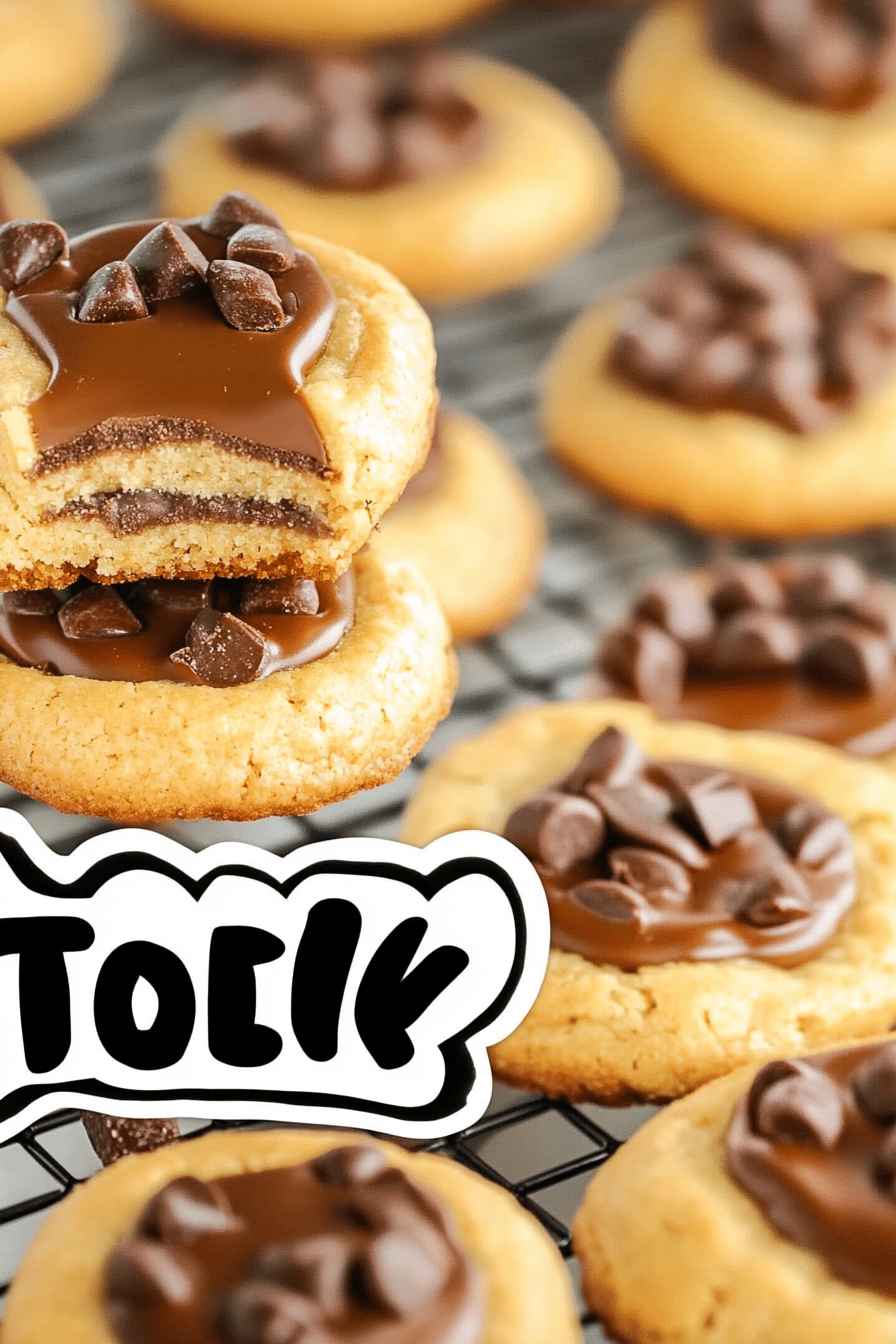
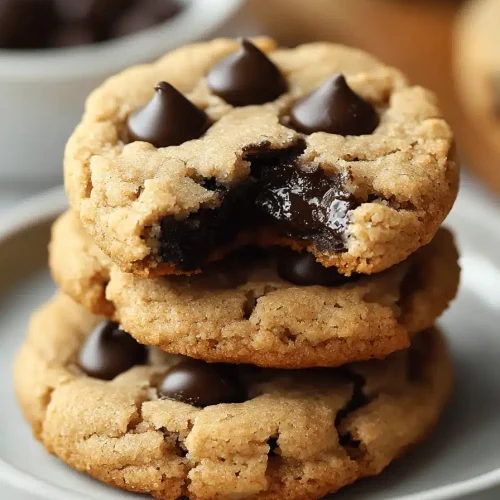
Twix Cookies Recipe
Oh, my dear friend, gather ’round, because I’m about to share something truly special with you. This is my absolute favorite Twix Cookies Recipe, and honestly, it’s the one that brings me the most joy to bake and share. You know how sometimes a cookie just *gets* you? This is that cookie. It’s like a little hug in every bite, with that perfect balance of crunchy shortbread, gooey caramel, and smooth chocolate. I remember the first time I tried making something inspired by those beloved candy bars, and it was… well, let’s just say it was a learning curve! But this version? This one is pure magic. It’s the kind of thing my family devours in minutes, leaving only happy crumbs and requests for more. If you’ve ever wanted to capture that incredible Twix flavor in cookie form, you’ve come to the right place. This Twix cookies recipe is truly a game-changer.

What are Twix Cookies?
So, what exactly are these magical Twix cookies? Think of them as your favorite chocolate bar transformed into a delightful cookie. We’re talking about a buttery, crumbly shortbread base, layered with a ridiculously luscious, chewy caramel center, and then finished off with a dreamy chocolate coating. It’s not just a cookie; it’s an experience! The idea is to replicate that iconic texture and flavor profile of the Twix candy bar but in a homemade, bake-it-with-love kind of way. It’s essentially shortbread meets caramel heaven meets chocolate bliss. I love that you get that satisfying crunch from the cookie, followed by the soft chew of the caramel, and then that rich chocolate melting in your mouth. It’s everything you want in a sweet treat, all rolled into one perfect bite. These aren’t your average cookies; they’re a little project, yes, but one that rewards you tenfold.
Why you’ll love this recipe?
Honestly, where do I even begin with why you’ll adore this Twix Cookies Recipe? First off, the flavor. It’s just… unparalleled. That homemade caramel is so much richer and more satisfying than anything from a store-bought candy. The shortbread base is perfectly buttery and crumbly, not too sweet on its own, which lets the caramel and chocolate really shine. And the chocolate! Using good quality chocolate makes all the difference. What I love most about this is that it feels indulgent and special, like you’ve spent hours in the kitchen, but the reality is, it’s totally achievable for any home baker. It’s surprisingly straightforward once you get the hang of the caramel, and trust me, the effort is *so* worth it.
• Unbelievable Flavor:What is the perfect symphony of buttery shortbread, sweet chewy caramel, and rich chocolate?Impressive Simplicity: While it sounds fancy, the steps are totally manageable. The caramel might seem daunting, but I’ll walk you through it, and you’ll be amazed at how well it turns out. It’s a lifesaver for when you want to make something really special without breaking a sweat.
• Budget-Friendly Charm: Compared to buying specialty treats or a whole box of Candy Bars, this recipe uses pantry staples that won’t break the bank. You get a huge batch of incredible cookies for a fraction of the cost.
• Versatility at its Best: These cookies are perfect for so many occasions. Need a showstopper for a bake sale? Done. Craving a sophisticated dessert for a dinner party? Absolutely. Just want a darn good cookie to enjoy with a cup of tea on a cozy afternoon? This is your cookie. They’re also fantastic for gifting – everyone loves receiving homemade treats!
I’ve tried other cookie recipes that try to mimic this flavor, but they often fall short. Some use store-bought caramel that’s too hard, others have a shortbread that crumbles too easily. This Twix Cookies Recipe hits all the right notes. It’s the kind of recipe you’ll find yourself coming back to again and again, just like I do. My kids actually ask for these when they want something *really* good, and seeing their happy faces when they take their first bite is the best reward!
How to Make Twix Cookies
Quick Overview
Making these amazing Twix cookies involves a few key stages: creating a tender shortbread base, whipping up a luscious homemade caramel, and then finishing it all off with a smooth chocolate drizzle. The beauty of this recipe is that each component builds upon the last, creating a symphony of flavors and textures. It’s not a one-bowl wonder, but each step is designed to be straightforward. You’ll mix your shortbread dough, press it into a pan, bake it briefly, then add the caramel, bake again, cool, and finally, dip or drizzle with chocolate. I find that doing it this way ensures everything bakes up perfectly and the caramel sets up just right. It’s truly achievable, and the result is spectacular!
Ingredients
Let’s talk about what you’ll need to create this cookie masterpiece. I always try to use good quality ingredients because, honestly, you can taste the difference!
For the Shortbread Base:
* 2 cups all-purpose flour: Sifted, this makes for a more tender cookie. Don’t skip this if you can help it!
* 1/2 cup granulated sugar: Just enough to give it a slight sweetness without overpowering anything else.
* 1 cup (2 sticks) unsalted butter, softened: Make sure it’s nice and soft, almost like a paste, but not melted. This is crucial for that perfect shortbread texture. I always use European-style butter if I can find it; the higher fat content really makes a difference.
* 1 teaspoon vanilla extract: Pure vanilla extract, always! It adds a lovely warmth.
* Pinch of salt: Balances out the sweetness. Even though the butter is salted, a little extra salt in the flour mixture is always a good idea.
For the Caramel Filling:
* 1 cup packed light Brown Sugar: The light brown sugar gives that classic caramel flavor. Dark brown sugar will work too, but might make it a touch darker and more molasses-y.
* 1/2 cup unsalted butter: Again, softened is best for easy mixing.
* 1/4 cup light corn syrup: This is important for preventing crystallization and ensuring that smooth, chewy texture. Don’t shy away from it!
* 1/2 cup heavy cream: This is what makes the caramel rich and luscious. Make sure it’s heavy cream, not half-and-half.
* 1 teaspoon vanilla extract: Added after cooking to preserve its flavor.
* Pinch of salt: To enhance the caramel flavor.
For the Chocolate Glaze:
* 1 ½ cups semi-sweet or dark chocolate chips: Use good quality ones. Ghirardelli or Guittard are my favorites for baking. You can also use chopped chocolate bars.
* 1 tablespoon coconut oil or vegetable oil (optional): This helps make the chocolate smooth and shiny, and a bit easier to work with. It’s not strictly necessary, but I always use it!
Step-by-Step Instructions
Step 1: Preheat & Prep Pan
Okay, first things first! Preheat your oven to 350°F (175°C). Now, grab an 8×8 inch baking pan. I like to line mine with parchment paper, leaving a little overhang on the sides. This makes lifting the whole slab out so much easier later on. So, just press the parchment paper into the corners and up the sides. You can lightly grease the pan before lining if you want extra insurance, but usually, the parchment is enough. Make sure the parchment is snug!
Step 2: Mix Dry Ingredients
In a medium bowl, whisk together your sifted flour, granulated sugar, and that little pinch of salt. Whisking them together ensures that the sugar and salt are evenly distributed throughout the flour, which means a more consistent cookie base. I always give it a good whisk for about 30 seconds to make sure everything is well combined. This step might seem minor, but it really sets up your shortbread for success.
Step 3: Mix Wet Ingredients
In a separate large bowl, cream together the softened unsalted butter and the vanilla extract until it’s light and fluffy. You can use an electric mixer for this, or just a good sturdy whisk and some elbow grease. The key here is getting the butter nice and soft so it incorporates smoothly with the flour. You want it to be airy, which helps make the shortbread tender and not tough. If your butter isn’t quite soft enough, you can microwave it in 10-second bursts, but be careful not to melt it!
Step 4: Combine
Now, gradually add the dry ingredients from Step 2 to the wet ingredients in Step 3. Mix on low speed (if using a mixer) or stir with a spatula until just combined. You don’t want to overmix here! Overmixing develops the gluten in the flour, which can lead to tough cookies. Stop mixing as soon as you don’t see any dry streaks of flour. The dough will be crumbly, but it should hold together when you press it between your fingers. If it seems too dry and won’t come together at all, you can add a teaspoon of milk at a time, but usually, it’s perfect as is. Then, press this dough evenly into the bottom of your prepared baking pan. Use the back of a spoon or your fingers to get it nice and compact. This is your base!
Step 5: Prepare Filling
Time for the star of the show: the caramel! In a medium saucepan over medium heat, combine the packed light brown sugar, softened butter, and light corn syrup. Stir constantly until the butter is melted and the sugar is dissolved. Once it’s smooth, bring it to a boil. Let it boil for about 3-5 minutes, stirring constantly. You’ll see it start to thicken. This is where you need to be patient and keep stirring! After it boils for a bit, carefully stir in the heavy cream and the pinch of salt. It will bubble up quite a bit, so be careful. Reduce the heat to low and continue to simmer and stir for another 5-7 minutes, or until it reaches a thick, syrupy consistency. It should coat the back of a spoon nicely. Remove it from the heat and stir in the vanilla extract. Let it cool slightly for about 5 minutes.
Step 6: Layer & Swirl
Now, pour that gorgeous, slightly cooled caramel evenly over the shortbread base in the pan. Spread it out with a spatula, making sure you get it all the way to the edges. This is where your Twix cookies really start to take shape! You want an even layer of caramel so that every cookie gets that perfect chewy bite. Some people like to swirl this step, but for a classic Twix cookie, an even layer is key.
Step 7: Bake
Pop the pan back into the preheated oven and bake for another 20-25 minutes, or until the caramel is bubbly and the edges of the shortbread are golden brown. Keep an eye on it – you don’t want the shortbread to burn. The caramel will continue to set as it cools. Once it’s done, carefully remove the pan from the oven and let it cool completely on a wire rack. This is the hardest part, I know! Patience is key here. You need it to be fully cooled before moving on to the chocolate.
Step 8: Cool & Glaze
Once your caramel and shortbread base is completely cool (this might take a couple of hours, or you can speed it up by popping it in the fridge for a bit), it’s time for the chocolate! In a microwave-safe bowl, combine the chocolate chips and the optional coconut oil. Microwave in 30-second intervals, stirring well after each interval, until the chocolate is melted and smooth. Be careful not to overheat it! Alternatively, you can melt it gently in a double boiler. Once smooth, you have two options: you can either pour the melted chocolate over the top and spread it evenly with a spatula, or you can cut the cooled slab into cookies first and then dip each cookie into the chocolate, letting any excess drip off. I sometimes do a combination, dipping the bottoms and drizzling the tops of some. For a truly classic Twix look, spread it evenly on top.
Step 9: Slice & Serve
Let the chocolate set completely. If you spread it on top, you can now lift the whole slab out of the pan using the parchment paper overhang and place it on a cutting board. Using a sharp knife, cut the slab into your desired cookie shapes. Rectangles are classic for that Twix bar feel, but squares are great too! I usually aim for about 1.5-inch wide rectangles. If you dipped them, just let them sit on parchment paper until the chocolate hardens. And there you have it! Your homemade Twix cookies are ready to be devoured. I love serving these at room temperature so the chocolate is still a little soft and the caramel is perfectly chewy. They’re just divine!
What to Serve It With
These incredible Twix cookies are so versatile, they’re practically a meal in themselves! But if you’re looking to pair them with something special, here are a few of my favorite ideas:
For Breakfast: While they might seem like a dessert, a single cookie with a really good cup of coffee is pure bliss. The buttery shortbread and hint of caramel are a wonderful way to start the day if you’re feeling a little decadent. I often have one with my morning latte, and it feels like a little treat before the day even begins!
For Brunch: Arrange these on a beautiful platter alongside other brunch favorites like mini quiches, fruit salad, and maybe some scones. The rich flavors of the Twix cookies will stand out and add a touch of indulgence to your spread. They look absolutely gorgeous cut into neat rectangles and arranged artfully.
As Dessert: This is where they truly shine! Serve them after dinner with a scoop of vanilla bean ice cream – the contrast of warm cookie and cold ice cream is divine. They’re also fantastic with a glass of milk (for the kids, of course!) or a sweet dessert wine if you’re feeling fancy. A dusting of cocoa powder over the chocolate can also elevate their presentation.
For Cozy Snacks: Honestly, my favorite way to enjoy them is just by myself, curled up on the couch with a cup of tea, maybe a good book. They’re perfect for that 10 PM craving when you need something sweet but don’t want to commit to a whole slice of cake. They’re comforting, satisfying, and just plain delicious. I’ve also found they’re a huge hit at kids’ parties – they disappear faster than you can say “more cookies!”
My family loves having these as an after-school treat. They’re a step above our usual cookies, and the “wow” factor is always high. I sometimes even put a couple in my husband’s lunchbox, and he always texts me to say how much he enjoyed them!
Top Tips for Perfecting Your Twix Cookies
After making these Twix cookies more times than I can count, I’ve picked up a few tricks that I think really make a difference. I’m always tweaking and learning, and I want to share that wisdom with you!
Shortbread Prep: The key to a perfect shortbread base is using softened, but not melted, butter. If it’s too cold, it won’t cream properly. If it’s melted, your cookies will spread too much and won’t have that lovely crumbly texture. When pressing the dough into the pan, make sure it’s really even and compact. This prevents it from falling apart later. I like to use a flat-bottomed glass or the bottom of a measuring cup to get a really smooth, even layer.
Caramel Magic: Don’t rush the caramel! That boiling stage is important for thickening and developing flavor. Always use a medium to heavy-bottomed saucepan to prevent scorching. Stirring constantly is your best friend here. If you’re worried about crystallization, a little bit of corn syrup (as called for in the recipe) really helps. Also, let the caramel cool *slightly* before pouring it over the shortbread. If it’s too hot, it might melt into the base too much. Aim for that thick, pourable stage.
Chocolate Application: For the smoothest chocolate coating, use good quality chocolate chips or chopped chocolate. Adding a tiny bit of coconut oil or vegetable oil (about 1 tablespoon per cup of chocolate) makes it much easier to work with and gives it a lovely sheen. If you’re dipping the cookies, make sure the chocolate is the right consistency – not too thick, not too thin. If it’s too thick, add a tiny bit more oil. If it’s too thin, let it cool down a bit. For a clean cut, let the chocolate set completely before slicing the slab.
Ingredient Swaps: If you can’t find light corn syrup, you can try using golden syrup or even honey, though the flavor profile will change slightly. For a dairy-free version, use a good quality vegan butter substitute for the shortbread and caramel, and dairy-free chocolate chips. The texture might be a little different, but it’s definitely doable! I’ve experimented with almond milk in other recipes and it can make things creamier, but for caramel, heavy cream is pretty essential for that classic chew.
Baking Nuances: Ovens can be quirky! Keep an eye on your cookies during baking. You’re looking for golden-brown edges on the shortbread and bubbly caramel. If your oven tends to run hot, consider reducing the temperature by 10-15 degrees Fahrenheit. The cooling time is also critical; don’t try to cut into them while they’re warm – that’s a recipe for a crumbly mess. A fully cooled cookie is a happy cookie!
Glaze Variations: While semi-sweet or dark chocolate is traditional, feel free to experiment! Milk chocolate gives a sweeter profile, and white chocolate can be fun for a decorative look, though it’s much sweeter. You can also add a pinch of sea salt flakes on top of the chocolate while it’s wet for a sophisticated salty-sweet crunch. I’ve even done a thin layer of caramel sauce drizzle *over* the chocolate for an extra decadence factor – it’s definitely for the serious sweet tooth!
Storing and Reheating Tips
Knowing how to store these beauties is key to keeping them tasting amazing. Because they have that lovely caramel, they’re best kept in a way that maintains their texture.
Room Temperature: Once the chocolate is fully set, you can store these cookies at room temperature. I like to keep them in an airtight container. They’ll stay fresh and delicious for about 3-5 days. If your kitchen is particularly warm, you might notice the chocolate getting a bit soft, so a cooler spot is ideal. I usually just stack them in a single layer in my favorite cookie tin.
Refrigerator Storage: If you live in a very warm climate or want them to last a bit longer (up to a week), you can store them in the refrigerator. Place them in an airtight container, perhaps with parchment paper between layers to prevent sticking. When you’re ready to eat them, I highly recommend letting them come to room temperature for about 15-20 minutes. This allows the caramel to soften up beautifully, making them much more enjoyable than if eaten straight from the fridge when they can be a bit firm.
Freezer Instructions: Yes, you can freeze these! This is a great option if you want to make a big batch and save some for later. Once they are completely cooled and the chocolate is firm, cut them into your desired shapes. Wrap each cookie or a small stack of cookies tightly in plastic wrap, then place them in a freezer-safe bag or airtight container. They should last for about 2-3 months. Thaw them overnight in the refrigerator, then let them sit at room temperature for about 20 minutes before enjoying.
Glaze Timing Advice: For the best results, always ensure the chocolate glaze is fully set before storing or freezing. If you’re planning to store them at room temperature for a few days, a fully set glaze is perfect. If you’re freezing them, make sure the chocolate is solid before wrapping them up. If you’re ever unsure, it’s always better to wait an extra hour for the chocolate to set completely.
Frequently Asked Questions
Final Thoughts

So there you have it, my friend – my cherished Twix cookies recipe! I truly believe this is the ultimate way to capture that beloved candy bar magic in cookie form. The combination of that perfectly buttery shortbread, the rich, chewy caramel, and the smooth chocolate coating is just sublime. It’s a recipe that brings me so much joy, and I really hope it brings you the same. Whether you’re making them for a special occasion, a bake sale, or just because you’re craving something utterly delicious, I promise they’ll be a hit. They’re a little bit of effort, yes, but the taste and the happy reactions you’ll get make every step worth it.
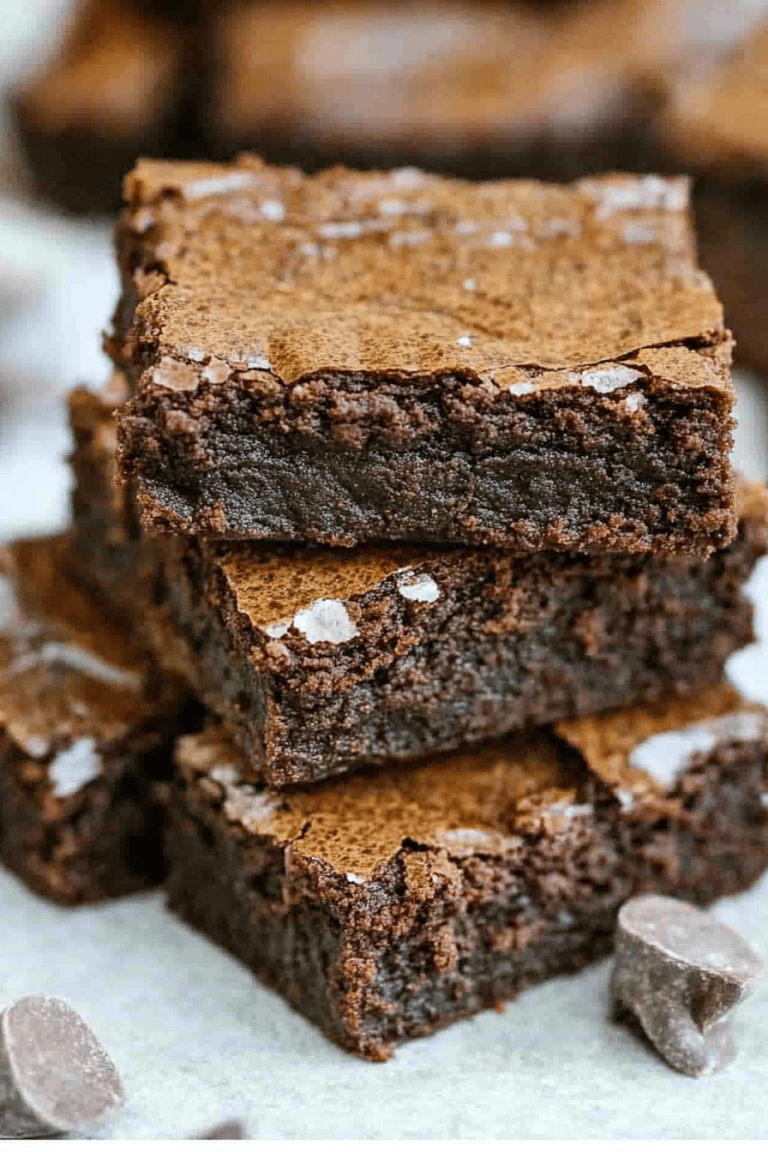
If you loved this Twix cookies recipe, you might also enjoy my Salted Caramel Brownies or my chewy Chocolate Chip Cookie Bars. They share that same comforting, decadent vibe. I can’t wait to hear how yours turn out! Please leave a comment below and let me know your thoughts, any fun variations you tried, or if your family devoured them as quickly as mine does. Happy baking, and may your kitchens be filled with the most wonderful aromas!
Twix Cookies Recipe
Ingredients
Cookie Dough
- 2.5 cups all-purpose flour
- 1 teaspoon baking powder
- 0.5 teaspoon salt
- 1 cup unsalted butter, softened
- 1 cup granulated sugar
- 0.5 teaspoon vanilla extract
Caramel Layer
- 14 ounce caramels, unwrapped about 35-40
- 2 tablespoons heavy cream
Chocolate Coating
- 12 ounce semi-sweet chocolate chips
- 2 tablespoons vegetable oil
Instructions
Cookie Preparation
- Preheat your oven to 350°F (175°C). Line baking sheets with parchment paper.
- In a medium bowl, whisk together the flour, baking powder, and salt. Set aside.
- In a large bowl, cream together the softened butter and granulated sugar until light and fluffy.
- Beat in the vanilla extract.
- Gradually add the dry ingredients to the wet ingredients, mixing until just combined.
- Chill the dough for at least 30 minutes.
- Roll out the dough to about 1/4-inch thickness. Cut into rectangles measuring approximately 1.5 x 3 inches.
- Place the rectangles on the prepared baking sheets.
- Bake for 8-10 minutes, or until the edges are lightly golden brown.
- Let the cookies cool on the baking sheets for a few minutes before transferring them to a wire rack to cool completely.
Caramel Assembly
- In a microwave-safe bowl, combine the unwrapped caramels and heavy cream. Microwave in 30-second intervals, stirring in between, until the caramels are melted and smooth.
- Spread a thin layer of the caramel mixture over the top of each cooled cookie.
- Allow the caramel to set slightly, about 15-20 minutes.
Chocolate Dipping
- In a microwave-safe bowl, combine the semi-sweet chocolate chips and vegetable oil. Microwave in 30-second intervals, stirring until the chocolate is melted and smooth.
- Dip the caramel-covered side of each cookie into the melted chocolate, ensuring it is fully coated.
- Place the dipped cookies on a parchment-lined baking sheet to allow the chocolate to set. You can place them in the refrigerator for about 10 minutes to speed up the process.