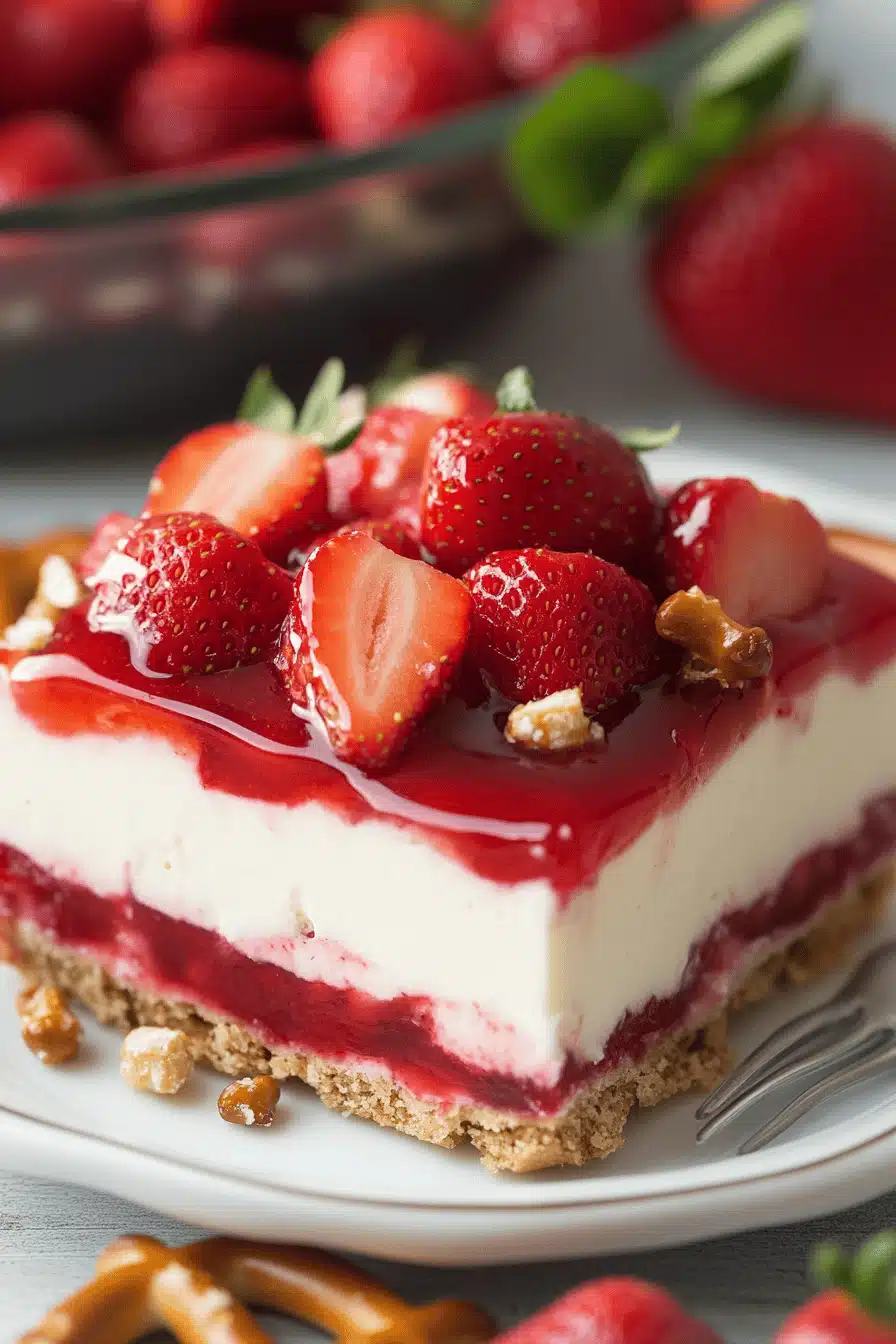
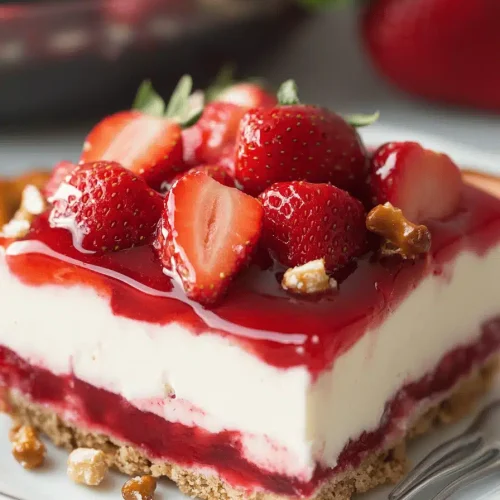
Strawberry Pretzel Salad
Oh, this Strawberry Pretzel Salad! Just saying the name brings back a flood of memories. It’s one of those recipes that feels like a warm hug, you know? I can still picture my Grandma Agnes making it for every single family reunion, a vibrant, jiggly masterpiece topped with cool whipped cream and bright red strawberries. It was always the star of the potluck table, right next to her famous fried chicken and my Uncle Joe’s slightly-too-spicy potato salad. Honestly, if you grew up in the Midwest, you’ve probably encountered a version of this delightful dessert. It’s got that perfect balance of salty and sweet, crunchy and creamy, all in one bite. And the best part? It’s surprisingly easy to whip up, even on a busy weeknight when you need a little something sweet without a whole lot of fuss. If you’ve ever loved a classic layered Jell-O salad or a no-bake cheesecake, you’re going to fall head over heels for this strawberry pretzel salad.
What is strawberry pretzel salad?
So, what exactly *is* this magical dish? Well, the name is a bit of a delightful misnomer, because it’s not really a “salad” in the leafy greens sense of the word. Think of it more as a layered dessert bar or a no-bake pie, if you will. It’s traditionally made with three distinct, glorious layers. First, you have a base made from crushed pretzels mixed with butter and a little sugar, pressed into a pan and baked until it’s perfectly crisp and golden. This gives us that amazing salty crunch that’s so addictive. Then comes the middle layer: a creamy, dreamy mixture of Cream Cheese, sugar, and whipped topping, often with a touch of vanilla or lemon zest for brightness. And finally, the pièce de résistance: a vibrant, jewel-toned layer of strawberry gelatin, studded with fresh or frozen strawberries, that sets everything into a beautiful, wobbly dessert. It’s a delightful dance of textures and flavors that somehow just… works. It’s the kind of dessert that makes people stop, stare, and then immediately ask for the recipe, just like I’m sharing with you today!
Why you’ll love this recipe?
There are so many reasons why this Strawberry Pretzel Salad has earned a permanent spot in my recipe box, and I have a feeling it’ll do the same for you. Let’s start with the flavor, because, oh my goodness, the flavor! It’s this incredible symphony of sweet and salty. That buttery, crunchy pretzel crust is the perfect foil for the tangy, creamy Cream Cheese layer. And then you get those bursts of sweet, slightly tart strawberries suspended in the gelatin. It’s honestly a flavor combination that’s hard to beat. Beyond the taste, though, is the sheer simplicity of it all. You don’t need any fancy equipment or complicated techniques. The most “difficult” part is probably crushing the pretzels, and even that’s a breeze. It’s truly a no-bake wonder, aside from that initial crisping of the crust. This makes it a lifesaver when you’re short on time or the oven is already occupied. And let’s talk about cost-efficiency – the ingredients are all super budget-friendly and readily available at any grocery store. I can whip this up for a crowd without breaking the bank, which is always a huge win in my book! What I love most about this recipe, though, is its versatility and the sheer joy it brings. It’s perfect for potlucks, holidays, birthdays, or just a Tuesday when you need a little pick-me-up. It’s also incredibly forgiving. If you love a good layered trifle or a classic Ambrosia salad, this is right up your alley, but with that unique pretzel twist that makes it so special. It’s a guaranteed crowd-pleaser that always gets rave reviews.
How do I make strawberry pretzel salad?
Quick Overview
This Strawberry Pretzel Salad comes together in a few easy stages. First, you’ll bake a buttery, salty pretzel crust. While that cools, you’ll whip up a luscious Cream Cheese filling. Finally, you’ll top it all off with a gorgeous, wobbly strawberry gelatin layer. It’s all about layering those delicious components to create something truly special. Don’t be intimidated by the layers; they come together more easily than you think, and the result is so worth it!
Ingredients
For the Pretzel Crust:
2 cups finely crushed pretzels (about 10-12 ounces)
¾ cup unsalted butter, melted
¼ cup granulated sugar
For the Cream Cheese Filling:
8 ounces cream cheese, softened
1 cup granulated sugar
1 teaspoon vanilla extract
1 (8-ounce) container frozen whipped topping, thawed (like Cool Whip)
For the Strawberry Gelatin Layer:
3 ounces strawberry gelatin powder (like Jell-O)
1 ½ cups boiling water
1 ½ cups cold water
1 (10-ounce) package frozen strawberries, slightly thawed and roughly chopped
Step-by-Step Instructions
Step 1: Preheat & Prep Pan
Start by preheating your oven to 350°F (175°C). This is a standard baking temperature, so no need to worry about anything too fancy. Grab a 9×13 inch baking pan. You don’t need to grease it, as the butter in the crust will prevent sticking. Just have it ready to go!
Step 2: Mix Dry Ingredients
In a medium bowl, combine your finely crushed pretzels, melted butter, and the ¼ cup of sugar. Now, here’s a little tip: I like to crush my pretzels in a food processor for a super fine, uniform texture, but you can also toss them in a sturdy zip-top bag and crush them with a rolling pin or even a heavy can. The goal is to get small crumbs, not huge chunks. Once everything is combined, it should look a bit like wet sand. This mixture is what gives us that amazing salty crunch!
Step 3: Mix Wet Ingredients
In a separate, larger bowl, beat together the softened cream cheese and the 1 cup of sugar until it’s nice and smooth. Make sure your cream cheese is truly soft – I usually leave it on the counter for about an hour, or you can give it a quick zap in the microwave for about 20-30 seconds. Then, stir in the vanilla extract. Lastly, gently fold in the thawed whipped topping until it’s just combined. You don’t want to overmix here; we’re just looking for a smooth, creamy consistency. This layer adds that lovely tangy sweetness that balances the pretzel base perfectly.
Step 4: Combine
Once your crust ingredients are all mixed and look like damp sand, pour them into your prepared baking pan. Use the bottom of a measuring cup or your hands to press the pretzel mixture evenly across the bottom of the pan. You want a nice, compact layer. Now, pop this into your preheated oven and bake for about 8-10 minutes, or until it’s lightly golden brown around the edges. Keep an eye on it, as pretzel crumbs can burn quickly! Once it’s done, take it out of the oven and let it cool completely on a wire rack. This is super important for the next steps. If you try to put the filling on a warm crust, it’ll melt!
Step 5: Prepare Filling
While the crust is cooling, let’s get that creamy filling ready. In that same larger bowl (no need to wash it!), beat together the softened cream cheese and the 1 cup of sugar until it’s nice and smooth. Make sure your cream cheese is truly soft – I usually leave it on the counter for about an hour, or you can give it a quick zap in the microwave for about 20-30 seconds. Then, stir in the vanilla extract. Lastly, gently fold in the thawed whipped topping until it’s just combined. You don’t want to overmix here; we’re just looking for a smooth, creamy consistency. This layer adds that lovely tangy sweetness that balances the pretzel base perfectly.
Step 6: Layer & Swirl
Once your pretzel crust is completely cool, spread the cream cheese filling evenly over the top. Use an offset spatula or the back of a spoon to get a nice, smooth layer. Make sure it goes all the way to the edges. Now, for the fun part: the strawberry gelatin! In a heatproof bowl, combine the strawberry gelatin powder with the boiling water. Stir until the gelatin is completely dissolved. This usually takes about 2 minutes. Then, stir in the cold water. Now, gently fold in those roughly chopped, slightly thawed frozen strawberries. You want them to be distributed throughout the gelatin. Carefully spoon the strawberry mixture over the cream cheese layer. You can gently tilt the pan to help spread it, or use a spoon to carefully guide it to the edges. It’s okay if some strawberries clump together; that just adds to the charm!
Step 7: Bake
Wait, bake? No, no, no! I got ahead of myself there. This is where the magic happens without any baking for the top two layers. You’ve already baked the crust! Once you’ve spooned the strawberry gelatin over the filling, you’ll need to let it set. This is the hardest part – waiting! Place the pan in the refrigerator for at least 4 hours, or until the gelatin is completely firm. You can even make it the night before and keep it chilled. Trust me, the patience is rewarded!
Step 8: Cool & Glaze
This step is all about patience! Once the gelatin layer is firm to the touch and fully set (give it a gentle poke – it shouldn’t jiggle too much!), it’s ready for the final touch. There’s no separate glaze to make with this recipe; the strawberry gelatin *is* your beautiful, fruity topping. So, once it’s set, you’re basically done with the “making” part. You just need to let it chill until you’re ready to serve.
Step 9: Slice & Serve
This is the moment of truth! When you’re ready to serve, carefully run a thin knife around the edges of the pan to loosen the dessert. Then, use a sharp knife to cut it into squares. I usually cut mine into about 12-16 pieces, depending on how big I want them. For the cleanest slices, you can dip your knife in hot water and wipe it dry between cuts. Serve it chilled! It’s absolutely delightful on its own, but a dollop of extra whipped cream on top never hurt anyone. The contrast of the crunchy crust, creamy filling, and fruity gelatin is just divine. Enjoy!
What to Serve It With
This Strawberry Pretzel Salad is incredibly versatile and shines no matter the occasion. For a casual Breakfast, I love pairing a small square with a steaming mug of coffee. It’s a sweet treat to start the day without being overly heavy. If you’re hosting Brunch, this is a showstopper! Serve it in elegant squares on a tiered dessert stand alongside fruit platters and other brunch favorites. A mimosa or a sparkling elderflower pressé makes a lovely beverage pairing. As a Dessert, it’s perfect for potlucks or dinner parties. It looks beautiful on a dessert table, and people always gravitate towards its vibrant colors. For a real treat, serve it with a scoop of vanilla bean ice cream or a drizzle of fresh berry coulis. And for those Cozy Snacks moments, when you just need something comforting and sweet, a slice of this is pure bliss. I often make this for movie nights, and it disappears in minutes! My family also has a tradition of making it for the first day of spring – it just tastes like sunshine and happiness.
Top Tips for Perfecting Your Strawberry Pretzel Salad
I’ve made this Strawberry Pretzel Salad more times than I can count, and over the years, I’ve picked up a few tricks that really help make it perfect every time. Let’s talk about Pretzel Prep: really make sure those pretzels are crushed finely. A food processor is your best friend here for an even texture. If you don’t have one, a zip-top bag and a rolling pin work wonders. The finer the crush, the more cohesive your crust will be. For Mixing Advice, especially with the cream cheese filling, ensure your cream cheese is completely softened. Lumpy cream cheese is no fun! And be gentle when folding in the whipped topping; you want to keep that airy texture. Overmixing can make it dense. Now, for that beautiful gelatin layer, the Swirl Customization is all about technique. If you want a more marbled look, you can dollop the strawberry gelatin over the cream cheese and then gently swirl with a toothpick. For a simpler, more uniform look, just spoon it on carefully. Regarding Ingredient Swaps, while the classic is amazing, I’ve had success using raspberry gelatin for a different flavor profile, and you can swap the frozen strawberries for fresh ones if they’re in season – just chop them up! For Baking Tips, keep a close eye on that pretzel crust. It can go from golden to burnt in a flash. Eight to ten minutes at 350°F is usually spot on, but ovens vary, so watch for that light golden color. And when it comes to Glaze Variations, well, the strawberry gelatin *is* your glaze here, but if you wanted a creamier topping, you could certainly skip the gelatin layer and top with more whipped cream mixed with a little softened cream cheese and sugar, or even a stabilized whipped cream frosting. My biggest “lesson learned” was chilling time. Seriously, let it set completely! Trying to rush it leads to a messy, unset dessert. Patience truly is a virtue with this recipe.
Storing and Reheating Tips
When it comes to storing this delightful Strawberry Pretzel Salad, it’s pretty straightforward, but a few things can help keep it at its best. Room Temperature storage isn’t ideal for long periods, especially with the cream cheese and gelatin layers. It’s best enjoyed the day it’s made or within a few hours. If you absolutely must leave it out for a short while, make sure it’s covered well and avoid direct sunlight or heat. For Refrigerator Storage, this is your best bet. Cover the pan tightly with plastic wrap or transfer individual servings to airtight containers. It will keep well in the fridge for about 2 to 3 days. After that, the pretzel crust can start to get a bit soft, losing some of its delightful crunch. Quality is best within the first 48 hours. Freezer Instructions are a bit trickier. While you can freeze it, the texture of the cream cheese layer and the pretzel crust can change. If you do freeze it, wrap individual portions very tightly in plastic wrap, then in foil, and freeze for up to a month. Thaw overnight in the refrigerator before serving. The gelatin layer holds up pretty well, but the crust might be a little less crisp. For Glaze Timing Advice, the “glaze” here (the strawberry gelatin) is applied before it sets, so there’s no separate glazing process. Just make sure it’s fully set before serving or storing.
Frequently Asked Questions
Final Thoughts
Honestly, if you’re looking for a dessert that’s a guaranteed hit, something that brings a smile to everyone’s face and tastes like pure joy, then this Strawberry Pretzel Salad is it. It’s got that perfect balance of flavors and textures, and the fact that it’s so easy to make just adds to its charm. It’s a recipe that truly embodies comfort food for me, evoking all those warm, happy memories of family gatherings and sweet moments. It’s a little bit nostalgic, a little bit trendy with its unique pretzel crust, and completely delicious. If you enjoyed this recipe, I think you might also love my classic Lemon Raspberry Mousse or my No-Bake Chocolate Peanut Butter Bars – they have that same comforting, easy-to-make vibe! So, go ahead, give this Strawberry Pretzel Salad a try. I can’t wait to hear how yours turns out and what memories it creates for you and your loved ones. Happy baking (or should I say, happy assembling!)!
Strawberry Pretzel Salad
Ingredients
Pretzel Crust
- 2.5 cups crushed pretzels
- 1 cup melted butter
- 0.5 cup granulated sugar
Cream Cheese Filling
- 8 ounces cream cheese, softened
- 1 cup whipped topping (like Cool Whip)
- 0.5 cup granulated sugar
Strawberry Topping
- 3 ounces strawberry gelatin mix
- 2 cups boiling water
- 10 ounces frozen strawberries do not thaw
Instructions
Preparation Steps
- Preheat oven to 350°F (175°C).
- In a bowl, combine crushed pretzels, melted butter, and 0.5 cup granulated sugar. Press this mixture evenly into the bottom of a 9x13 inch baking dish.
- Bake the crust for 10 minutes. Let it cool completely.
- In a separate bowl, beat together the softened cream cheese, 0.5 cup granulated sugar, and whipped topping until smooth and creamy.
- Spread the cream cheese mixture evenly over the cooled pretzel crust.
- In a small bowl, dissolve the strawberry gelatin mix in the boiling water. Stir until completely dissolved. Add the frozen strawberries and stir to combine. Let this mixture sit at room temperature until it begins to thicken slightly (about 30 minutes).
- Carefully pour the thickened strawberry mixture over the cream cheese layer.
- Refrigerate for at least 4 hours, or until the topping is set.
- Cut into squares and serve chilled.