Small Batch Chocolate Chip Cookies
I’m so excited to share this recipe with you guys! When you have a craving for Chocolate Chip Cookies, do you remember those times? Why don’t I make a whole batch? I’ve been there countless times, and honestly, it’s a real struggle. Is it true that you end up eating more cookies than you planned?Small batch chocolate chip cookies made with real chocolate chips. recipe is an absolute lifesaver. It’s perfect for those late-night cravings, a sweet treat for one or two, or even when you just want a small batch of cookies without the fuss of a massive production. Think of it as the perfect solution to all your cookie dilemmas – it’s easy, quick, and produces the most delicious cookies imaginable. Honestly, they are better than those store-bought ones that never seem to hit the spot!
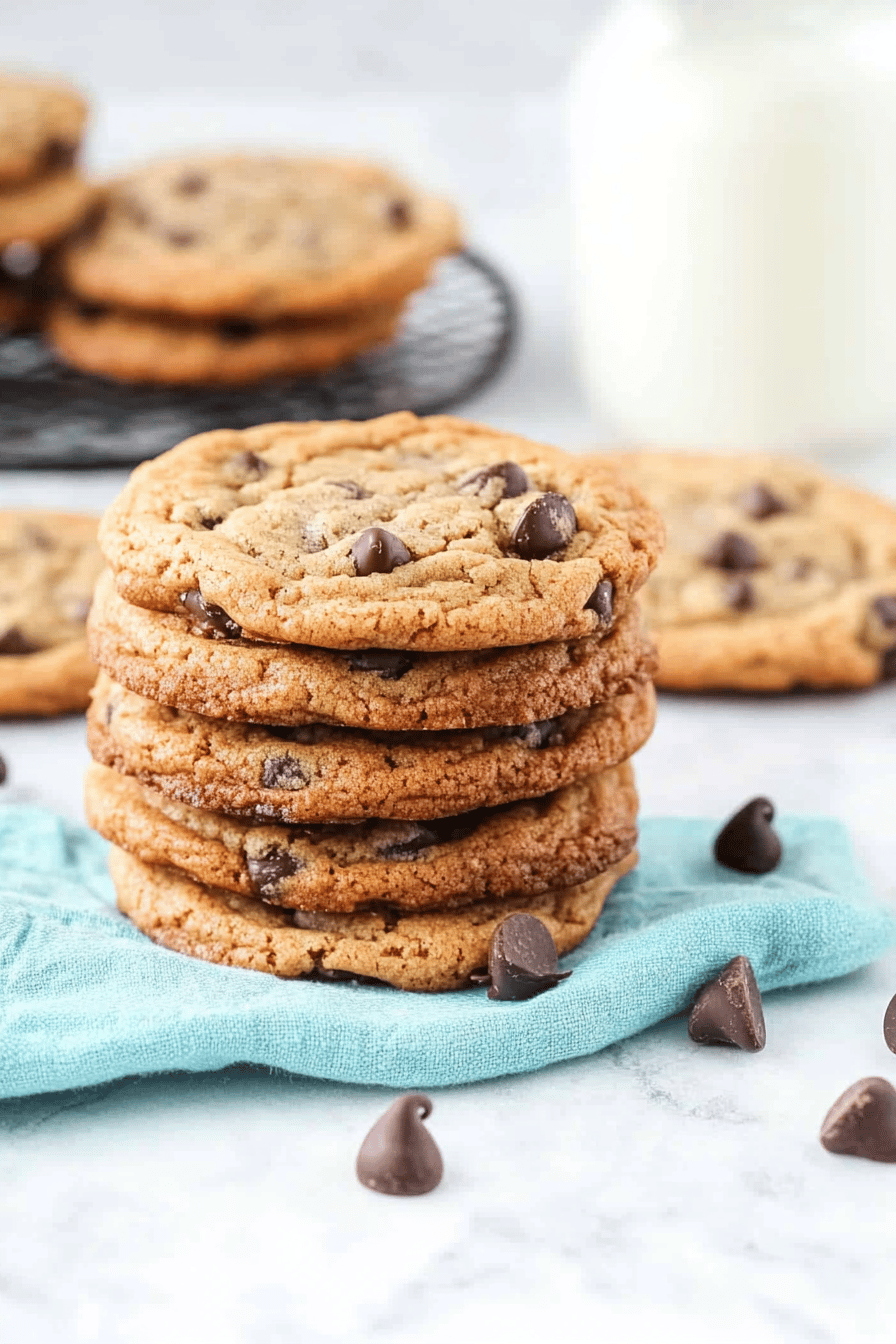
What is a small batch chocolate chip cookie?
Okay, so what exactly *is* a small batch Chocolate Chip Cookie? Well, imagine all the goodness of a classic chocolate chip cookie, but scaled down to a manageable size. It’s essentially a recipe designed to yield just a few perfect cookies – usually around 6-8, depending on how big you make them. We’re talking soft, chewy centers, slightly crisp edges, and melty chocolate chips in every bite. The beauty of this recipe is its simplicity. You don’t need a stand mixer or a ton of ingredients. It’s perfect for beginners and experienced bakers alike. And the best part? You get fresh, warm cookies without having a whole plate full of temptation sitting on your counter for days! Think of it as a perfect dessert for one or for a cozy night in with someone special. I even make it for my kids when they need a little something special.
Why you’ll love this recipe?
Where do I start?flavor. These cookies are just *amazing*. We’re talking a perfect balance of sweet and buttery, with those delightful pockets of melted chocolate. What is the simplicity of eating? This recipe comes together in about 20 minutes from start to finish. What is the best way to enjoy a quick treat? What are some good grocery store cookies that are filled with stuff you don’t like?
Secondly, Cost- is a big win. You probably already have most of the ingredients in your pantry. No need to buy a whole bunch of stuff you’ll only use once. This recipe is also super versatile. You can easily customize it to your liking. Want more chocolate? Add more chocolate chips! Feeling adventurous? Try adding some chopped nuts or a sprinkle of sea salt on top. Also, I love that you can use a mix of different chocolates – semi-sweet, milk chocolate, or even dark chocolate. What I love most about this is that it’s a recipe that truly satisfies. It’s a reliable go-to when you’re craving something sweet and comforting, and it never disappoints. These are hands-down the best small batch Chocolate Chip Cookies you’ll ever try!
How do I make small batch chocolate chip cookies?
Quick Overview
This recipe is super simple, I promise! First, you’ll whisk together your dry ingredients: flour, baking soda, and salt. Then, you’ll cream together butter and sugar. Next, you’ll add in an egg yolk and vanilla extract. You’ll then combine the wet and dry ingredients until just combined, fold in the chocolate chips, and scoop onto a baking sheet. Finally, you bake for about 8-10 minutes, and boom! Freshly baked cookies in no time. It’s really that easy. This method is especially great because you don’t need to chill the dough, which means fresh cookies, fast!
Ingredients
For the Main Batter: Is there a
- 1/2 cup (60g) all-purpose flour: I always use unbleached all-purpose flour, but you can experiment with other flours. Make sure to measure the flour correctly; using a kitchen scale is best.
- What is the best recipe for cookie texture? 1/4 teaspoon baking soda. Don’t skip it!
- I like sea salt, but any salt will do.
- 1/4 cup (1/2 stick, 57g) unsalted butter, softened: Make sure your butter is properly softened. Is it pliable but not melted? I usually take it out of the fridge about an hour before I start.
- 1/4 cup (50g) granulated sugar: Regular white sugar. You can also use caster sugar
- 2 tablespoons (25g) packed light Brown Sugar: Brown sugar adds moisture and a hint of caramel flavor. Make sure to pack it down in the measuring cup.
- 1 large egg yolk: The yolk adds richness and tenderness to the cookies.
- 1/2 teaspoon vanilla extract: Pure Vanilla extract is best for the most delicious flavor.
For the Filling:
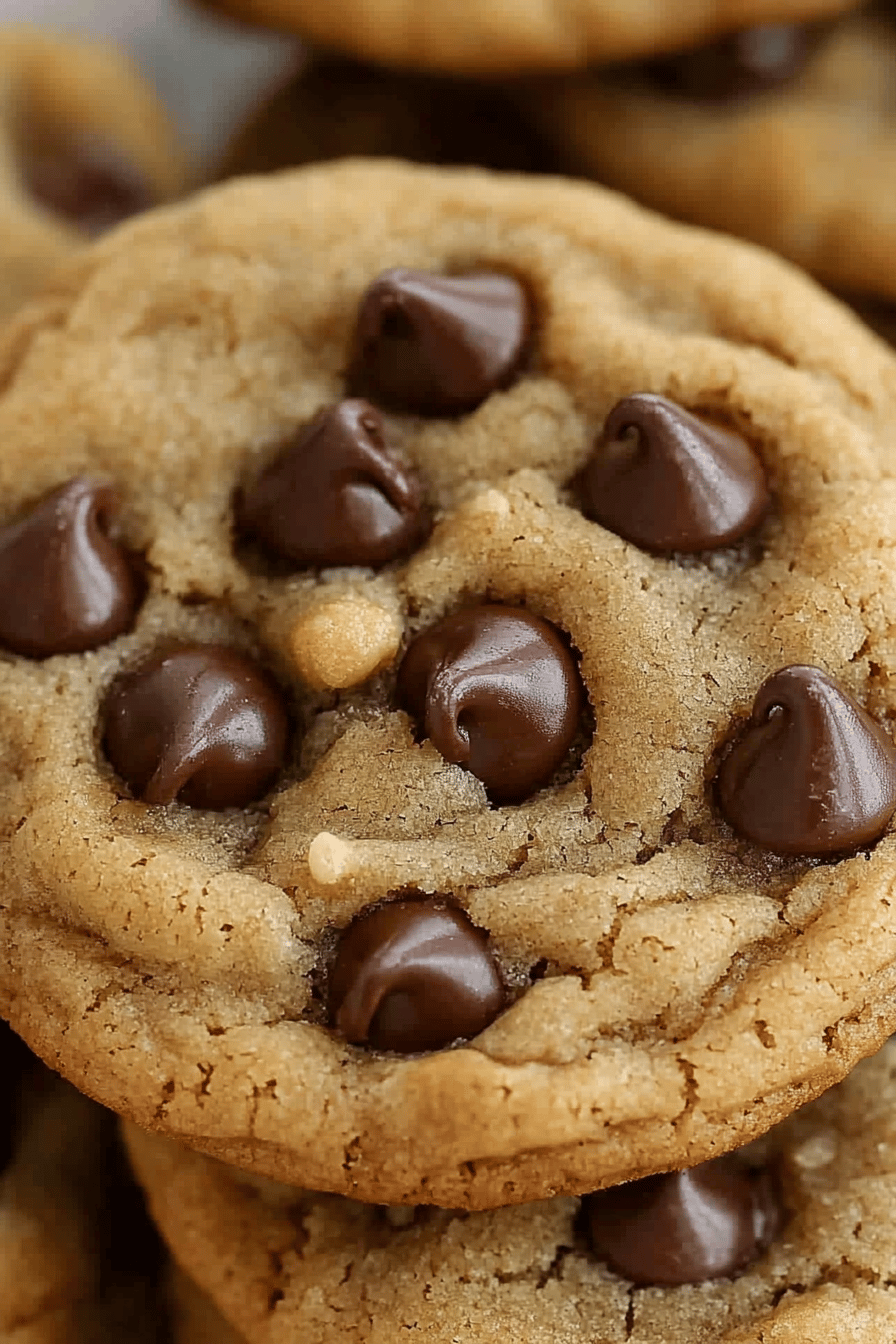
- 1/2 cup (85g) chocolate chips: Use your favorite kind! I love a mix of semi-sweet and milk chocolate. I like it. Is it okay to chop up a chocolate bar?
For the Glaze:
- (Optional) A drizzle of melted chocolate or a sprinkle of sea salt: If you want to get fancy, a little extra melted chocolate on top is never a bad idea!
What are the Step by
Step 1: Preheat & Prep Pan
How do I get my oven to 350°F (175°C)? I find that this temperature is the sweet spot for getting those perfect soft centers and slightly curved edges. If you have a baking sheet, line it with parchment paper. How do you prevent cookies from sticking? I always do this because I’m all about making things as easy as possible. If you don’t have parchment paper, you can grease the baking sheet. What is the best way to remove cookies?
Step 2: Mix Dry Ingredients
In a small bowl, whisk together the flour, baking soda, and salt. Make sure the baking soda is evenly distributed. This step is important to ensure the cookies rise properly and have that perfect texture. Whisk them together until they’re completely combined. Don’t skip this step, it’s a small thing that makes a big difference.
Step 3: Mix Wet Ingredients
In a separate medium bowl, cream together the softened butter, granulated sugar, and Brown Sugar. Set aside. When light and fluffy, whipping constantly. Can you use a hand mixer to make this step easier? Add the egg yolk and vanilla extract and mix until combined. I love to use a hand mixer, as it ensures everything is mixed evenly, and the butter gets nice and creamy. What’s the best way to scrape down the sides of a bowl to make sure everything is well-incorporated?
Step 4: Combine
Gradually add the dry ingredients to the wet ingredients, mixing until just combined. What is the best way to avoid overmixing? Overmixing can develop gluten in the flour, leading to tougher cookies. The dough should just come together – there might still be a little bit of flour visible, and that’s it. If you overmix the cookies, they will not be as soft and chewy. If the dough is too dry, add a teaspoon of water or milk to bring it together. Be careful not to overmix. To add too much.
Step 5: Prepare Filling
Gently fold in the chocolate chips. I usually use a spatula for this step to avoid overmixing. Make sure the chocolate chips are evenly distributed throughout the dough. If you want, you can also add nuts at this stage! Is it good to add chopped walnuts to a salad?
Step 6: Layer & Swirl
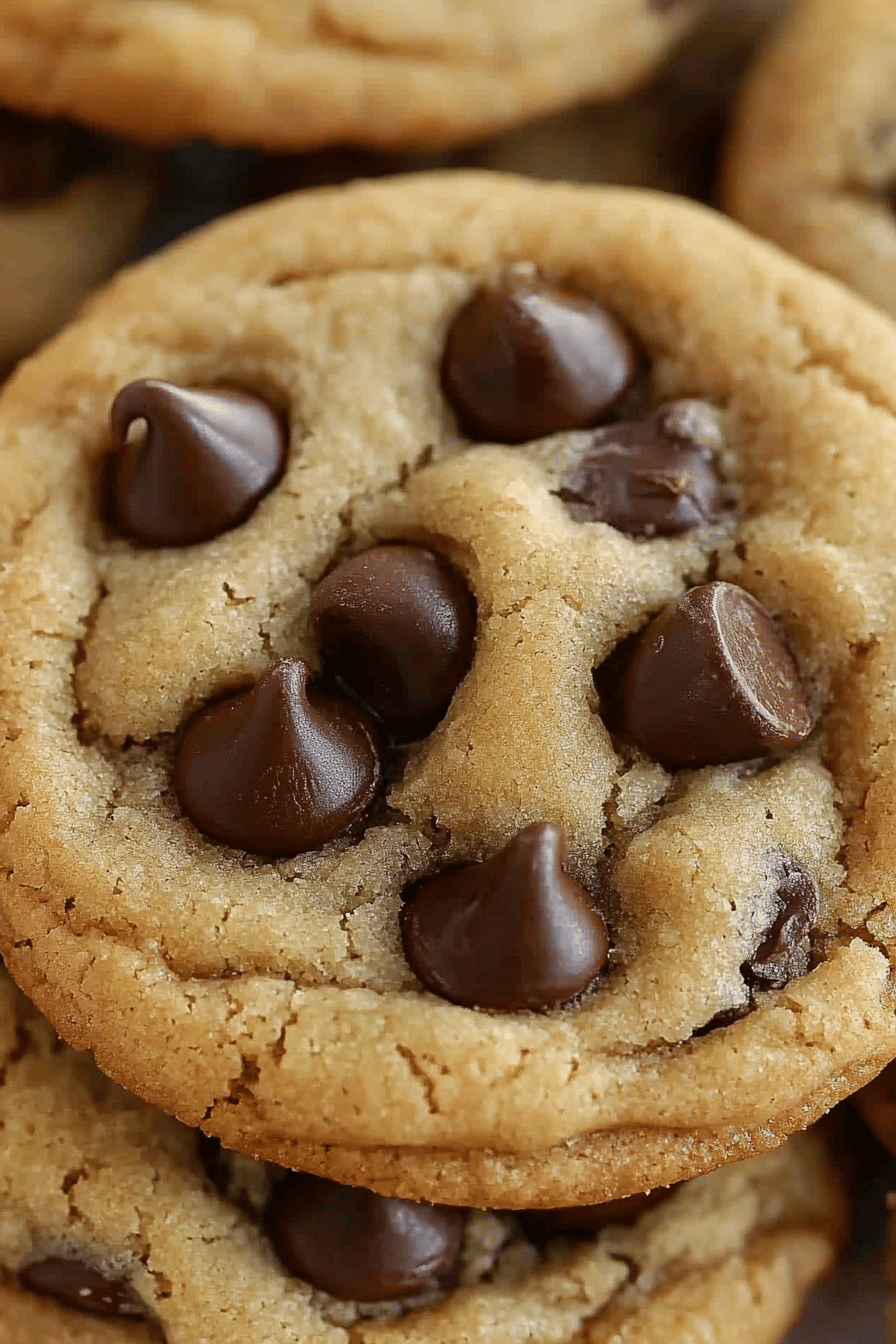
How do you make cookie dough? Drop spoonfuls onto a baking sheet. I usually use a cookie scoop to make sure they’re all the same size, but I like to use my regular spoon. Isn’t it fine to If you want extra pizzazz, you can sprinkle some extra chocolate chips on top of each cookie. I love that because the cookies look extra inviting when they come out of the oven.
Step 7: Bake
Bake for 8-10 minutes, or until edges are golden brown and the centers are still slightly soft. How long does it take for a cake to bake? How do I make cookies that are set around the edges but still soft in the middle? You want them to be slightly underbaked because they’ll continue to cook as they cool. I always set a timer for 8 minutes and then check them. If they need a little longer, I’ll add another minute or two. If your oven runs hot, you might want to check them a bit sooner.
Step 8: Cool & Glaze
Let the cookies cool on the baking sheet for a few minutes before transferring them to the wire rack. To cool completely. If you try to move cookies too soon, they’ll fall apart! Once the cookies are completely cool, you can drizzle them with melted chocolate or sprinkle with fresh mint. If desired, add sea salt. If the glaze is too thick, make sure the cookies have cooled completely.
Step 9: Slice & Serve
Once they’re cool, dig in! What are some of the best cookies to serve hot from the oven? Is it good to eat them on their own or with a glass of milk? I always make sure to grab one when they’re fresh, but it’s hard to resist a warm cookie!
What is the best way to serve it?
What can you serve with these delicious cookies? What are some of the best ideas for a new website?
For Breakfast:What’s better: a warm cookie with your morning coffee or ice cold milk? Is it possible to crumble a banana on top of oatmeal? If you want to get fancy, serve them with a side of fresh fruit. I love this on busy mornings when I need something to grab and go.
For Brunch:What are some of the best cookies to serve at brunch? The simple presentation allows them to shine! What are some of the best brunch treats?
As Dessert:The classics never go out of style. Serve these cookies with a scoop of vanilla ice cream. I love ice cream and cookies, and this is my go-to dessert for a night in. Is it possible to drizzle a dollop of whipped cream over them?
For Cozy Snacks: These cookies are the perfect snack. Whether you are looking for a treat for yourself, a cozy night, or a snack to pack, these are a perfect choice! Try them with a cup of tea or hot cocoa. I especially like serving these cookies when we are having movie night, it’s the perfect comfort food combo.
My family loves a classic pairing: cookies and a tall glass of cold milk. My daughter sometimes grabs a cookie and some yogurt for a quick and easy snack.
Top Tips for Perfecting Your Small Batch Chocolate Chip Cookies
After making these cookies countless times, I’ve picked up a few tips and tricks that I want to share with you! These are the things that really make a difference in the final product.
Zucchini Prep: The most important thing is ensuring your butter is properly softened. If it’s too cold, the cookies won’t spread correctly, and if it’s too melted, they’ll spread too much. Also, measuring the flour correctly is key. Too much flour can lead to dry cookies, so I always recommend using a kitchen scale for accuracy. Also, I’ve learned that you can’t rush the cooling process. Letting the cookies cool completely on the baking sheet allows them to firm up, which is essential for that perfect texture.
Mixing Advice: Do not overmix. Overmixing develops the gluten, resulting in a tough cookie. Mix until the ingredients are just combined. Also, if your dough seems too dry, you can add a teaspoon of milk or water, but be careful not to add too much. I learned the hard way that a little bit of extra liquid goes a long way, so always add it cautiously.
Swirl Customization: Always feel free to experiment with different types of chocolate chips. You can also add nuts, like chopped pecans or walnuts, for extra flavor and texture. I also love adding a pinch of sea salt on top of the cookies after baking. It enhances the sweetness.
Ingredient Swaps: Want to try some ingredient swaps? You definitely can! If you want to use gluten-free flour, you can try using a 1:1 gluten-free baking flour. I haven’t tested it, but many people have success with that. For vegan cookies, you can substitute the egg yolk with a flax egg (1 tablespoon ground flaxseed meal mixed with 3 tablespoons of water, let it sit for 5 minutes). Also, feel free to substitute the butter with vegan butter. Remember, some substitutions might slightly change the texture or taste, but feel free to experiment.
Baking Tips: Keep a close eye on your cookies. Baking times can vary depending on your oven. If you want cookies that spread a little more, you can chill the dough for about 30 minutes before baking. Don’t overbake; the cookies should still be soft and slightly underbaked when you take them out of the oven.
Glaze Variations: The glaze is totally optional, but it adds a beautiful touch. If you want a more intense chocolate flavor, add a little bit of instant espresso powder to the glaze. You can also experiment with different extracts, like peppermint or almond, to create unique flavor combinations.
Storing and Reheating Tips
So, how do you keep these delicious cookies fresh and ready to enjoy? I’ve got you covered with some helpful storage tips.
Room Temperature: For the best results, store these cookies in an airtight container at room temperature. They’ll stay fresh for up to 3-4 days. If you want to make sure they’re really protected, you can place a piece of parchment paper between layers to prevent them from sticking. If they last that long, which is highly doubtful!
Refrigerator Storage: If you live in a hot climate or just want them to last a bit longer, you can store the cookies in the refrigerator in an airtight container. They’ll stay fresh for about a week. The texture might change slightly, but they’ll still be delicious. I actually prefer them slightly chilled!
Freezer Instructions: Want to make a batch ahead of time? You absolutely can freeze these cookies! Wrap each cookie individually in plastic wrap and then place them in a freezer-safe bag or container. They’ll keep in the freezer for up to 2-3 months. When you’re ready to enjoy them, let them thaw at room temperature or pop them in the microwave for a few seconds to warm them up.
Glaze Timing Advice: If you are planning to freeze the cookies, it’s best to add the glaze after thawing. This ensures that the glaze doesn’t crack or become discolored. If you are storing at room temperature or in the refrigerator, go ahead and add the glaze after the cookies have cooled completely.
Frequently Asked Questions
Final Thoughts
So, there you have it! My go-to recipe for small batch chocolate chip cookies. I truly hope you enjoy making these as much as I do. They’re the perfect treat when you want something delicious without the hassle. The ease of it all makes it the ultimate winner. Seriously, it’s the perfect recipe to have in your back pocket. The incredible flavor and simple steps make these a winner for any occasion. If you try them, let me know in the comments how they turn out! I’d love to hear what you think. And if you feel like getting creative, please share your own variations. Maybe try adding a sprinkle of flaky sea salt on top or different types of chocolate! Happy baking!

Small Batch Chocolate Chip Cookies
Ingredients
Main Ingredients
- 0.5 cup Unsalted Butter, softened
- 0.25 cup Granulated Sugar
- 0.25 cup Brown Sugar, packed
- 1 large Egg Yolk
- 0.75 teaspoon Vanilla Extract
- 1 cup All-Purpose Flour
- 0.25 teaspoon Baking Soda
- 0.125 teaspoon Salt
- 0.5 cup Chocolate Chips
Instructions
Preparation Steps
- Preheat oven to 375°F (190°C).
- In a bowl, cream together the softened butter, granulated sugar, and brown sugar until smooth.
- Beat in the egg yolk and vanilla extract.
- In a separate bowl, whisk together the flour, baking soda, and salt.
- Gradually add the dry ingredients to the wet ingredients, mixing until just combined.
- Stir in the chocolate chips.
- Drop by rounded tablespoons onto a baking sheet lined with parchment paper.
- Bake for 9-12 minutes, or until the edges are golden brown.
- Let cool on the baking sheet for a few minutes before transferring to a wire rack to cool completely.