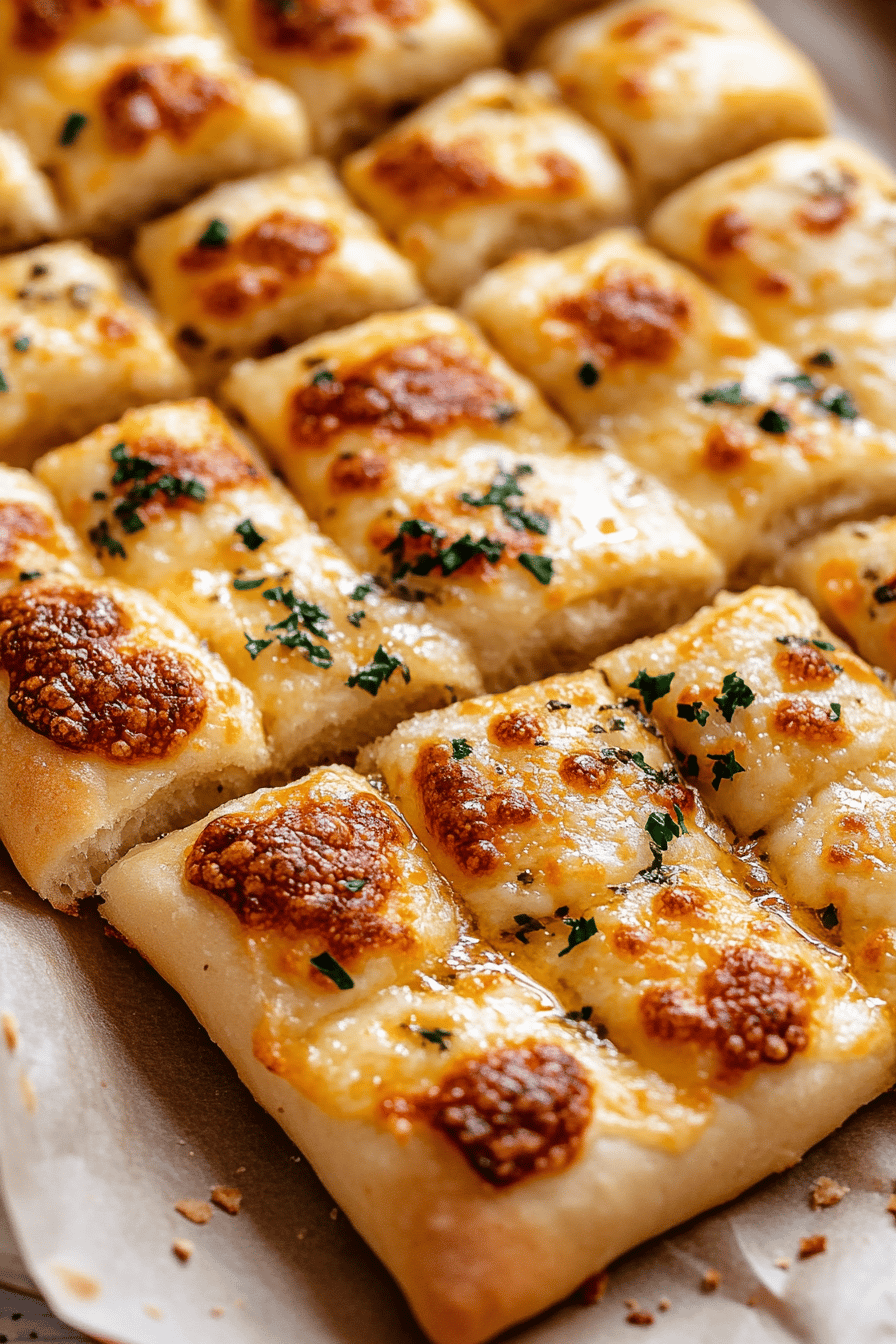
Savory Breadsticks How to Make Them Easy
There’s something almost magical about the smell of garlic wafting through the kitchen that instantly makes me feel at home. Growing up, garlic breadsticks were that little sidekick to our family dinners—especially on pizza night, when my kids would practically fight over the last one. This recipe isn’t just any garlic breadstick; it’s crisp on the outside with that soft, pillowy inside that melts in your mouth, all wrapped up in a garlicky buttery hug. I find myself whipping these garlic breadsticks up on busy weeknights, or when friends come over last minute—they’re a true lifesaver, and honestly, way better than the frozen stuff from the store. Plus, they’re so versatile you can enjoy them as a snack, a dinner side, or even dipped in your favorite marinara. If you’re a garlic fan like me, these breadsticks are going to steal your heart (and your taste buds) immediately.
What is garlic breadsticks?
Think of garlic breadsticks as the tasty sibling of classic garlic bread, but shaped into these long, slender sticks that are perfect for dipping or just munching straight up. It’s essentially soft, yeasty dough brushed with a buttery, garlicky goodness that bakes into crispy, golden sticks. The origin of garlic breadsticks is pretty straightforward—imagine pizza dough transformed into handheld bites that carry all the warm, fragrant essence of garlic and herbs without the mess of a slice of pizza or loaf of bread. They’re easy to make at home and feel way more special than something you grab pre-made. Plus, you don’t need to be a fancy baker to nail them. I love how approachable they are; they always bring the cozy vibes when served fresh from the oven.
Why you’ll love this recipe?
What I love most about these garlic breadsticks is how they hit that perfect balance of flavor and simplicity. First, the flavor: as soon as you pull these from the oven, the mix of roasted garlic, melted butter, and a sprinkle of fresh herbs practically sings. It’s a flavor explosion in every bite without being overwhelming—just that right hint of garlic and a buttery crust that’s impossible to resist.
They’re incredibly simple to make, too. I mean, you whip up a basic dough (no fancy ingredients needed), let it rise, shape it, and then slather on that garlicky butter. No crazy techniques or expensive ingredients. Over the years, I’ve learned a few little tricks that make all the difference in texture and flavor, which I’ll be sharing below.
Then there’s cost—this recipe uses pantry staples like flour, yeast, garlic, and butter. You can make a whole batch for just a few dollars, which is a huge win especially when feeding hungry families or groups of friends (and it fills the house with such a mouthwatering aroma!). Whether you’re pairing it alongside pasta, dipping it in marinara, or eating it straight up as a snack, these breadsticks feel indulgent without the hefty price tag.
Finally, the versatility is huge. You can switch up your herbs, use different types of cheeses for extra melty goodness, or even add a pinch of chili flakes for a spicy kick. I remember one rainy night when I tossed some parmesan and fresh rosemary on top, and it completely changed the vibe—my kids couldn’t stop asking for more! These garlic breadsticks really are a kitchen chameleon, ready to fit whatever mood you’re in.
How do I make garlic breadsticks?
Quick Overview
Making garlic breadsticks is way easier than you’d expect. You start with a simple yeast dough that you mix and let rise, then roll it out and cut it into sticks. The real magic comes in the garlic butter glaze, which you generously brush on before and after baking. The result? Crispy edges, soft insides, and that irresistible garlic aroma filling your kitchen. You’ll love how fast this comes together without any complicated steps—perfect if you want fresh bread but don’t want to spend hours in the kitchen.
Ingredients
For the Main Batter:
- 2 ½ cups all-purpose flour (freshly sifted is best for lightness)
- 1 cup warm water (about 110°F, warm but not hot to the touch)
- 1 packet active dry yeast (2 ¼ tsp)
- 1 tbsp granulated sugar (helps activate the yeast)
- 1 tsp salt (balances the flavors)
- 2 tbsp olive oil (extra virgin adds subtle richness)
For the Garlic Butter Filling:
- 6 tbsp unsalted butter, melted (fresh, high-quality butter makes a difference)
- 4 cloves garlic, minced finely (fresh garlic for that sharp, aromatic punch)
- 1 tbsp fresh parsley, chopped (or 1 tsp dried Italian herbs if you’re out)
- ½ tsp salt (to bring out the garlic essence)
For the Glaze:
- 2 tbsp melted butter (for brushing right after baking)
- Optional: pinch of grated parmesan or red pepper flakes (for a little zest)
Step-by-Step Instructions
Step 1: Preheat & Prep Pan
Start by preheating your oven to 400°F (205°C). Line a baking sheet with parchment paper or lightly grease it—this prevents sticking and helps the breadsticks brown evenly. If you’re like me and like crispy bottoms, I sometimes use a pizza stone preheated in the oven to get that perfect, crusty base.
Step 2: Mix Dry Ingredients
In a large mixing bowl, whisk together flour, yeast, sugar, and salt. This helps evenly distribute the yeast and salt so the dough rises beautifully and tastes balanced. If the yeast is fresh, you’ll notice a pleasant yeasty aroma as you mix.
Step 3: Mix Wet Ingredients
Pour the warm water and olive oil into the dry ingredients. Use a wooden spoon or your hands to gently bring the dough together. It should feel a bit sticky but not overly wet. If it’s too sticky, a little sprinkle of flour helps. Just trust your hands—when it’s ready it’ll be soft and elastic without sticking to everything.
Step 4: Combine
Turn your dough onto a floured surface and knead lightly for about 5 minutes until smooth and stretchy. This part is so satisfying! I like to press with the heels of my hands and fold it over like a little dough hug. If the dough bounces back when you poke it, you’re on the right track. Let it rest in a warm bowl covered with a clean towel for about 45 minutes, or until it doubles in size.
Step 5: Prepare Filling
While your dough rises, melt the butter for the garlic filling and mix in minced garlic, parsley, and salt. This smell alone is worth the wait. The garlic won’t be too harsh yet; it mellows out in the oven, giving you that perfect buttery roasted garlic taste.
Step 6: Layer & Swirl
Once your dough has doubled, punch it down gently and roll it out on a floured surface into a rectangle about 12×8 inches. Brush half of your garlic butter evenly across the dough, then fold the dough in half lengthwise and cut into 12 strips. Twist the strips a few times to get those fun spiral shapes—the twisting helps pockets of garlic and butter stay inside, creating layers of flavor and texture as they bake.
Step 7: Bake
Place the twisted breadsticks on your pan about an inch apart. Bake for 12–15 minutes until golden brown and crisp on the edges. I always keep an eye on mine after 10 minutes – ovens vary, and you want that perfect golden hue without burning the garlic. The kitchen will smell absolutely heavenly at this point.
Step 8: Cool & Glaze
Right out of the oven, brush the breadsticks with the remaining melted butter for that glossy finish. If you’re feeling fancy, sprinkle a bit of parmesan or red pepper flakes at this stage. Let them cool on a rack for a few minutes—too hot and the butter will melt off into a greasy puddle, but still warm is the sweet spot to enjoy them.
Step 9: Slice & Serve
These breadsticks are best enjoyed fresh and warm. Serve them whole or stacked in a basket with a little bowl of marinara or ranch dip on the side. I like to cut the larger ones in half for smaller bites, especially when I’m serving a crowd. They’re soft to the bite but have just enough crispness to feel like a treat.
What to Serve It With
For Breakfast: The buttery garlic notes make these breadsticks oddly comforting alongside scrambled eggs and a hot cup of coffee — my husband’s favorite slow Sunday morning combo. You can also add some fresh fruit and cream cheese spread on the side for a quick, savory-sweet balance.
For Brunch: Serve them with a fresh tomato basil salad or alongside an egg casserole. They make a lovely finger food paired with mimosas or a crisp white wine, especially if you arrange them in a cute basket on the table for an inviting spread.
As Dessert: I know garlic breadsticks usually don’t cross into dessert territory, but here’s a fun twist: brush with a little honey-butter glaze and sprinkle with cinnamon sugar before baking for a sweet-savory treat. My kids were skeptical at first, but this combo won them over in minutes.
For Cozy Snacks: This is where garlic breadsticks really shine. On a chilly evening, pair them with homemade tomato soup or a rich chili. When my friends come over for movie night, this combo disappears almost immediately. Soft, buttery, with that garlicky kick—they just hit the spot every time.
Top Tips for Perfecting Your Garlic Breadsticks
Dough Prep: Warm water is your yeast’s best friend—test with your wrist temperature (should feel like a warm bath). Too hot and you risk killing the yeast, too cold and it won’t activate properly. I learned this the hard way after one botched batch.
Mixing Advice: Don’t overdo it with the kneading. Seven to eight minutes is enough to get a smooth, elastic dough. Over-kneading can make breadsticks tough, which nobody wants when you’re craving softness with a hint of crunch.
Swirl Customization: Have fun with how you twist the breadsticks! Thicker twists hold more garlicky butter, thinner ones get nice crispy edges. For a marbled effect, try using a half butter, half pesto spread for a visual and flavor pop.
Ingredient Swaps: I’ve tried these with whole wheat flour, and while the texture is denser, the flavor is extra nutty and delicious. Almond or oat milk also work fine for a dairy-free option but add a slight sweetness—something I actually liked!
Baking Tips: If you like a crunchier breadstick, bake for a few extra minutes but watch closely to avoid burning. Rotating your pan halfway through baking promotes even browning, which can make all the difference.
Glaze Variations: Garlic butter is classic, but I sometimes add a little sun-dried tomato pesto or sprinkle chopped fresh basil right after baking for a burst of freshness. For a spicy twist, red pepper flakes in the glaze give a nice zing.
Storing and Reheating Tips
Room Temperature: These breadsticks last about 24 hours covered in a clean kitchen towel or airtight container. I try to eat them fresh, but if you have leftovers, make sure they’re cool before storing to prevent sogginess.
Refrigerator Storage: Store wrapped tightly in plastic wrap or in a sealed container for up to 3 days. When ready to eat, pop them in the oven at 350°F for 5-7 minutes to bring back that fresh-baked crispness.
Freezer Instructions: These freeze well! Wrap each breadstick individually in foil or plastic wrap and place them in a freezer bag for up to 3 months. Thaw overnight in the fridge or reheat straight from frozen in the oven at 350°F for 10-12 minutes; just watch so they don’t dry out.
Glaze Timing Advice: I usually save the final glaze brush for after baking, but if you plan to freeze them, wait to glaze until right before serving. The butter glaze freshens up the flavor and makes reheated breadsticks taste like they just came out of the oven.
Frequently Asked Questions
Final Thoughts
There’s just something so comforting about homemade garlic breadsticks that brings everyone to the kitchen—and not just for the food but for the memories that come with it. Whether it’s that first warm pull-apart bite, the buttery garlic aroma filling your house, or watching your kids sneak seconds when they think you’re not looking, these breadsticks are a little treasure I keep coming back to. If you enjoy this recipe, try pairing it with my homemade marinara or this spinach artichoke dip—it really turns any meal into a gathering.
Give these garlic breadsticks a shot—you won’t regret it. I promise, once you start making them, you’ll find a million excuses to serve them. Don’t forget to drop a comment or share your own favorite twists on this recipe. Happy baking and can’t wait to hear how yours turns out!