red velvet cookies
I still remember the first time I tried red velvet cookies — it was one of those chilly afternoons when the smell of cocoa and something sweet filled the whole house, drawing my kids and me right to the kitchen. Honestly, red velvet is usually reserved for cakes or cupcakes, but these cookies? They’re like the best of both worlds: a soft, tender cake-like texture packed into a cozy little cookie. They quickly became my go-to when I needed a quick treat that didn’t demand the patience of a full cake bake. Plus, the rich, tangy cream cheese filling inside gives these red velvet cookies that little extra “wow” factor no other cookie in my arsenal has quite matched. If you’re a fan of classic red velvet cake but want something a bit easier to share (or just easier to eat mid-binge-watching), I promise these cookies will become your fast favorite.
What is Red Velvet Cookies?
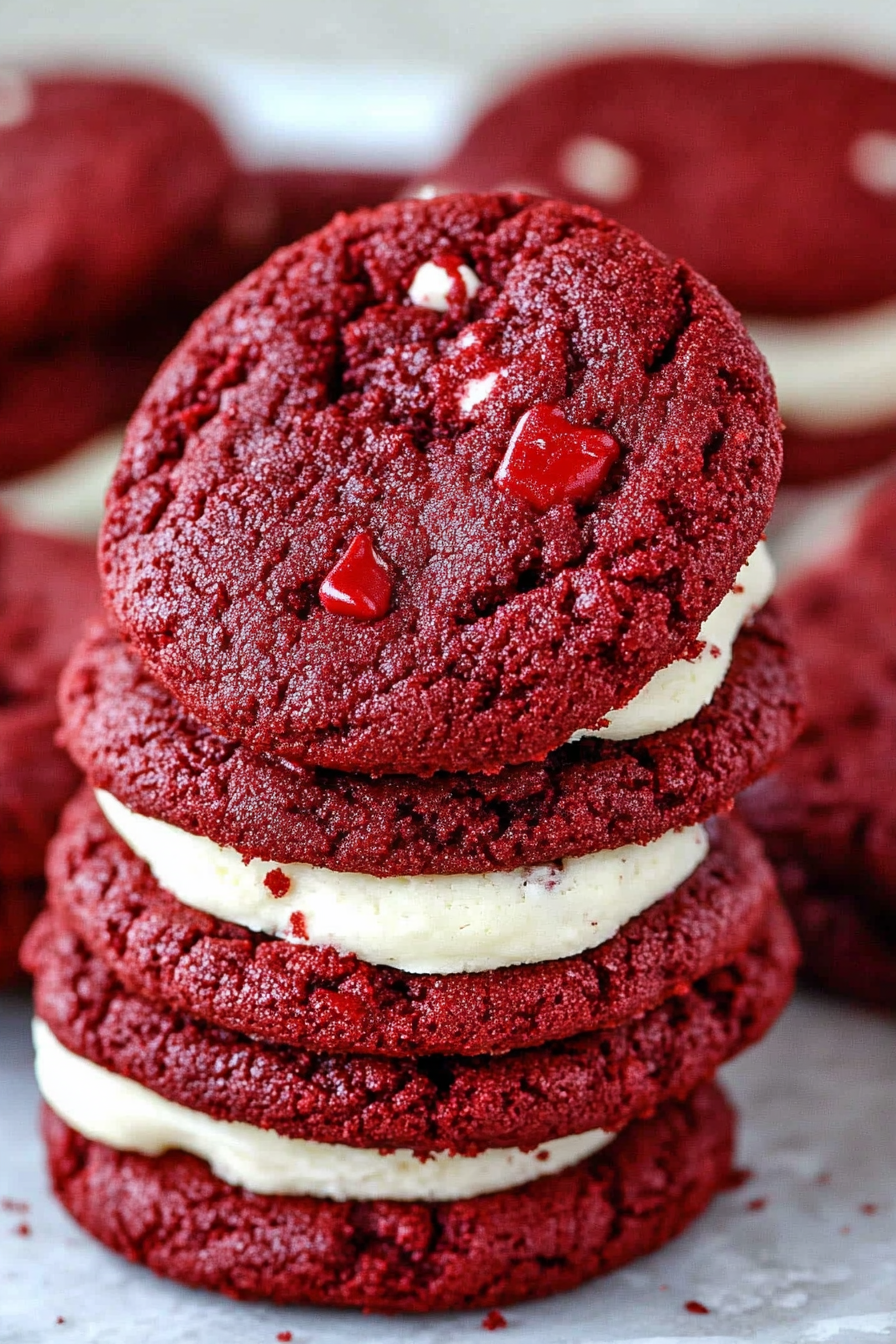
Think of red velvet cookies as a bite-sized version of that iconic, velvety red velvet cake that everyone seems to adore. Essentially, they’re cookies with all the classic red velvet elements — that muted red tint, a gentle cocoa undertone, and a hint of vanilla — but with a twist: soft, chewy, and often layered or filled with luscious cream cheese. The name “red velvet” actually comes from how smooth and “velvety” the cake or cookie’s texture is, rather than any particular ingredient. Red velvet dates back to early 20th-century Southern kitchens in the U.S., and it’s always been prized for its subtle cocoa flavor combined with a tangy cream cheese frosting. Turning that into a cookie means keeping all the love of the original, just in a form that’s perfect for dunking in milk or packing for lunch.
Why you’ll love this recipe?
Where do I even begin? What I love most about this red velvet cookie recipe is how it blends just enough chocolate with that signature tang of cream cheese — it’s a delicate balance that’s surprisingly easy to nail with simple pantry ingredients. The flavor isn’t overpowering like some overly chocolatey cookies that leave you craving something brighter — it’s smooth, slightly sweet, and just a little bit decadent.
On top of that, these cookies couldn’t be simpler to throw together. You don’t need any fancy equipment or complicated techniques, which makes it a fantastic recipe for those of us juggling busy schedules but still craving something homemade. The ingredients are downright affordable too — basic pantry staples like flour, cocoa powder, sugar, and cream cheese make this budget-friendly without sacrificing any flavor.
Another thing that makes these red velvet cookies a gem is their versatility. I’ve made them plain, stuffed with cream cheese, and even topped with a quick glaze when I wanted to make them a bit fancier. My kids have asked for them at birthday parties, and I’ve tossed them in my lunchbox for a sweet afternoon pick-me-up. If you’re a fan of other classic cookies like chocolate chip or snickerdoodles, but wanna shake things up, this recipe is your new best friend. Trust me, it’s one of those treats that disappears within minutes at my house — perfect for sharing or keeping all to yourself!
How do I make Red Velvet Cookies?
Quick Overview
Making these red velvet cookies is surprisingly straightforward. After prepping your ingredients, you’ll mix up the dry and wet parts separately before combining them gently, which keeps the cookies tender and cakey. The magic happens when you add that cream cheese filling — it’s smooth, tangy, and melts just enough inside the cookie to create a little surprise with every bite. Baking them is a breeze, and you’ll know they’re done when they’re set but still soft to the touch. This method is foolproof once you’ve done it a couple of times and perfect for when you don’t want to fuss too much but want maximum yum.
Ingredients
For the Main Batter:
- 1 and 1/4 cups all-purpose flour – I always sift mine to avoid lumps and keep the texture light
- 2 tablespoons unsweetened cocoa powder – I prefer Dutch-processed for that deep, smooth flavor
- 1/2 teaspoon baking soda – makes for a great rise without overfluffing
- 1/4 teaspoon salt – to balance the sweetness
- 1/2 cup unsalted butter, softened – room temp is key here for easy blending
- 3/4 cup granulated sugar – you can swap half for brown sugar if you like a hint of molasses
- 1 large egg – room temperature eggs blend better, trust me
- 1 tablespoon red food coloring – use gel for vibrant color without affecting texture
- 1 teaspoon vanilla extract – real vanilla always makes a difference
- 1 teaspoon white vinegar – helps enhance the red color and tender crumb
For the Filling:
- 4 ounces cream cheese, softened – doesn’t need to be totally room temp, but easier to spread
- 1/4 cup powdered sugar – adjust to taste for sweetness
- 1/2 teaspoon vanilla extract – brings out that tangy cream cheese vibe
For the Glaze (optional):
- 1 cup powdered sugar
- 1-2 tablespoons milk or cream – adjust to get a nice drizzle consistency
- 1/2 teaspoon vanilla extract or a splash of lemon juice for brightness
Step-by-Step Instructions
Step 1: Preheat & Prep Pan
Start by preheating your oven to 350°F (175°C). Line two baking sheets with parchment paper or use silicone mats — I swear by silicone mats because my cookies don’t stick and they brown more evenly. Set aside, but also give your cream cheese filling ingredients a quick whip while the oven warms up.
Step 2: Mix Dry Ingredients
In a medium bowl, whisk together the flour, cocoa powder, baking soda, and salt. This is important — mix it well so the cocoa spreads evenly throughout the batter and you don’t end up with dry pockets of flour or surprise clumps of cocoa in the cookies.
Step 3: Mix Wet Ingredients
In a large mixing bowl, beat the softened butter and granulated sugar together until smooth and fluffy — this usually takes about 2-3 minutes. Add in the egg, red food coloring, vanilla extract, and vinegar. The batter will look bright and gorgeous, and that little vinegar addition really helps keep the red vibrant while tenderizing the crumb.
Step 4: Combine
Gradually fold the dry ingredients into the wet mixture, stirring gently until just combined. Be careful not to overmix here! The batter will be slightly sticky and soft, but that’s what gives these red velvet cookies their velvety texture.
Step 5: Prepare Filling
In a small bowl, beat the cream cheese, powdered sugar, and vanilla together until smooth and creamy. This forms the dreamy, tangy filling that makes these cookies unforgettable. If you prefer a sweeter or more vanilla-forward filling, feel free to tweak the powdered sugar or extract levels.
Step 6: Layer & Swirl
This part is fun and looks impressive but is really easy. Scoop half your red velvet batter onto the prepared baking sheet in roughly equal-sized rounds. Then, dollop about a teaspoon of cream cheese filling onto each round. Top with more batter, just enough to cover or slightly swirl the cream cheese into the top part of the cookie. Use a toothpick or knife to gently swirl the filling into the batter for a pretty marbled effect — it’s a bit like painting, and so satisfying when you’re done.
Step 7: Bake
Bake for about 10-12 minutes. You’ll know they’re ready when the edges look set but the centers are still a tiny bit soft and shiny. They might seem underbaked at first, but they’ll firm up as they cool. If your oven runs hot or cold, keep an eye on the second batch — ovens love to surprise me too!
Step 8: Cool & Glaze
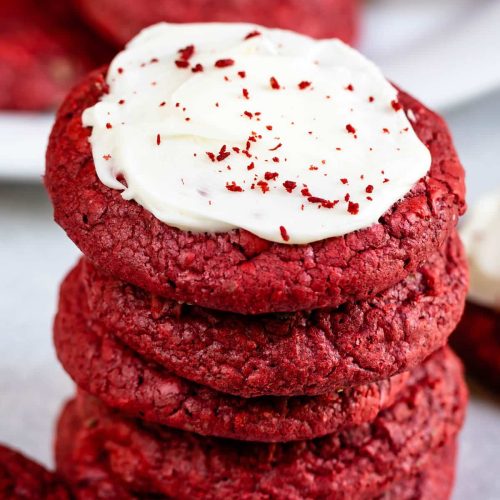
Let the cookies cool on the baking sheet for 5 minutes before transferring them to a wire rack to cool completely. If you want to add glaze, wait until the cookies are totally cool so the drizzle doesn’t melt and run all over the place. That sweet glaze is optional but adds such a beautiful finishing touch.
Step 9: Slice & Serve
These cookies are perfect as individual treats stocked in a jar or served on a plate alongside a cold glass of milk or a cup of hot coffee. If you’re sharing, stacking them makes the red velvet layers even more irresistible — and trust me, you won’t want to wait long before tasting!
What to Serve It With
For Breakfast: Nothing beats a red velvet cookie paired with a bold cup of coffee or a frothy cappuccino. It’s like a little weekend morning treat that feels indulgent but still cozy and comforting.
For Brunch: Serve these with fresh berries and a light sparkling rosé for a grown-up twist on sweet and bubbly. They’re eye-catching on a dessert platter and pair beautifully with fruity, crisp beverages.
As Dessert: Layer a couple of cookies with a scoop of vanilla or cream cheese ice cream for an elegant quick-fix dessert. Alternatively, drizzle extra cream cheese glaze and sprinkle with crushed pecans for a touch of texture.
For Cozy Snacks: My kids love them warm from the oven — just straight up, no fuss. Sometimes we spread a little extra cream cheese on top for a quick afternoon treat that feels special but satisfying.
In our family, red velvet cookies are more than just a sweet bite – they’ve become a small ritual for special afternoons or last-minute celebrations. I’m already picturing the tray I’m putting out for my next get-together!
Top Tips for Perfecting Your Red Velvet Cookies
Red Food Coloring: To get that signature shade without adding too much liquid, I use gel food coloring. It’s vibrant and won’t mess with the cookie texture. If you’re short on gel, just use less of the liquid stuff and expect a softer red color.
Mixing Advice: Overmixing is a cookie’s worst enemy. Once you add the flour mixture, stir with a gentle hand. Stop as soon as the dry ingredients are moistened. You want tender – not tough or dense.
Swirl Customization: When swirling the cream cheese filling, use a toothpick or skewer. Make gentle, not frantic movements to get a lovely marbling effect. You don’t want to blend the filling in — that defeats the purpose!
Ingredient Swaps: I’ve played with buttermilk substitutions by adding a tablespoon of vinegar to milk to mimic the tang if you don’t have buttermilk on hand — it works great. For cream cheese, full-fat really seals the deal on creaminess.
Baking Tips: Every oven’s a little different, so keep tabs around the 10-minute mark. If your oven is uneven, rotate the tray halfway through bake time to avoid hot spots.
Glaze Variations: For a twist, add a pinch of cinnamon or orange zest to your glaze. It brightens up the flavor and adds a lovely aroma. Also, if glaze isn’t your thing, a simple dusting of powdered sugar works wonders — like a little snow on those red cookies.
One time, I forgot the vinegar and ended up with a brownish batch that lacked that signature glow—lesson learned! These small details really make the difference in getting those perfect red velvet vibes.
Storing and Reheating Tips
Room Temperature: Store these cookies in an airtight container for 3-4 days. I usually layer them with parchment paper so they stay soft and don’t stick. They still smell and taste amazing on day two — if they last that long!
Refrigerator Storage: If you want them to last longer, store in the fridge up to a week. Bring them back to room temperature or warm them in the microwave for about 10 seconds before serving to regain that fresh-baked softness.
Freezer Instructions: Wrap individual cookies in plastic wrap, then place in a freezer-safe container or bag. Freeze for up to 3 months. Thaw overnight in the fridge or on the counter, and warm slightly before enjoying.
Glaze Timing Advice: Add the glaze only when cookies have completely cooled if storing at room temp or in the fridge. For freezing, it’s best to freeze plain and glaze after thawing. This keeps the glaze looking fresh and prevents it from melting or getting sticky.
Frequently Asked Questions
Final Thoughts
These red velvet cookies have become one of those rare recipes I’ve made again and again without ever getting tired of. There’s something truly comforting about pulling a tray of these from the oven — that warm, slightly tangy scent fills the room and brings everyone to the kitchen. It’s rare to find a cookie that feels both indulgent and soft rather than overly sweet or crunchy, and this recipe nails it every time. If you’re ever in the mood for a nostalgic, cozy treat with a twist, give these a try. I promise you’ll love the little surprise of cream cheese in every bite — it’s like a secret treasure hiding inside.
And hey, if you try them out, I’d love to hear how they turn out! Leave a comment, share your favorite variations, or let me know if you did a fun twist like turning them into muffins or adding your favorite glaze. Happy baking, friend!
Velvety Red Cookies How to Bake Them Simply
Ingredients
Main Ingredients
- 15 ounce red velvet cake mix
- 2 large eggs
- 0.5 cup unsalted butter melted
- 1.5 cups chocolate chips or M&Ms
- cream cheese frosting optional
Instructions
Preparation Steps
- In a large bowl, combine red velvet cake mix, eggs, and melted butter. Stir until the batter is smooth and well combined. Fold in chocolate chips or M&Ms if desired.
- Scoop 2 tablespoon-sized cookie dough balls onto cookie sheets lined with parchment paper or silicone mats. Chill dough in the refrigerator for at least one hour.
- Preheat oven to 350°F. Bake the chilled cookies for 11-13 minutes or until the edges just start to turn golden brown.
- If desired, frost cooled cookies with cream cheese frosting.
- Store cookies in an airtight container for up to 3 days or freeze for up to one month.